Showing posts with label paint. Show all posts

Monday, August 01, 2016

August Challenge

Welcome to our AUGUST Challenge!!!


We are inspiring you with words like bold, BRIGHT, intuitive, strong, women, feminine, ARTIST, artsy, splatter, script, polka dots, color blocks, numbers, alphas, pinkteal, lime green, white, black, stencils and more.


Don't forget the rules:
-Create a new project based on our inspiration board (it has to be posted this month, but you can certainly link up to other challenges as well!)
-Use at least one (but certainly more if you want) Viva Las VegaStamps! rubber stamps
(We are now allowing competitors stamps to be on your work, but please make VLVS! the focus of the project, thank you.)
-Post it to your blog with a link back to us
-Upload to our linky using your direct blog post link (You may also upload via facebook, flickr or other gallery)
You could win a Project Spotlight post on our blog + some new rubber of course.
And visit us back here for inspiration!


Tuesday, June 23, 2015

Altered Canvas by Shanna

Hey everyone. Shanna here today to share with you a fun creation. 
I have been wanting to play with this resins I got and had no clue what to do with them. Well I figured that out really quick! What do you think?


I did create a video so check it out. 


I loved using my stamps to create the background of this piece. 


I added some glass beads and glass glitter with a matte gel on some of the corners. 


Of course there is no glass on this but I thought the sentiment stamp Through The Looking Glass - 19353 was fitting. 


The stamp Pair of Butterfly Wings - 19647 went perfectly off the side of the frame too. 


Items Used:


Friday, January 09, 2015

January Guest Designer : Georgia Heald

Today I'd like to introduce you to our January Guest Designer Georgia Heald. She is one super talented girl and I'm so excited to have her on our blog. She's joining us with a card and a tag, both so beautiful.


Hi, I'm Georgia, I'm 38, from Tasmania Australia where I live with my husband, teenage son and furry cat baby. I would describe my style as modern grunge with a real love for art mediums and stamping. I create mostly 12 x 12 layouts, cards and journals with the occasional off the page project and canvas. I currently design for Prima Marketing & The Scrapbook Diaries. I am absolutely thrilled to have been invited to be guest designer this month at VLVS!

My blog: www.startingtoscrap.blogspot.com.au


Seek Paradise Card


This little guy is so adorable, as soon as I saw him I could see him sailing across the ocean in search of something. So I decided to create just that. I have cut a piece of Ranger Claudine Hellmuth Studio sticky back canvas to fit my card, stuck on a craft mat and prepped with Gesso.


Once dry, I have painted my background using Studio Calico Color Theory acrylic paints and adhered to my card. I have then stamped my Boy In The Tub Boat stamp on a piece of Ranger Inkssentials matte coated cardstock and cut him out. I have kept him in black and white as I really wanted him to pop out from the background. And finally finished with the Seek Paradise stamp also on the matt cardstock to finish.


Product List
Boy In The Tub Boat Stamp
Seek Paradise Stamp
Studio Calico Color Theory Acrylic Paints, Ranger Sticky Back Canvas, Ranger Matte Coated Cardstock, Ranger Archival Ink in Black

Why Hello Tag


How sweet is this little girl! I really wanted to keep her the focus of my project so decided to do a small gift tag with her. I have created my background using watercolors, modeling paste and a stencil. I have then stamped my Girl In A Princess Costume onto some Ranger matte cardstock with archival ink. I have then cut her out and sprayed with some Micador Fixtative which makes the ink run just slightly giving her some grey shading. I have then used some watercolor paints to color several small pieces of tissue paper and once dry, stamped her onto each and cut out the layers of her dress to add to my image. I have added a few little embellishments and then using another piece of tissue paper, stamped my Why Hello title. I have then added this using a gel medium to my tag. Using tissue for your stamps is awesome when you have a textured background and may not be able to get a complete stamped image.


Product List
Girl In A Princess Costume Stamp
Why Hello Stamp
Micador Watercolor Paints, Micador Fixative Workable Mat Spray, Ranger Inkessentials Matte Coated Cardstock, Studio Calico Wood Veneer Stars, Prima Marketing Art Basics Heavy Gesso, Prima Marketing Art Basics Modeling Paste, Prima Marketing Art Basics Gel Medium Matte, The Crafter's Workshop Stencil, Prima Marketing Ingvild Bolme Junkyard Findings Wings Trinket, Chain & Jump Ring, Ranger Archival Ink in Black

Tuesday, November 04, 2014

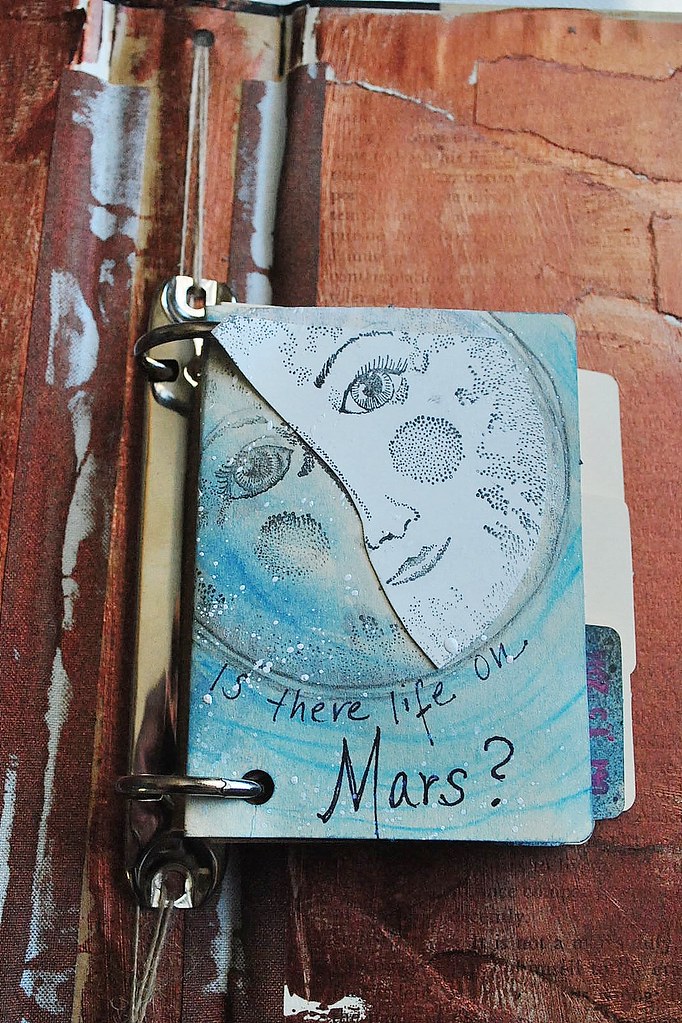
Is there life on Mars? (ATC folio)

ATC folder inside
Hello stampers!! It's Amy, and I have a little ATC folio I created to share today!
I am a big fan of the show "American Horror Story- Freakshow," and at the end of the first episode, Jessica Lange's character sings a cover of David Bowie's "Is There Life on Mars?" This got my creative juices flowing for some funny reason. I wanted to make something out of my box, with an element of freakiness.
I started the card by water coloring the front of the folio, using watercolor pencil to create space like rings, and used some white ink splatter across the page as well, for stars.


I then stamped the Man in The Moon stamp, using tuxedo black memento ink. On a separate bit of smooth cardstock, I stamped the moon again, and cut it out to give an angular illusion, and some layering. I then hand wrote the song quote underneath.


For the inside of the folio, I sprayed Dylusions ink in black, and added splatter of Hero Arts ink in neon pink. I stamped the Banksy Gas Mask Flower Girl stamp onto cardstock, but to give the fading illusion, I stamped using Big Brush pens from Faber Castell Design Memory Craft, and colored her skirt and tights with watercolor.

have started a little book holding ATC's and I'm so happy this silly little (different for me) bit is the first I see when I open the book!

Thanks so much for having a look! I hope you were inspired today!
~Amy

Stamps Used:
Man in the Moon
Banksy Gas Mask Flower Girl

ATC Folder:
7 Gypsies
Ink: IMAGINE Crafts, Hero Arts
Adhesive: Helmar
Hole Punch/Binder Rings: Tim Holtz
Pens: Faber Castell-Design Memory Craft, PaperMate Flair


Friday, October 03, 2014

Zombie Gnomes Mini Canvas


Goood morning, and a very happy October to you! This month is always my favorite....with the spooky stories and things to see, the falling bright leaves, crisp apples, and chubby pumpkins, October is a delight!
Today I have a mini canvas to share (it is 4x5) that I created to bring a little Halloween into Sparkling Gnome Studios.


To begin my canvas, I added some rust, silver, and orange paints to the canvas in small amounts, and then smoothed them out, also including the 4 outsides of the canvas. I had a faux "newspaper" from a local restaurant here in Des Moines, called "Zombie Burger," that had all kinds of funny headlines pertaining to the zombie apocalypse. I cut those on and collaged them onto the page, along with some dark papers from 7 Dots Studio's Cold Country collection. When the glue had dried, I added just a few dots of gesso, and smoothed it over the collaged areas, to mute it somewhat. I wanted my zombie/skeleton gnomes to be the focus.
My next layer was stamping using the Writing Background 4x4, to add a bit of a vintage vibe. The rest was layering on trims and washi tapes until I felt the layering was complete.


I used the awesome Gnome Lady Skeleton as well as the Gnome Skeleton and stamped them onto cardstock, using Memento Ink in Tuxedo Black. I colored them lightly with watercolor, and placed them on the canvas using 3D foam dots.
The gnomes look so calm and casual, I thought they needed something to be casual about, so I added an UmWowStudio chipboard piece, with zombie hands, at the bottom of the piece.
I'm so excited about how this little canvas came out, and I already have it on the wall in my studio. These gnomes may not sparkle, but they have edge, which definitely has a place in my creative space.
Thanks so much for having a look today, and a very happy fall day to you!
~Amy

Supply List:
Viva Las VegaStamps! Gnome Lady Skeleton, Gnome Skeleton, Writing Background
Ink: Tsukineko/Imagine Crafts, Ranger
Paint: 13 Arts, Folk Art (Plaid), Sakura
Trims: Webster's Pages
Washi Tape: Tim Holtz
Paper: 7 Dots Studio
Chipboard: UmWowStudio

Thursday, September 18, 2014

Family Love Vintage Style Collage


Greetings stampers! It's Amy blogging today, to share a vintage style collaged canvas. I have 7 different Viva Las VegaStamps! on this canvas, and I think they all work so well together.

  I started by prepping a 12x12 canvas board with...of all things, a sample of Benjamin Moore blue paint I picked up at the hardware store for $1. I then layered on vintage style papers, layering them on with Mod Podge. When this had dried, I added layers of mists in light browns, and spread them on with a brayer. A layer of white acrylic paint was the final of the canvas layers. 
The fourth layer on this canvas is the background stamping, where I used the checkerboard and cursive writing stamps randomly all over. I kept the harlequin diamond stamping just over the area where my photo cluster would be. 
 After layering on vintage papers and elements, I stamped the Bee Cards, Paintbrushes in Jar, and Pen Tips onto untextured cardstock, and fussy cut them out. Adding them throughout the clustered area of the collage, gave the perfect unique vintage touch.


 The Directional Wheel stamp added a perfect bit of movement on the bottom and top corners of my layered cluster. I love the look and how it blends seamlessly with the style of the piece.

I'm really excited with how this canvas turned out, and I hope you enjoyed seeing it too! I hope you have a creative rest of the week! <3

Supply List:
Viva Las VegaStamps!:
Backgrounds: checkerboard, cursive writing, Harlequin Diamond.
Other: Bee Cards, Paint Brushes in Jar, Pen Tips, Directional Wheel.

Canvas board
Ink: IMAGINE Crafts, Ranger
Paint: Benjamin Moore,Plaid Crafts
Mist: 13 Arts, Tattered Angels
Paper: Tim Holtz, 7 Dots Studio, Vintage
Metals: Prima, Bead Landing, Vintage
Photograph: The Sparkling Gnome

Saturday, August 02, 2014

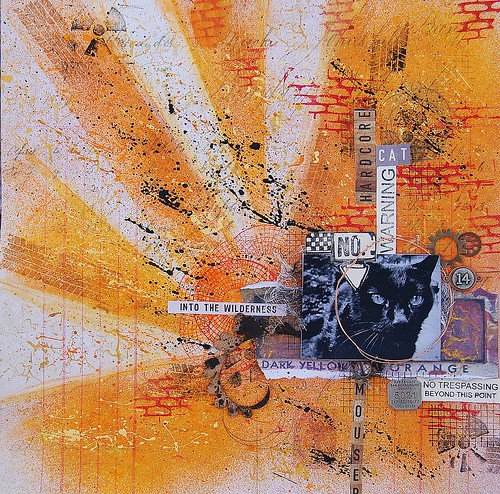
Warning: Hardcore Cat (August Challenge Inspiration)

hardcore cat, full, allassiter, VLVS
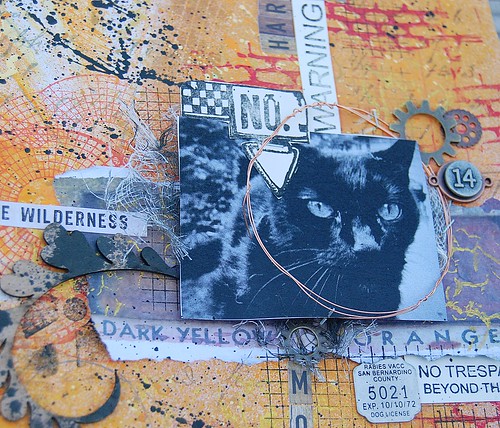
Welcome to Friday and a bit of inspiration, from me, Amy using the fabulous illustration for August here at Viva Las VegaStamps! This inspiration is so awesome, unique, and punk rock, I couldn't wait to dig in. I grabbed a piece of 12x12 paper from the Crowded Attic collection by Tim Holtz, and though the vintage theme is a strange mix with the graphic boldness of the inspiration board, I liked how it worked.

title, hardcore, ALLassiter
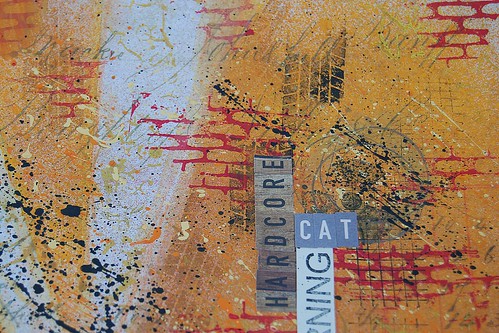
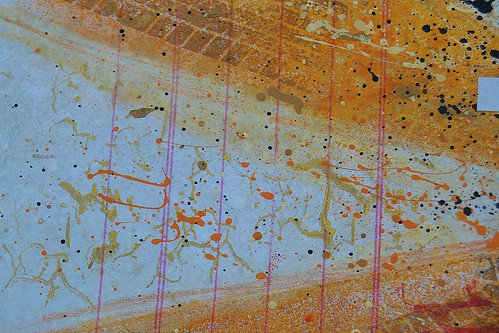
I began the mixed media journey here, by creating lines for the sun rays,using a ruler and a pencil. To get the brighter orange lines, I needed to cover the "white" area with a piece of paper, and on the other side of the ruler. I used Dylusions mist in Pure Sunshine, to create the orange sunbeams. When those were complete, I added Pan Pastel in orange along the edges, to soften them a bit. I stamped over the "beams" using the tire tread stamp and silver ink. For the "sun" I used the color wheel lines stamp, and overlapped it a bit in a circular area. bg, hardcore, ALLassiter
I added some "punch" to the plain lines, with the cracked background stamp, and gold ink. On top of all of this, I added lots of paint drippings and flickings. Hehe. The brick background was perfect for getting that "graffiti-ed wall"/Banksy's palette I was looking for. photo cluster, hardcore, ALLassiter
Finally, I created a layered cluster around the photo. First, I stamped around the area with the washi grid background, and then I added some black misted cheesecloth, and popped the photo up on 3D foam dots. I stamped the area 51 warning,and the top portion of the No.5 tag using memento ink in tuxedo black, onto library cards, and cut and layered them up. All that was left, was adding embellishments, like the UmWowStudio flourish, metal bits, and alphas to create the title. Voila! I created a way to honor my sweet but hardcore cat, who lived 8 years indoors, before sneaking outside one day....and disappearing for 4 months....then returning one day looking like he had been in a gang fight. He now hangs out on our deck, and catches mice and rats that he presents to me as a lovely gift. ;)
 Thanks for having a look today, and get busy making your own creation using this month's inspiration! (here's a reminder):

Supplies Used:
Viva Las VegaStamps!:Tire tread, color wheel lines, cracked background, brick background, washi grid background, area 51 warning, No. 5 tag
Miracle Tape, Memento Ink-tuxedo black
Paper: Tim Holtz
Inks: IMAGINE Crafts
Paint: Plaid, 13 Arts
Pan Pastel-orange
Metal-Bead Landing
Chipboard-UmWowStudio

Wednesday, June 25, 2014

A Carnival of Happy

It's Amy here today to share a blast from the past, the HERE stamp.
I had fun getting this funny Mardi Gras gal ready for a carnival atmosphere, on this layered ATC (I'm clearly big on those these days).


I used my gelli plate to make the background, using purple and green paints, and neon pink Hero Arts ink, spreading it with a brayer, over a stencil. I then added some drywall tape, cut down, for texture, and rolled the brayer over the top.

For the ATC card with the Mardi Gras Mask stamp on it, I stamped with IMAGINE Crafts Neon and Memento inks in Pink and Green shades, and colored it in with watercolor pencils. The background is shaded with purple watercolor pencil.


Finally, I added layers of embellishments, including the vintage plastic ballerina. I tried to keep everything light and fun, using some cupcake flags from Ruby Rock-it for little banners.


Thanks for having a look today, and I hope you enjoyed taking a trip back in time, to find a new stamp!
Loves,
Amy

Supplies:
Stamp: Mardi Gras Mask
Adhesive: Miracle Tape, E6000
Ink: IMAGINE Crafts/Tsukineko
Chipboard Frame/Hearts: Studio Calico/Pink Paislee-Heidi Swapp
Metal: Bead Landing/Tim Holtz
Ballerina/Laces: Vintage
Cupcake Flags: Ruby Rock-It
Rhinestone word: Unknown


Wednesday, June 11, 2014

She IS The Key

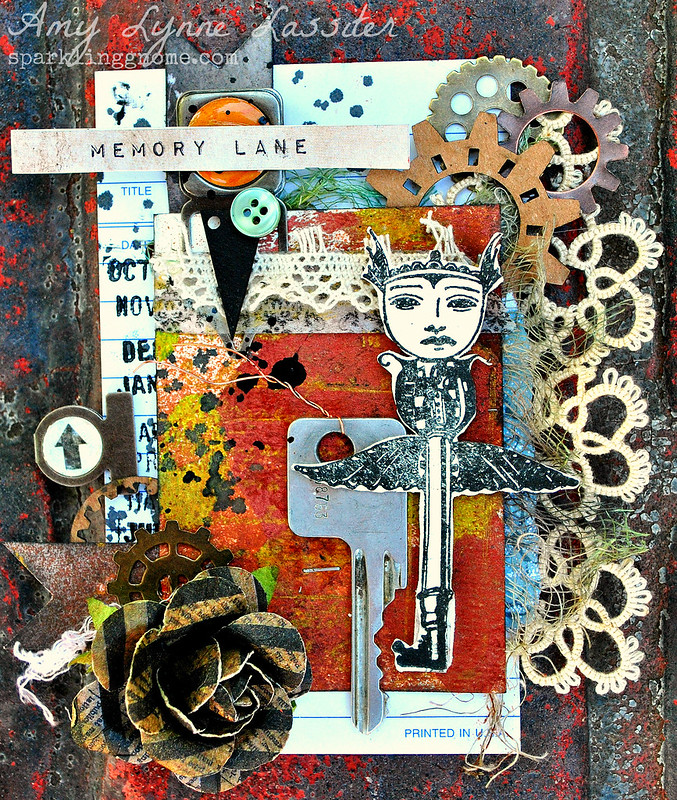
queenfullvlvs, alassiter Hello stampy friends! It's Amy  here, to share a layered and oversized ATC.  I'm not sure if that is something that has existed with a different name until now, but if not....I'm coining the term. ;)

I began with a regular ATC card, and layered on some copper and green paints. When those had dried, I stamped using the Waybill/Invoice Background, using Delicata Ink from IMAGINE Crafts in gold. I attached a couple of little banner die cut pieces from 7 Dots, using a stapler.
A few fibers were pretty easy to adhere to the back, using miracle tape.
queencloseside
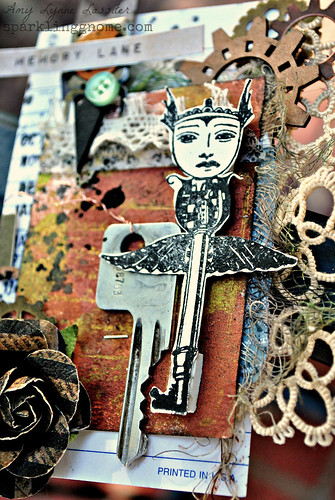
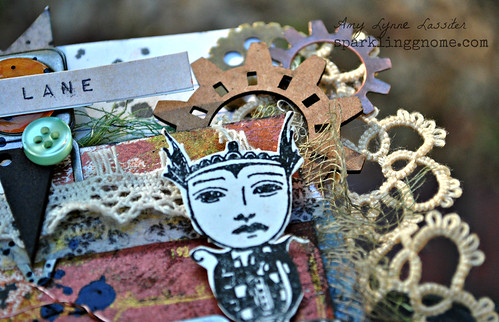
When all of that was complete, I added the ATC to a vintage library card. I stamped the Flying Face Key on a piece of cream cardstock, using Memento Ink in tuxedo black. I fussy cut her out, and added her to the card using foam tape. queentop
I finished my layered oversized ATC by adding plenty of chipboard, metal embellishments (including an old house key I had back in college), other fun bits, and a piece of lace from a vintage doily. When I stood back and had a look, I was quite pleased with my lady...who doesn't just hold the key..she IS the key. I think that's a nice metaphor in life. BE the key to your dreams. Have a lovely day, and go stamp up something wonderful. ~Amy

 Supply List: Viva Las VegaStamps!: Waybill/Invoice Background, Flying Face
Adhesive: Miracle Tape (from VLVS!), Helmar, Tombow
Chipboard: UmWowStudio
 Paint: Folkart, Luminarte Silks
Ink: IMAGINE Crafts-Tsukineko
Paper/Stickers/Die cuts: 7 Dots Studio, Fab Scraps
Flower: Prima
Metal Clip: 7 Gypsies Metal Tab: Tim Holtz
Fibers: Vintage (Fab Scraps paper and Flower from Scraps of Darkness Kits)

Friday, April 04, 2014

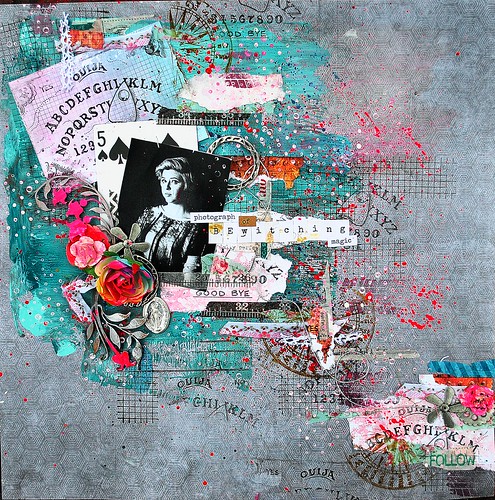
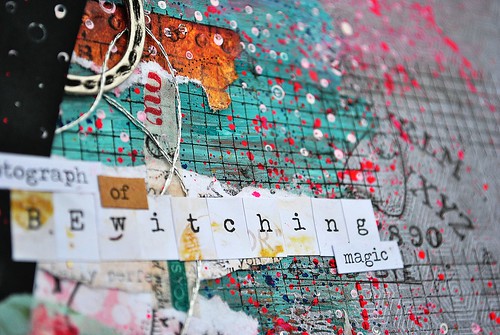
Bewitched {Mixed Media Scrapbook Layout}

ouija stamp, bew, allassiter
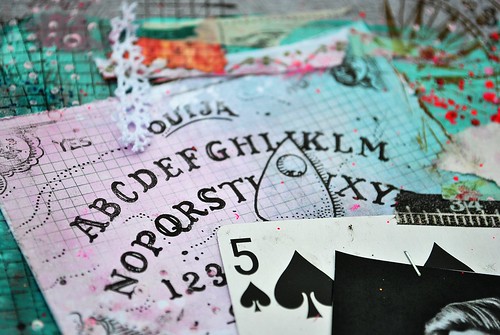
Hello stampers, It's Amy here today, sharing a layout I created with some pretty rad stamps. I used a photo of my daughter, and used some of her favorite things........mystical, magical things.
Bewitched, ALLassiter, VLVS
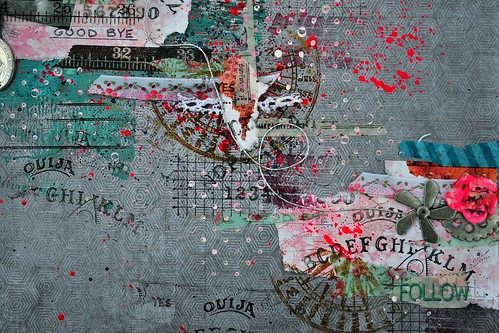
I started by painting my background, and then finding a few coordinating papers, that I then stamped with the ouija board onto them, using Momento ink in Tuxedo Black. Next I stamped random lines with the washi grid background, using Ranger Archival Ink in Coffee; and then layered on the photo and playing card, as well as some more paper bits and washi tape.
title bewitched
When those were complete and adhered, I stamped with the directional circle
, as well as inking up only bits of the ouija board stamp, and randomly adding some stamping to the background. After adding my embellishments, I stamped throughout using paint, with the cross square background stamp...which really completed it for me. 

close flower, bewitchedbottom section, bewitched,allassiter

 Thanks for having a look today, and I hope you have a creative day! :)

Supplies used: Viva Las VegaStamps-ouija board, directional circle, washi tape grid background, cross square background
Paper-7 Dots Studio-Illumination, Messy Head, Domestic Goddess
Flowers-Prima
Chipboard-UmWowStudio
Stickers-7 Dots Studio
Paint-Plaid folk art Ink-Hero Arts, Tsukeniko/Imagine Crafts, Ranger, Liquitex

Wednesday, February 05, 2014

Into the Abyss~ Altered Altoid Tin

Greetings, stampers! It's Amy here today, to share an altered Altoid tin I made into a fun little "shrine" of sorts on the inside.
I used a regular Altoids tin, and covered it with vintage book pages in layers (on both the inside and outside), using gel medium. When those were dry, I added a layer of copper paint, that had been thinned in half with water........to cover the entire tin and papers. This half paint mixture allowed the papers to show through, and gave a cool realistic metallic shimmer.
abyss bottom tin
For the outside of the tin, I added flicks of turquoise, olive green shimmer, and Mediterranean blue, and when that was dry, I added stamping with the Area 51 Warning  stamp.
abyss detail stamping
I added the whimsical diver stamp in two layers. One is stamped on cardboard, and fussy cut, and a second is stamped onto a library card, fussy cut, and added on top with foam adhesive. I then stamped the into the abyss stamp onto a small scrap, and adhered it, along with the metal wing (with a little bit of cheesecloth behind it),and chipboard star. I sprayed the outside with a protective gloss spray, and wrapped it with copper wire, attaching a clasp. tin inside, abyss, ALLassiter
 The inside was simple to complete, since it has already been covered with the vintage pages. To the top, I simply added some washi tape,a chipboard piece,button and a fussy cut vintage image of octopus tentacles. The wire from the front wraps to the inside, so it adds a nice line of color, as well. For the bottom, I adhered a playing card to the bottom, and a strip of washi; added cheesecloth/twine to the sides/edges....and then added a stamped and fussy cut Octopus/Cephalopod...to happily slink along the bottom edge. A die, and a star pin stamped image, and little sewing machine charm (because every octopus thinks about sewing) complete the project!
I am going to give this little tin to my husband, for his desk at work. Because...everyone needs a little whimsy during a work day. :)

Thanks for having a look today, and for more inspiration from me, visit my blog at www.sparklinggnome.com! Have a great rest of the week!

Supply List: 
Viva Las VegaStamps!: Whimsical Diver, Octopus/Cephalopod, Star Pin, Area 51 Warning.
Ink: Clearsnap Mix'd Media Inx (black, denim).
Paper: Vintage, digtal download-Stampington and Co.
Chipboard: UmWowStudio
Metal Wing: Tim Holtz

Monday, January 13, 2014

The Background Takes Center Stage

Good Monday morning to you all! It's Amy here today, to share an art journal page, with lots of background stamping that adds a bit of flair to the pages. 
I began by stamping both pages with the cracked background stamp,
with Ranger Archival Ink in coffee. I then dotted on acrylic paints in gold, silver, and metallic green, and spread them thin with a brayer. After waiting for the first layer to dry, I added flicks and flecks of paints in many colors, and black ink, as well. When those were dry, I began stamping, first using the checkerboard background 4x3   and the star pin, in random places that seemed pleasing to my eye. 
 To add layers on top of my vintage photo of children during the great depression, I stamped on Prima cotton tape with the lace background stamp, and added it along the sides, along with washi tape, and bits of 7 Dots Studio papers.
Finally, I added embelllishments, like UmWowStudio chipboard hearts and stars, Prima Gears, and  a chipboard banner piece from Maya Road, stamped with the moon circle (I love that sweet face).
I finished off the page using the fabulous new Color Wheel Lines  and the No. 5 Tag  stamps.
I'm so pleased with how this page came out, and the way it showcases this very unique photo, in such an artistic and "different" way. Thanks for having a look, and for more inspiration, visit my blog at www.sparklinggnome.com . Have a happy, inspired, and stampy week! ;)

Monday, November 18, 2013

We Can't All Be Saints

We can't All Be Saints, ALassiter When I first saw the Nun Licking Gun stamp I giggled a lot, and then immediately thought of a way to incorporate this stamp into a silly project, using a lot of up-cycled materials and ephemera I have hanging around my studio.  
   I started with a large shipping tag, and used some old book pages from a religious text, that had been thrown into a bin outside the library that I work at. I tore the pages into strips, and added them to the tag horizontally, adhering with a craft and hobby glue. When the glue had dried, I added splashes and flicks of aqua and Caribbean blue paint, and dried it with my craft dryer. I took Heidi Swapp Color Shine in Teal, and sprayed it twice onto my craft mat. I then used a paintbrush to paint the ink onto the edges of the tag, and to add a few splashes cross the tag.
saints, close title
   
  Before adding my ephemera, I stamped with Momento ink in Tuxedo Black , using the cracked background and Stars 2 x 2 1/4 stamps, to add a little pizazz. 
wings, ephemera 
                                            

stamp, Saint, Alassiter

When the stamping was finished, I cut the beautiful saint ephemera from a book, and layered it along the right side of the tag, embellishing with wing, upcycled jewelry piece, and feathers on top of a strip of text that has been pleated and sprayed with color shine in teal.


Finally, I added the image that changed the whole tone of the project, the nun with a gun, which was stamped using black ink, and embossed, using ultra high gloss embossing powder. To draw attention to the image, I elevated it using foam adhesive, and added a strip of trim, and a stamped and cut star pin image, along with a hanging coin.

In the end, I have a project that's not meant to offend, but certainly has a lot of sass, to counter the lovely and saintly ephemera art.  

Thanks for having a look today, and grab your tag, and get to stamping! 

~Amy

Supply List:
Viva Las VegaStamps! Stamps:
Nun Licking Gun, Star Pin, Cracked Background,  Stars 2 x 2 1/4
Ink and Embossing Powder, found in the Viva Las VegaStamps! store: Momento Ink in Tuxedo Black, High Gloss Embossing Powder
Tag: Uline
Metal Embellishments: Tim Holtz Idea-ology, Bead Landing, vintage
Lace Trim: Gauche Alchemy
Ribbon, Gold Cord, feathers: from my stash