Sunday, April 30, 2023

Everywhere she went.... mixed media card

Hello friends! Aimee here happy happy May!
I have a lovely mixed media card to share with you today. 

Here's a shot of most of the supplies- we're using watercolors and chalk markers.


Let's work on some watercolor paper. 
I started with a piece approx 5x7" and cut it down when the piece was finished.

First, add some random watercolor to the paper in colors that you like. 
Once you're satisfied with this you can either set it aside to dry, or dry it with a heat tool.

Once dry, choose a stencil with large open areas (this one is from Dylusions). Use the chalk markers through the stencil. When you remove the stencil you can soften the edges of the designs with a damp paint brush if you want. 


Now let's stamp a little on the back ground.  I used the x's from plate 1495- ya really should get this plate- especially if you like to art journal or do mixed media work. Stamp with black permanent ink.


Once you like your background, it's time to trim it down to fit a card. I like to work on a larger piece of paper and then trim it down when it's finished so I have nice clean edges.
I used a Waffle Flower layering die.


Mat your background onto black card stock.


Now get out your stamp postitioner (you'll want this because you're stamping a fairly solid image onto watercolor paper). Place the panel inside and line the stamp up, approx in the center of the panel. Stamp with black permanent ink (I use Archival Ink) as many times as needed (I stamped twice).


Next, adhere the finished panel onto an A2 card (mine is a top folding card) with foam adhesive. I use fun foam sheets.


Color your lady in whatever way ya fancy. I just gave a little embellishment with gold & white gel pens.


Now, if you know me at all, you know my card motto is "no naked insides". 
I stamped this gorgeous flower inside and added a little accent with a gold gel pen.


What type of flowers do you like?
I like alllll the flowers, but my favorite flowers are actually tulips and hyacinths. 
Since I don't have either of those in my stash, I used this Tim Holtz/Sizzix set to make flowers for this card.


First, I watercolored some paper using the same paints that I used for the panel. Got 'em dry, and cut out the flower pieces.

Once my flowers were assembled, I inked the edges of some of them with Archival Ink (Jet Black of course).


Aren't they pretty!
I started layering the flowers by putting the first few onto the card glued flat. Then I started adding flowers with foam adhesive for some dimension.


Stamp the sentiment on a scrap of white card stock. Trim and edge with black ink. Add to the top left corner of the card.


My final step was to add some bling. 


Supplies-
  • A2 card base, watercolor paper, adhesives, trimmer, die cut machine, gel pens, water, paint brush
  • black card stock
  • heat tool if you're impatient 
  • Tim Holtz/Sizzix die set (or whatever flowers you prefer)
  • Waffle Flower A2 layering dies (or just use your trimmer)
  • bling
  • Archival Ink (Jet Black)
  • watercolor paints
  • chalk markers
  • plate 1478
  • xxx marks- single-plate


I hope you like this card. It came together fairly quickly, the worst part is drying time HA!!

Come see me on my You Tube Channel  and at my blog 😍


Saturday, April 29, 2023

The Butterfly by Tracy Blackwolf

 Hello Everyone!!

Today's project is a mixed media on canvas board. Enjoy~

To start This piece, I got a 4 x 5 canvas board. I sprayed on some distress spray stains, Dried them with my heat tool, And  then stamped the writing background ..  I then   randomly put white crackle paste over it leaving empty spots. I used a small pallet knife That has to dry overnight for the cracking to happen.
Once dry, I sprayed some more spray stains making sure some went down in the cracks.
While I waited for that to dry, I stamped the butterfly three times and cut it out in varying parts, and then colored it in with alcohol ink markers.

I wanted kind of an old look so I cut a strip of silk to have coming out of one of the layers-
I used foam tape between the layers to get some great dimension. I started to assemble my butterfly onto the canvas. I shaped the wings a bit using my fingers to roll the edges. I went back in with the blending marker because I was not happy with how the markers were blending. I ended up going over it with some spray stains and a paintbrush just to refine the blend a bit more. I put some inks on the silk to grunge it up a bit.
Then of coarse it needed some black crystals - and a little face bead. Last I Found a little verse board and added a green crystal and some foam tape and applied it to the canvas. And that is it! Done!
Stamps Used:
Butterfly Gossamer, lg.     7760
French Writing     20646

Other supplies:
Ohuhu alcohol markers
Ink- Versaclair pinecone, Nocturne
Distress spray stains: Vintage photo, Gathered twigs, Twisted citron, Victorian velvet, Tea Dye, Antique linen
Crackle paste by Golden
Silk gauze
4 x 5 board canvas
Moon bead
Black and green crystals
TH Quote chips


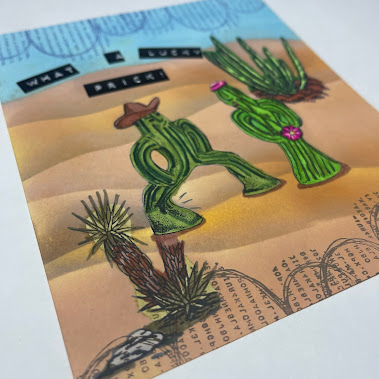
What A Lucky Prick! made by Madisen Hernandez

Hello stamping friends! I hope this title and sentiment isn't too crass for you, but if you're a fan of VivaLasVegaStamps, you've probably seen a naughty stamp or two! I made this scene with my husband in mind, {we've been together for 13 years so I'm allowed these type of jokes!} Hope you all like this card! 


I began stamping and masking using these stamps

Cactus Lovers

Cactus Clump

Yucca Large


I then used a piece of wavy cut out paper to design some sandy hills and a desert sky


took the masks off and began to color! 

 
I finished off the design by using my label maker to have my crass sentiment and adding seemingly the internet's favorite border


That's it for today! Thanks for stopping by! -Madisen 
 

Friday, April 28, 2023

Take time and play…ATCs


Hi guys!
Today I wanted to make something I rarely create…ATCs.
I cut black and white 2x3 cards.


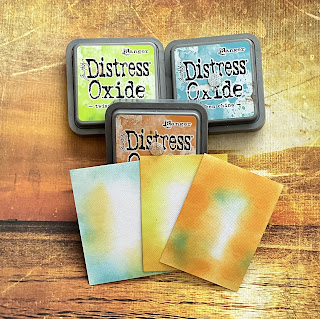
Then I stamped these cute pets, cut them out and used Distress Inks to prepare my background.


I added some circles, crosses and small numbers and glued my cats and a lonely dog:)


Stamps I used:


Plus Copics & Distress Inks 


Have a great weekend!


Sunday, April 23, 2023

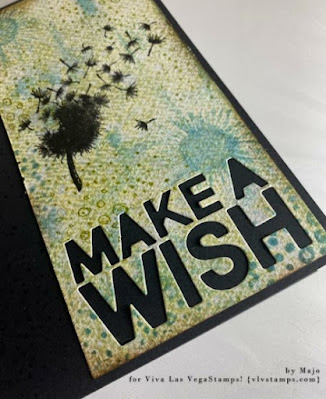
Make a wish ► Majo


Hi Lovelies,


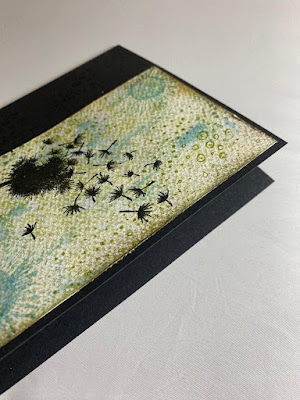
today I show you a card I made for a friend who doesn’t like Birthday presents, so I let it be her choice. Maybe she just wants some of my time?


I create my background with distress inks and cut the sentiment with Tim Holtz “Bold text #1”.


I added the following stamps:


19045 from plate 918

16685 from plate 1311

19827 from plate 1471


And adhered the tag to my card base. Ready, set, go.


You’ll have a good start into the new week and have fun cratfting!


Luv ya

Dance in the Moonlight - Fran

Hi everyone!

Today I have made a tag/bookmark.  Here's how I did it.....


To make the background I used a gelliplate.  I brayered Elements Ink "Della Blue" onto the gelliplate and then sprinkled watered down Brushos onto the gelliplate.  I put my card onto the gelliplate to then get the mottled effect.


I then stamped the moon and embossed it with silver.


I put a mask over the moon, and went round it with distress inks.  I then splashed water on the ink to give the illusion of stars and a bit of texture.


I stamped the lady dancing onto the tag, and then onto thick paper, coloured her and cut her out.


After writing the sentiment (as I don't have a computer!) onto card, I cut it out to add to the tag.  I then went round the edge of the tag with glue and added some silver gilding flakes.


Stamps Used:

Other Items Used:
Gelliplate
Elements Inks in Della Blue
Brushos in Prussian Blue, Purple
Distress inks in Chipped Sapphire, Wilted Violet, Faded Jeans
White pastel pencil
Moon mask
Polychromos pencils
Black fineliner
Silver gilding flakes


See you next time!