Monday, February 28, 2022

The world needs more heroes - by Arwen

 Hey Lovelies

It's me again and I'm here with a lil' postcard:


And here are some quick steps, how I made it:


All stamps, I used for this card:

- Punchinella/Sequin Waste Border

- We could be heroes

- Boy in cape

- Row of distressed lines

- The end is near

- Worldwide Pandemic

- Say new normal one more time

- Scrabble Alphabet small

- Writing triangles


other stuff:

- Watercolor paper

- Staz on

- Distress reinker

- Distress Oxide

- Stampin' up pad 

- Brush

- Shimmer spray Dylusions


See ya soon ❤


Saturday, February 26, 2022

Enjoy what's left of winter.... by Tracy Blackwolf

Hello all!

Hope you're all doing well - this week on the blog is a quick and easy card, enjoy.


The background is done using spray stains. I just love how the colors blend together. When you're happy with the color blend,  dry with heat tool to stop the process. Once the background was dry, I stamped the running lady and dried her. Then I used a paint brush and a bit of the spray stain to color her dress a bit.


I then took the bubble wrap texture and stamped it with two different ink pads ,one on each side just for some texture. after that I took a sheet of acetate and stamped the bugs around so they are chasing her.. Its hard to tell but doing that on the acetate gives a bit more dimension. And also if you don't like the placement of the bugs, you can stamp another sheet of acetate..


After that I used the computer to make the words I wanted for this card...A little more spray stain brushed on with a paint brush and some foam tape on the back and done. I also used some tiny black foam tape on the back of a couple of the flies to attach the acetate.

I know most of us are sick of winter but the sentiment is so true- spring/ summer brings the bugs.LOL

Be safe ,find humor where you can, and keep doing art!

Stamps used:

Running lady    1080

Bubble wrap texture    19566

Mosquito   1885

Fly   18952

Other supplies used:

Kaleidacolor ink pads: Riviera and Desert Heat

Disstress spray stains: Salvaged Patina, Mustard Seed, Picked Raspberry, Dried Marigold

Acetate

Black Staz on ink for the acetate

Versafine ink for lady


Two Bird Cards by Fran

Hi all!

Today I have made two small (4" x 4") cards which can be used for any occasion, like a thank you, birthday, best wishes, hello, etc.


 I made the backgrounds by smooshing distress inks with water onto my mat and putting the card into the ink.


For the first card, I stamped the wire fence on each side of the card


I then stamped the main image onto the card, and again onto some heavyweight paper so I could colour and cut it out


I edged the card with a Lucky Clover and Black Soot to frame the main image.  I then added a cut out question mark to my final card (a personal touch to send to a friend of mine)


For the second card, I stamped a moon onto the background with a darker blue, and edged the card with silver embossing powder


I stamped the bird image separately and coloured and cut it out before sticking it on the card


Stamps Used:

Other items used:
Distress inks in Mowed Lawn, Twisted Citron, Lucky Clover, Salty Ocean, Peacock Feathers, Blueprint Sketch and Black Soot
Versafine Clair in Nocturn and Paradise
Memento in Tuxedo Black
Copic pens
Silver embossing powder
Versamark
Enjoy!


Friday, February 25, 2022

Box for storing postcards - by Arwen

 Hi Lovelies ❤

Today, I'm here on the Blog with a new project.

I built a box to store my postcards.


And that's the way, I created it ->

1.) I used cardboard - cutting into matching pieces (one for every side, one for the bottom)


2.) Alfter gluing all pieces together - the blank is ready to processed.


3.) I used acrylic paint for the edges of the box, also for the inside.


4.) Used watercolor paper and paint it with Distress Reinker.


5.) Now it's time to use rubberstamps, to decorate my paper pieces.


6.) I used foam to stick my letters onto the front of my box.


7.) I also used foam for the bottom of my box to make it non-slip.


All stamps, I used for this project:

- Wildflowers Silhouette

- Silhouette Clumps of plants

- Scrabble Alphabet regular size


Other materials:

- Cardboard

- Watercolor paper

- Foam

- Staz on

- Distress Reinker

- Distress Oxide

- Heavy Gesso black

- Multi medium gloss


See ya soon with new projects

xoxo 


Wednesday, February 16, 2022

Happy Birthday you old Sweetie ► Majo


Hi Folks,


I show you a Birthday Card I made with the lovely scribbled hearts, instead of flowers.


The background is spray with different colors of Distress spray stain (I always have a few sheets in my stash).


I stamped the hearts and the sentiment as well as the stems on inked watercolor paper and assembled everything on my sprayed panel using pop dots.


This is a very quick card for all occasions.


I have used the following stamps:

7701 The Heart

7952 The “Stems”

14307 The Sentiment


I hope you enjoyed my quick tutorial and I wish you a very nice Thursday.


Luv ya


Tuesday, February 15, 2022

Exotic

 Hi Everyone, 

For today's project I have made a postcard! 


And here's how I made it:


First I dunked the card in to Distress Oxide inks that I smooshed on my craft sheet. I did add some water too. 


Next I stamped the background and inked the edges of the card. 


I then stamped the focal image on the card because the one I stamped to colour, I cannot cut out perfectly so I just glue it over the top of this one. Looks perfect ! 


Here I have glued the coloured and cut out image over the top of the one on the card. 


I have used the following stamps: 


I also used:
Distress Oxide Inks
Copic Markers
Clippings sticker
Washi tape

Thank you so much for stopping by today ! 


Monday, February 14, 2022

Fairy Bubble by Tracy Blackwolf

 Hello everyone ! 

Today I Am thinking spring thoughts- Here is A fun card-

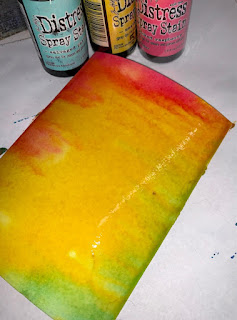
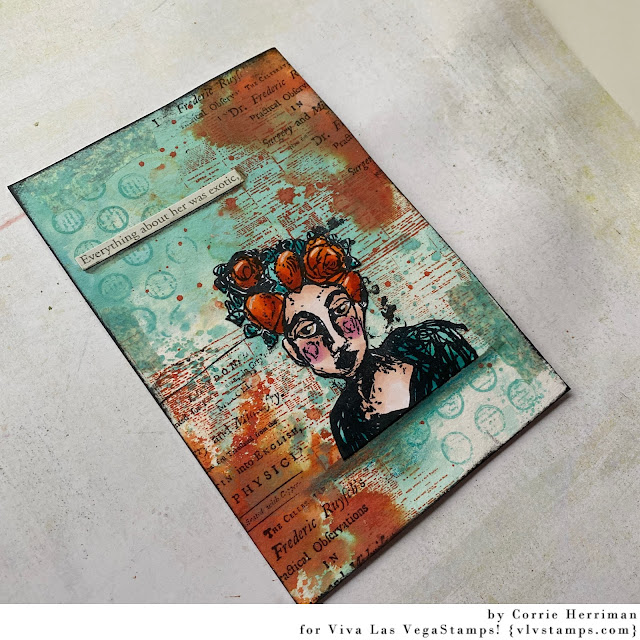
For this card I Started by spritzing the rubberstamp with spray inks, three colors. I blended them with my finger and then layed the card on top of  the stamp. I used my brayer to roll over the whole thing to make sure it was covered evenly.
It was brighter than I wanted so I spritzed water over the stamp again with out reapplying ink and layed a new card on top. It came out very pale which I was happy with. It gave a barely there print. 
Then I stamped the Christmas ball stamp on the sparkle laminate with staz on ink. Inking just around the edges and a little more. I practiced on scrap paper first to make sure of the inking. I did this twice.
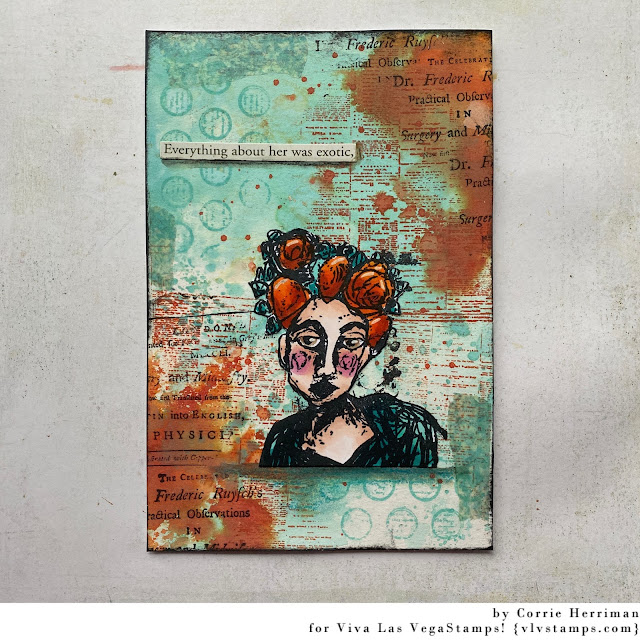
I used a sharpie to fill the line across the top where the neck of the ornament would be. I needed a bubble after all. I stamped the fairy and fussy cut her out. then cut out the bubbles. I made a "mask" to cover the body of the girl and used spray inks to color her wings.

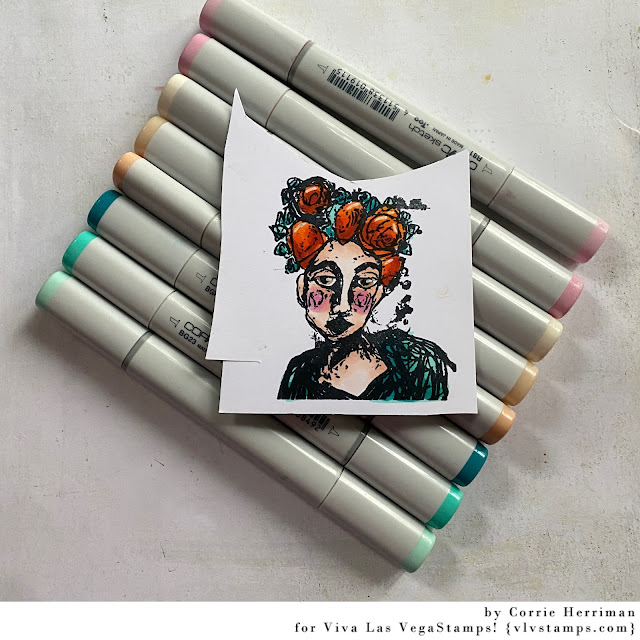
Then I colored her body with alcohol markers.

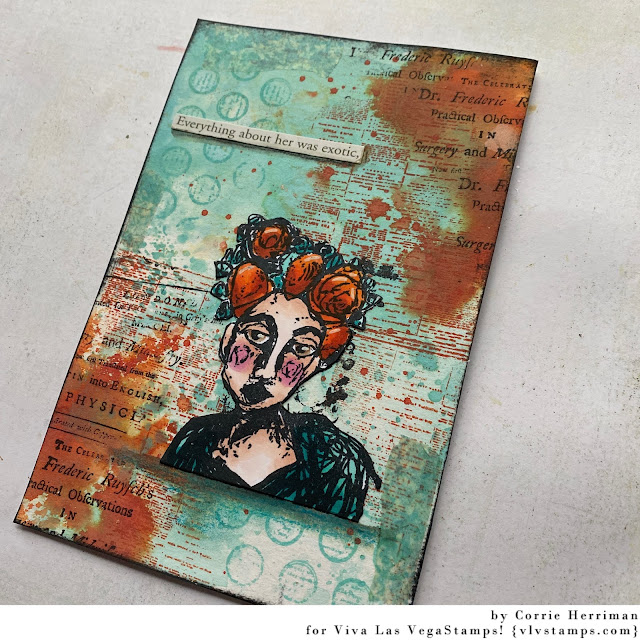
I stamped the background with more  "bubbles", Spritzed some yellow and speckled egg color on the background, dried it then stuck the first bubble onto the card. for the bubble on top I left the backing on so the the foam tape didn't show and then did the same with the fairy.  Found some fitting words and that was it!
I hope you enjoy!

Stamps Used:
Harlequin diamond background            18920
Grunge circles                     19563
Christmas ball         9234
Kneeling butterfly woman                  2138

Other supplies:
Kaleidacolor ink pad_ Baby powder
Dylusions shimmer spray- Bubblegum pink, pure sunshine, fresh lime
Dylusions spray ink- Vibrant Turquoise,funky fuscia
Distress spray stain- picked raspberry, salvaged patina, shaded lilac
sparkle laminate- may find online
TH small talk verbage stickers
Until next time! stay arty!!