Hello, Friends,

I stamped
the lady and the sentiment on tissue. After drying I added some more ink and
distressed the edges.


I have used the following stamps:
Tina
Walker Spiky Hair Scribble Girl 2
(Plate 1517)
(Plate 1483)


Hello, Friends,
I stamped
the lady and the sentiment on tissue. After drying I added some more ink and
distressed the edges.
Tina
Walker Spiky Hair Scribble Girl 2
(Plate 1517)
(Plate 1483)
Hi everyone!
Today I have made this quick and easy card. Hope you like it.


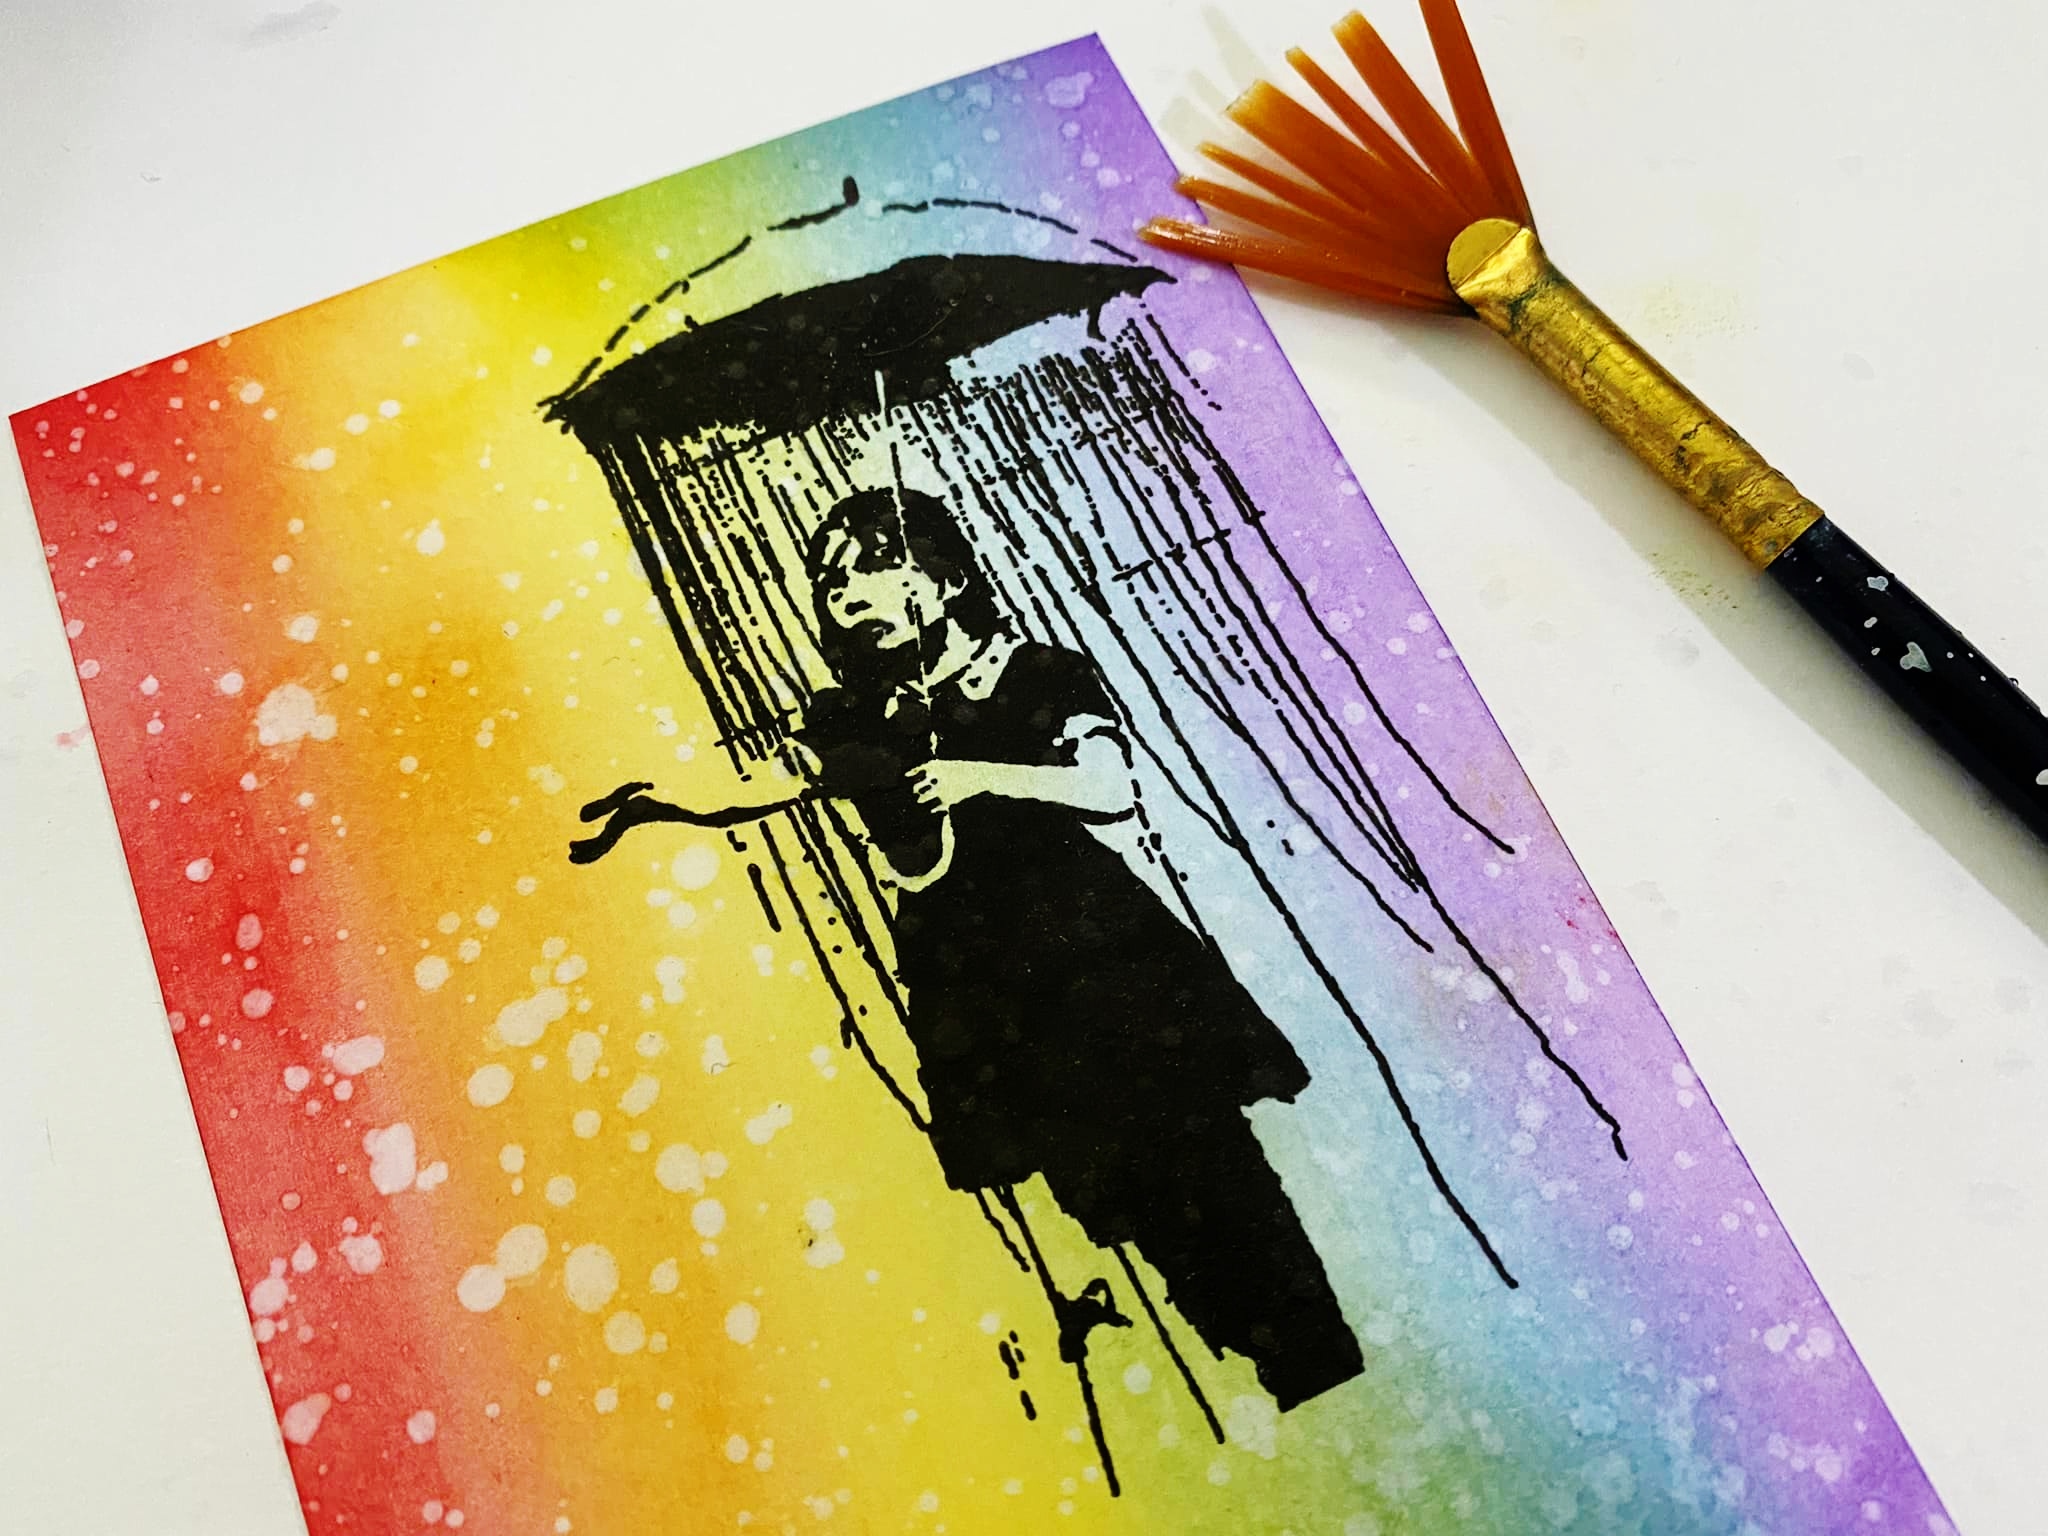
I stamped the image again on white paper, as well as the sentiment onto card.

I fussy cut the image and stuck it onto the card so that the skin on the girl and the umbrella stayed white. I cut up the sentiment and spaced it onto the card.
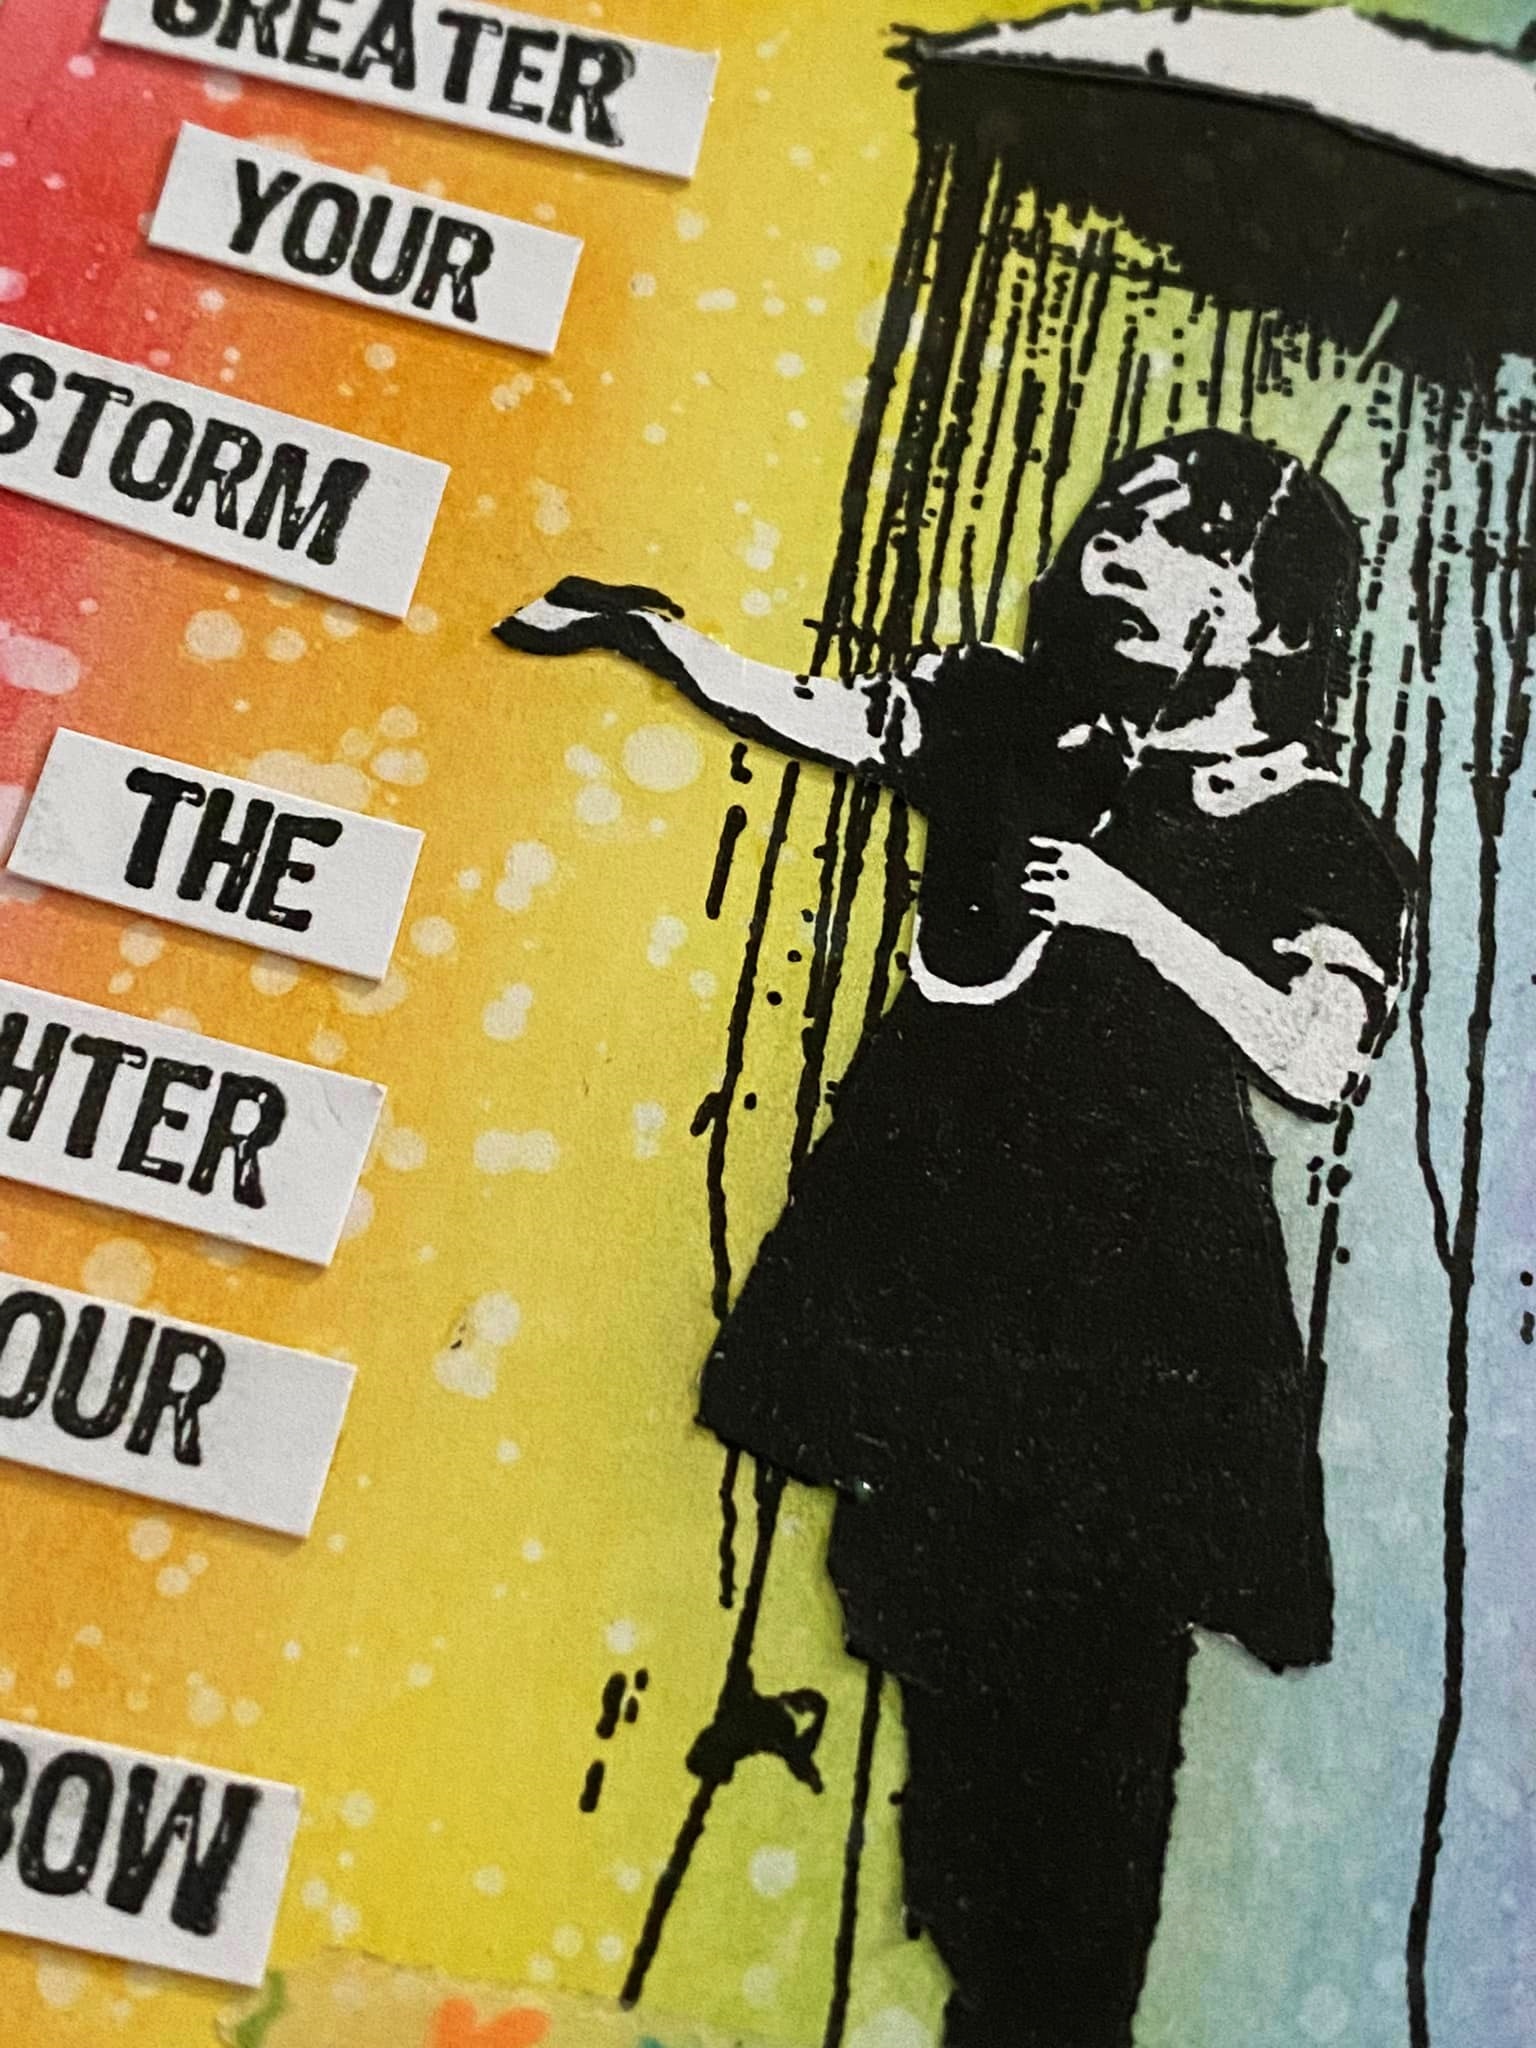
To finish the card off, I added some washy tape under the girl and drew a thin, black line round the edge, and mounted it onto a blank white card.


Stamps Used:
Banksy Rain Under Umbrella Girl 2 19486
Other Items Used:
Distress inks in Candied Apple, Spiced Marmalade, Mustard Seed, Twisted Citron, Tumbled Glass, Wilted Violet
Versafine Clair Nocturn ink
Washy tape
Fine black liner
Fan brush
See you next time!
Hey Lovelies ❤
Today I wanna share my newest card. It's a card with a rotation wheel (including four images)
First, I show it on this video:
Here is a summary of all 4 variations:

And that's the way, how I made it:

1.)I punch a smaller circle, a large circle with prongs, and a matching circle without prongs. In the small circle I punch a hole in the middle.

2.) I connect the small circle to the large jagged circle using a brad. The brad's head is pointing downwards. Then I glue 3D pads to the underside.

3.) I position my wheel on the back of my card and mark the section I want to punch out.

4.) Now I punch half a circle so that the jagged circle sticks out a bit.


6.) Now I can attach my rotating wheel to my card blank.

7.) I can now design my spinning wheel. You have to make sure that the pictures fit into the section of the card.

8.) When I've finished designing my circle and my card, I glue the circle to the serrated wheel. I stick 3D pads on the back of the card and glue these to my blank. The rotation wheel card is ready.
All stamps, I used:
- Batman
- Writing and scribble collage
- Brain
other stuff:
- black cardstock
- watercolor paper
- Staz on
- Distress reinker
- Distress oxide
- 3D pads
- Brad
- Spellbinders
See ya soon *mwah*

Hello friends! here we have a simple but cute art tag...enjoy.


.jpg)
Hello, my friends,
I used one of the images (Smirky Scribble Girls designed by Tina Walker) from the set 1517, masked the image after stamping and added two background stamps. I added some texture by stamping dots and little flowers, inked her hair and adhered the sentiment in stripes.


I used the following stamps:
Flower
(Plate 916)

Luv
ya ♥
Hi Lovelies ❤
Today, I love to share my magical postcard.
I love this little grumpy elf :)

Close-ups:


All stamps, I used:
Other stuff:
- Watercolor paper
- Cardstock
- Staz on
- Distress Reinker
- Distress Oxide
- Dylusions Shimmer Spray
See ya soon ❤❤❤
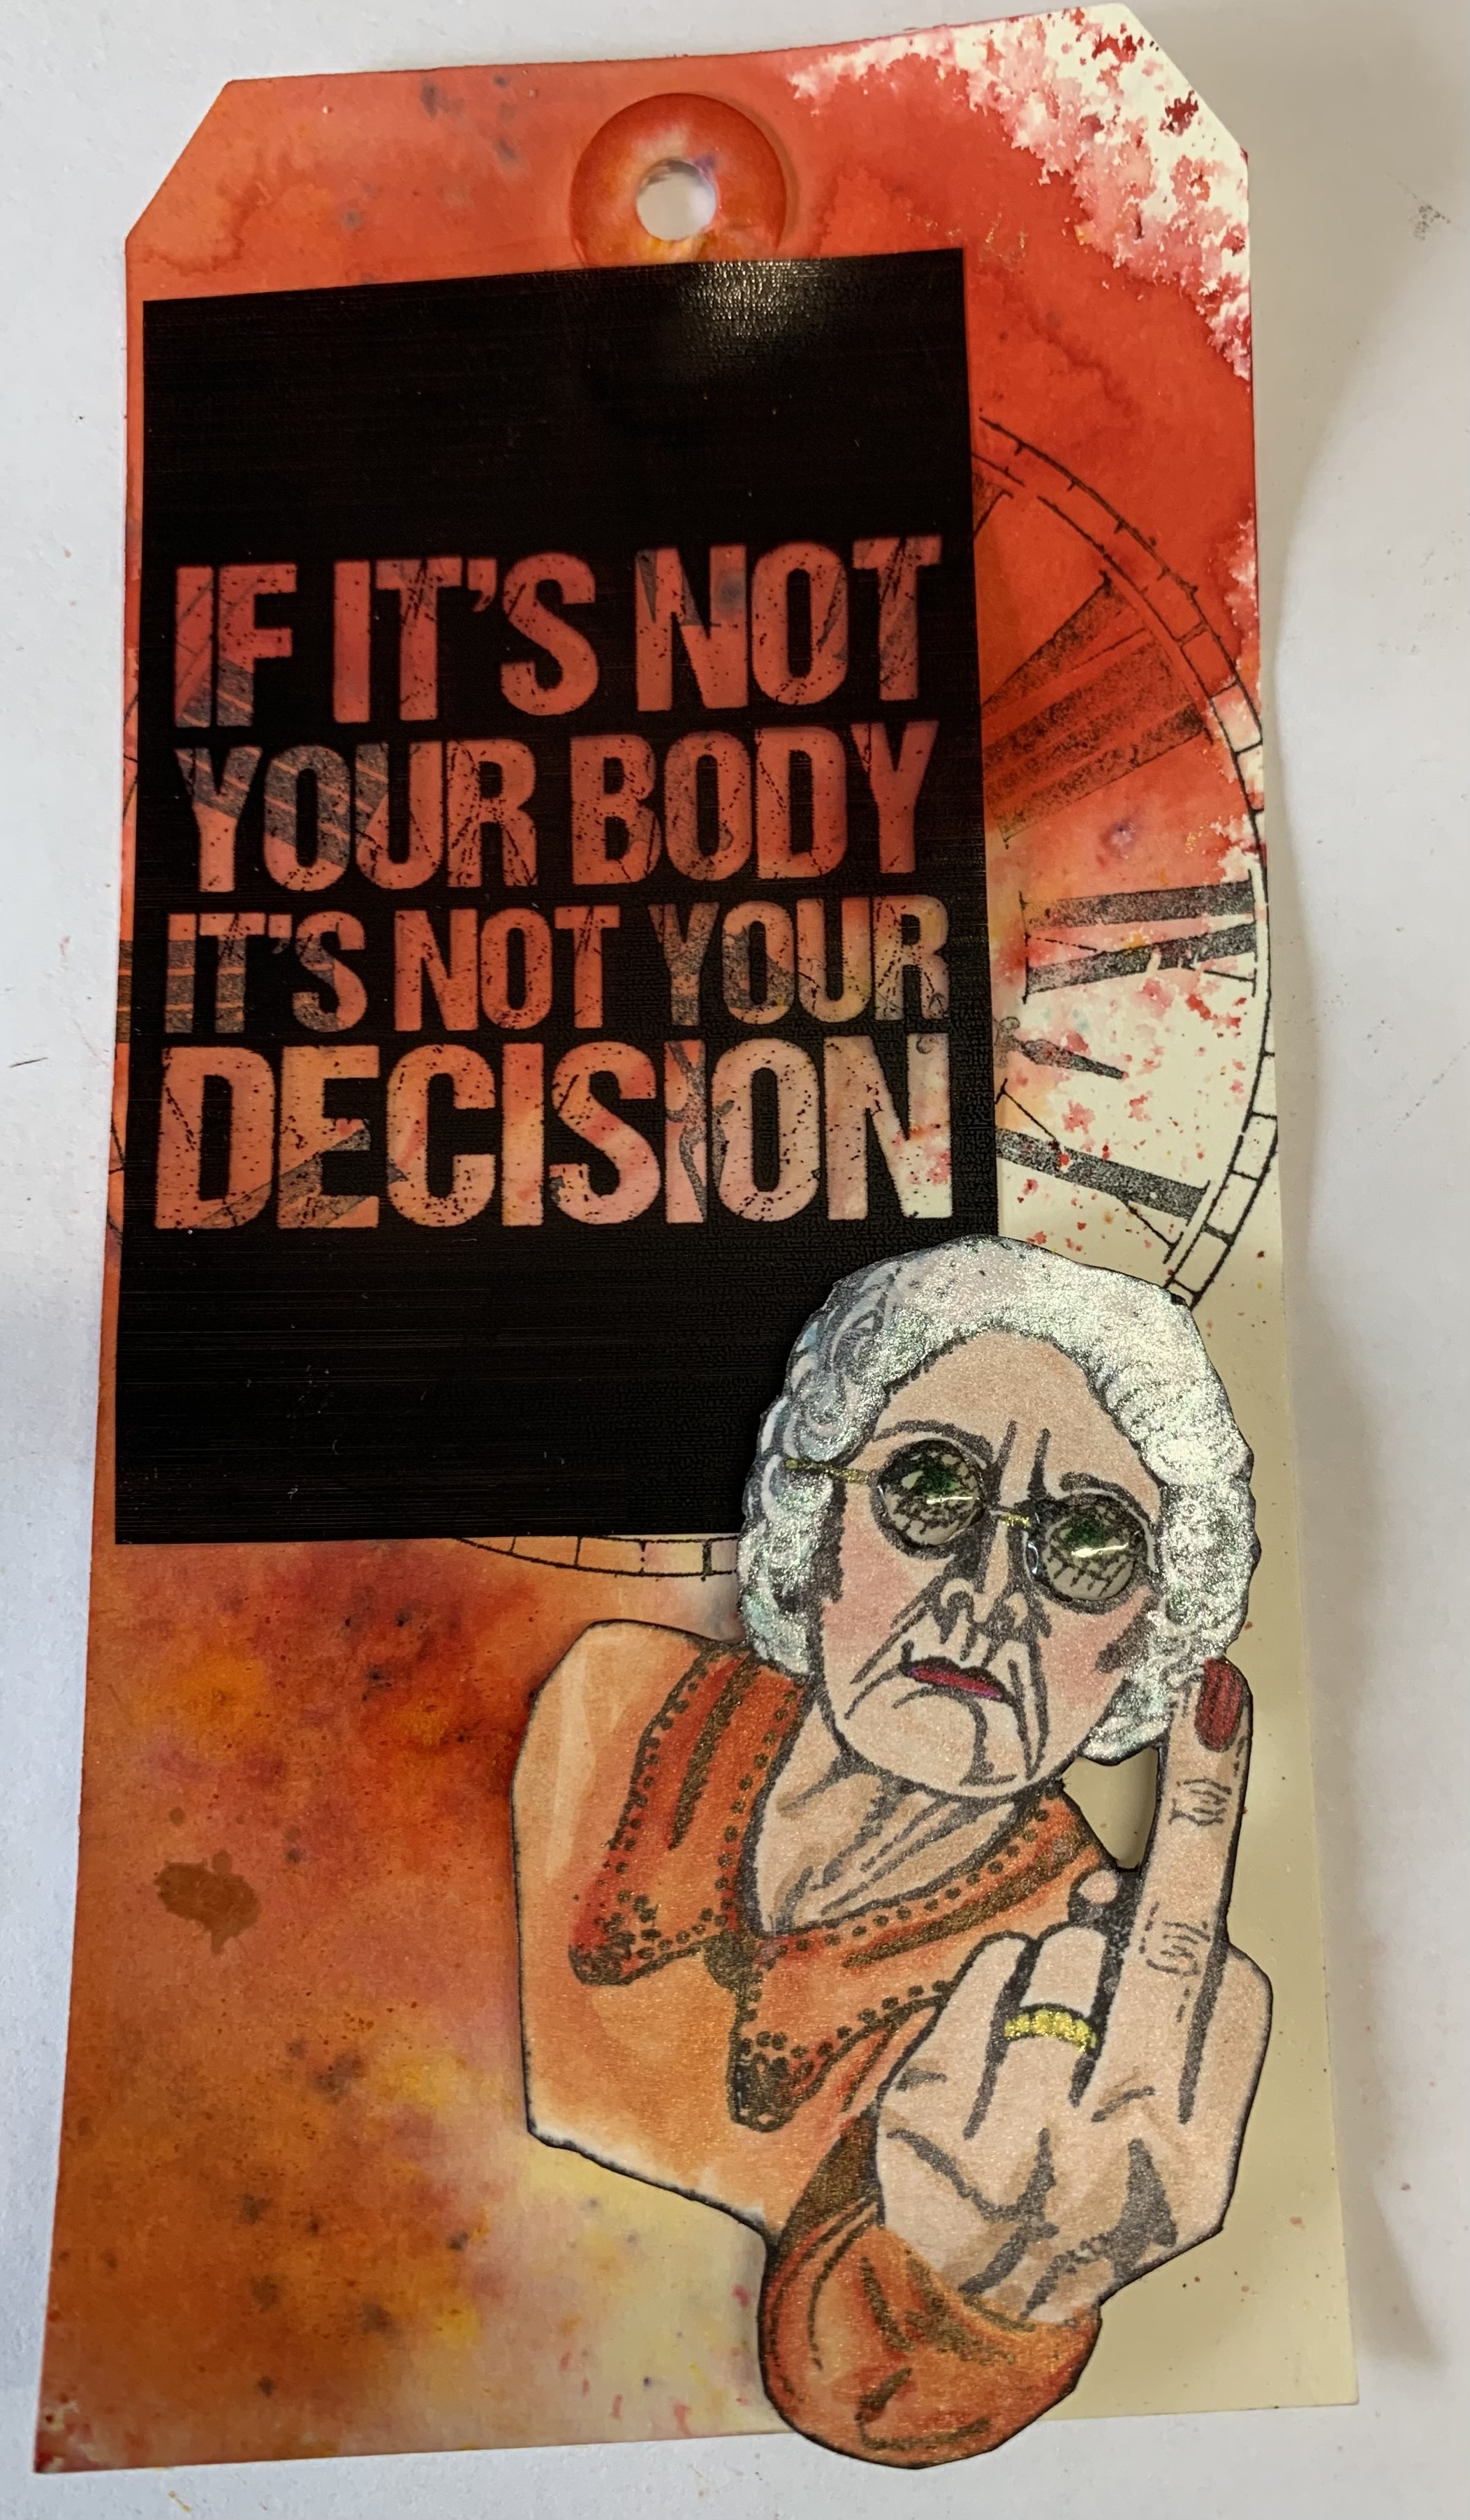
Hello all!
Here is my blog post for this week- In light of what's going on I couldn't help but make this tag.

So, for this tag I used Brushos pigments. I just love them. I used three different reds and a yellow.
I sprinkled a bit all down the left side with more going out at the top.


.jpg)
Hi everyone!
Today I have made a tag.


I stamped the main image on thick paper, coloured it and fussy cut it out.

I stamped the sentiment and cut it up, then stuck it onto the tag how I wanted it placed, having gone round the edges with Gathered Twigs. I added an eyelet at the top of the tag, and put some ribbon through it to finish it off.

Hope you like it!

Stamps Used:
Other items used:
White card
Distress inks in Spiced Marmalade, Tea Dye, Gathered Twigs
Copic Pens
Eyelet
Ribbon
Piece of packing foam
