Saturday, October 30, 2021

Hallows Eve By Tracy Blackwolf

 Happy Halloween Everyone!!!!!!!!

My most favorite time of the year!!! On the blog today with a little Hallows eve Vignette box...Enjoy!!

I just love making these boxes! they make such fun decor and night lights. They come brown so I almost always paint them with white Gesso first because then I can use any medium to paint what ever I want after that.
I do two coats and then I used spray stains to put in the color... Squeezed Lemonade and then Shaded lilac. next I sprayed some black soot and used a paint brush to pull the black upwards in streaks....spooky...
while that dried, I got my moon out of my stash...its a chipboard moon... I coated in modeling paste, let dry and spritzed on two orange spray stains. Then stamp the witch and color with alcohol markers. 
I used some neon red paper to stamp the row of jack o lanterns, let dry and fussy cut them out.
I then stamped the weathered tree on acetate twice and fussy cut them out. I gessoed the chipboard stars and splashed some spray stains on them as well. Then stamped some bats on the inside back of the box.
the witch is stuck to the moon with foam glue dots. Then I had to drill a hole in the box for the tiny lights... Because how fun are they?!! I used just a little had drill you push up and down. then used an awl to make the hole a little bigger. I cut off all but four lights because that is all I wanted. be sure to cut from the end opposite the battery pack! I bent them and stuck them to the top back of the box using hot glue. Be careful not to get hot glue on the light itself. hold in place with a toothpick if you need to.
Then use the moss from the craft store to hide the lights wire a bit, and help with the creepy effect.
Glue in some moss on the bottom too.. then cut apart the jack o lanterns and start gluing them in where you want. Then the trees. you want to rough up the acetate  with an emery board or fine sand paper a bit to give it some "tooth" so the hot glue sticks. I glued the bottom and just two spots on either side to anchor them to the box. Then came time to glue the moon and witch on the front. just pay attention to the contact points and glue well there. Then I glued my stars on along with some more moss.and finished with the last of the jack o lanterns. I stamped bats on the outside of the box, added some hologram black stars to her dress and called it done!


So fun!
I always like to finish the back too....
You can leave the battery case loose or as I have done since I did the photo and glued it on the back. Just make sure you have the opening on top and not glued down to back..So you can change the batteries.
Hope you Enjoy!! Have a safe and fun Halloween all!!!!

Stamps:
Weathered tree   19467
Row of Jack o lanterns  19210
Bats   18909
Witch holding broom   19705

Other supplies:
Vignette box...TH
Moon and stars chipboard..TH
Moss ...Craft store
Tiny lights..TH
White gesso
hot glue
Black staz on ink for acetate
Disstress spray stains...Black soot, squeezed lemonade, Shaded lilac, Ripe persimmon, Carved
pumpkin.


Friday, October 29, 2021

Happy Holidays ► Majo


Hi my friends, this will be a very short posting since I’m pretty sick from getting a flu vaccination yesterday, too close to my last Corona vaccination.


I had already started with my Christmas bags and will show you one now instead of posting it later in November.

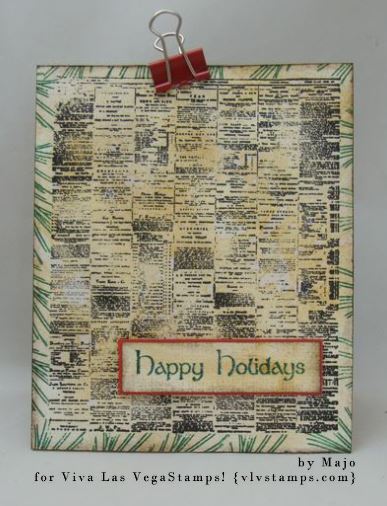
 I inked watercolor paper, and stamped the SHEET OF NEWS PRINT

and added the PINE BRANCH on the edges. After stamping my Christmas sentiment HAPPY HOLIDAYS, I matted it and adhered it to my panel.


 Ready is my little gift bag for Christmas …. One of them!


The versatile Sheet of News Print is from the new Plate 1529

 Have a wonderful time, enjoy Halloween and stay safe


Thursday, October 28, 2021

Halloween tag - Zombie brains

Hi everyone,

you may have guessed it, but here is another Halloween inspired project from me. ;-)
This time I have a Frankenstein tag to share with you.

I worked on a tag that is about 3 inch wide and has a torn edge at the bottom. To start the tag I used three colors of Distress Oxide sprays and dried the paper between each layer of color. Background done - it's really a simple one.

For my focal cluster I stamped and heat embossed the blood drops in read. Then I stamped the jar, roughly masked the outside and added Frankensteins head inside. I added some little touches of color with ZIG watercolor pens, but to be honest you have to look very close to see that.

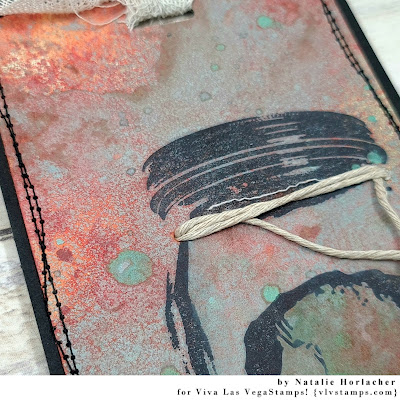
I also stamped "Zombie brains" onto a piece of watercolor paper, tore the edges so that I ended up with a little tag and added more of the Oxide spray to that. With a few stitches I adhered it to the tag itself. Then I just added the large tag to a base with my sewing machine and decorated it with a piece of ribbon.


Stamps used:
Blood Dripping (18961)
Mason Jar (18957)
Frankenstein's Bolts (5842)
Zombie Brains (18955)
All stamps from plate 827

Other material:
- Canson watercolor paper
- black cardstock
- Versafine Claire Ink (nocturne)
- Versamark Ink
- Distress Oxide Ink Sprays (crackling campfire, frayed burlap, cracked pistachio)
- WOW! embossing powder (primary pink robin)
- ZIG real brush watercolor markers
- thread

- ribbon or cheesecloth strip

 
See you soon + happy Halloween!

Monday, October 25, 2021

HALLOWEEN CARDS by Fran

Hi everyone! Today I made a couple of cards for Halloween.  I'm not really a great fan of Halloween but seeing the great spooky work that others were doing, I was inspired!


 For the first card, I put a small moon mask on the top right of my piece of card and smooshed distress inks in Wilted Violet, Seedless Preserves and Chipped Sapphire with water.


I went round the moon mask with the darkest colour, then added more colour with blending brushes.


I stamped the cemetary stamp a little way up from the bottom in black.


For a bit of added interest I stamped branches across the moon and round the top and sides of the card using the top of a tree stamp.


After stamping the skeleton, I darkened the ground in front of the gravestones with black distress ink then used a white gel pen to highlight the skelly's bones, and the tops of the graves where I thought the moonlight would hit them.


And where there is light, there are shadows, so I coloured in some shadows with a black charcoal pencil.


To finish off this card, I mounted it on a white mat before putting onto a black card.


For the second card, I started by stamping the main image on white card, and also cut out a mask so that I could use Wilted Violet and Chipped Sapphire distress inks over it.


After removing the mask, I inked around the edge of the card with Carved Pumpkin distress ink, making the corners darker.


With a small brush, I infilled the bits that the mask covered that needed to be purple.


I then coloured the main image with Polychromos pencils


To finish the card off, I mounted it on a black card and drew round the edges with a black fine liner pen. I don't have any Halloween sentiments, so I had drew a spider hanging down (and actually wished I hadn't afterwards, haha!)


Hope you like these cards!  See you next time :)

Stamps Used:

Card 1:

Card 2:

Other items used:
Distress inks Wilted Violet, Seedless Preserves, Chipped Sapphire, Carved Pumpkin, Black Soot
Versafine Clair ink in Nocturn
White Gel Pen
Black fine liner pen
Moon mask
Polychromos pencils
Black Charcoal pencil


Friday, October 22, 2021

Notebook by Arwen

 Hi Lovelies ❤

Today, I wanna show you my newest project.

I built a notebook with black and lots of purple 💜💜💜

And of course, I' ll have an instruction for you.

But first - the finished book:


Close-ups:


   And this is, how I made it:

1.) I used cardboard and paper and cut it into the right size.

2 pieces of cardboard for the book cover and 80 sheets of paper.


2.) After cutting all the pages and the cardboard pieces, I used black paper to wrap the book covers.


3.) For the back of my book cover, I used a ribbon as a bookmark.

I placed it, in the middle of the top and glued a few cm.


4.) Time to finish the book covers, glueing in the right sized paper on the inside.


5.) Ok, let's put the single pieces together :)

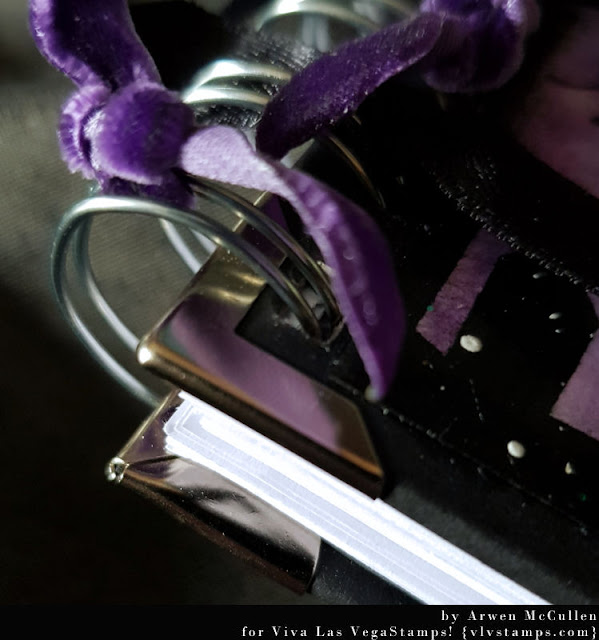
I punched all the pages and the book cover with the Bind-it-all.

I also used book corners to protect the corners from wear and tear.


6.) The book blank is ready. Now it can be designed.


7.) I use a suitable piece of watercolor paper for the front of my book cover.

 Now the best part of any project - choosing the stamps.


8.) Let's bring some color onto this page. Result -  at the top of this posting 😺


All stamps I used:

- The moon

- Realistic skull

- Cemetery

- Raven in witch hat

- Bat

- Spider

- Scrabble Alphabet small

- Stay creepy

- The end is near


Other stuff:

- Cardboard

- Paper

- Black paper

- Staz on

- Distress Reinker

- Zutter Bind-it-all

- Binding wire

- Book corners

- Ribbons

- Canson watercolor paper

- Varnish


Ok, that's all. Hope you like it ❤

See ya soon