Showing posts with label ribbon. Show all posts

Friday, October 22, 2021

Notebook by Arwen

 Hi Lovelies ❤

Today, I wanna show you my newest project.

I built a notebook with black and lots of purple 💜💜💜

And of course, I' ll have an instruction for you.

But first - the finished book:


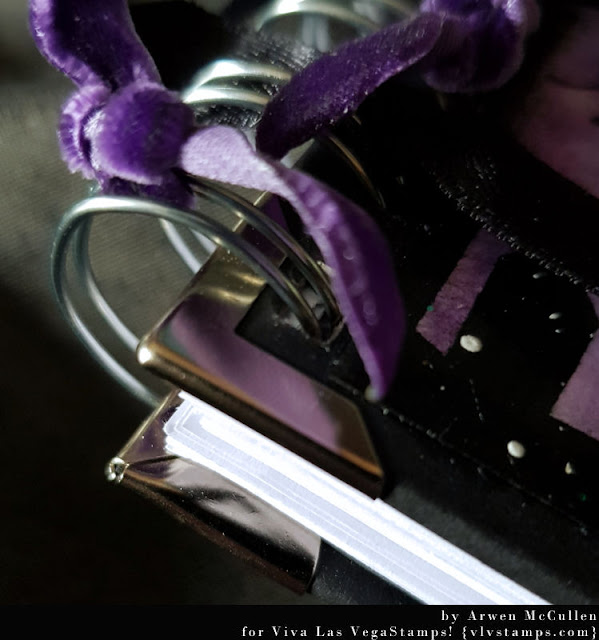
Close-ups:


   And this is, how I made it:

1.) I used cardboard and paper and cut it into the right size.

2 pieces of cardboard for the book cover and 80 sheets of paper.


2.) After cutting all the pages and the cardboard pieces, I used black paper to wrap the book covers.


3.) For the back of my book cover, I used a ribbon as a bookmark.

I placed it, in the middle of the top and glued a few cm.


4.) Time to finish the book covers, glueing in the right sized paper on the inside.


5.) Ok, let's put the single pieces together :)

I punched all the pages and the book cover with the Bind-it-all.

I also used book corners to protect the corners from wear and tear.


6.) The book blank is ready. Now it can be designed.


7.) I use a suitable piece of watercolor paper for the front of my book cover.

 Now the best part of any project - choosing the stamps.


8.) Let's bring some color onto this page. Result -  at the top of this posting 😺


All stamps I used:

- The moon

- Realistic skull

- Cemetery

- Raven in witch hat

- Bat

- Spider

- Scrabble Alphabet small

- Stay creepy

- The end is near


Other stuff:

- Cardboard

- Paper

- Black paper

- Staz on

- Distress Reinker

- Zutter Bind-it-all

- Binding wire

- Book corners

- Ribbons

- Canson watercolor paper

- Varnish


Ok, that's all. Hope you like it ❤

See ya soon


Thursday, September 23, 2021

Halloween Garland by Arwen

 Hi Lovelies ❤

Today, I'm back here with a new project.

I created a Halloween garland with 3 pieces.

Some close-ups:


And that's the way, I created this one:

1.) Choosing my materials for the garland. I used black cardstock and Watercolor paper from Canson. I used two different sizes of a banderol die.


2.) Stick together, so you get 3 pieces of banderols with a tiny black edge.


3.) As first stamps, I choose the Scrabble Alphabet.


4.) Stamping a letter in each left edge of every banderol.


5.) Time to choose the rest of stamps. Now, let's colorize!


6.) Now, every piece is colored - the single banderols need to be connected.

To make it possible, I used eyelets in different colors and connected them with a gauze ribbon. Finished! Time to celebrate Halloween 💀👻


Stamps I used:

- Scrabble Alphabet

- Devil's Trap

- Small wasp

- Vampire

- Cemetery

- Wolfman

- Bat

- Spider web in tree branches

- Spider

- Raven in witch hat

- Jack O' Lantern


other stuff:

- Cardstock

- Watercolor paper

- Staz on

- Distress reinker

- Eyelets

- Gauze ribbon

- Dies


See ya soon *mwah*


Tuesday, May 18, 2021

Biohazard gift box by Arwen

 Hi peeps ❤

Here I am again.

Today, I wanna show you my gift box, which I created for today.


And that's the way, I made it

First, I choose black cardstock to build my box and fold it:


 2nd step is glueing:


The 3rd step is, I choose a piece of cardboard and some fabric - both for the top of my box:


The 4th step - I used Brusho to create some background paper:


5th step - after spraying my fabric with colorspray, I sticked it onto the top of my box:


6th step is to wrap my piece of cardboard into my background paper and stamped with my chosen images:


7th step - I cut my background paper in pieces of equal size and stamped with my chosen image:

Last step - glueing all pieces together and finished the box:
 

All stamps, I used:

- Biohazard 

- Warning

- Jagged chain link fence


Other stuff: 

- Cardstock

- Cardboard

- Exacompta white cardstock

- Brushos

- Staz on

- Scor Pal

- Fabric

- Dylusions Color Spray

- Ribbon

- Scrappers floss

- Charm


I hope, you like my project - see ya soon with more creative stuff 😻


Saturday, March 20, 2021

Jewlery Box by Arwen

 Hi Lovelies

Today, it's my turn to share my project with you.

This time, I created a jewlery box to store all my earrings.


And this is how I made it:

First, I built this box from chipboard, cardstock and acrylic paint:


After finished this , I chose the stamps, I wanna use:


Next step is, to cut the paper pieces, which I need to decorate my box. I need 4 pieces with same size and one for the top of the box:


Of course, only white is just boring - so I used Distress Reinker to color the paperpieces:


Last step before finishing - stamp,stamp,stamp :)


All stamps, I used:

- Raven looking up

- Bat

- Devils Trap


other materials:

- chipboard

- cardstock

- Canson Mixed Media Imagine paper 

- Distress Reinker

- Waterbrush pen

- Acrylic paint

- Diamond Glaze

- Glitter

- Ribbon


See ya soon


Wednesday, February 04, 2015

Banksy trio of tags

Hello everyone,

Today I have three tags to share with you. I love the Banksy stamps and couldn't resist playing with them again. I have also used quite a few other rubber stamps. You will find a complete list at the bottom of this post.


This is the finished result


Paint tags with gesso. Also gesso a piece of card stock for sentiments if wanted/needed)


When the gesso has dried, stamp the images with Archival ink and heat emboss. I used black embossing powder to get a real black image. 


Randomly glue (I used gel medium)  book text around the images and put a thin coat of gesso over it. Make sure you can still see the text. 


Use a stencil, model paste and a paletknife of old credit card and add more texture to your tag. 


After this has dried (you can use a heat tool) the fun can start. Use different spray inks to colour the tags. I didn't spray; I used a brush as, although the images repel the ink, when drying the ink with a heat tool you might melt some of the liquid into the embossed images leaving light spots. If this happens you can always touch it up with a black marker. 


The last thing you do is stamp the background, use a fine tipped marker to doodle here and there, splatter some white ink (avoiding the images),  adhere your sentiments (if using) and add some ribbon. I also used some plaster bandage for added interest. 

I used the following stamps : 


Thank you so much for stopping by !

Until next time 
Corrie x