Showing posts with label Memento ink. Show all posts

Sunday, September 24, 2023

Boys Just Want to have Fun - by Fran Chalmers

Hi everyone!

Today I have made a tag, which talks about the boys for a change!


I made the background by first brayering on some colour onto a gel plate - I used Graphite by Elements Ink.


I then splattered some watered down Brushos in Grey, Burnt Sienna and Yellow


Once the background had dried, I stamped the main image onto it.  Then I stamped the image onto some thick paper to colour in.


After gluing the main image onto the tag, I stamped out the sentiment a couple of times and cut out each word so I could place them where I wanted to.  Once glued on, I went round the words with a fine black liner, as long as round the edge of the tag.


I finished the tag off by putting some fancy ribbon on the top.


Stamps Used:

Other Items Used:
Elements ink in Graphite
Brushos in Grey, Yellow and Burnt Sienna
Black Fine Liner
Memento Ink in Tuxedo Black
Copic Pens


See you next time!


Monday, November 15, 2021

Choose your own Adventure by Fran

Hi again 

Today I have made a postcard for all those little dudes that want to be heros and adventurers.


 First I smooshed a background in distress inks in Blueprint Sketch, Salty Ocean and Cracked Pistachio.


I then added lots of stamps to give background interest and texture.


I stamped our little hero on some 180gsm paper with Memento ink and coloured him with Copic pens, and cut him out.


After sticking him on, making sure he was grounded on some washy tape, I stamped the sentiment.


Hope you like it!
See you next time.

Stamps Used:


Other items used:

Memento black ink
Distress inks in Blueprint Sketch, Cracked Pistachio and Salty Ocean
Washy tape
Copic pens


Wednesday, December 19, 2018

Winter wishes


Hello everyone,

Welcome to today's blogpost ! For today I have made a quick Christmas card just in case you might still need some!


I enjoyed making this and I have only used 3 stamps ! 

If you'd like to know how I made this then go HERE of click on the pic below ! 


I have used the following stamps:

I have also used :
WOW Embossing powder - White Regular 
Distress Oxide Ink by Ranger - Broken China & Blueprint Sketch
Copic Markers

Thank you for stopping by today ! 


Wednesday, April 11, 2018

Eat more...

Hello everyone,

For today's post I have an art journal page to show you. This cat has just got the cream eh... custard I think. lol.


The background is a mop up page from a gelli plate, you know at the end where there are so many left over paint bits. Sometimes these turn out really nice and I thought this one was great so I decided to use it for this page. I added some stamping and white splatters. After the cat was adhered I also added some more shading under him. 


He looks like he's having a great time, doesn't he ...


Not sure I'll take his advice though.. 

Anyway, I have used the following stamps:


Thank you so much for stopping by today ! 


Thursday, March 15, 2018

Easy Easter Card

Hello Crafty Friends!

Today, I want to share a super cute and easy Easter card.
(which could easily be adapted for any occasion)


Stamps Used:
Wind-up Bunny
Waybill/Invoice

Other Items:
A2 Card Base- Black, slightly smaller white card stock for card front
Dylusions Paint- cut grass, fresh lime
Tim Holtz products- layering stencil, distress oxide ink (broken china), Chitchat stickers
Memento ink- Tuxedo Black
Brayer
Lace washi tape
various markers

Let's Play
I started by brayering a piece of card stock with my 2 dylusions paints (all colors/products listed above), once dry I used one of my layering stencils to add some background depth.  (I used the same ink to lightly edge my card for a more blended effect). 

Next, I stamped the waybill/invoice stamp to add additional depth and visual interest.  Setting that aside, I stamped my little wind-up bunny on a separate piece of card stock.  I used various markers to color in the cute little details in my bunny, then cut her out (yep, I said her... because, why not).  


Next I began by using my Miracle tape to add my card front to my A2 card base.
I used wet glue to add my bunny, and my Tim Holtz chit chat sticker. (Of course the washi tape was plenty sticky and didn't need anything).


Well crafty friends, as you can see this is super fun and easy! 
 I hope you use this as inspiration for some cards of your own. :)


Thank you for visiting 
and
Happy Easter
(A bit early)


Friday, February 02, 2018

Mermaids and Monthly Inspiration...

Hello Crafty Friends!!!

I hope you are all as excited as I am about another monthly inspiration.  I love this month's inspiration board (of course what's not to love about mermaids?!)


I used the inspiration and I also added a little Valentine twist...


STAMPS USED:
XO
You are Beautiful
Bettie Mermaid
Miracle tape (not stamp but vlvs)

OTHER PRODUCTS:
White cardstock base
Black cardstock
Pink cardstock
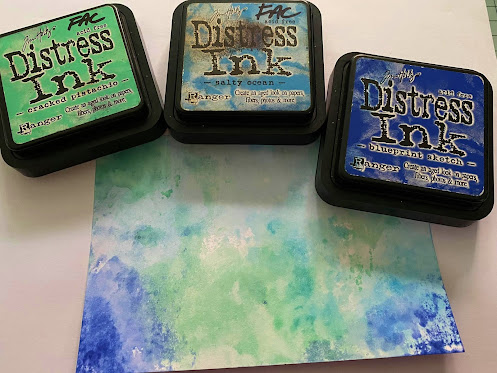
Distress ink- worn lipstick, festive berries
Memento ink- tuxedo black
Markers/Pens-zig clean color, blick alcohol-based markers, gelly roller pens, and wink of Stella
Glitter (various pinks)
Foam tape (I created my own with fun foam)
Distress Collage medium (as a wet glue for my mermaid... cant have glitter getting stuck)


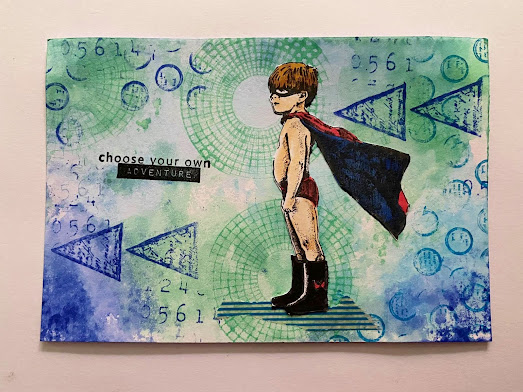
I love shaker cards, but rarely ever make them.  I am super excited with how this one came out.  This one is going to be a Valentine card for someone special (Don't want to spoil the surprise by saying whom for).

I started with a white A2 card base, a black matte, and a pink card stock base. The top layer of the card was created with more black card stock, and some clear acetate from some packaging I had lying around.


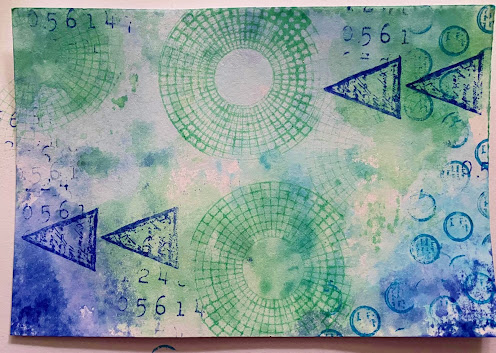
On my pink card stock i started by stamping the XO stamp in "worn lipstick" and "festive berries" distress ink.  I also stamped "you are beautiful" in black memento ink on the pink card base.

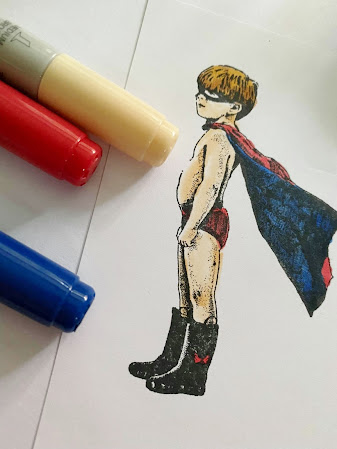
On a separate piece of card stock I stamped my Bettie mermaid in black memento ink.  I colored my image with various markers (zig clean color, blick alcohol-based markers, gelli roller pens, and wink of Stella).


(before top shaker layer added)


(Close up of glitter goodness inside the card!)


(different angle so you can see all that glitter in the shaker!!!)

I hope you enjoy this card as much as I do. :)
Don't forget to join in the challenge!!
(There are prizes to be won!)


Wednesday, June 21, 2017

There is a universe inside you - notecard by Cheetarah


Hi all! It's Cheetarah here and I am sharing a note card I made with some lush Cat Kerr designs for VLVS! as the focal point. This card was fairly simple put together, it's stamped all on one layer and has a fun and bright effect due to the background stamp and perfect pearl sprays I used. 

So I first stamped the Girl's face, masked it off and then stamped Expanding rays silhouette background over the masked face with a mixture of yellow and orange memento dewdrop inks. 
The stamped some bits of the Squiggly stars and numbers here and there for some texture. 
When the mask was still on I sprayed some perfect pearls kiwi glimmer mist over it for a sunshine effect for the rays. I then took the mask off, made sure the card was dry and colored the face with some letraset pro-markers. 

Lastly I stamped the sentiment under the face, matted the card on a light blue cardstock (blue skies) and called it done! 

VLVS! used;

Also have you seen the NEW Releases for this summer?! They are just stunning and with a 20% off for the pre order for a limited time so grab that up quick :) 
And don't forget our monthly challenge where you could win up some free rubber by linking up a project based on the challenge theme :) 

Thanks so much for stopping by today! 

Thursday, October 06, 2016

An art journal spread with a VIDEO tutorial !


Hello everyone,

and welcome to the VLVS! blog where today I have an art journal to share for my DT post. I have filmed the process so you will find a link to my YouTube channel underneath. 

If you enjoy it, please give me the thumbs up and maybe even subscribe to my channel ! 

Here is a picture of the finished project:


I have used the following stamps:
(click and they will take you straight to the shop)

19995 - Overlapping circles (I designed this one) 


If you would like to know how I made this then please click the link :


Enjoy ! 

Thank you so much for stopping by today ! 


Thursday, June 09, 2016

Well behaved women...

Hello everyone,

Today for my blogpost I am sharing an art journal that was part of a set of three art journals that I submitted to RubberStampMadness for publishing in their summer 2016 edition (women of the world)  but unfortunately they didn't make it.
One of my postcards did make it into this edition so it was not all bad ! haha....
Anyway, this art journal was my favourite of the three so for today's post I tweaked it a little here and there and here it is :


I made this page by cutting a piece of Mixed Media paper to size and painting it with gesso. Next I painted it with acrylic paints and dried it. I used a stencil (Tim Holtz - Scribbles) over top with Distress Ink and a blending tool in similar colours. 
I then stamped the background using Archival Inks in similar colours and also some black. (A complete list of all the stamps I used is at the bottom of this post.)
The image of the girl and the sentiment were both stamped on white card stock and coloured with Copic Markers. I then cut them out and adhered them to the page. A double doodle line around the edges finished it off. 

I used the following stamps:

Thank you so much for stopping by ! 


Tuesday, April 05, 2016

Fancy a cuppa

Hello everyone,

For today's Challenge Inspiration I have made a tag. This was a little different for me, as there are no bright colours on this !


I started with a #8 tag which I cut from a sheet of Tim Holtz pattern paper pad called 'French Industrial'. It was stamped with a coffee ring stamp and Archival ink. ( A complete list of the stamps I used it at the bottom of this post). 
Next I cut a circle from some corrugated cardboard card stock and painted some gesso over it to lighten it a little. I then took my Archival ink pad and dragged it over the edges. 
Next I glued the circle onto the tag and then used my sewing machine to stitch around the edges. I then rubbed the edges with the Archival ink also. 
The lady was stamped on white card stock and coloured with Copic markers. She was cut out and adhered onto the circle. Lastly the sentiment was stamped and the leather cord added through the hole. 

Here is the inspiration board this tag is based on:


The words to go with this : caffeine, coffee, tea, warm drinks, hyper, cups, fancy, stain, brown, vintage, cardboard, tan, brown, black.

Here are the stamps I have used:


I hope I have given you some inspiration to play along !! You might win a grab bag of lovely pink rubber.....


Friday, March 04, 2016

So retro !

Hello everyone,

For my first DT post for March, I have made an art journal. I have been watching VLVS! own DeeDee Catron doing art journaling on YouTube and I saw her using a shape that I really liked so I borrowed it from her. I am sure she won't mind. It is a circle with a hole in it and to me it looks really retro...


I started with die cutting the circles and the holes in the circles. These circles were then adhered to my journal page. Next I gessoed it all with white gesso. 
I used a few shades of yellow acrylic paint (PaperArtsy Fresco paints) and my fingers to add the colour to this page. The dark shades around the circles were made with a brown Big Brush Marker. 
next I used a bottle cap with yellow ink and a credit card and some watered down black paint to add some mark making. I also stamped the background a little with Saffron, Sepia and Black Archival inks. There is a list of all the stamps I used at the bottom of this post. 

The lady was stamped on white card stock, coloured with Copic Markers, cut out and adhered on the page. I used a coloured pencil to add some shading under her. This is so she is anchored down and not floating in space. The sentiment was also stamped on white card, coloured with copics and the edges were darkened with the Sepia Archival ink. I adhered this to the page as well and that finished it off. 

I used the following stamps:


Thank you so much for stopping by today ! I hope I gave you some inspiration to get your stamps out and play !