Showing posts with label art journaling. Show all posts

Thursday, August 12, 2021

Art journal page - Jump at your own risk

 Hi everyone,

I'm back on the blog with a new art journal page. It's a quick one that I created in my lunch break as I'm still mainly working from home.

I started by stamping the newsprint in several spots and did not care much for a perfect impression. On top I used some Lindy's sprays and water and dried the page with my heat tool.
I added some more stamping with the writings and scribbles collage and some splatters of watered down gesso and dried it again.
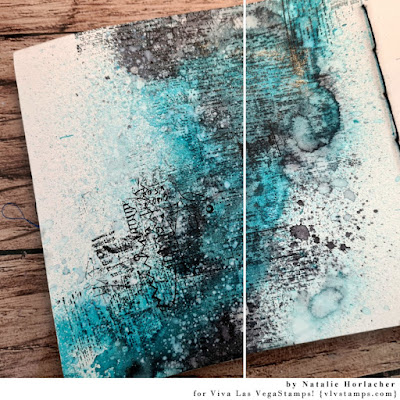
Here you can see the two stages of my background, the first steps on the right and with the added finishing touches on the left:

I used a cut out photo of the jumping Grace Kelly as my focal point and paired that with a text stamp from the latest release: Jump at your own risk.

That's it - a quick but fun project. Here are a few more photos of the finished page:


Stamps used:
Sheet Of Newsprint (20676)
Writings and Scribbles Collage 20695)
Jump At Your Own Risk (20668)
 

Other material:
- Art Journal, 5.5 x 5.5 inch
- scrap paper
- Versafine Claire Ink (nocturne)
- Lindy's Gang Sprays (flat fabio: blazing black; starburst: time travel teal)
- Gesso
- copied image


See you soon!


Wednesday, February 10, 2021

Art journal page - Believe in yourself

Hi everyone,

I'm in love with the latest release and want to share a project that features some of the new stamps. So here's a new art journal page for you.


As a base layer I applied some chalk paints with a brayer. I mixed some blue and yellow tones and really liked how the colors work together. The paints dry very fast, especially when you apply them in a thin layer with the brayer. This helps to avoid getting muddy colors. I added some script stamping in ochre to create just a little more visual texture (not yet in the picture below).

Next, I started to build a cluster that will be my focal point and therefore used scraps and stamps. I stamped the zodiac wheel in brown onto a die cut circle with a notebook edge that I had laying on my desk. It was already colored with an ink spray, but I cannot remember which one. I also found another scrap that I wanted to use. It had a beautiful stain of some oxide ink and a torn edge on one side. I simply stamped the eclipse chart on top and inked the straight edges.

The cluster needed something more and I added some torn book pages with inked edges to it as well as a piece of lace. This is hardly visible, both in the picture and in reality, but it adds some nice texture to the project. I glued the cluster down and added some splatters with acrylic ink.


At this point I liked my cluster, but also felt that there was something missing regarding my whole composition. I thought it would be nice if I had added the fortune teller stamp before I glued down my cluster. So I cheated a little and used my favorite fixing trick. I stamped her onto a piece of white napkin (make sure to use just one layer) and glued that down with matte medium, slightly under the circle so that it looks as if she is behind that. Luckily, I had a background that was not reacting with wet medium. The edges of the napkin turned almost invisible.


To finish the page, I stamped the quote "believe in yourself" and called this page done.


Here are a few more photos of the finished page:


Stamps used:
French Writing Background (20646)
Eclipse Chart (20614)
Zodiac Wheel (20619)
Gypsy Fortune Teller (20616)
Believe In Yourself (20643)


Other material:
- Marabu chalk paint (lagoon, light-blue, pastel yellow, ginger)
- brayer
- Versafine Clair ink (nocturne)
- Archival ink (pale ochre, potting soil)
- Acrylic ink (sepia)
- Joy! crafts - "notebook circles" die
- scraps, old book paper and lace


See you soon!


Wednesday, July 15, 2020

Art journal page: Currently

Hey everyone,

Natalie here with an art journal page that I want to share with you, along with an easy background technique. For this technique you just need a stencil and some spray inks. I'm sure it would work with a water reactive ink pad, too.


I picked three earthy and greenish color sprays from Lindy's Gang and started with the lightest one which was Opal Sea Oats. I sprayed my stencil with the spray and then pressed it onto the paper. Then I repeated the process on another spot of my page and let it dry. This is important if you don't want the colors to bleed into another.
The next color I used was My Mojito Green. Again, I sprayed ink on the stencil, but this time a little less, and pressed it onto the page. It was quite easy to align it right over the last imprint.
I did the same with the last color, Drop Dead Gorgeous Green, and a very light spritz of color.

On the following pictures you can see how I built up the layers.


While my page was drying, I decided that I want to use the bearded man as my focal image. And while browsing through my stamps I found a mushroom with the perfect size for him to sit on. I stamped both with Archival Ink, first in Coffee, then in Watering can. The two colors mixed to a grey tone with a little vintage touch. Using a stamping tool makes it easier to do this.
I cut out both images and added a little watercolor to them as well as I inked up the edges with a black marker.


Back on my page I stamped some flowers and a few other mushrooms to the bottom left corner of the background. I used Oxide Inks for all this stamping, just because they work well and I had some matching colors.


All I had left to do was placing my focal point on the page, backed with some thread for a little more contrast and texture, and adding a quote. Well, I didn't used a whole phrase, this word stamp "currently" was just saying everything that this page needed.
And because the top right corner looked a little too empty I grabbed the waybill stamp and added some stamping there, too.

Hope that my little tutorial inspired you. Here are some more photos of the completed page:


Stamps used:
Wild Flowers (18819)
Wildflowers Silhouette (19666)
Waybill/Invoice Background (19416)
Bearded Man Cross Legged (20087)
Mushroom (20046)
Mushroom (19118)
Tall Mushroom (19117)
Currently (20285)


Other material:
Art Journal (my page was cut from Canson watercolor paper)
Archival Ink (Watering Can, Coffee)
Lindy's Gang Starburst Sprays (Opal Sea Oats, My Mojito Green, Drop Dead Gorgeous Green)
Distress Oxide Inks (Forest Moss, Peeled Paint)
Stencil (TCW - Foral Radar)
Watercolor
Pitt Brush Pen (black)


See you soon!


Thursday, October 10, 2019

Art Journal Page by Preeti D.

Hi friends :)
Hope you are doing well.
Preeti Datta (Dutt Preety) here from the VLVS! Design Team. 
For today's post, I've created an Art Journal Page.  
I've used some gorgeous VLVS! Rubber Stamps here.
I was inspired by Banksy Style graffiti art and tried to depict a grungy, old wall.

I've used a wall stencil here to create the background.

  I've used 2 colours of distress oxides to create the old, worn out, grungy look. 


VLVS! Supplies:


Other Supplies:

Maremismallart Stencil - Stoned Wall
Finnabair's Heavy White Gesso, Heavy Black Gesso
Ranger's Archival Inkpads- Jet Black and Potting Soil
Tim Holtz Distress Oxide Inkpads - Iced Spruce and Vintage Photo

Thanks a lot for your precious time :)
Stay Blessed!
Preeti

Wednesday, September 18, 2019

Whimsical Wednesday

Hello Again Crafty Friends!

Today I want to share a fun little art journal page using Viva Las VegaStamps.
(this would also be perfect on an envelope)


Stamps Used:
Whimsical Leaf
Whimsical Tree Lady

I started by stamping the leaf and masking them off between each stamping.  Once all of my wanted leaves were stamped, I stamped the whimsical tree lady.


I removed the masks and used various alcohol markers to color my images. 


With everything colored, I re-masked off the leaves, then I used Distress oxide ink in mustard see to ink the background. 
(I just lightly inked around the lady rather than masking her off)


Next, I used one of the Tim Holtz layering stencils, and Picked Raspberry distress oxide ink to add background depth. 


I used a black ink pen to start adding that art journal feel.


To finish everything off, I used white distress stray stain and a white gel pen. 


I hope you all love this mini art journal page... 
Now to add a little journaling or a quote stamps... 
Tough decisions!


Tuesday, August 27, 2019

Art Journal Spread by Preeti D.

Hi friends :)
Hope you are doing well.
Preeti Datta (Dutt Preety) here from the VLVS! Design Team. 
For today's post, I've created a Whimsical Art Journal Spread.  
I've used some gorgeous VLVS! Rubber Stamps here.


First, I applied heavy white gesso to the pages, to prepare them for mixed media work. Then applied distress paints in muted tones to the background, to add texture and for some subtle colour.

Stamped all the images and the sentiment using VLVS! rubber stamps onto Tim Holtz collage paper using archival ink. Then adhered these to the pages using gel medium.

Added colour around the adhered images using distress inks and distress paints. 

Created ink splatter to add interest to the background and tie everything together. Did background stamping using a VLVS! text stamp to add more texture to the background. 

For the finishing touches, doodled on a border and scribbled on some writing using a thin black permanent pen. 
VLVS! Supplies:


Other Supplies:

Finnabair's Heavy White Gesso, Heavy Black Gesso, Soft Matte Gel
Ranger's Archival Inkpad- Jet Black
Tim Holtz Distress Inks and Paints 
Tim Holtz Idea-ology Plain Collage Paper 
Sakura Pigma Micron Black Pen

Thanks a lot for your precious time :)
Stay Blessed!
Preeti

Tuesday, August 13, 2019

Art Journal Spread by Preeti D.

Hi friends :)
Hope you are doing well.
Preeti Datta (Dutt Preety) here from the VLVS! Design Team.  
For today's post, I've created an Art Journal Spread titled Wanderlust.  
I've used some gorgeous VLVS! Rubber Stamps here. 


First, I applied heavy white gesso to the pages, to prepare them for mixed media work.

Then, stamped the background using VLVS! Stamps and Versamark sticky ink. Next, heat embossed all the stamped images with metallic embossing powder. 
 Added color to the background using Sprays & Starburst squirts. Sprayed with water to create movement.
Did additional stamping using archival ink & VLVS! Rubber Stamps.
 Next, stamped the sentiment and focal image using VLVS! rubber stamps onto white cardstock using versamark watermark ink & heat embossed them in black. Then fussy cut the images & distressed their edges. 
 Adhered a couple of die cuts behind the sentiment and focal element. 
 In the end, distressed the edges of the pages using distress inks and created white & black splatter using watered down gesso. 

VLVS! Supplies:


Other Supplies:
Lindy's Gang Embossing Powders, Starburst Squirts & Spray
Scrapman Dies
Versamark Watermark Inkpad 
Finnabair's Heavy White Gesso, Heavy Black Gesso, Soft Matte Gel
Ranger's Archival Inkpad- Potting Soil
Tim Holtz Distress Inkpads- Vintage Photo & Black Soot

Thanks a lot for your precious time :)
Stay Blessed!
Preeti