Showing posts with label Amy Lassiter. Show all posts

Tuesday, December 09, 2014

Merry Merry : A Christmas Card

Hello stamping friends :) Yesterday we had a giant delicious blog hop full of Christmas Cards by our Design Team. Please stop by if you didn't get a chance to see everything. We had a fun giveaway and now we have a winner to announce!!!

the winner is......
Julie Steed said...
Er... no, I haven't started them yet. But I've been THINKING about it!
Congrats Julie!! Please email me @ deedee430@gmail.com with your shipping address and we'll get you a LB o' rubber and a Christmas grab bag!

Also -- Sometimes things don't go as planned and we had a little hiccup -- so today I'm sharing the deliciously whimsical card by Amy Lassiter here on our blog that was missed yesterday. Her original post was here. Check out the her card, leave her some love here on our blog, and we'll give away one more Christmas themed grab bag to a sweet comment left for Amy.

Plucked directly from Amy's Blog:
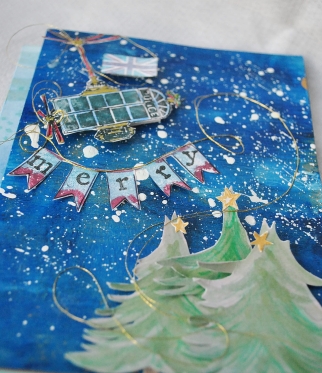
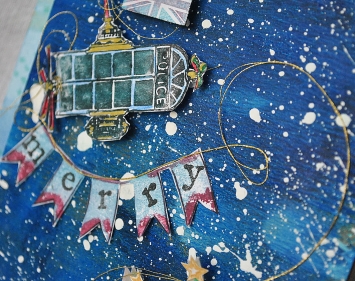
"I have created a fun little card to shine with Christmas spirit, without a single Christmas specific image! Today I am giving a shout out to Dr. Who…and thinking of how the TARDIS would look, sailing across a sky of Christmas stars, sending a Christmas greeting.


The background of my card was created by adding many colors of blue on my Gelli Plate, and then spreading with a brayer. When this was dry, giving splatters of white ink from 13 Arts, gave me a nice night sky to work with.
????????
 
I painted the watercolored pine trees, fussy cut them out, and added them in layers. Each tree is topped with a star from the Stars 2 x 2 1/4, using gold ink from Imagine Crafts.
????????
 
The Whimsical flying police box stamp is focus of this card, obviously. I decided to stamp it in several colors of blue, and then color with Sakura Gelly Roll pens, Faber Castell Design Memory Craft big brush pens, and fine line Sharpies; for pops of color. I wanted the TARDIS to be flying the Union Jack, so I stamped it using the Union jack silhouette, and added it and the Chevron banner stamp, using shimmering gold heavy embroidery thread….like they were being flown. The entire card was added in a layer to another white plain 4×6 card, which was watercolored to give a lighter background pop of color."


Thursday, October 30, 2014

TCW and VLVS! {A blog hop} Day 4

Hello friends! Welcome to Day 4 of the blog this week where we're having a big ol' delicious blog hop/product swap with those fantastically talented people at The Crafter's Workshop.


Visit through the end of the week to be inspired and see tons of projects featuring The Crafter's Workshop stencils and Viva Las VegaStamps! rubber stamps. Be sure to comment along the way and be entered to win prizes at the end :)

Today resident DT member Amy Lassiter is joining us to inspire you with this beauty of a 12x12:

TCW439 Retrobursts | TCW455 Love Post | TCW467 Live Love Laugh
Visit her blog to see details.

And visit The Crafter's Workshop blog to see what those talented artists are up to. We'll see you back here tomorrow for the final day and more projects by our Design Team.

Tuesday, August 26, 2014

StencilGirl & VLVS! Day 3

It's time for another amazing Team Up! This time we're pairing Viva Las VegaStamps! pink rubber stamps with StencilGirl stencils.


 Day 3 folks! Welcome to Wednesday of our week long blog hop♥


 Sneak peek from Karen Knight:


Sneak peek from Amy Lassiter:


Today's blog hop:

  
And what's a big ol' delicious hop without some PRIZES?!??!?! 2 prizes to be won TOTAL -- so join us ALL WEEK LONG and hop to see the fabulous projects. Let each designer know what you think -- then you're entered to win, every comment is another chance to win. Easy peasy right? 


Both prizes consist of $25 in StencilGirl Products and $25 in VLVS! unmounted rubber stamps.

Wednesday, May 28, 2014

IMAGINE Crafts & Viva Las VegaStamps! Day 5

Mixed Media Blog Hop 

Welcome to the IMAGINE Crafts and Viva Las VegaStamps! Blog Hop. For the next week, our two design teams will be featuring some amazing projects featuring products from both our companies. Amazing stamps require amazing ink, right?

Mixed Media Prize Package

We're proud to announce your chance to win one of three different Mixed Media Prize Packages from IMAGINE Crafts and Viva Las VegaStamps! You have until midnight PST on Sunday, May 31st 2014 to comment on as many of the Design Team Blog Posts from this week as possible. On Monday, June 1st we’ll draw three random blog posts and one comment from each of those posts will win a prize package!

Ready for some inspiration from our artists?

Here's today's post from IMAGINE Crafts:

And from Viva Las VegaStamps!:


IMAGINE Crafts:
Brilliance, Fireworks,Radiant Neon, Versa Color. Staz On, Walnut Ink.

Viva Las VegaStamps:
WayBill/Invoice, Star Pin, Dungeness Crab, Anchor 1 1/2x2, Coffee Ring Stain


If you're just joining us on the Mixed Media Blog Hop, here' the links to the previous days posts: Saturday, Sunday, Monday, Tuesday   

 ***Blog Hop Hint – if you click on a link that takes you to a page saying something like, “Sorry this page cannot be found” just click on the header at the top of the blog (usually a picture or the blog’s name) and it will take you to that blog’s most recent post. That post *should* be our hop. If not, you can probably scroll down a short way to find the hop post.

Wednesday, May 07, 2014

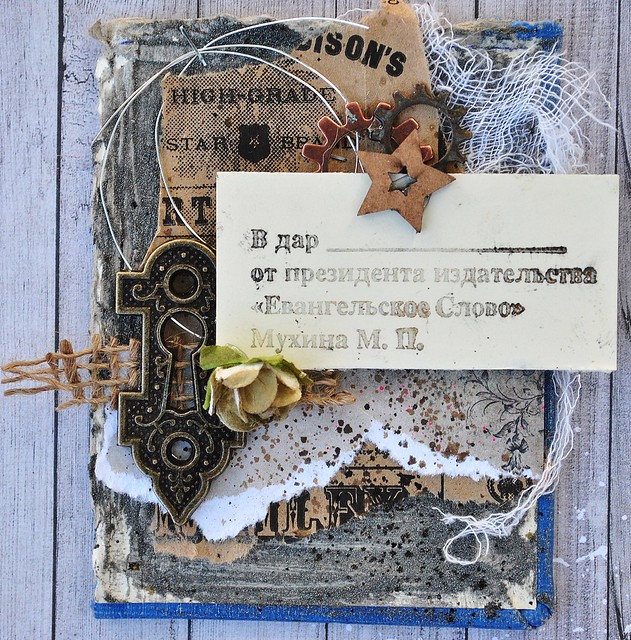
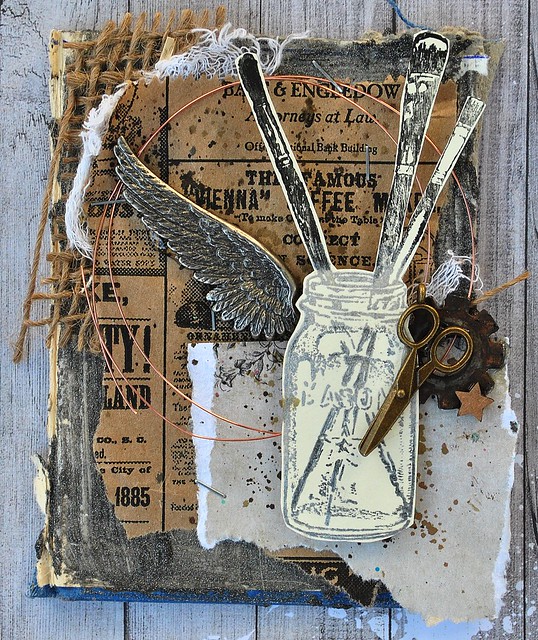
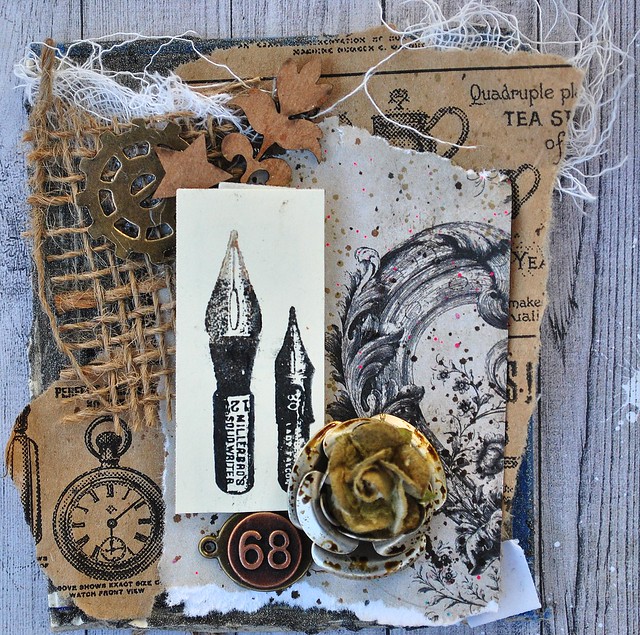
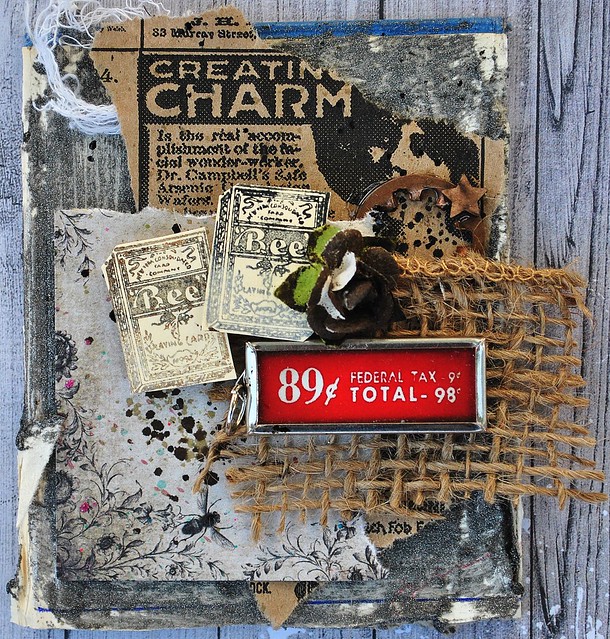
Four Vintage-Style Chunky ATC's

Hello all, it's Amy sharing a project today, that's just a little bit south of the average ATC....what I'm going to call "chunky ATC's!"
To start my 4 piece set of vintage images and their layers, I cut a 8x6 vintage book cover into fourths. I used the side that had a layer of paper, and painted over it with Viva Decor Ferro paint in Graphite. This gives lots of sparkle and texture.
cyrillic full, Next, I grabbed a vintage printed paper bag I received from a local store, and upcycled it...it has some really fun images on it. I tore four pieces, and adhered using my Tim Holtz Tiny Attacher mini stapler. On top of this, I added a strip of paper, from the 6x6 Nature Walk collection by 7 Dots Studio, adhering with Miracle Tape. 
jar brushes full Prior to adding my stamped images, I added bits of burlap and cheesecloth....for even more yummy texture. Adding little splash of walnut inks here and there, gave a little flash of color, as well.
pens full Finally, I stamped my images onto a library card. For each of the images, I used gorgeous Tsukineko inks in copper, silver and gold.....and stamped them as a gradient for interest. I cut these out, and added with foam tape. After adding bits of chipboard, metal, flowers and more.......I had four cards done. bee cardsf ull I believe I will frame these in a vintage style shadowbox frame. I think that will add a touch of quirky vintage to my living room!
Thanks so much for having a look today!
Loves,
Amy

Supply List:
Viva Las VegaStamps!: Bee Cards, Russian Cyrillic, Pen Tips, Paint Brushes in Jar
Paper: Upcycled, 7 Dots Studio-Nature Walk
Ink: Tsukineko- Delicata Silver, Copper, Gold; Momento- Tuxedo Black; walnut inks- eucalyptus, java, terra cotta
Chipboard- UmWowStudio
Flowers- Prima Marketing
Metal Bits- Bead landing, Tim Holtz, 7 Gypsies

Sunday, April 27, 2014

Wheeling in with Spring Color

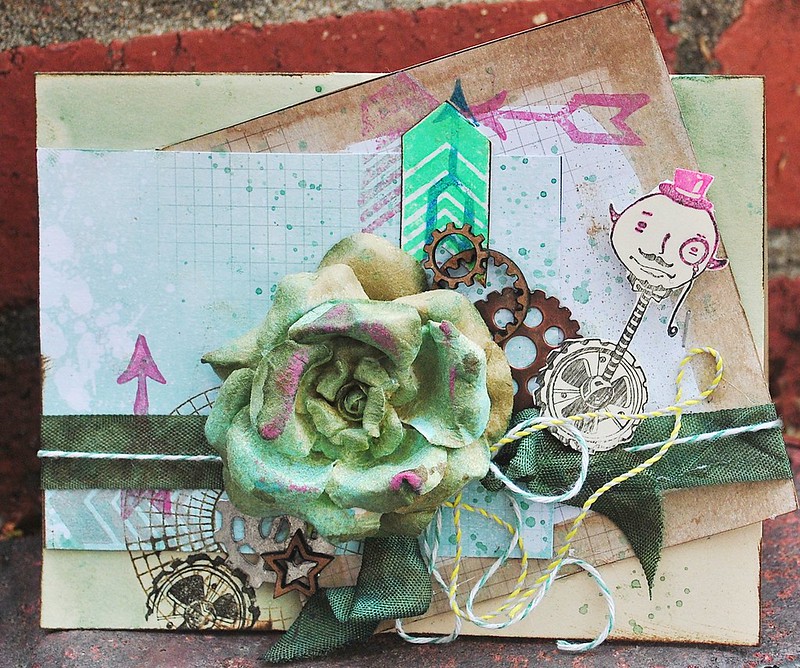
wheelie man full card2
Hello stampers! It's Amy here today share a card I've made, with lots of springy bright colors. I'm happy when I see it, and that's a good thing.
wheelie man arrows and cirlce

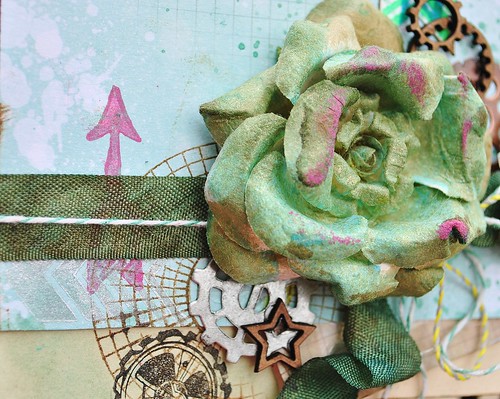
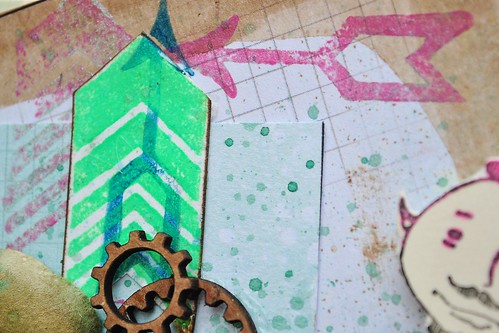
I started my project by layering on two haphazardly cut squares of pretty patterned paper. I inked the edges of one paper, using walnut ink, and both edges were inked with Archival Ink in coffee. These were adhered with Miracle Tape. I tapped on a little bit of green mist, and then stamped the Arrow 3/4x1 1/2,and Chevrons 1x1 1/2, directly onto the paper, using pink and silver inks. I stamped with green ink and the chevron stamp onto a separate paper,and fussy cut this out, inked the edges, and adhered with miracle tape. The final bit of the layers of stamping was to stamp the color wheel lines stamp in the bottom corner, and the wheel from the Wheeley Monocle Face slightly off the page.

wheelie man, arrows close

I dyed my own seam binding ribbon with the green and brown walnut inks, dried it, and adhered it using miracle tape on the back. To the tied ribbon I added some baker's twine for extra pizzaz.;) I sprayed the Prima flower with mists, adhered, and added the chipboard and metal pieces.
wheelie man, close
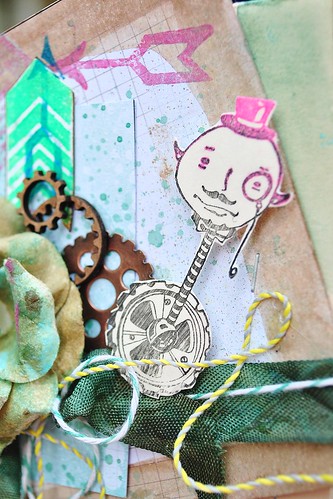
Finally,I colored on the wheeley monocle face stamp with a Faber-Castell Big Brush Pen in black, and then swiped on some radiant neon ink in electric pink....to give some va-va-voom to his hat, eyes, and monocle, and stamped that baby onto some heavy cardstock. I fussy cut him out, and popped him onto the paper, using foam dots. And voila! A fun, springy, and special card to pop into the mail for a friend!

Thanks so much for having a look today! I hope you were inspired to start stamping up a storm! :)
<3 Amy

Supply List:
Viva Las VegaStamps!: Wheeley Monocle Face, Arrow 3/4x1 1/2, Chevrons 1x1 1/2, color wheel lines
Ink: Tsukineko/Imagine Crafts-Delicata Silver, Radiant Neon in Electric Pink,Green
Paper: 7 Dots Studio-Messy Head
Pen: Faber-Castell Design Memory Craft, Big Brush Pen in Black.
Chipboard: UmWowStudio
Flower: Prima
Mist: Imagine Crafts-Walnut Ink in Eucalyptus, Java; Lindy's Stamp Gang-Midnight Teal Starburst; Heidi Swapp Color Shine-Teal Other: Seambinding, baker's twine, metal gears

Friday, April 04, 2014

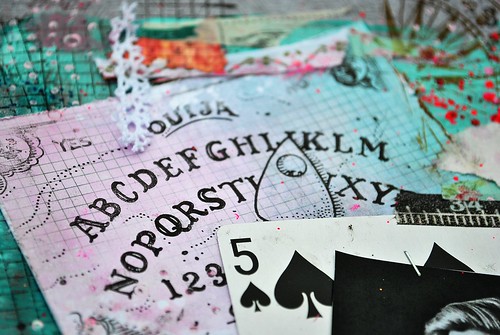
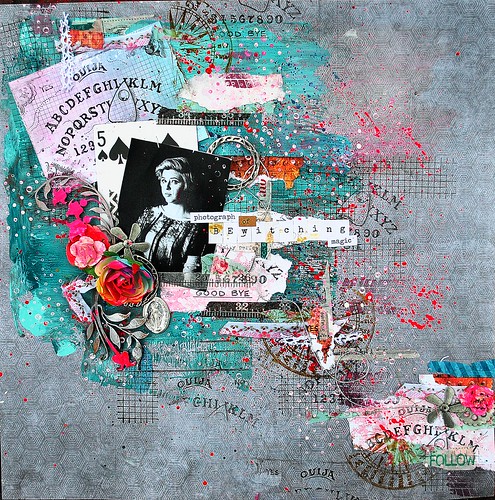
Bewitched {Mixed Media Scrapbook Layout}

ouija stamp, bew, allassiter
Hello stampers, It's Amy here today, sharing a layout I created with some pretty rad stamps. I used a photo of my daughter, and used some of her favorite things........mystical, magical things.
Bewitched, ALLassiter, VLVS
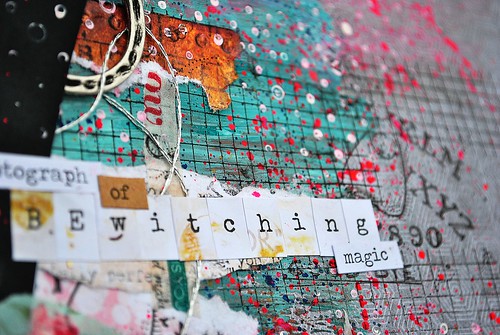
I started by painting my background, and then finding a few coordinating papers, that I then stamped with the ouija board onto them, using Momento ink in Tuxedo Black. Next I stamped random lines with the washi grid background, using Ranger Archival Ink in Coffee; and then layered on the photo and playing card, as well as some more paper bits and washi tape.
title bewitched
When those were complete and adhered, I stamped with the directional circle
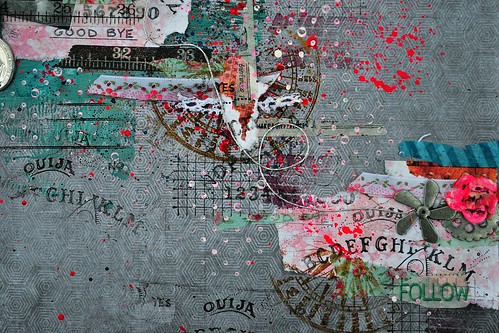
, as well as inking up only bits of the ouija board stamp, and randomly adding some stamping to the background. After adding my embellishments, I stamped throughout using paint, with the cross square background stamp...which really completed it for me. 

close flower, bewitchedbottom section, bewitched,allassiter

 Thanks for having a look today, and I hope you have a creative day! :)

Supplies used: Viva Las VegaStamps-ouija board, directional circle, washi tape grid background, cross square background
Paper-7 Dots Studio-Illumination, Messy Head, Domestic Goddess
Flowers-Prima
Chipboard-UmWowStudio
Stickers-7 Dots Studio
Paint-Plaid folk art Ink-Hero Arts, Tsukeniko/Imagine Crafts, Ranger, Liquitex

Tuesday, March 04, 2014

The Road Less Traveled

Road, Title, VLVS
Hello stamp fanatics, it's Amy here today, to share a small wooden canvas I made, with some of my favorite Viva Las VegaStamps!
Road Less Taken, FULL, ALLassiter, VLVS
For this project, I began by covering the wood background (a scroll album page from Genuinely Jane Studios) with a layer of diluted copper acrylic paint, spread very thin using a putty knife. Over the top of the painted page, I stamped the coffee ring stain and Cursive Writing Background stamps randomly, using Clearsnap Mix'd Media Inx in Black/Noir. When this was dry, I sprayed fixative over the top; and repeated the thin layer of paint (other colors included gold,silver and aqua), stamping (with the same stamps), drying, fixative....five times. This created a nicely textured background with lots of depth, without much texture.
Road, ALLassiter, VLVS, paint
Over the top of my background, I added plenty of paint and ink splatter, and then began to layer my paper, including a vintage photo.
 Road, Title, VLVS
I layered up some of my favorite new papers from 7 Dots Studio's "Nature Walk" collection, and adhered them, and my photo, using miracle tape. I also stamped several images, including: The Road Not Taken, Hands Pointing, No.5 Tag (the top only), coloring them using Stamper's Big Brush Pens from Faber Castell on library cards, and cutting the images out. The lighter I colored, the more of a watercolored look I achieved, which was fun and added interest.
Road, VLVS moon, bee,
For the top right corner cluster, I used a chipboard gear from UmWowStudio (all dolled up with copper embossing powder), and placed the Moon Circle stamp behind it. The bee on top of the "moon gear" is from the Italian Sonnet Background stamp; this was also colored using Stamper's Big Brush Pens from Faber Castell Design Memory Craft.

Road, corner, stamped chip, VLVS
 Finally, I added a bit of subtle stamping to the edges of the papers, using the checkerboard background, and after embellishing further with metal bits and bobs, as well as some flair, I stamped the UmWowStudio layered circle chipboard with the word "lost" from the Let's Get Lost stamp.

I'm very pleased with the way this canvas came out, celebrating a photo I found in a bin at an antique mall.....wondering who the baby was, and where they went in life.....years later. The photo was lost, but found its way to a new home, where it became a piece of art. I bet that was something the photographer, or the parents of the baby never thought would occur, when this was taken over 100 years ago. :)

 Supply List:
Viva Las VegaStamps!: Let's Get Lost, Checkerboard Background, Italian Sonnet Background, Moon Circle, No. 5 Tag, Hands Pointing, The Road Not Taken, Coffee Ring Stain, Cursive Writing Background
Adhesive: Miracle Tape
Chipboard: UmWowStudio
Paper: 7 Dots Studio
Ink: Clearsnap, Tsukeniko, Faber Castell Design Memory Craft
Embellishments: 7 Gypsies, Bead Landing
Stickers: Tim Holtz

Monday, January 13, 2014

The Background Takes Center Stage

Good Monday morning to you all! It's Amy here today, to share an art journal page, with lots of background stamping that adds a bit of flair to the pages. 
I began by stamping both pages with the cracked background stamp,
with Ranger Archival Ink in coffee. I then dotted on acrylic paints in gold, silver, and metallic green, and spread them thin with a brayer. After waiting for the first layer to dry, I added flicks and flecks of paints in many colors, and black ink, as well. When those were dry, I began stamping, first using the checkerboard background 4x3   and the star pin, in random places that seemed pleasing to my eye. 
 To add layers on top of my vintage photo of children during the great depression, I stamped on Prima cotton tape with the lace background stamp, and added it along the sides, along with washi tape, and bits of 7 Dots Studio papers.
Finally, I added embelllishments, like UmWowStudio chipboard hearts and stars, Prima Gears, and  a chipboard banner piece from Maya Road, stamped with the moon circle (I love that sweet face).
I finished off the page using the fabulous new Color Wheel Lines  and the No. 5 Tag  stamps.
I'm so pleased with how this page came out, and the way it showcases this very unique photo, in such an artistic and "different" way. Thanks for having a look, and for more inspiration, visit my blog at www.sparklinggnome.com . Have a happy, inspired, and stampy week! ;)

Saturday, January 04, 2014

Intro : AMY LASSITER

Today I bring you the first designer Alphabetically ...  


Amy Lassiter. 


This is her 2nd term on our team and we just adore the layers of love that go into all her projects. She's fond of paints, mists, stamps, fibers, flowers, paper, found bits and layering all of the above.


 Amy's says "I am a wife to my best friend from college, and the mother to three daughters. I live in a tiny town that sits on a lake, on the prairies of Kansas, USA. I am employed both as a church soloist (I am a classically trained soprano), and also a librarian.  Other than my amazing family, the thing I eat, sleep, and breathe is mixed media art and craft. I adore creating scrapbook layouts and canvases, tags, cards, and altered projects with an eclectic, free, and soulful vibe.  In the time when I’m not creating, I also enjoy photography, sewing, reading, thrifting, swimming and snorkling. Most days, I also spend at least a little time planning, journaling and dreaming, about relocating to Oahu, Hawaii; my favorite place on earth.


I stamp because stamping allows me to take a single image, and repeat it in 1,000 different, unique ways, to fit any number of projects"

You can find her blog HERE.

And to help us welcome her --- comment here on the blog welcoming her to the team and we'll pick one random comment to win a grab bag of VLVS! Rubber Stamps!

Wednesday, December 18, 2013

Sentimental Adventure Tag

It's Amy today, to share a tag I made with a Victorian Steampunk theme. I came across this fun technique for creating a "faded" look, and gave it a whirl, and with some of my favorite Viva Las VegaStamps! I ended up with something pretty, unique, and (for me) thought provoking.

adventuretag, ALLassiter, FULL To make this tag, I started with a library card (card catalog style), and using my worn clockface stamp, I stamped vertically and horizontally, using black archival ink by Ranger.
When the stamping was complete, I added a vintage Victorian image of a woman, using Faber-Castell Design Memory Craft gel medium on both sides. 
 Next, before the gel dried, I gently rubbed my finger (dipped in water) over the edges of the paper, leaving the stamped image behind, and a worn look to the photo. 


The result allows the shadow of the man behind the worn clockface, to appear over the woman's shoulder. 


To add even more drama to the tag, I colored on the vintage tricycle   stamp using Faber-Castell big brush pens in black and cold gray, in a gradient,for a very transparent look and fussy cut the image after watercoloring; and finally applying it to the right top corner of the tag, using foam adhesive. I build around this using chipboard gears from UmWowStudio, a prima flower, various metal embellishments, and lace trim from Gauche Alchemy. 
chip, corner, adventuretag, ALLassiter Finally,to complete the tag, for the bottom left corner, I punched using a Fiskars notebook paper punch, for a bit of different texture and interest. I stamped the man from Plate 945  onto a separate card, using Archival Ink by Ranger, in Coffee. I fussy cut him out, and added him flush with the bottom of the tag, embellishing with trims, more chipboard gears, and a Prima flower. tophatman, adventure tag, ALLassiter I think it is fun to guess what is going on between all of the people on this tag. Who is the Victorian woman musing about, each of the men in her past lives (or current?) that enjoy top hats and steampunk wear? Are the men thinking of her? Ah, it's a sentimental adventure. Hehe.
~Amy