Showing posts with label cracked background. Show all posts

Thursday, September 10, 2015

Let's get lost in unknown destination


Hello my dear crafty friends and welcome to first VLVS post in September.
Irit is here and this time I decided to make a journal page again (so what if it's not in my journal? I can always glue it into with a drop of a good glue, like a few strips of VLVS Miracle tape); it's just easier to make those art pages separately.
As you know any art journal page needs  it's title. So first thing I picked my titles from my VLVS stamps collection (not as big with sentiments as I want, but yet I can manage ). So my title as picked is Destination Unknown and as the extra words I added Let's get lost, Discover and Explore.
The next step was  to pick the color scheme and I decided on reds and blues with a bit of coppers.
The whole page was built around the couple- they can be a family, friends or just random people around who are moving somewhere, but yet not sure about the  destination.
Each image was stamped with clear embossing ink (I used VersaMark as that's what I have, but any clear ink is perfect); then I heat embossed each stamped image with coordinating embossing powder: red, blue, copper and black. The heat embossed background is misted and inked with distress inks. I usually begin with mists and if the coverage is not sufficient I add inks and more mists.


My favortie background stamps were used to make the background:
Cracked background,Solid color wheel, Color wheel lines, Torn paper and Postal background.


I hope you liked my art piece.
VLVS USED TO MAKE THIS PIECE:
Cracked background  Item 16208 Plate 1287
Solid color wheel-Item 19339 Plate 1435
Color wheel lines-Item 19338 Plate 1435
Let's get lost Item 19348 Plate 1435
Destination unknown Item 19019 Plate 890
Discover Item 19024 Plate 890
Explore Item 19022 Plate 890
 Writing Arrow Item 19078 Plate 917
Postal background Item 14596 Plate 1200 
Man and Woman symblom  Item 19080 Plate 917
Torn paper Item 19341 Plate 1435


My new design adventure


Friday, July 31, 2015

Her wings- my art: art page tutorial


Hello my dear crafty friends!
Irit is here and this time I made an art  journal page tutorial.
I know that making art page tutorial is almost mission impossible. There is no right or wrong way to make the art page and there is no workshop that can teach you " copy writing" of those book pages.
So it's just to show you my way to use products and to cluster techniques on one single page  with just  bit of real dimension.
Step by step instructions:
1. Gather your favorite VLVS backgrounds and make  a full letter size stamped piece with them.  I wanted those stamps to stay a background ones, so I used VersaMark ink and white embossing powder only.
Most of the stamps are not even masked, but just stamped one near another.

2. Grab you three primary Staz-On inks (Blazing Red, Azure and Mustard) and ink the stamped page with a mix of them. As you can see those 3 primary colors give us the full rainbow effect. I need to say that this works much better over the glossy paper, but I was short of the glossy one and used the regular Mixed Media thick white paper.

3. Now we need to add some dimension and the best way to do it on Mixed Media piece is with stencils and some paste. The paste I used is our Israeli Sand Texture one, but it's just similar to any non smooth texture paste on the market. I used a couple of Tando Creative stencils around the page and left the central part clean as we are going to add the focal point there anyway. Let the paste dry. 

4. While waiting for the texture paste to dry, I stamped my big focal image using  Whimsical Lettered Man stamp. I know it's a man; so what? It looks like a strong courageous woman to me, kind of an Amazon.
I decided to use pigmented ink and clear embossing powder for this main image: glossy one and durable too as it goes to the front.
5. As I was still waiting for the texture paste to dry I heat embossed a pair of bare chipboard wings with a mix of colorful embossing powders and added a bit of clear glitter too.


6. From this point and on it was just to arrange all pieces over the background and to add whatever you want to add.
So I added a bit of stamped blue images using Solid  circles  stamp and  Butterflies row stamp.
I arranged the hand cut head and the wings over the page. Then I stamped two sentiments with the same Crafter's ink over the sticky canvas (this is a perfect ink  for  fabric stamping and all you need to do is to heat it/iron it to make it permanent). Some splashes of mists were added and my art page was done.

Here are a couple of close- ups to this page:


As you can see this time I decided to make a page according to sentiments. If it says" bold and bright"-  it will be bold and bright, even if those are not my usual art colors.
Thanks for reading my tutorial and see you soon again!

Product list:
VLVS

Whimsical Lettered Man Item 19679 Plate 1457


Other products:
Chipboard  wings- Creative Embellishments
Stencils- Tando Creative
Cardstock, fabric- Ranger
Inks- Tsukineko, Clearsnap
Mists- Tattered Angels
 Embossing powders- WOW! Embossing Powders
Other- texture paste

My new design adventure


Saturday, August 02, 2014

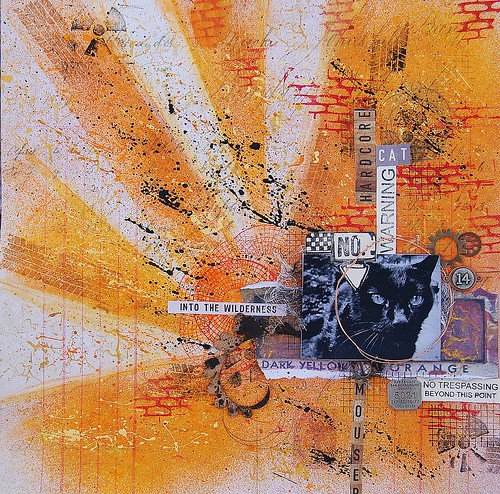
Warning: Hardcore Cat (August Challenge Inspiration)

hardcore cat, full, allassiter, VLVS
Welcome to Friday and a bit of inspiration, from me, Amy using the fabulous illustration for August here at Viva Las VegaStamps! This inspiration is so awesome, unique, and punk rock, I couldn't wait to dig in. I grabbed a piece of 12x12 paper from the Crowded Attic collection by Tim Holtz, and though the vintage theme is a strange mix with the graphic boldness of the inspiration board, I liked how it worked.

title, hardcore, ALLassiter
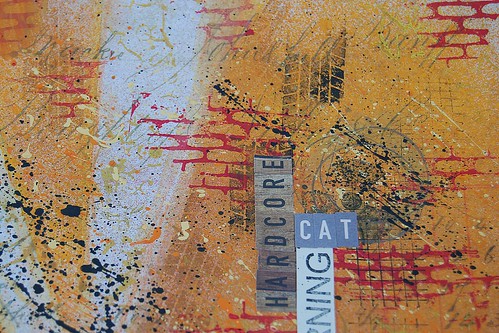
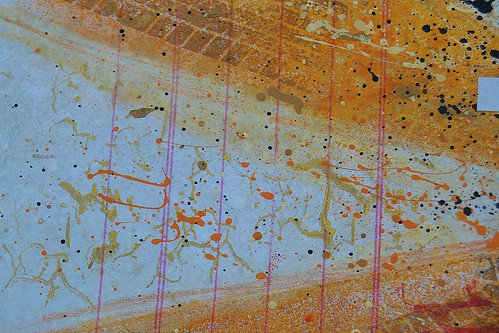
I began the mixed media journey here, by creating lines for the sun rays,using a ruler and a pencil. To get the brighter orange lines, I needed to cover the "white" area with a piece of paper, and on the other side of the ruler. I used Dylusions mist in Pure Sunshine, to create the orange sunbeams. When those were complete, I added Pan Pastel in orange along the edges, to soften them a bit. I stamped over the "beams" using the tire tread stamp and silver ink. For the "sun" I used the color wheel lines stamp, and overlapped it a bit in a circular area. bg, hardcore, ALLassiter
I added some "punch" to the plain lines, with the cracked background stamp, and gold ink. On top of all of this, I added lots of paint drippings and flickings. Hehe. The brick background was perfect for getting that "graffiti-ed wall"/Banksy's palette I was looking for. photo cluster, hardcore, ALLassiter
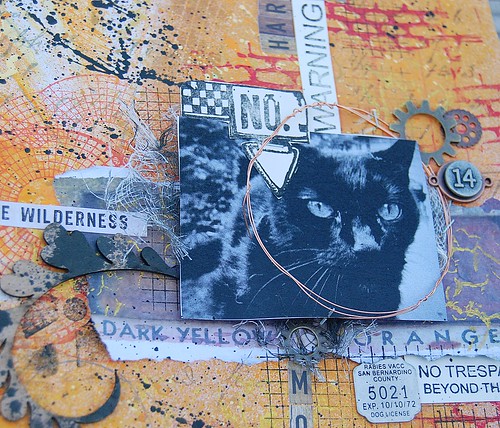
Finally, I created a layered cluster around the photo. First, I stamped around the area with the washi grid background, and then I added some black misted cheesecloth, and popped the photo up on 3D foam dots. I stamped the area 51 warning,and the top portion of the No.5 tag using memento ink in tuxedo black, onto library cards, and cut and layered them up. All that was left, was adding embellishments, like the UmWowStudio flourish, metal bits, and alphas to create the title. Voila! I created a way to honor my sweet but hardcore cat, who lived 8 years indoors, before sneaking outside one day....and disappearing for 4 months....then returning one day looking like he had been in a gang fight. He now hangs out on our deck, and catches mice and rats that he presents to me as a lovely gift. ;)
 Thanks for having a look today, and get busy making your own creation using this month's inspiration! (here's a reminder):

Supplies Used:
Viva Las VegaStamps!:Tire tread, color wheel lines, cracked background, brick background, washi grid background, area 51 warning, No. 5 tag
Miracle Tape, Memento Ink-tuxedo black
Paper: Tim Holtz
Inks: IMAGINE Crafts
Paint: Plaid, 13 Arts
Pan Pastel-orange
Metal-Bead Landing
Chipboard-UmWowStudio

Tuesday, April 29, 2014

Vintage Art Journal Spread

Hi Stampers! DeeDee here again, today. This time sharing a project of my own, using a splattering of old and new stamps!

Did you see this post on Saturday talking about the new Art Journaling classes we're doing? Well I've been wanting to really fill up my new journal with all types of pages.. and so today I have a double spread to share, that really is just sort of all my favorite techniques and styles. 


The page base is a sheet of Nature Walk from 7 Dots Studio, with layers of stamping and gesso, coffee, distress ink and more. 


Up in the top right corner I stamped the Cracked Background in Memento gray flannel. I have tons of ink pads in different colors, but it's tough for me to break out of stamping black. I found this gray was a nice subtle alternative, without losing interest in the rubber stamped image. You can also see, in the very corner, where I stamped the Writing Background in archival ink. At this point I did find it to be a bit heavy for the vintage feel of the page, and so I covered it up a bit with gesso, just letting the stamp peek through. 


Below this tag you can see some more stamping in gray, this time the Color Wheel Lines. Notice in the top left corner... that's the brand new Waybill / Invoice background. It's been stamped in Versafine Toffee and whitewashed with a thin layer of gesso. It helps lighten the stamped image allowing it to blend in a bit to the background. Handy when you don't have a lighter colored ink pad.


On the left hand corner is the new Butterfly Specimens stamp in a nice heavy black Archival ink. It helps balance out the spread. 


And one last final photo here.. I snuck in the 23.24.25 tape measure stamp from Plate1430. It's been stamped in that same gray used earlier in the page. 

There's tons of media mixing going on here, including ink types (Archival by Ranger, Memento, Versafine,) mists (Tattered Angels mixed with coffee,) coffee stain (Which I totally picked up from this post by Natasha, SO COOL,) gesso, patterned paper (7 Dots Studio,) Golden Gel Medium, Tim Holtz tissue tape, Prima flowers, My Minds Eye brads, UmWowStudio chipboard, 7 Dots Studio and Sizzix die cuts, and more. 

Monday, January 13, 2014

The Background Takes Center Stage

Good Monday morning to you all! It's Amy here today, to share an art journal page, with lots of background stamping that adds a bit of flair to the pages. 
I began by stamping both pages with the cracked background stamp,
with Ranger Archival Ink in coffee. I then dotted on acrylic paints in gold, silver, and metallic green, and spread them thin with a brayer. After waiting for the first layer to dry, I added flicks and flecks of paints in many colors, and black ink, as well. When those were dry, I began stamping, first using the checkerboard background 4x3   and the star pin, in random places that seemed pleasing to my eye. 
 To add layers on top of my vintage photo of children during the great depression, I stamped on Prima cotton tape with the lace background stamp, and added it along the sides, along with washi tape, and bits of 7 Dots Studio papers.
Finally, I added embelllishments, like UmWowStudio chipboard hearts and stars, Prima Gears, and  a chipboard banner piece from Maya Road, stamped with the moon circle (I love that sweet face).
I finished off the page using the fabulous new Color Wheel Lines  and the No. 5 Tag  stamps.
I'm so pleased with how this page came out, and the way it showcases this very unique photo, in such an artistic and "different" way. Thanks for having a look, and for more inspiration, visit my blog at www.sparklinggnome.com . Have a happy, inspired, and stampy week! ;)