Showing posts with label her wings were made of. Show all posts

Friday, April 08, 2016

Artist Trading Cards by Jenn Engle

Hello Again! Today I have a very simple ATC to share with you. This card came together very quickly, as the background is a mop-up card from a previous project and the leaves were already colorized when I went on an acetate stamping binge! Haha. I'm telling you, the Viva Las VegaStamps! are made for acetate stamping. 
 
I stamped "Whimsical Leaf" several times with black Staz-On ink on acetate. Then, I colorized them with a variety of green alcohol inks, alcohol markers (like copics), and distress paint.
I just had to use the "Her Wings Were Made" sentiment because the leaves are definitely a bold pattern!
The background card is made from Distress Stain Sprays and I stamped over that with a few of my favorite VLVS Background Stamps, "Writing Circles Background" and "Mesh Texture".

SUPPLIES USED:
Distress Spray Stain in Cracked Pistachio, Mermaid Lagoon, and Blueprint Sketch
Archival Ink in "Watering Can"
"Writing Circles Background"
 "Mesh Texture"
"Her Wings Were Made"
"Whimsical Leaf"
Heidi Swapp Ink in Teal & Navy
Tim Holtz Distress Tool
Distress Ink in "Peacock Feathers"
Fabri-Tac Adhesive

Thanks so much for looking!
~Jenn


Monday, March 07, 2016

Monday Mail Art from Fiona

Happy Monday everyone! Fiona here with you today to share some "Mail Art Monday" I created using the gorgeous VLVS stamps.


Stamps I used include:


I created the background suing some sprays and once it dried I stamped the Butterfly Lady directly on to it. The Whimsical Lady Walking is stamped on to a separate piece of white card and heat embossed white. Then I used a resist technique with more sprays to color the background.

To finish it all off, I added the stamp with the "Her wings were made of bold patterns and bright colours". I just love this little phrase.

Until next time xx


Friday, July 31, 2015

Her wings- my art: art page tutorial


Hello my dear crafty friends!
Irit is here and this time I made an art  journal page tutorial.
I know that making art page tutorial is almost mission impossible. There is no right or wrong way to make the art page and there is no workshop that can teach you " copy writing" of those book pages.
So it's just to show you my way to use products and to cluster techniques on one single page  with just  bit of real dimension.
Step by step instructions:
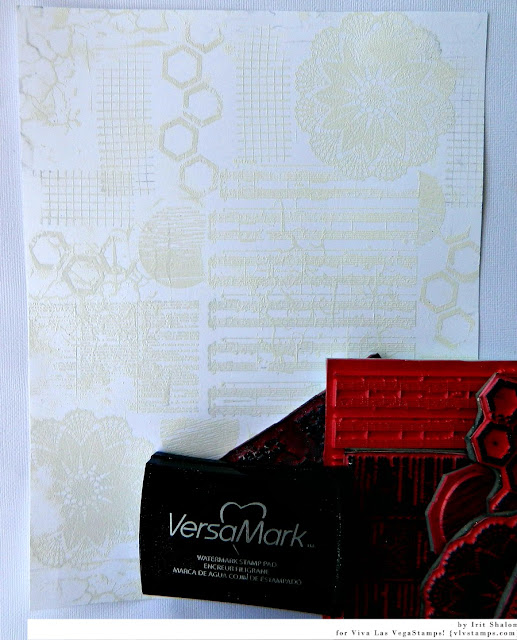
1. Gather your favorite VLVS backgrounds and make  a full letter size stamped piece with them.  I wanted those stamps to stay a background ones, so I used VersaMark ink and white embossing powder only.
Most of the stamps are not even masked, but just stamped one near another.

2. Grab you three primary Staz-On inks (Blazing Red, Azure and Mustard) and ink the stamped page with a mix of them. As you can see those 3 primary colors give us the full rainbow effect. I need to say that this works much better over the glossy paper, but I was short of the glossy one and used the regular Mixed Media thick white paper.

3. Now we need to add some dimension and the best way to do it on Mixed Media piece is with stencils and some paste. The paste I used is our Israeli Sand Texture one, but it's just similar to any non smooth texture paste on the market. I used a couple of Tando Creative stencils around the page and left the central part clean as we are going to add the focal point there anyway. Let the paste dry. 

4. While waiting for the texture paste to dry, I stamped my big focal image using  Whimsical Lettered Man stamp. I know it's a man; so what? It looks like a strong courageous woman to me, kind of an Amazon.
I decided to use pigmented ink and clear embossing powder for this main image: glossy one and durable too as it goes to the front.
5. As I was still waiting for the texture paste to dry I heat embossed a pair of bare chipboard wings with a mix of colorful embossing powders and added a bit of clear glitter too.


6. From this point and on it was just to arrange all pieces over the background and to add whatever you want to add.
So I added a bit of stamped blue images using Solid  circles  stamp and  Butterflies row stamp.
I arranged the hand cut head and the wings over the page. Then I stamped two sentiments with the same Crafter's ink over the sticky canvas (this is a perfect ink  for  fabric stamping and all you need to do is to heat it/iron it to make it permanent). Some splashes of mists were added and my art page was done.

Here are a couple of close- ups to this page:


As you can see this time I decided to make a page according to sentiments. If it says" bold and bright"-  it will be bold and bright, even if those are not my usual art colors.
Thanks for reading my tutorial and see you soon again!

Product list:
VLVS

Whimsical Lettered Man Item 19679 Plate 1457


Other products:
Chipboard  wings- Creative Embellishments
Stencils- Tando Creative
Cardstock, fabric- Ranger
Inks- Tsukineko, Clearsnap
Mists- Tattered Angels
 Embossing powders- WOW! Embossing Powders
Other- texture paste

My new design adventure


Tuesday, June 02, 2015

Her Wings

Our June Inspiration board went live yesterday and OMG is it a doosey!!


Stunning right??!!
Michele here today with a bit of, well, inspiration.  Maybe you need a nudge to get you going...


My card was inspired by the main image, dots and even a bit of the blue and green.


Viva Las VegaStamps!:  Her wings were made, pair of butterfly wings, squiggle heart, bubble wrap texture and scribble heart.  I also used ultra high gloss embossing powder.

Other items used:  Prima soft matte gel, Art Anthology Coloration Sprays, mixed media paper and Bazzill cardstock.

I snuck the little scribble heart in side the card.

I'll be looking forward to your entry and wishing you luck because who doesn't want to win some awesome pink rubber?!??

Monday, May 04, 2015

Challenge Inspiration - Her Wings by DeeDee Catron

Hi folks! :) DeeDee (Marketing and Artistic Director for VLVS!) here today to inspire you for our brand new challenge

The challenge mood board is :


I loved the color scheme, the boldness and the patterns. I also adore butterflies but moved away from the actual image and more towards a sentiment that was imagery heavy. 

I was having a hard time in the beginning trying to use so much red, BUT, it only gave me the opportunity to show you just how "loose" your inspiration can be. So without many more words, here is the piece I worked up: 


The base is an old piece of music note ephemera. I prepped it with two coats of clear gesso. This not only sealed the paper, but also made a sturdier primed base for me to work on top of.


Then I dove right in with some mark making using found objects (in this case, a recycled bangle) and some Golden fluid acrylic. A bit of water and working around in the background gave me this washed look.


Then there's a bit of dripping and dropping and some journaling with a fine liner.


After I had the background complete I got to work on the middle of the circle with some beautiful Golden Fluid Acrylics in Magenta and Orange. Using my fingers, the two colors and a tiny bit of water I worked up the bright bold red I was looking for. I finished everything off with the most important piece... the winged sentiment. I stamped Her Wings Were Made Of in archival ink by Ranger on watercolor paper. I trimmed it apart and glued it down with Matte Medium. Then I was done! :) 

Now stop on over to the Mood Board post and link up to win!