Showing posts with label cursive writing background. Show all posts

Friday, October 03, 2014

Zombie Gnomes Mini Canvas


Goood morning, and a very happy October to you! This month is always my favorite....with the spooky stories and things to see, the falling bright leaves, crisp apples, and chubby pumpkins, October is a delight!
Today I have a mini canvas to share (it is 4x5) that I created to bring a little Halloween into Sparkling Gnome Studios.


To begin my canvas, I added some rust, silver, and orange paints to the canvas in small amounts, and then smoothed them out, also including the 4 outsides of the canvas. I had a faux "newspaper" from a local restaurant here in Des Moines, called "Zombie Burger," that had all kinds of funny headlines pertaining to the zombie apocalypse. I cut those on and collaged them onto the page, along with some dark papers from 7 Dots Studio's Cold Country collection. When the glue had dried, I added just a few dots of gesso, and smoothed it over the collaged areas, to mute it somewhat. I wanted my zombie/skeleton gnomes to be the focus.
My next layer was stamping using the Writing Background 4x4, to add a bit of a vintage vibe. The rest was layering on trims and washi tapes until I felt the layering was complete.


I used the awesome Gnome Lady Skeleton as well as the Gnome Skeleton and stamped them onto cardstock, using Memento Ink in Tuxedo Black. I colored them lightly with watercolor, and placed them on the canvas using 3D foam dots.
The gnomes look so calm and casual, I thought they needed something to be casual about, so I added an UmWowStudio chipboard piece, with zombie hands, at the bottom of the piece.
I'm so excited about how this little canvas came out, and I already have it on the wall in my studio. These gnomes may not sparkle, but they have edge, which definitely has a place in my creative space.
Thanks so much for having a look today, and a very happy fall day to you!
~Amy

Supply List:
Viva Las VegaStamps! Gnome Lady Skeleton, Gnome Skeleton, Writing Background
Ink: Tsukineko/Imagine Crafts, Ranger
Paint: 13 Arts, Folk Art (Plaid), Sakura
Trims: Webster's Pages
Washi Tape: Tim Holtz
Paper: 7 Dots Studio
Chipboard: UmWowStudio

Thursday, September 18, 2014

Family Love Vintage Style Collage


Greetings stampers! It's Amy blogging today, to share a vintage style collaged canvas. I have 7 different Viva Las VegaStamps! on this canvas, and I think they all work so well together.

  I started by prepping a 12x12 canvas board with...of all things, a sample of Benjamin Moore blue paint I picked up at the hardware store for $1. I then layered on vintage style papers, layering them on with Mod Podge. When this had dried, I added layers of mists in light browns, and spread them on with a brayer. A layer of white acrylic paint was the final of the canvas layers. 
The fourth layer on this canvas is the background stamping, where I used the checkerboard and cursive writing stamps randomly all over. I kept the harlequin diamond stamping just over the area where my photo cluster would be. 
 After layering on vintage papers and elements, I stamped the Bee Cards, Paintbrushes in Jar, and Pen Tips onto untextured cardstock, and fussy cut them out. Adding them throughout the clustered area of the collage, gave the perfect unique vintage touch.


 The Directional Wheel stamp added a perfect bit of movement on the bottom and top corners of my layered cluster. I love the look and how it blends seamlessly with the style of the piece.

I'm really excited with how this canvas turned out, and I hope you enjoyed seeing it too! I hope you have a creative rest of the week! <3

Supply List:
Viva Las VegaStamps!:
Backgrounds: checkerboard, cursive writing, Harlequin Diamond.
Other: Bee Cards, Paint Brushes in Jar, Pen Tips, Directional Wheel.

Canvas board
Ink: IMAGINE Crafts, Ranger
Paint: Benjamin Moore,Plaid Crafts
Mist: 13 Arts, Tattered Angels
Paper: Tim Holtz, 7 Dots Studio, Vintage
Metals: Prima, Bead Landing, Vintage
Photograph: The Sparkling Gnome

Tuesday, March 18, 2014

Little House of Madness


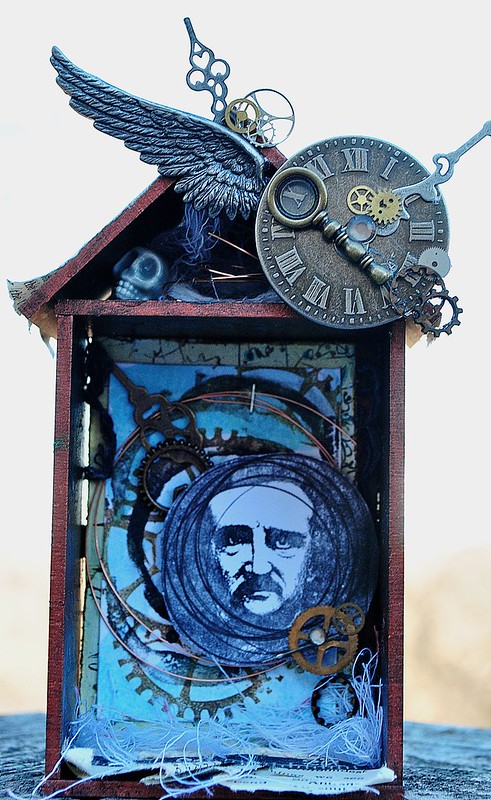
Poe Shrine Full
Hello, it's Amy here today to share my first ever attempt at an ATC. I decided to also create a shrine for my ATC, so Mr. Edgar Allan Poe has a little house for his
brilliantly mad mind.
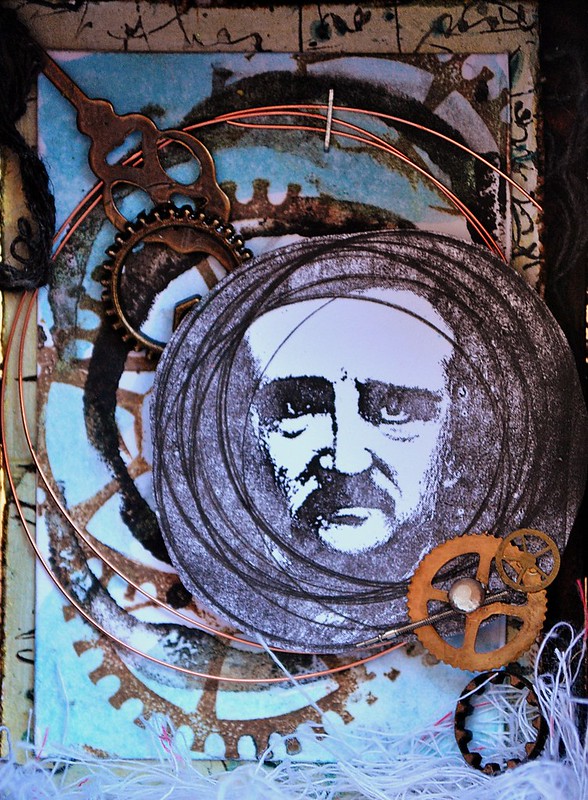
 Poe ATC
To create the look I was after with my ATC, I started with one standard size ATC card, and after painting it with iridescent green paint, I stamped it, using the cursive writing background stamp in black ink. Next, I used a 1.5" smaller piece of cardstock, and painted it with an aqua mist. When that was dry, I stamped randomly with the nesting gears and coffee ring stain stamps,using brown and black inks. I stamped the Poe stamp onto another piece of paper, and then sponged black ink around his face. When that had dried, I hand doodled circles around the face as well, using a template, cut them out, and mounted it using foam tape. Adding some metal embellishments gave it steampunk/time passing flair.

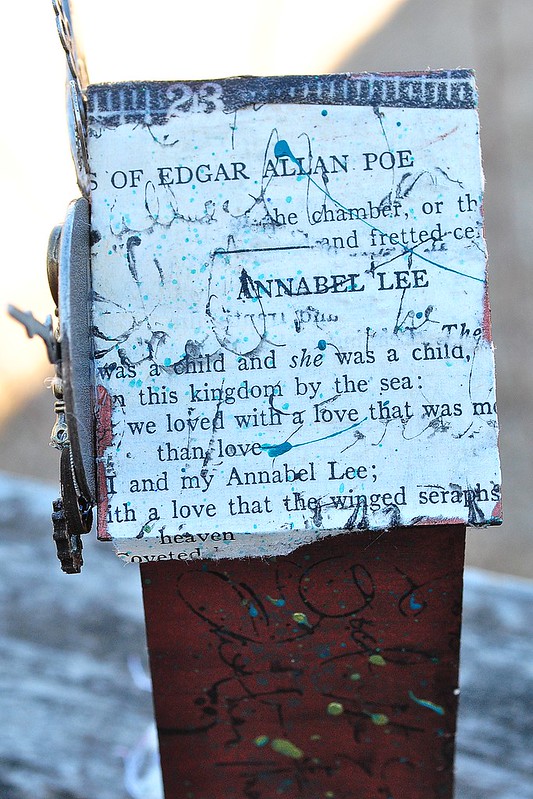
poe shrine roof
When creating my ATC shrine, (from Retro Cafe Art) I also stamped over the painted and papered outside, using the cursive writing stamp here as well.

I am super excited about my first ATC, and the little house it has to reside in. I've already been so inspired by the creations of the design team, I cannot wait to create another very soon! Keep an eye out for more fabulous ATC sized projects from the design team as we continue to celebrate our ATC bash!

Supplies: 
Viva Las VegaStamps!: Coffee Ring Stain, Nesting Gears, Cursive writing background, Poe
Ink: Momento-Tuxedo Black, Clearsnap mix'd media inx-noir, Ranger Archival-Coffee.
Paint: Plaid, Mist: Heidi Swapp Color Shine- Teal
ATC Shrine, watch gears, skull bead: Retro Cafe Art
Metal Embellishments: Tim Holtz, Bead Landing, vintage
Chipboard Gears: UmWowStudio