Monday, May 30, 2016

Aflutter {Mail Art Monday with DeeDee}


Hiya folks :) DeeDee here today to round off the month with our last Mail Art Monday!


I created my own envelope after seeing Michele Kosciolek's version of Mail Art Monday. I also recorded all the steps via video and did a voice over for you. Please feel free to watch :) :


Not much writing from me today as most of the info is in the video.. but I did want to say I love how moody this envelope turned out even though I used pinks :) The addition of the gray, book text and stabilo all worked really well together to help tone down the brightness that would have occurred. AND those whimsical clouds are so fun (And come in two styles!) with the stabilo that I will DEFINITELY be doing that again.


I have frequently found myself stamping a lot of the new mixed media stamps on different vintage papers and I love it. It adds such great depth and character to them. Plus.. the vintage book texts look so great on artsy pieces.

Would you like to send us some Mail Art? Please feel free! I've included our address on this envelope so you can find it easily. ♥ we especially love artwork featuring our stamps.. we have TONS of display pieces all around our brick n mortar location.


Thursday, May 26, 2016

April Winners!

We have a couple of WINNERS to announce today.

We are celebrating the April Challenge that was all about coffee.

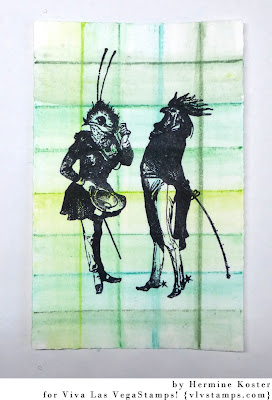
Our first winner (voted!) goes to our very own DT member Hermine Koster!


And our randomly chosen winner is... #13 Cecilia.

Congrats to both! Please email me (deedee430@gmial.com) with your shipping info and we'll get you grab bags o' rubber! 

Wednesday, May 25, 2016

Mini Art Journal Page: "My Beautiful Imperfection" by Jenn Engle

Hey Everyone! I have a page in my mini art journal to share today.  It is pretty straightforward and came together rather quickly.

STAMPS I USED!:
Writing Circles
Mesh Texture
Flying Insect Eye
Stitching Lines
Sawtooth Stitching Lines
  
First, I started with Blue and Teal Dylusions Paints, applied with a round Ink Blending Tool.


Next, I started stamping Writing Circles, Mesh Texture in matching inks on the background.
Then, I applied Texture Paste thru a Crackle Stencil. Once that was dry, I used my finger to go over it with Purple Dylusions Paint. Then, I hit a few spots with the teal paint. Finally, I went over all the edges (and about a inch or so in) with Black Dylusions on an Ink Blending Tool. I also stamped some Stitches coming in from the edges, as well.


For my focal image, I stamped The Flying Eye Insect once on my spread and once on white cardstock. I colored just the round part of my cardstock with Copic Markers, then cut that out. I adhered it over the stamped image on my spread. Added a quote. Et Viola! Done.
VLVS STAMPS USED!:
Writing Circles
Mesh Texture
Flying Insect Eye
Stitching Lines
Sawtooth Stitching Lines

Thanks so much for looking!
~Jenn

Tuesday, May 24, 2016

Supernova !

Hello everyone,

and welcome to the blog where, today, I am sharing a little tutorial about how I made this tag for my DT post.  I had lots of trouble with it along the way, but I will explain what went wrong and how I rectified it with the photos.
So, get yourself a drink, sit down and enjoy !

As usual I'll start with the finished tag:


Most of the stamps I used for this tag are from the latest release April 2016. 

... and here's how :


I started with a tag that I cut myself. I have on Tim Holtz tag left from a pack and I just use that one as a template whenever I need a tag. I do have a die set but I hardly ever use it. It is just as easy to cut one by hand. 


Next I used a Crafter's Workshop stencil and some model paste and a palet knife to add some texture. 


I dried this with the heat tool. 


Next I painted a layer of gesso over it. 


I then coloured the tag with Distress Inks and a blending tool. 
Love these colours together... Mustard Seed, Picked Raspberry and Carved Pumpkin.


Looked good when it dried. Then I thought I'd better fixate this some how... So I used a spray fixative... first mistake....


It came out all mottled, which I kind of liked. So I decided to continue... 


I then thought the colours needed a bit more oomph so I added some Distress Crayon.... I think I really do not like them... This is the third time I've used them and I have a hard time with them.. 


Anyway.... I then found out that the Distress Ink I used for the first layer was still coming off when I rubbed it so I decided to use Tim's new Distress Collage Medium, crackle of over the top. Of course I knew it was going to smear but I thought that would be OK... This was how it looked and not a crackle in sight.. It might be because I didn't put it on thick enough or because I dried it with the heat tool.. Anyway, everything seemed fixed now. 


Next, the stamping, the fun part ! There is a full list of all the stamps I have used at the bottom of this post. 


Work in progress... 


I then used a white pen and doodled around the stamps.


I wanted to use this gorgeous new star stamp and when I saw this lady in my stamps I thought of putting her in it and that is what I did. 


The star with the lady was then adhered onto the one on the tag with dimensional tape. 
The last thing I did was  stamp the sentiment, cut it apart and adhered it to the tag. I doodled around the words and added a ribbon. 


And here is the finished tag again. I hope you liked my tutorial.... and have learned from my mistakes!

I have used the following stamps :


Thank you so much for stopping by today ! 


Monday, May 23, 2016

Mail Art Monday with Michele


 It's Monday and time to share some MAIL ART!!  Michele here today and I have to confess...I never thought I would be very good at this mail art things.  BUT I am really enjoying it, lot's of fun and a new obsession!!

I have a tutorial, start to finish for my enveope this time.  I used my scoreboard and scissors and just 'winged' it on the envelope.


 I used a piece of 8-1/2 x 11 heavy card stock to start.


 After I scored and cut I used a corner rounder on all corners.


 I stamped Creepy Bird on the envelope and on a book page.  The book page is my mask.  I did the same with Creepy Cat.


 Then I used washi tape to mask off the areas for the address and return address.


 I stamped over the entire thing with Expanding Rays Silhouette.


I sparayed with Distress Stain Spray, dried and carefully peeled pff the masks.


I used some Miracle Tape to close up my envelope.


I finished my stamping with the Deliver To stamp.  A little doodling and coloring with my Distress Markers and viola!


Seriously!!  These creepy stamps are some of my favs!!


And you are going to be seeing these rays A LOT!!!

Until next time...get inky!!

Friday, May 20, 2016

I've still got it !

Hi, Nikki here today sharing some fun Artist Trading Card's (ATC's) I made. 

The star of the show is Senior Lady doing split :


Isn't she fun. Seriously, can you imagine being able to do the splits in later life. Kudos to her. 

You can see in the background that I have also used a stamp from the most current release, Squiggly star collage.

The background is made up of torn music paper, acrylic paint and black and white ink.

A close up :


I actually made a series of these ATC's, here they are : 


Thanks for stopping by, Nikki x


Thursday, May 19, 2016

tutorial - friends are cheaper than therapy

Hi Hermine here with a tutorial again.


step 1: take a piece of paper and start drawing lines with a ruler and Derwenrt Inktence blocks. Then take a water brush and blend the lines. Leave to dry.

step 2: Dot the same but turn your paper. Leave to dry


step 4: stamp with Stazon Black only the top half of the Whimsical Tree Lady Nude 19681 at the bottom of your card.

step 5: Stamp with Stazon Black the tekst Good Friends are 18885 and with Memento olive green Sky of stars background 19819 . I coloured the bottom trees and the upper part of the chicken with felt tip markers.

step 6: Start colouring the rest of the images with Lyra water colour crayons and a water brush.

step 7:  take a rectangle double card and glue the inner card on the card. Then colour some paper and die-cut the branches. Glue onto the card.

Close up

 Hope you liked the tutorial. 

Warmly Hermine
Used materials: 
Derwent Inktence Blocks
Lyra water colour crayons
water brush
Making Memories die
felt tip markers