Showing posts with label Sawtooth Stitching Lines. Show all posts

Tuesday, April 18, 2023

Bookmarks by Cathy

 Goodmorning, Today I have 2 bookmarks for you.

I started out by cutting a strip of paper 6in X 2in. 

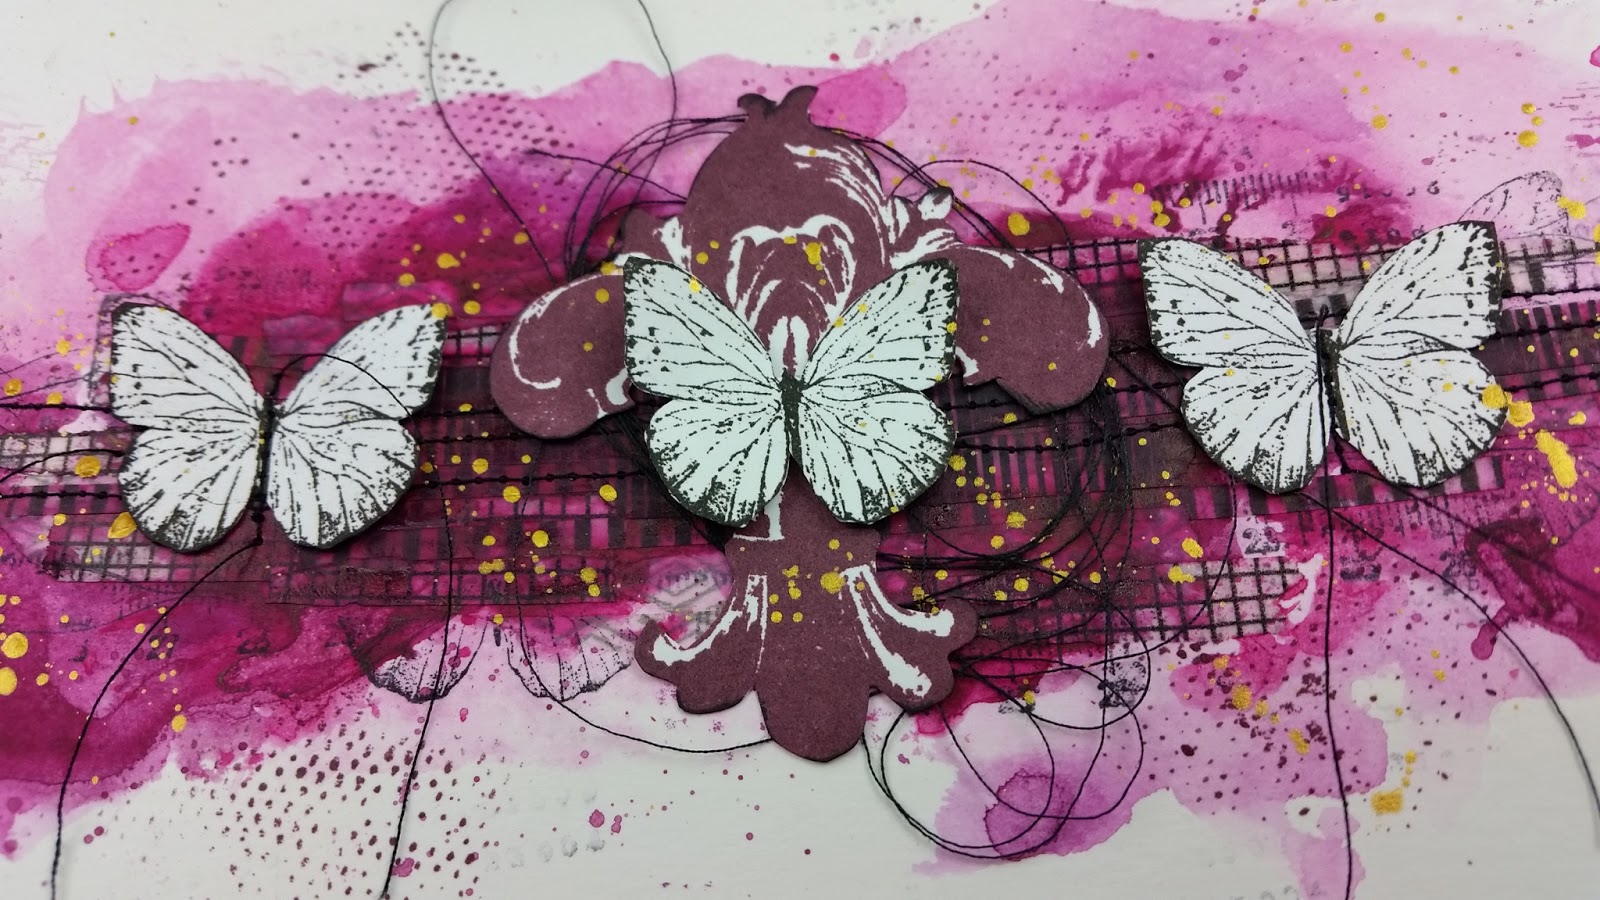
Then I used a Tim Holtz stencil and green distress ink and make a background.

On a scrap of paper I stamped the creepy creature and colored with Copic markers and cut out and added to the bottom of the bookmark.


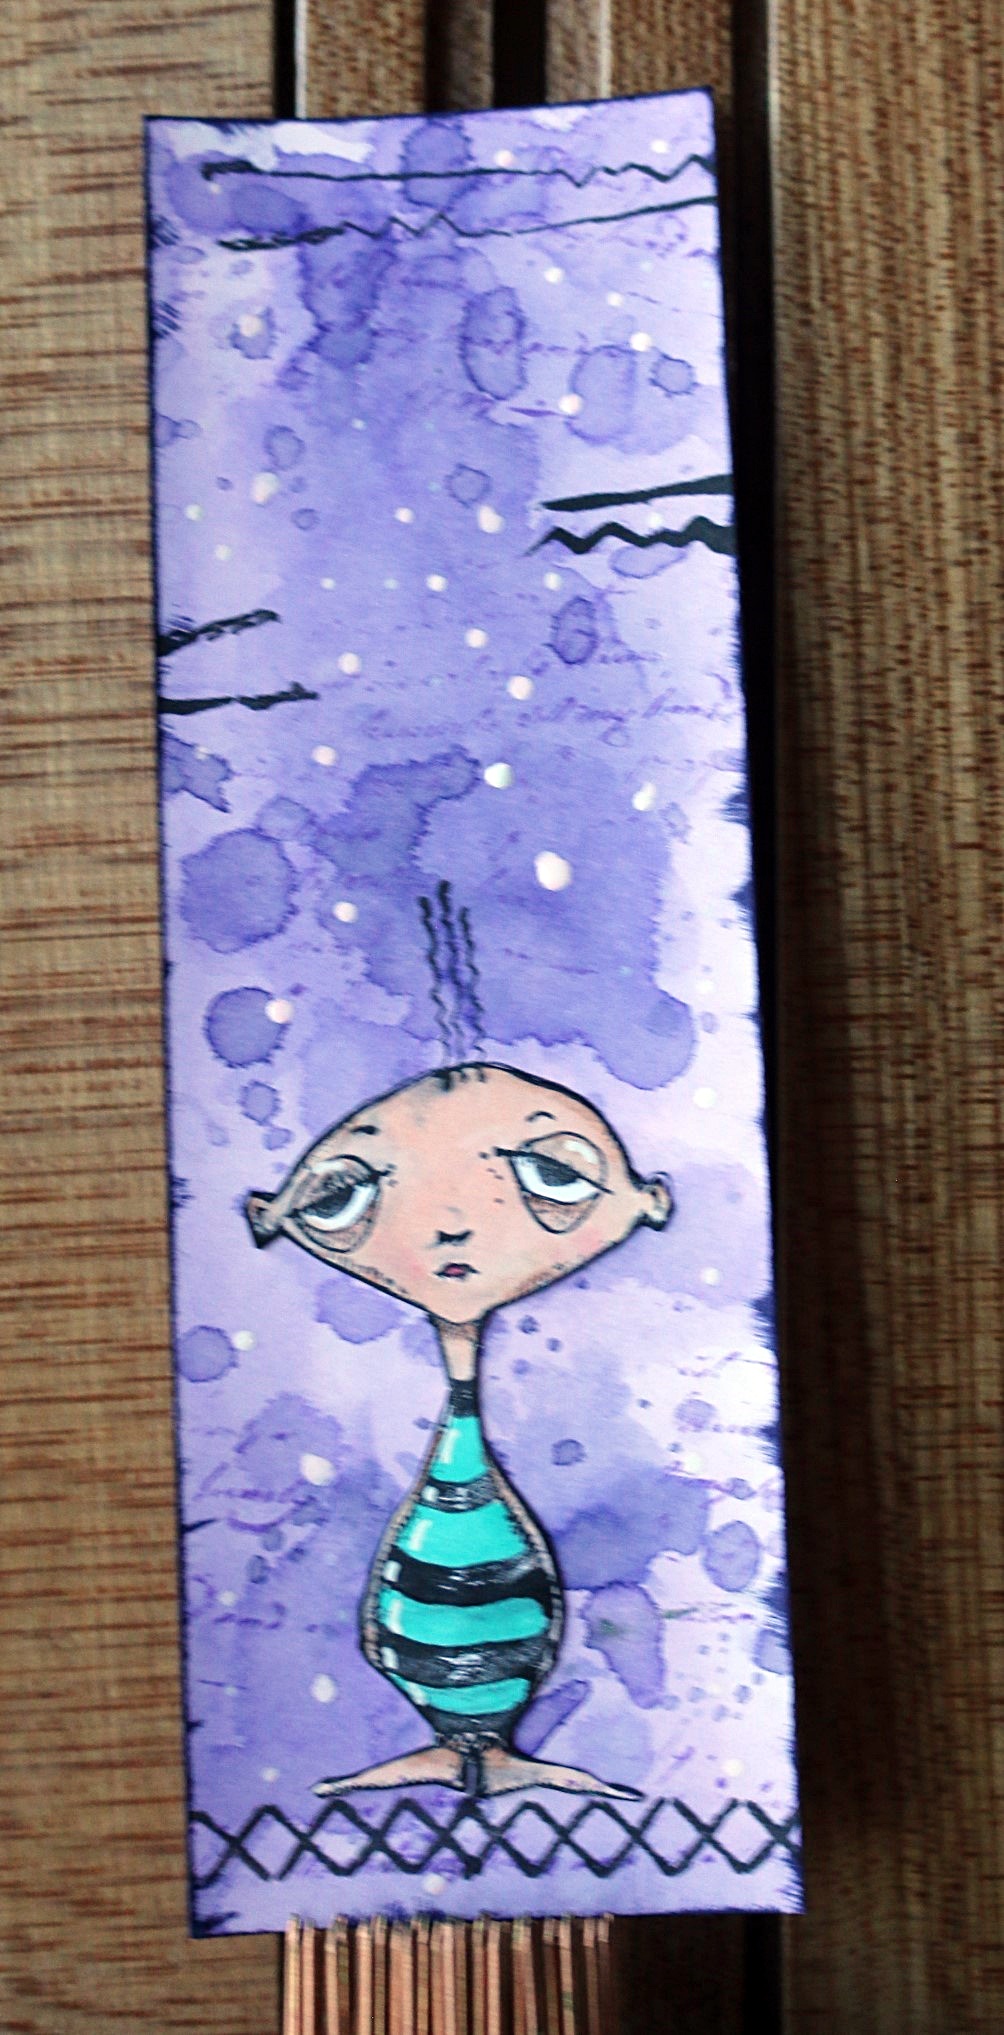
For this one I started with 2 different purple distress inks to make the background. 
I then stamped the cross stich on the bottom of the bookmark for the creepy striped creature to stand on.

On a scrap of paper, I stamped the creepy standing creature and colored it with Copic markers and cut out. Next, I placed the cut out on top of the stamped cross stich. Around the background I stamped the grunge writing in purple ink. 
I then stamped the sawtooth stitching off the top of the bookmark.
Lastly, I added some white spots to it.

Stamps Used:

19876Creepy creature sitting.

19877 Creepy striped creature

19880 Cross stich

19643 sawtooth stitching

17545 Grunge writing

Other stuff:

Cardstock

Distress inks, green and 2 purples

Copic

White ink

Black ink

Tim Holtz stencil


Sunday, January 26, 2020

Zombies - Art Journal page by Elisa Ablett


Hi VLVStamp fans,

Hello from Australia ...'waving madly'🙋🙋

Elisa here from the design team with my latest inspiration for you. 
I created an Art Journal page featuring loads of Viva Stamps in a crazy collage.

I have included a few close ups showing the fun I had stamping and colouring each layering of the collage and including some mulberry coloured craft wire and stitching.


Love this Creepy Bald guy stamp, so versatile, I can definitely see myself using him again and again.

And I find myself using the Rows of Numbers and X Circle stamp over and over in my backgrounds. 


Make sure you head to the website to check out the new plates of stamps and also I have included a list with direct links to the stamps I used to create my journal page.

I used the following Viva Stamps:-


Other products used: 

Archival Ink
Blue Fern Chipboard
Colour Blast Watercolour Ink
Black Thread
Versafine Ink Black
Dina Wakely Scribble Sticks
Gesso
Scraps of Patterned paper

Thanks for stopping by !

Elisa x


Thursday, May 09, 2019

She was a Dreamer : Guest MAJO

Hi folks!

Majo here from the Guest Inspiration Team. 

I hope you are all doing well. I'm happy & excited to share a project for Viva Las VegaStamps. 

I've created an Art Journal Spread "She was a dreamer" using some gorgeous VLVS! rubber stamps. 


1.    I stamped the Whimsical Lettered Man twice, once on my spread and once on a piece of scrap paper to mask my image.
2.    I stamped all other elements in different colours over the image
3.    The main image was coloured with Pitt Artist pens
4.    To create some kind of a frame I added the stitches
5.    I stamped the sentiment several times without reinking my stamp
6.    I distressed the edges with some ink
7.    At last I added some inked water splashes


I have used the following stamps:


Other supplies:
Florence Watercolour Paper
Ranger Distress Inks

Thanks a lot for your precious time.

Majo


Friday, March 29, 2019

Fleur de Butterflies An Art Journal Page by Jenn Engle

Hey everyone! I have an art journal page to share with you today. A simple monochromatic page that pops with the use of Viva Las VegaStamps!


Stamps Used:


This page came together quickly using an ink smooshing technique and washi tape. If you want to see exactly how I made it, you can watch the video at the bottom of this post.


Stamps Used:

Other Supplies Used:
Liquitex Acrylic Ink
Washi Tape
Dina Wakley Media Acrylic Paint
Ranger Archival Inks
Sewing Machine

Thanks for looking!
~jenn


Monday, March 05, 2018

Mail Art Monday with Majo


Good morning, Peeps!

Another Monday and some new Mail Art.

I'd like to show you an envelope with many of my favorite stamps, which I used on a master board I created with Distress Inks and stamps.


I prefer to use heavy paper or card stock adhered to the envelopes when I apply lots of colors or layers. Plain envelopes tend to coil up, I like mine to look tidy when I send them to my friends.

I started with Distress ink in four different colors:


I swiped the pads alternately over my panel until it had the color richness I desired. To soften this up a bit I spritzed some water on the panel.


I stamped different images randomly with the colors I had used before.


I cut the panel to my envelope size and stamped my main images: The little child, the stitches, the world map, the sentiment and the word. I adhered the panel to my envelope with Miracle Tape.


I added a piece of self adhesive paper for the address label and stamped the stitches on the edges.


These are the stamps I used:


 I hope you enjoyed my little tutorial! 

I wish you a happy week and happy crafting ♥

Thursday, June 22, 2017

Learning To Love Purple

Hello VLVS! peeps, Fiona here with you today and I have a little video to share of an art journal page I created.


I'm learning to love purple because for some unknown reason my brain keeps making me use it in my art!!!


 I have never been a big fan of the colour but it just keeps creeping in to my creations. In all reality I think I am learning to like it.


 And I paired it up with green and pink so it doesn't over power the piece. I tried something different this time in my journal too. I stamped first!


I mean I stamped in between too but I began the process with some background stamping. Anyway you can see it all in the video.

Here is a link 


VLV Stamps used:


I am totally enjoying exploring with different colours and different stamping techniques in my art journal. I feel i'm really starting to develop a style. I hope you feel inspired to get your VLV stamps out and have a little play in your journal too xx


Tuesday, March 28, 2017

She was... Art Journal Spread by Susanne

Hi my dear crafty friends!

Susanne here and I'm sharing an art journal page today. I used the beautiful "Fed-up Vintage Lady " stamp as my focal point.

For my background I used a kind of embossing resist technique. Instead of watercolour I used white acrylic paint. I learned this in a video by Marion Emberson from WOW! Embossing Powder. She calles it White Out Resist technique.
Start by colouring the background with PanPastels. Next step is stamping the "" image with embossing ink. Use clear powder, so your background will shine through. Add a l layer of white acrylic paint on top. Let it sit for a short moment and wipe the colour off the embossed parts with a baby wipe.
The result is a shabby background. I used the "Scribble Heart" and "Sawtooth Stitching Lines" to add some details.
Finally I added my focal image with the sentiment on top of a silver thread.

Thank you for stopping by today!
xx Susanne


Supplies:
Viva Las VegaStamps!:
All stamps can be found on Plate 1495
Fed-up Vintage Lady
Scribble Heart
She was
She was a Wildflower
Wildflower Silhouette 2
Sawtooth Stitching Lines
Other:
WOW! Clear Embossing Powder
PanPastels
Archival Ink Jet Black
White Acrylic Paint
Thread

Thursday, February 16, 2017

Challenge Inspiration by Susanne

Hi my dear crafty friends!

It's Susanne here and I'd like to share two Artist Trading Cards today. I used our monthly challenge theme as my inspiration.


 I love the stripes and the turquoise colour splashes!

I cut two 2.5" x 3.5" cards from heavy weight watercolor cardstock. I used a pink acrylic spray to give it some color. While this dried, I picked a gelli printed deli paper with orange hues and cut it to strips. I adhered those with Gel Medium and added some texture with the Dictonary Page, after it was dry. Now it was time to stamp the main images (Whimsical Horned Boy, Whimsical Lettered Man ). I used StazOn Jet Black ink. Of course I wanted to have these gorgeous turquoise splatters on my ATCs. I used Dylusions Paint "Vibrant Turquoise", thinned it down with a little bit of water, and added the splatters with a brush.
I used WOW! Opaque White powder to add the title and the sewing border on this card.

I added some doodling to this card with an acrylic fineliner.

Thank you for stopping by today. Don't forget to enter our February challenge!
xx Susanne.

http://clayscrapkreativ.blogspot.de/

Supplies:
Viva Las VegaStamps!:
Whimsical Horned Boy
She was a dreamer
Whimsical Lettered Man
Sawtooth Stitching Lines
Dictonary Page 
WOW! Opaque Bright White powder
Gelli Plate
StazOn Inks

Wednesday, December 07, 2016

Find Your Tribe | Fiona Paltridge

Hello VLVS! peeps Fiona here with you again to share a little card tutorial.


I want to show you how I got this Whimsical Fairy Lady to look like she's poking out from behind the tree.


First I made a mask of the stamp and placed it in my embossing folder where I wanted to stamp her later on. Then using some Distress ink I stamped the Brick Background stamp directly onto the inside of the embossing folder. You have to stamp on the non raised side (the side the writing in on in this case).


Next I stamped the Fairy lady. This time I used archival ink as I wanted it to be really black and permanent so I could do some Distress Ink blending later on and it wouldn't be disturbed.
I also got a wet wipe and removed any excess ink from inside the tree embossing part so it wouldn't transfer onto my card when I ran it through the machine. Seeing that it is Archival ink I did use a little bit of Stazon remover to help with this part.


After running it through my Big Shot I used a brayer and some more Distress Ink to add some ink onto the front of the tree. Later on I blended some ink over the top of it very carefully as well.


I have to be honest, I was worried ..... I was very worried when it first came out of the machine but after some additional Distress Ink blending and the addition of the Stitching stamps (everything looks better with a stitch stamp) plus a title, I was much happier with the results in the end.

Viva Las Vegastamps! used:


Thanks for popping by xo


Sunday, December 04, 2016

December Challenge Inspiration | Fiona Paltridge

Hello my VLVS lovelies! Fiona here with you today to share a little tag I have created for the December challenge.


We'd like to inspire you with frames, scallops, doodles, vintage tones, tealgraytanwhiteblack,Christmastrees, WINTER, snowmensquirrels, snow angels, Victorian, house, scenery, road, snowbanks, family & more! Just be inspired ^_^

 Brown and teal together is one of my most favourite colour combinations! So I was very keen to create a background that would represent the mood.


Seeing that it's December I also wanted to give my tag a little Christmas theme so I popped the Santa and Reindeer stamp on it too.


Viva las Vegastamps! Used:


I hope you will join us. The link to take you to the monthly challenge is HERE

Don't forget the rules:
-Create a new project based on our inspiration board (it has to be posted this month, but you can certainly link up to other challenges as well!)
-Use at least one (but certainly more if you want) Viva Las VegaStamps! rubber stamps
(We are now allowing competitors stamps to be on your work, but please make VLVS! the focus of the project, thank you.)
-Post it to your blog with a link back to us
-Upload to our linky using your direct blog post link (You may also upload via facebook, flickr or other gallery)
You could win a Project Spotlight post on our blog + some new rubber of course.
And visit us back here for inspiration!

Good Luck!