Showing posts with label gossamer butterfly. Show all posts

Friday, March 29, 2019

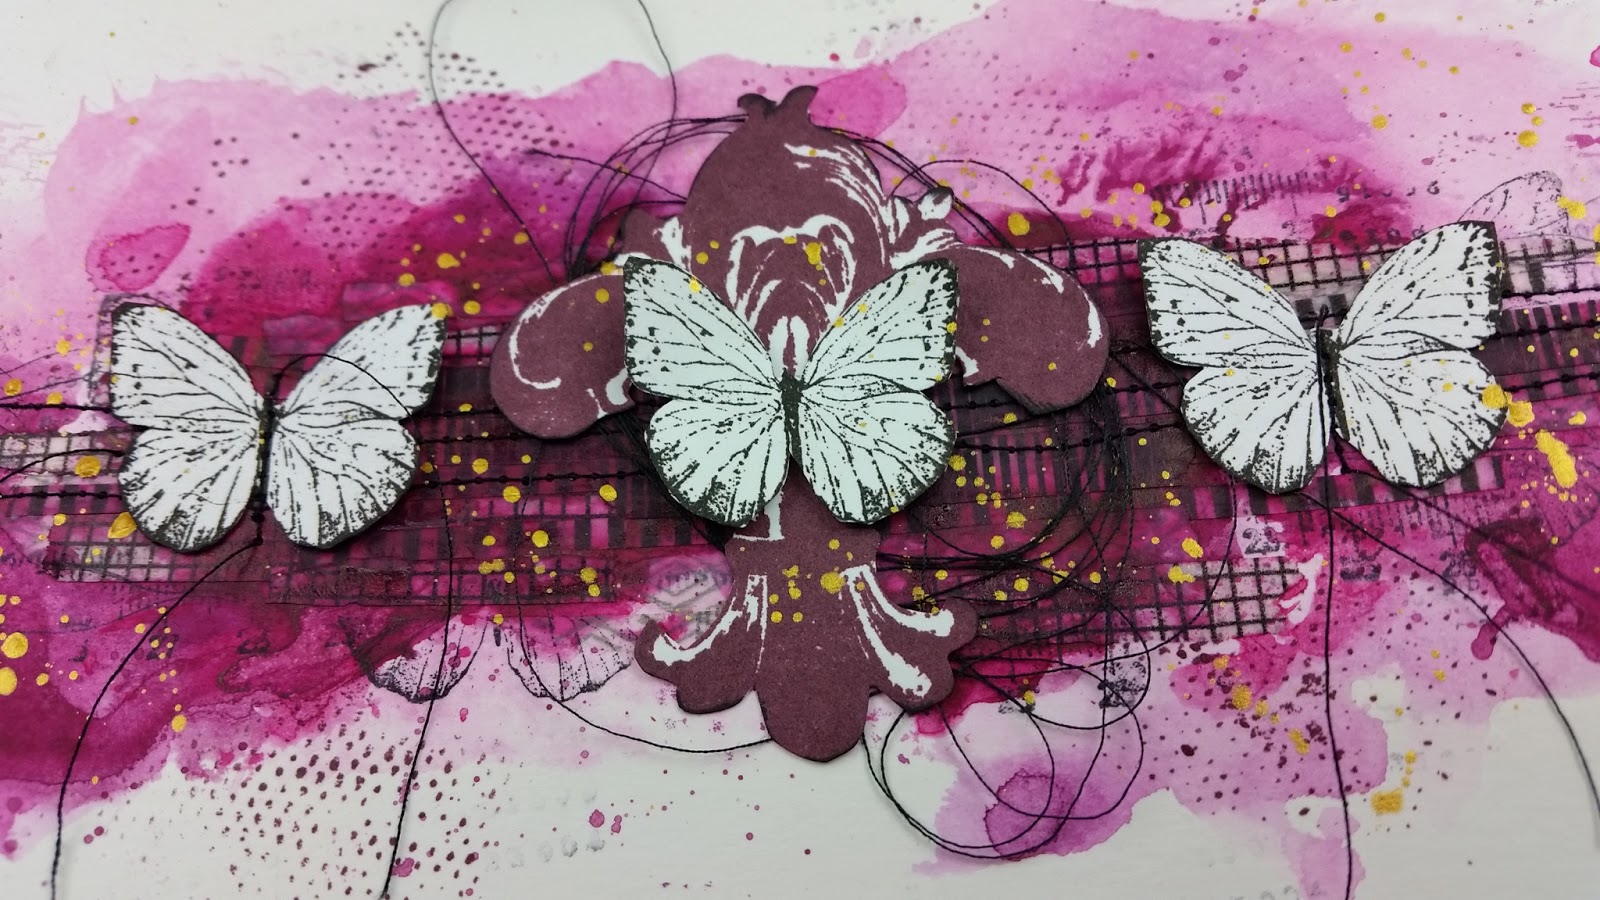
Fleur de Butterflies An Art Journal Page by Jenn Engle

Hey everyone! I have an art journal page to share with you today. A simple monochromatic page that pops with the use of Viva Las VegaStamps!


Stamps Used:


This page came together quickly using an ink smooshing technique and washi tape. If you want to see exactly how I made it, you can watch the video at the bottom of this post.


Stamps Used:

Other Supplies Used:
Liquitex Acrylic Ink
Washi Tape
Dina Wakley Media Acrylic Paint
Ranger Archival Inks
Sewing Machine

Thanks for looking!
~jenn


Wednesday, July 04, 2018

Feeling the Love | Sue Plumb


Hi everyone!
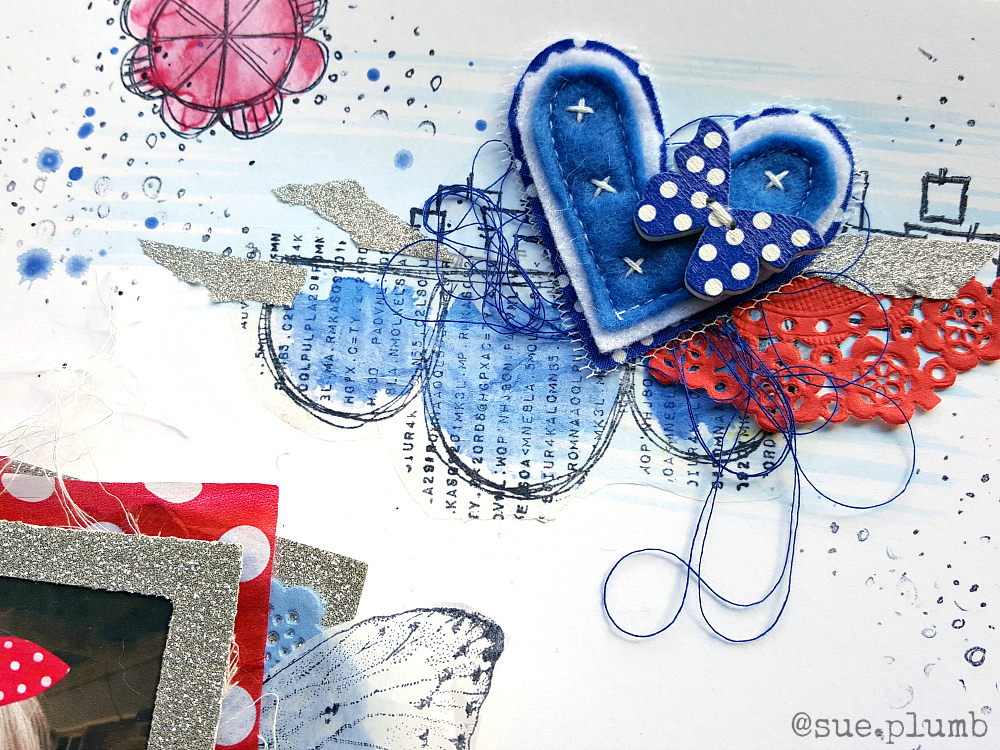
Sue Plumb here with my latest design team project for you. Today I have a mixed media scrapbook layout to share that features an abstract painted & stamped background and a photo of one of my most treasured scrappy friends taken at a retreat last year.


I began this page with some heavy weight white cardstock and a few Dylusions acrylic paints. I used a brush to apply the paint randomly in a few different directions; simply following my instinct and a rough idea of where I was going to put my photo.


Once I had the paint in place and it had dried, it was time to add some stamping to the background. I started with a few stamps from one of my very favourite plates, #1495. I used the Rows of Numbers and the Typeset Scallop to add some vertical and horizontal structure to my page using black Staz On ink. I then used the Cross Marks Background stamp with Ranger Archival Ink (Paradise Teal) to add some extra depth. 


Next, I added my photo to the page using Miracle Tape and then began building layers around it. I started with a few Jane Davenport patterned papers, which featured gorgeous painted style backgrounds. I used the Large Butterfly Gossamer and stamped out a couple, then fussy cut them and set them aside. I then repeated the process with the Whimsical Leaf and the Leaves stamps. I then began assembling my page.


I used the fussy cut leaves and placed them along the horizontal line created by the scallop stamp, tucking the ends in under the photo. I layered the whimsical leaves and tucked them in beneath the photo.


The two butterflies were adhered along the body only, allowing the wings to be bent up away from the page. I then took some white cotton thread and added some on top of each one, wrapping a few strands around the wings.


My page still need more though, so I took the opportunity to use up a few old Heidi Swapp acetate ephemera pieces that I had in my stash. These were perfect for layering over the painted and stamped background as they allowed the colours and patterns underneath to still be visible, while adding an extra layer over the top.


To finish off my page I stamped some Scribble Hearts with Vivid Chartreuse Archival Ink. I also added some scribbles with a Stabilo All Pencil; and some tiny splatters of Colour Blast 'Mermaid' Colour Artist Ink.


Thanks for stopping by today so I could share this. I hope I have inspired you to get inky too!


Stamps used:
Leaves

Other materials:
- Bazzill cardstock
- Ranger Dylusions acrylic paints
- Ranger Archival Inks
- Staz On 
- Jane Davenport Mixed Media Paper Pad
- white cotton thread
- Heidi Swapp acetate ephemera pieces
- Stabilo All Pencil
- Colour Blast Colour Artist Ink

Monday, March 12, 2018

Watercolor Background and Stamping Journal Page with Fiona

Hello my gorgeous VLVS! peeps! Fiona here with you today to share an art journal page I have created with the amazing red rubber from VLVS!!!


 I had lots of water colour fun in the background with this one. I love the unpredictability of using water colours. They just do whatever they please ..... no point trying to control the outcome. Once I got the hang of that rule ... I then began to love using water colours in my work.


 They can be a little bit difficult to stamp onto though as they often warp the paper and make it difficult to get a clear image. So I do a little double stamping technique that I'll show you in my next VLVS! tutorial video.


I didn't over use the stamps with this page. I was looking at creating a simplistic effect. A lot of my journalling now days has got really busy and full of doodles and mark making so for this one, I wanted to pull it all back a wee bit.


 There is still some mark making but it's very tame in comparison to what I normally would do and it is with water soluble markers so it would blend in seamlessly with the background.


Viva Las Vegastamps! used:

I hope you like my little creation and I'll be back again very soon with some more creaty arty farty stuff xx


Tuesday, January 30, 2018

"She Was a Wildflower" scrapbook page | Sue Plumb


Hi everyone!
It's Sue Plumb here and I am excited to be sharing my latest design team project with you. Today I have a mixed media scrapbook page that features some fun photos of my fellow VLVS design team member Fiona Paltridge and I. The photos were taken at a scrapbooking retreat after I did a class with Fiona; and as soon as my latest batch of stamps arrived I knew I had the perfect stamps to document these pictures!


I started my page by using the Wildflowers Silhouette stamp several times across my page to create a "garden" for my background; then I added some colour using Colour Blast Colour Artist Inks (Marine, Berry and Mermaid) and a small brush; allowing the colour to run down the page. I also added some splatters of Lime ink around the edges of the flower silhouettes.


While my background was drying, I stamped a large Gossamer Butterfly image onto some extra cardstock, then coloured it using Faber-Castell watercolour pencils and a waterbrush. I then cut around it, and added some shimmer to the wings using a Colour Blast (Silver) Shimmer Brush Marker before sticking it down amongst my garden.


I used several stamps to create the quote at the top of my page:
I also used the Row of Chevrons stamp to help highlight it.


I used my very favourite Doodle Dots stamp to lightly stamp around where I had splattered the lime ink to add more depth to the background.
 

I then added my photos to my page (using Miracle Tape and some scrap cardboard to mount it up) before sticking the She Was a Wildflower quote (stamped onto cardstock with watercolour pencil used to highlight the edges) onto my photos.


I added some subtle pops of texture by creating a few small "flowers" from cotton thread, using enamel dots as the centres.
I also added some coordinating enamel dots to the butterfly body.


Thanks for stopping by so I could share this - I hope I have inspired you to get inky today!


Stamps used:
Wildflowers Silhouette
Gossamer Butterfly (large)
She Was
An Artist
She Was a Dreamer
She Was a Wildflower
Row of Chevrons
Doodle Dots

Other materials:
Miracle tape 1/2"
- Colour Blast Colour Artist Inks
- Colour Blast Shimmer Brush Marker
- Staz On ink
- Faber-Castell watercolour pencils
- enamel dots
- cotton thread

Thursday, October 12, 2017

Guest Blogger : Sue Plumb : Fancy

We have some really incredible people who grace our blog.. today I get to introduce one more of them to you!

We have SUE PLUMB Joining us today... she's an Aussie full of sass n spunk. Her work replicates that.. just you wait n see.


Hi everyone! 
My name is Sue Plumb and I am a mum of 3 (daughter Brielle, 9 and twin sons Hunter and Kaden, 5) and I come from sunny Queensland, Australia. I began scrapbooking approximately 9 years ago, shortly after the birth of my daughter. Since that time, my work has evolved from a very simplistic paper-based style, to where it is now - which is far more artistic and often incorporates stamping, mixed media and eclectic elements (including the odd swear word!)
I am currently on several Australian manufacturer design teams including Cocoa Vanilla Studio; Colour Blast and Flutterby Designs. I am also a design team member for both the Scrap the Boys and Scrap the Girls challenge blogs and a current Creative Team member for Scrapbooking Memories magazine.
I was absolutely thrilled when DeeDee asked me to be a guest designer for Viva Las VegaStamps, having become a fan some time ago through design team member (and fellow Aussie) Fiona Paltridge. (I now directly blame her for my addiction to the delicious smell of new red rubber!) Thank you for the opportunity to share some of my work DeeDee. 


For this layout, I started by brushing some soft blue watercolour onto my page before using my stamps to define the focal areas. 


I then coloured some of the images using more watercolours.
Most of the images on my page were stamped directly onto the cardstock, however some were also pre-stamped onto tissue paper, and then adhered using a matte medium. (This allows you to easily layer images and place them more precisely.) 


The Gossamer Butterfly image that was stamped onto tissue, I simply cut in half and incorporated each piece into the layers under my photo. I only adhered them at the inner edge that was hidden under the layers, allowing the wings to "float" free.


Here is a list of the stamps I used:

- Typeset scallop
- Butterfly Gossamer (large)
- Overlapping squares by Corrie Herriman
- Striped pattern circle by Tera Callihan
- Doodle dots
- Incredible as it seems

Friday, February 26, 2016

Butterfly Specimen

I have been really wanting to try encaustic art, so after a bit of hemming and hawing...and a bit of research I did it.  Michele here to share an 8x10 encaustic and stamping piece, I had so much FUN!!
Oh, and thanks to Jen Mattot for the fabulous inspiration.


I taped down a piece of heavy watercolor paper to start.  On some old dictionary pages I stamped the Butterfly Specimens in archival ink.


I used mat gel to attach the stamped dictionary pages, let it dry and then stamped the Waybill/Invoice Bachground and Specimen randomly on the page.


I added some great color with Gelatos and water.


Once everything was dry I painted over the entire page with bees wax, let it set and stamped the Gossamer Butterfly on top of the set wax.

Embellished with the Um Wow Studio chipboard butterfly, Prima flowers, May Arts ribbon, thread and gold leaf.

There is a bit of grass in there too...


I attached some burlap string (May Arts) to the page before I painted on the wax.  It created an awesome texture!!

Stamping under and on top of the wax created a great layer!


And I was quite surprised by how well you could see the color and the stamping under the layer of wax.

Thanks for stopping by!  For more VLVS! inspiration join us on our Facebook page, Viva Las VegaStamps! Groupies.

Until next time, get inky!!