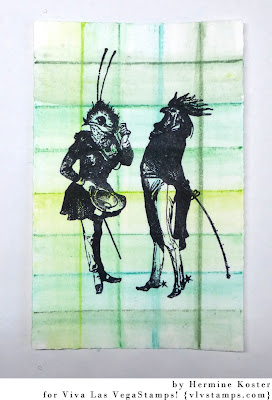
Showing posts with label VLVS words and Images. Show all posts

Monday, June 27, 2016

Mail art monday with Hermine

Hi Hermine here, I altered this box for my turn on mail art monday. The size is to fit two DVD boxes in it. I bought an blanc one, so awesome to turn it in to a colourful and btight one and its already on its way to Vegas.


step 1: lay the box flat on your work service and brayer on some acryllic paints, I used red, blue, yellow and green. Leave to dry. Then take a stencil and brayer qwith white acryllix paint. Leave to dry again.

step 2: mask off the area you want to put the adress in, but mask of the outside lines, paint in with white acryllic paint. Start enhancing the box with stamps. First I used the Writing Chevron 19824 and stamped with Colorbox Chalk Black bird

step 3 : Mask off the space for the adress,  then I stamped the Doodle Flower/garden 19828 on both sides of the bottom. And the Squiggly Star collage 19822 ont the address side of the box.

step 4: Then enhance some of the circles with Doodle Circle 19823. And last but not least stamp the Banksy Winged Mohaek guy 19602 on the left hand side of the address space.


step 5: fold the box, close the lid, write on the adress and sent away!!!!


Hope you like it.

Warmly Hermine

Used materials:
Writing Chevron 19824
Doodle Flower/garden 19828
Squiggle Star Collage 19822
Doodle Circle 19823
Banksy winged Mohawk guy 19602
cardboard box
acryllic paint
Colorbox Chalk ink Blackbird


Friday, June 17, 2016

You are beautiful

Hi Hermine here, I had a good time playing around with the gelli plate. Awesome thing is that you always end up with more then one.


step 1 :  Brayer one colour Memento Luxe onto you gelli plate, then take a stencil put it on your gelli plate, take a second colour Memento Luxe and brayer over your stencil.
step 2 : Stamp with Stazon Black the Butterfly Gossamer Large 7760 and colour the image with colouring pencils.
step 3 : then stamp with Stazon Black the Writing Chevron 19824, the row of Chevrons 19829 twice and the tekst You are beautiful 19832. Colour the row of chevron in with markers.
step 4: Take a black fine liner and doodle a border around the gelli print, colour some spaces in with a marker.

As you can see there is still lots of ink left on the gelli plate to make a second one. Here I stamped the Brown Towhee 15392 and the Multi-leaf Branch 14088 with Stazon Black. Coloured the bird with ZIG markers.
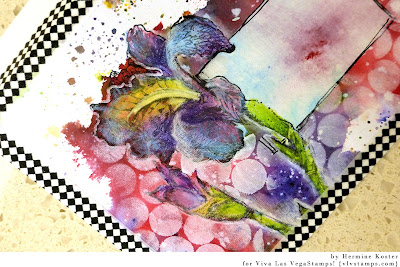

Hope you like it.

Warmly Hermine

Used materials:
Memento Luxe
Fine liner
ZIG markers
colouring pencils
gelli plate


Thursday, May 19, 2016

tutorial - friends are cheaper than therapy

Hi Hermine here with a tutorial again.


step 1: take a piece of paper and start drawing lines with a ruler and Derwenrt Inktence blocks. Then take a water brush and blend the lines. Leave to dry.

step 2: Dot the same but turn your paper. Leave to dry


step 4: stamp with Stazon Black only the top half of the Whimsical Tree Lady Nude 19681 at the bottom of your card.

step 5: Stamp with Stazon Black the tekst Good Friends are 18885 and with Memento olive green Sky of stars background 19819 . I coloured the bottom trees and the upper part of the chicken with felt tip markers.

step 6: Start colouring the rest of the images with Lyra water colour crayons and a water brush.

step 7:  take a rectangle double card and glue the inner card on the card. Then colour some paper and die-cut the branches. Glue onto the card.

Close up

 Hope you liked the tutorial. 

Warmly Hermine
Used materials: 
Derwent Inktence Blocks
Lyra water colour crayons
water brush
Making Memories die
felt tip markers


Wednesday, March 23, 2016

boys tutorial and winner give away

Hi Hermine here, this time with a little tutorial, sijple but effective. And ofcourse the announcement of the winner of my give away.


step 1:  take 3 colours distress ink. Stamp one colour directly on paper with the inkpad, take a waterbrush and blend the colour, take a second colour and do the same in a angle, same thing with the third colour.

step 2: Stamp Spotty Background 1461, Line of Chevrons 18965, Bubble warp texture 19566 and Stitching 19575 with the same colours you used for the background.

step 3: Stamp with Stazon Black Man in Flying Machine 18161 and Boys just want to have fun 19766. Take a water brush and remove some of the colour in the man. Then matt on black paper and glue onto a double square card.


And now for the winner and that is:


Craft Addicts - Tracy Evans said: Absolutely gorgeous. I love using spotlights and they are so effective here. Wonderful designs. Fabulous giveaway. Thank you x 

Congratulations Tracy, please could you mail me your snail mail address to herminekoster@yahoo.com .


Hope you like the tutorial.

Warmly Hermine

Used materials:
Distress ink


Monday, February 15, 2016

Whassup - mail art monday

Hi Hermine here on mailart monday. Hope you like it.


step 1: Take an acryllic bloc and add three colours Memento Luxe, but instead by spraying water onto the block I sprayed water on my paper and then presed the coloured acryllic block onto your paper. I think this work easier without dripping colour water onto you work when you flip you block. Leave to dry.

step 2: Mask off the white border. Stamp your focal image Cellular Fanatic 415 with Stazon Black

 
step 3 Stamp  Coffee rings 19568, December daily 1430, Victorian Flourish19417, Pointed Pen 18793 with the same colours you used for the background. Stamp with Stazon Black the Spiked Fence 18919. Then hand draw the outside line, mask it and stamp Bubble Wrap Texture 19566 in the corners

step 4: Colour the woman with colouring pencils. Stamp Whassup 3048  with Stazon Black below the woman. And because I decided I needed a little more colour I stamped the Scribbled heart 19645 twice above the woman.

And I hear you thinking, I thought it was mail art monday and it is, because I used a blanc postcard, so here you see the back side of the card. Remember if you send a postcard out like this to use water proof inks and stuff.


Warmly Hermine
Used materials:
Memento Luxe

Thursday, January 07, 2016

Made to match

Hello, Hermine here. Made this card and matching envelope, using Magenta Nuances and colouring pencils.


step 1: spary some water on your craftsheet and sprinkle some Magenta Nuances powder into it. Then put your cardstock and your envelope onto the craftsheet. Leave to dry.
step 2: for the envelope I masked of a little rectangle and bleached the inner side. Remove masking paper and stamp the Fris ChamairisLatifolia  18733 (not inking the text), and stamp the same flower onto you card. Discolour with bleach and colour in with colouring pencils.
step 3: Mask the flower and use sequin scrap and Memento Luxe wedding dress to sponge.
step 4: handdrawn some lines around the rectangle on the envelope with a black fine liner. Stamp with stazon the text inspire 18888 on the lefthand bottom side.
step 5: Use black/white washi tape all around the outside  on both card and envelope.


Warmly Hermine


Used materials:
Fris ChamairisLatifolia 18733
Inspire 18888
Stazon

Tuesday, December 22, 2015

I believe

Hi Hermine here. This is my last post for 2015. I believe together we can make the world a better place, I believe dreams can come true. Sometimes you let loose of the old ones and make some new ones. And I want to wish everyone a very merry Christmas and a happy, healthy and artful 2016.

step 1: sand the wood, so you create a very smooth surface to stamp on.
step 2: stamp the Banksy balloon girl 19430 with Stazon for the balloon, stamp this with red Memento Luxe
step 3: stamp the line of Rocks/pebbles 19720 and the tekst I believe 19347 with Stazon Black/
step 4: colour the rocks with colouring pencils.


warmly Hermine

Used materials:
Bansky Balloon girl 19430
Line of rocks/Pebbles 19720
I believe 19347
Stazon black
Memento Luxe


Thursday, December 03, 2015

from the heart

Hi hermine here. Again with a photo step by step tutorial. As you probably know by know I love to incorporate the back of my cards into my design.


step 1: make a heart mask and put on the onfolded (but already scored in the middle) card

step 2 : stamp all around the heart except for the spot where you see the girl peeping out, for that see next photo. You can find the stamps I used at the end of this article. I used Stazon the stamp with. Sometimes you mask things, sometimes you can stamp on top of the previous stamp.

step 3: flip the mask over to one side for a minute and stamp the Banksy Swing Girl.

step 4: flip mask back and make a mask for the Banksy swing girl.

step 5: spray with 2 colours Dyllusion spray and remove mask.

step 6: hand draw the lines around the heart twice with a black fine liner and make some red accents with a red fine liner and scribble some zigzag stitches with a black fine liner.

step 7: make some highlights in the windows of the buildings with a white sharpie. Stamp with Stazon black the text She was a dreamer on the inside of the heart. Then fold the card.
 

Hope you like my tutorial. Have fun playing around.

Warmly Hermine

Used materials:

Tuesday, September 15, 2015

Create art every day

Hi Hermine here. This time I made a tutorial on how I made a pocket letter using a gelli plate and paint.


step 1 : cut a piece of paper in 9 sections and put some low tack masking tape on the back to keep them together

step 2 : put some acryllic paint on you gelli plate and put the paper on the gelli plate, do this several times with different colours

step 3 : take another colour and put a stencil onj top of the gelli plate, remove and put you paper onto the gelli plate. Then use the stencil itself to put on the paper, so you get a positive and negative print of the stencil.

step 4: stamp with Stazon black stitching lines 19642 on left and richt side and Sawtooth stitching lines 19643 on the bottom and top side

step 5: Before deciding where to put the images onto the pocketletter pieces I stamped them on transparant sheet so I can shuffle and decide to put which one on which place, see photo below.


step 6: put the transparant sheet on top of your background and see what look best, if your happy with it stamp the images onto the background.


step 7: I used Verdamark and black embossing powder to stamp the images, on 2 of the bottom ones I stamped: Whimsical honred boy 19688 and the text she was 19632  and an artist 19636 on each side.

step 8: on 4 of the pocketletters I stamped Whimsical lady on bench 19691 and the text create art every day 19637 on one of them.

step 9: remove the tape, make some white high lights with a sharpie and put then in the pockets


BONUS: if you keep a piece of paper by hand, so you can use the leftover paint from the gelli plate, and stencil you can create a second background and clean you gelli plate, stencil and brayer at the same time. Its looks great to start a new project. I haven't decide yet how to use it, make it into a journal page, cut them in four to make a series of cards or make another pocket letter. Time will tell.
 

Hope you like it.

Warmly Hermine
Used material: