Showing posts with label tree. Show all posts

Wednesday, November 09, 2022

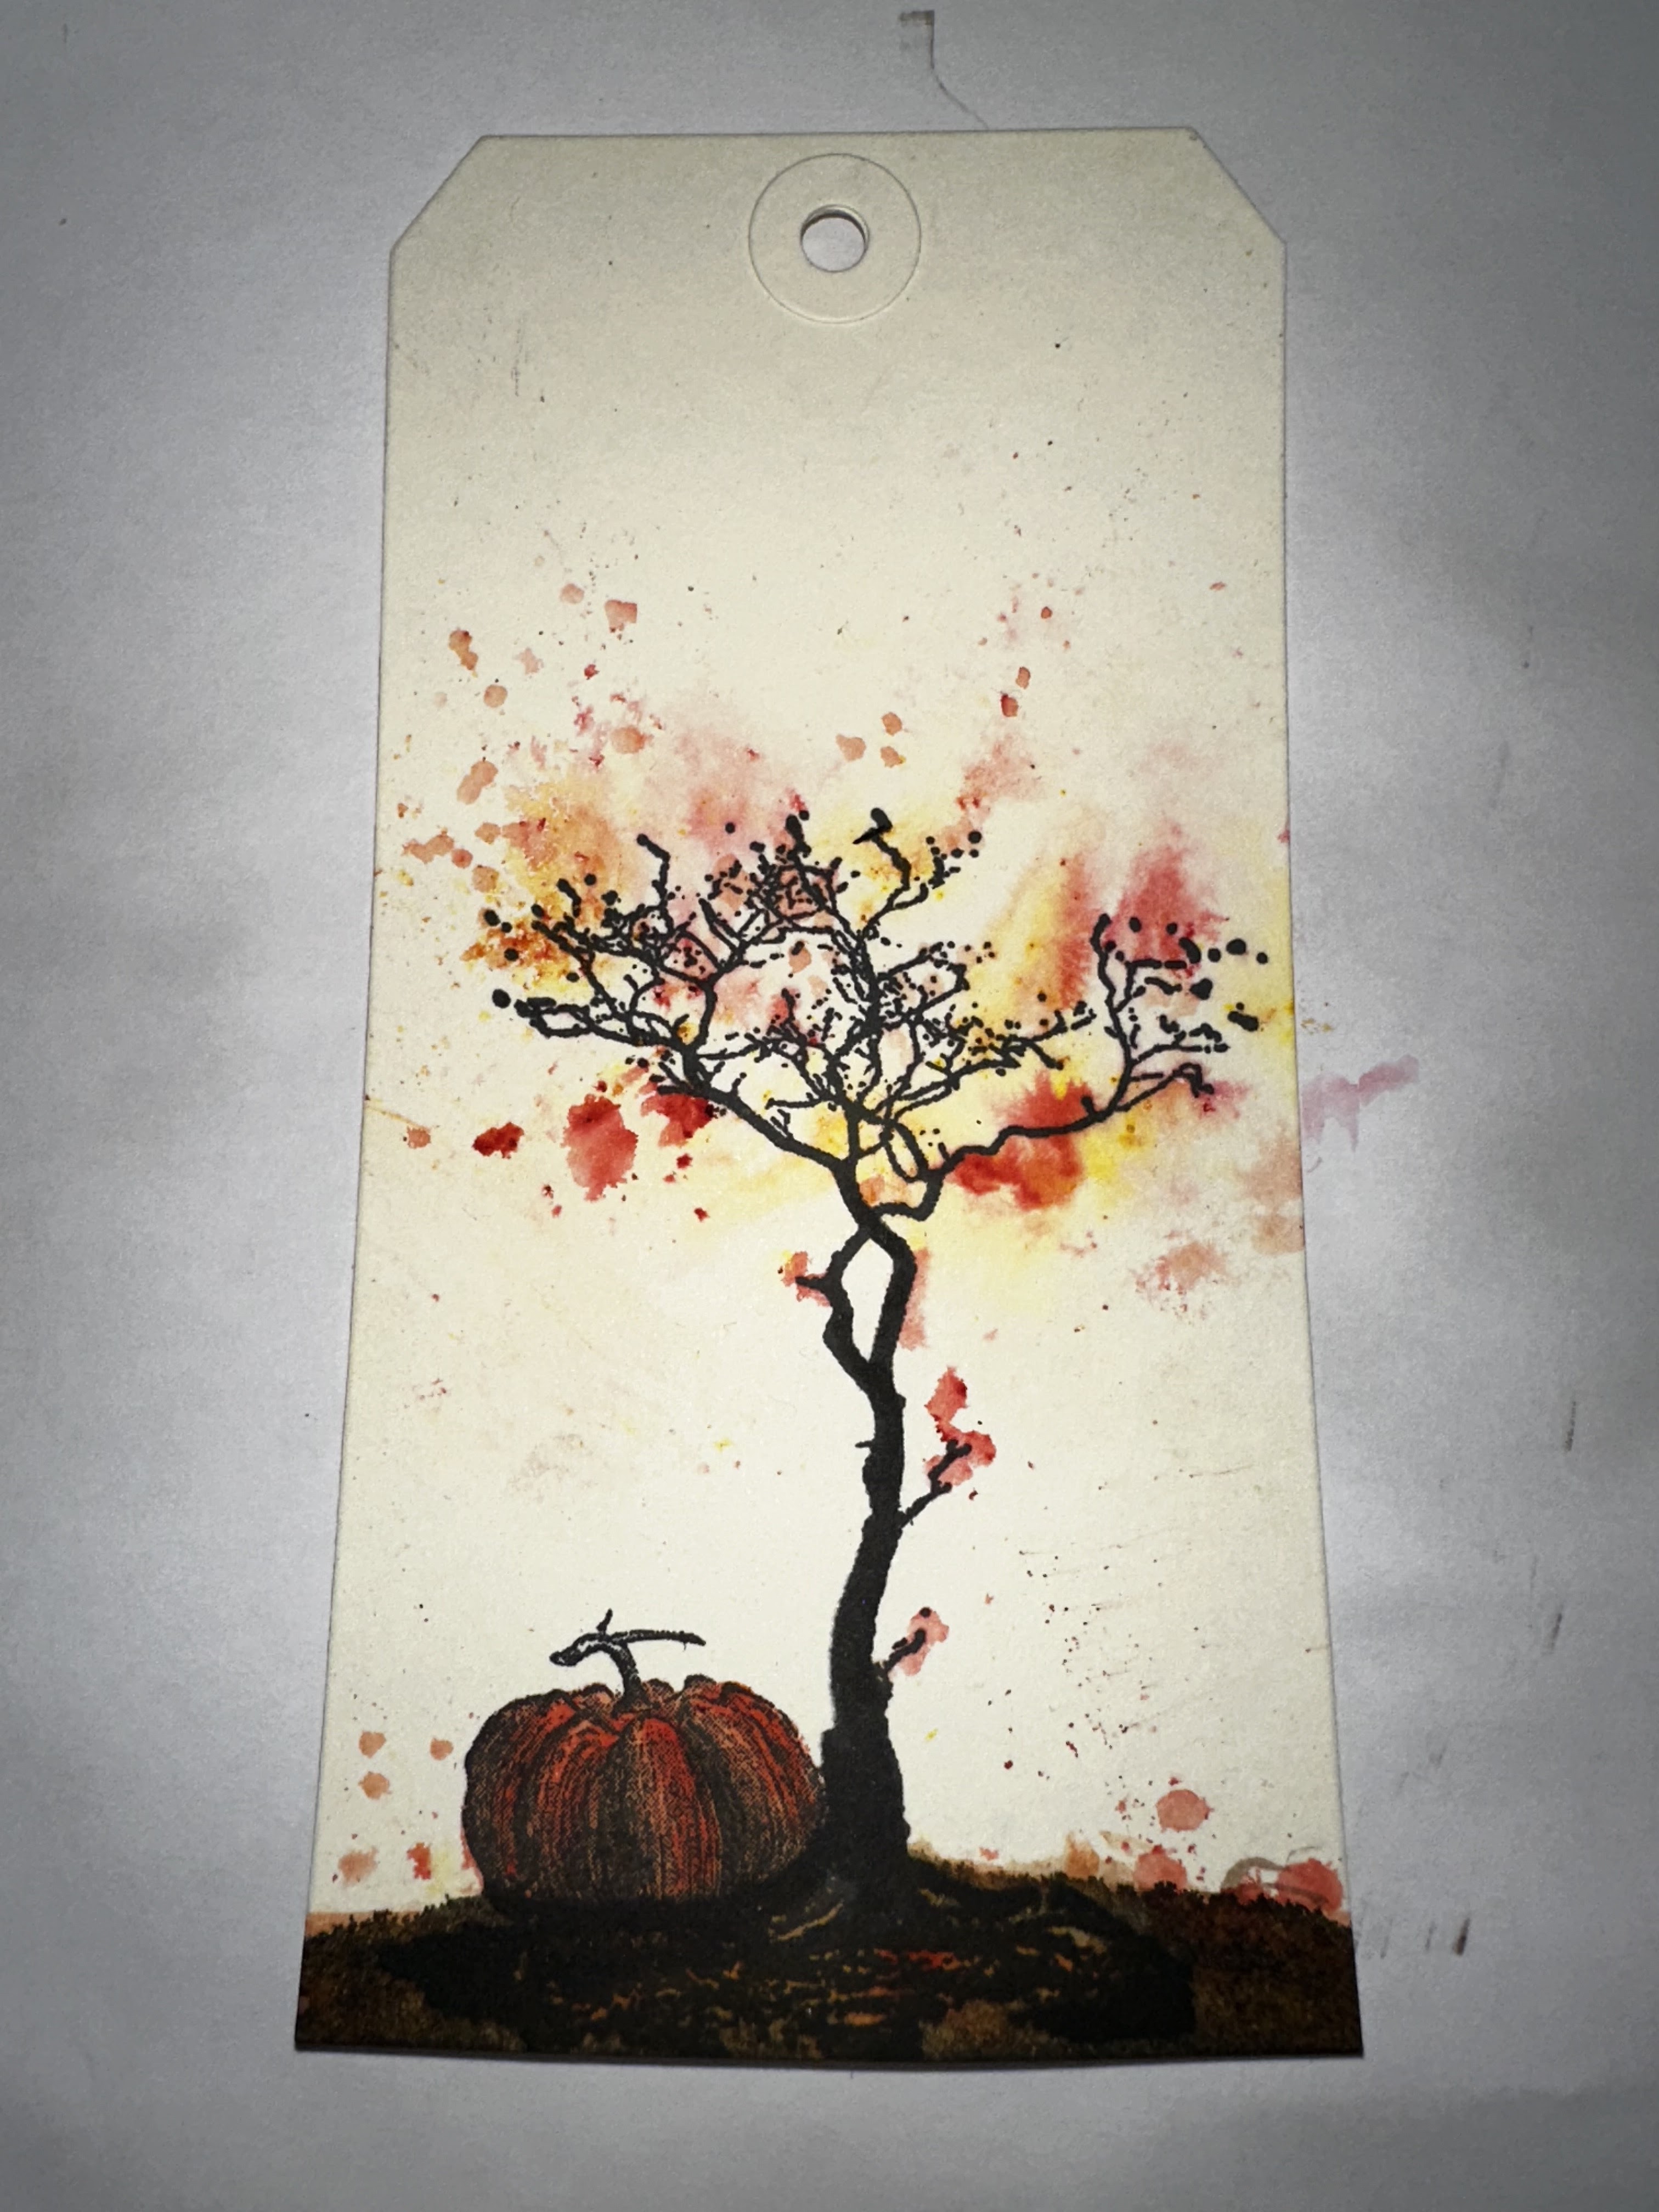
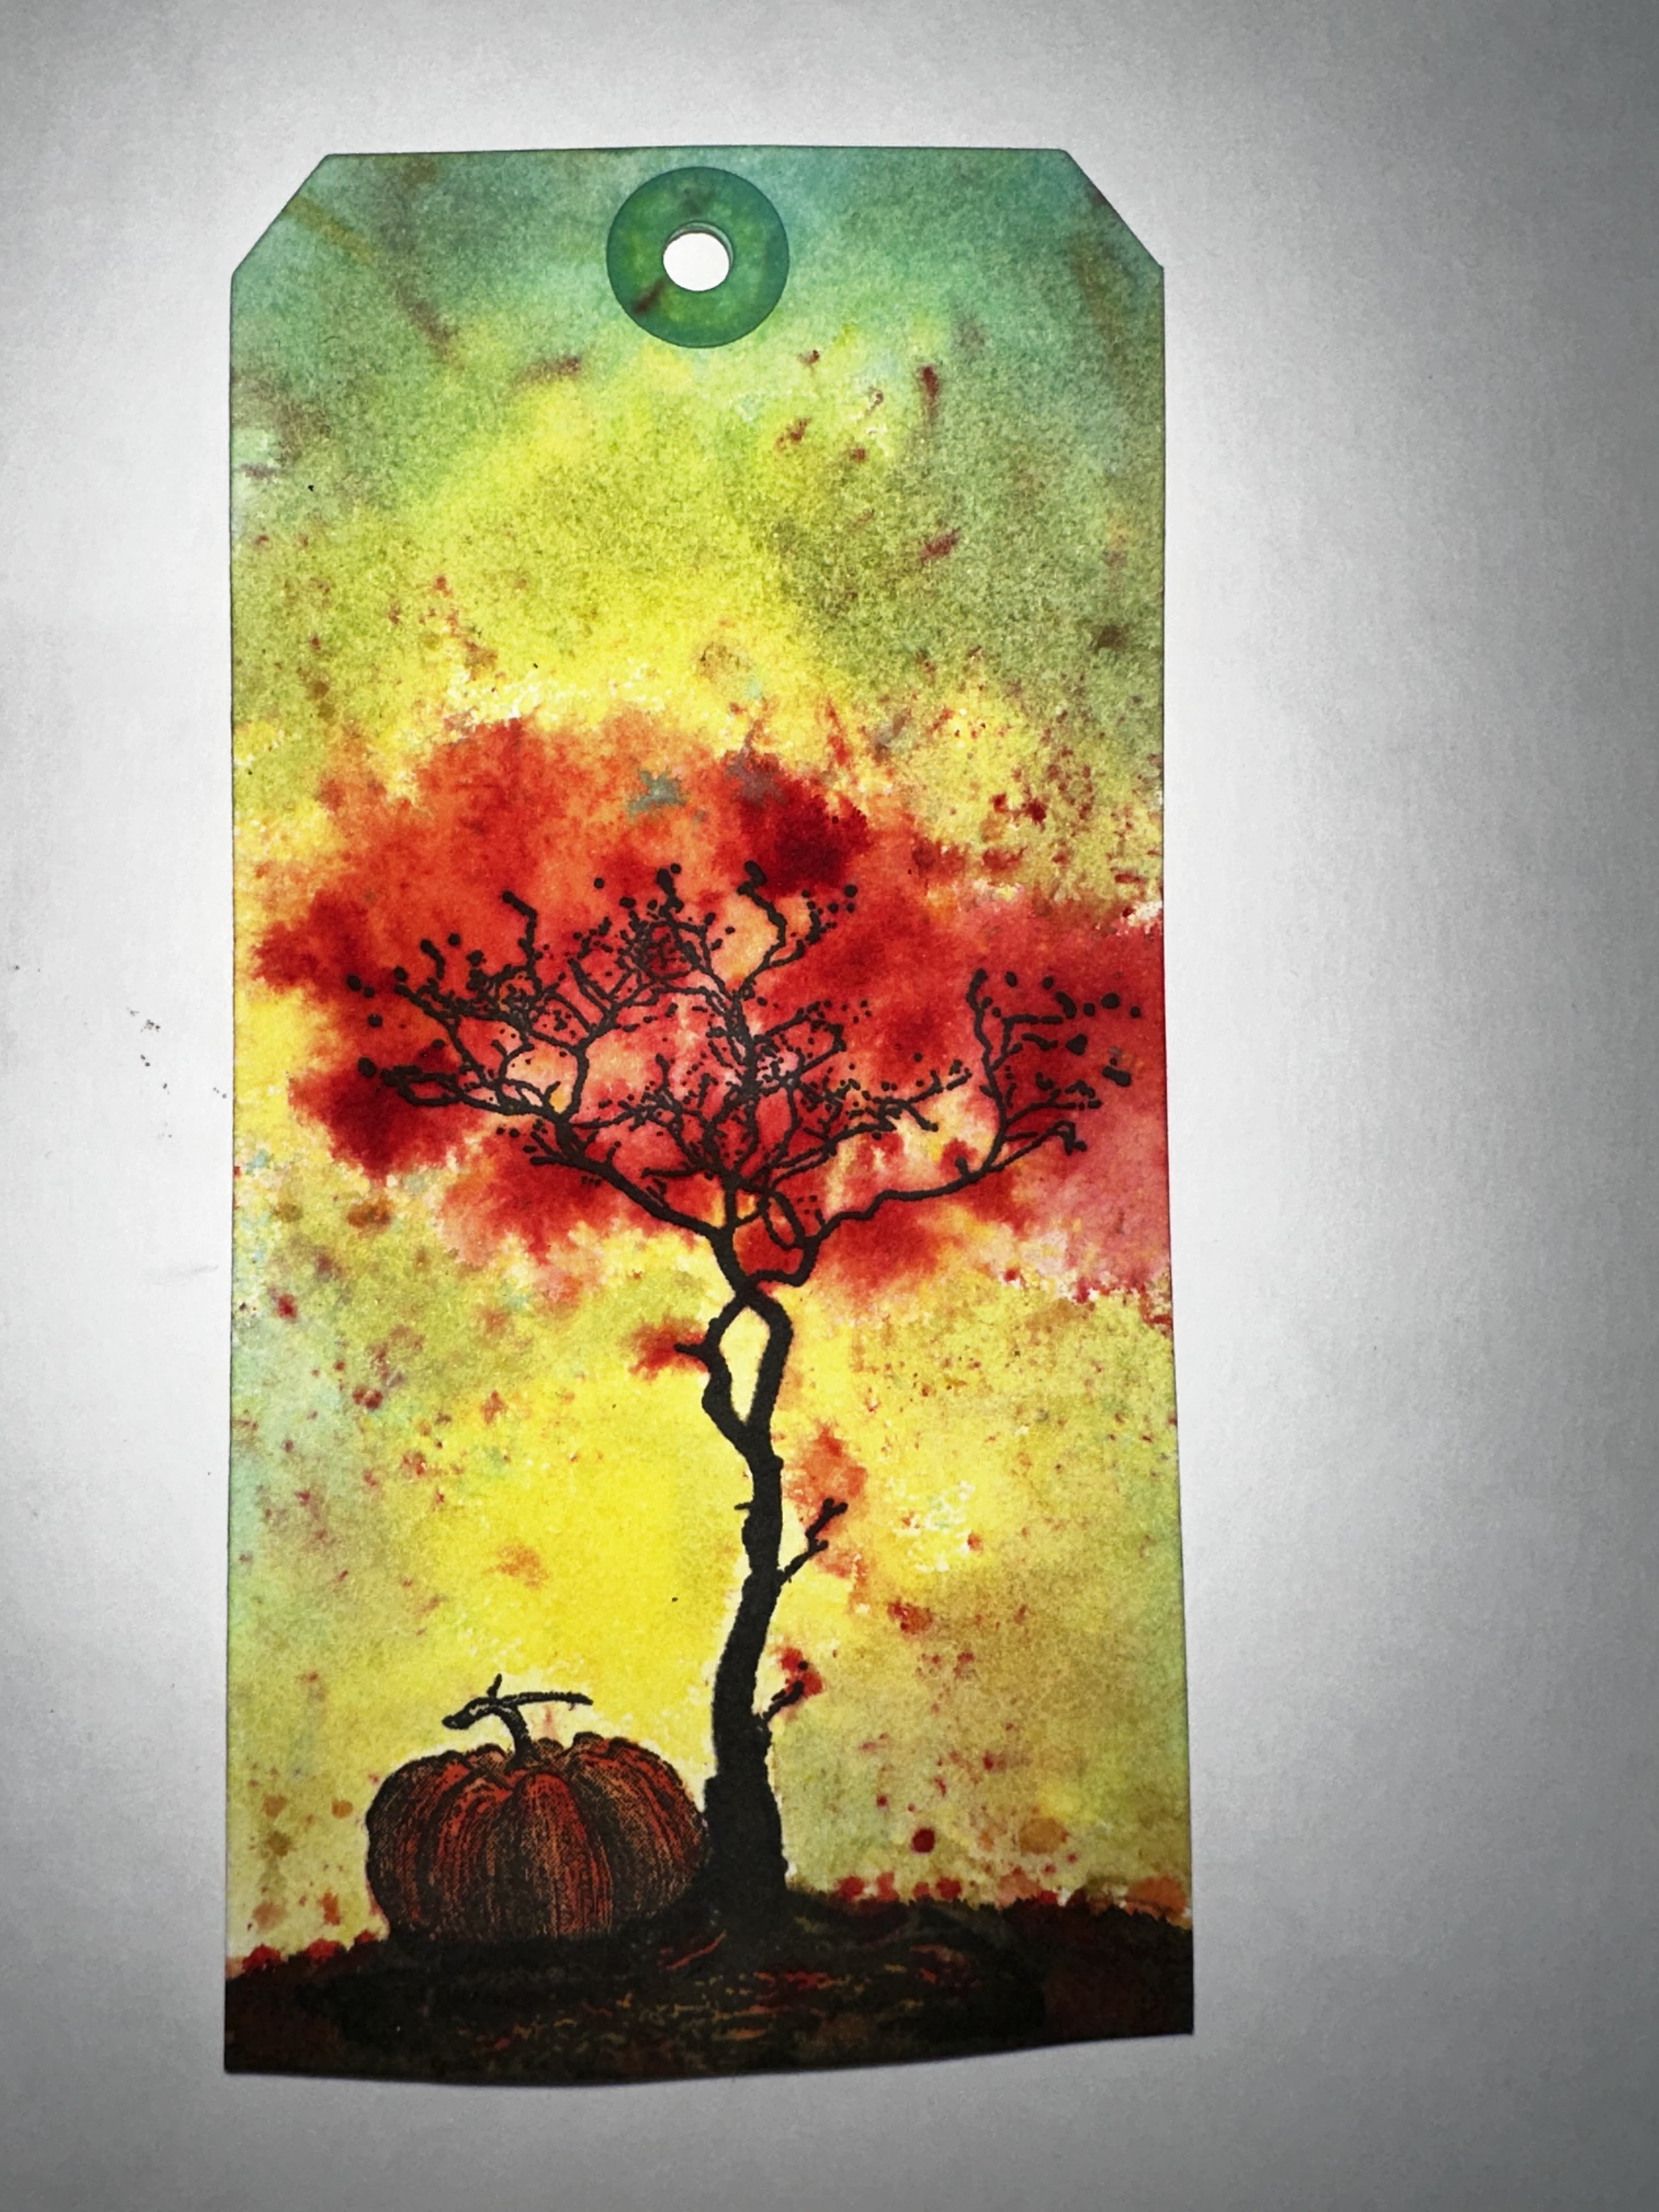
Fall Leaves by Tracy Blackwolf

Hello all!

for this weeks blog I did an art tag- for the last days of fall....well, before snow fly's  at least. 

For this art, I used Brushos watercolor  powders. There are other brands out there as well. So I stamped the tree with versaclaire black. Dry with heat tool. then add a small spritz of water.
Then add a very small amount of  red brusho powder around the crown of the tree, a bit on the ground. Then add in more colors as you like as well as more water as needed. Work in small amounts. The powders have a mind of their own and go places they want to go. I think it adds to the beauty.

Then I stamped the pumpkin next to the tree. I painted it in with the Brushos.
I also started to paint the ground. Using a light brown, blending in the bottom of the pumpkin.
Then I added in some black. I used black soot distress spray for that using a paint brush. Could have  left it alone at this point, but I wanted more "leaves". So I added more Brushos.
I used a wet brush to control the water on the powders a bit. Once I was happy with the look of the tree, I used my heat tool to dry the tag, stopping the blending process. once dry, I used Distress sprays and my paint brush to do the background. Spritz some color on, move it around with the brush if needed until happy with the result. Then dry carefully with heat tool. You could add a sentiment or leave as is.

That's it! Fun to play with. play and experiment- 
Until next time, stay arty!

Stamps Used:
Weathered Tree     19467
Pumpkin    18626

Other supplies:
Inks: Distress sprays: Squeezed lemonade, Salvaged patina, black soot
Brusho colors: OST. Red, Scarlet, Vermillion, Orange, Gamboge, Lt. Brown




Friday, June 01, 2018

June Challenge -- Tree of Life!

Well well well... WELCOME TO JUNE! 1/2 way through the year... man oh MAN! 2018 is flying by. I seriously think the years go by quicker the more they come.


Let's play with LIFE. Be inspired by nature, the tree of life, trees & roots, stars, star charts, the heavens & earth, above & below. Think tandem but opposite. Yin & Yang.

Oh MAN I cannot WAIT to see what you guys create for this challenge!

Meet us back here shortly for inspiration & our last challenge's winner!

Don't forget the rules:
-Create a new project based on our inspiration board (it has to be posted this month, but you can certainly link up to other challenges as well!)
-Use at least one (but certainly more if you want) Viva Las VegaStamps! rubber stamps
(We are now allowing competitors stamps to be on your work, but please make VLVS! the focus of the project, thank you.)
-Post it to your blog with a link back to us
-Upload to our linky using your direct blog post link (You may also upload via facebook, flickr or other gallery)
You could win a Project Spotlight post on our blog + some new rubber of course.
And visit us back here for inspiration!


Sunday, October 01, 2017

October CHALLENGE

Ready for some creepy stamping time?! We LOVE Halloween!


We're going a little more traditional this year with yellows & oranges, black & white. Also be inspired by anything that goes BUMP in the night, creepy crawly feelings, scary ladies & witches. You can draw inspiration from bats and things in flight, moons, trees, and other lights. GOOD LUCK!

Don't forget the rules:
-Create a new project based on our inspiration board (it has to be posted this month, but you can certainly link up to other challenges as well!)
-Use at least one (but certainly more if you want) Viva Las VegaStamps! rubber stamps
(We are now allowing competitors stamps to be on your work, but please make VLVS! the focus of the project, thank you.)
-Post it to your blog with a link back to us
-Upload to our linky using your direct blog post link (You may also upload via facebook, flickr or other gallery)
You could win a Project Spotlight post on our blog + some new rubber of course.
And visit us back here for inspiration!


Monday, May 30, 2016

Aflutter {Mail Art Monday with DeeDee}


Hiya folks :) DeeDee here today to round off the month with our last Mail Art Monday!


I created my own envelope after seeing Michele Kosciolek's version of Mail Art Monday. I also recorded all the steps via video and did a voice over for you. Please feel free to watch :) :


Not much writing from me today as most of the info is in the video.. but I did want to say I love how moody this envelope turned out even though I used pinks :) The addition of the gray, book text and stabilo all worked really well together to help tone down the brightness that would have occurred. AND those whimsical clouds are so fun (And come in two styles!) with the stabilo that I will DEFINITELY be doing that again.


I have frequently found myself stamping a lot of the new mixed media stamps on different vintage papers and I love it. It adds such great depth and character to them. Plus.. the vintage book texts look so great on artsy pieces.

Would you like to send us some Mail Art? Please feel free! I've included our address on this envelope so you can find it easily. ♥ we especially love artwork featuring our stamps.. we have TONS of display pieces all around our brick n mortar location.


Monday, March 21, 2016

More Manly Mail!!!

Hello Everyone!!
Tera Here...


Today I am here to share some more fun Mail Art for this months monthly inspiration.


I'm loving this months inspiration. I hope you are having as much fun as I am! I know some people struggle with making masculine themed art, but with these awesome stamps It's just so easy!!!


Stamps Used: 

Straggly Pine Trees 2 1/2 x 4 1/2


Saturday, August 01, 2015

August Challenge --

Thank you so much for all the beautiful entries in our July Challenge!

We are jumping into August with a black and white newspaper feeling!


We'd like to inspire you with words like BOLD, newspaper print and dictionary text, heritage, black, white, gray, monochrome, film reel, movies, black AND white, tire swings, business, suits, man, briefcase, tire swing, grungry, distressed, vignette, trees, pensive, lost in thought, contemplating and silhouettes.

Don't forget the rules:
-Create a new project based on our inspiration board
-Use at least one (but certainly more if you want) Viva Las VegaStamps! rubber stamps
(We are now allowing competitors stamps to be on your work, but please make VLVS! the focus of the project, thank you.)
-Post it to your blog with a link back to us
-Upload to our linky using your direct blog post link (You may also upload via facebook, flickr or other gallery)
You could win a Project Spotlight post on our blog + some new rubber of course.
And visit us back here for inspiration!


Wednesday, October 15, 2014

September Winners

Hi hi folks!! We've got a couple WINNERS to announce from our September Challenge!

By popular vote the talented Harikini is our winner!


She's used our  
and  

Harikini please feel free to use the following image on your blog as our voted winner!!


And our RANDOM winner is Carla.

Congrats both ladies, please email me @ deedee430@gmail.com with your shipping address to collect your rubber!

And don't forget to enter to win in our SPOOKY October Challenge.

Friday, September 19, 2014

GDT : Marilyn Hughes

Hello everyone!  Marilyn back with you today with a journal page I created.  I fell in love with one of the recent plate releases (Plate 1444) and just had to use the stamps.


Stamps Used:

Other Supplies:
Art Anthology Lemon Tart, Fiji, Kona & Basil Velvet
UmWow Studios Clouds & Star Confetti
Prima Stencil Crackle 12x12
Distress Paint Picket Fence & Brushed Pewter
Distress Ink Broken China
Distress Stickles Dry Glitter Clear Rock Candy
Micron Pen


To start off my journal page, I stamped the Clockface and Flock of Geese with black Archival ink directly onto the white page.  I then masked them off and since I was going for a cloudy, moonlit night-type of background, stenciled over them using a Crackle stencil with Broken China Distress Ink. Next I painted the Clockface with Lemon Tart Velvet (I wanted a glowing effect) and then traced each Roman numeral, the clock hands, and the geese with a Micron pen to make them darker and to help them stand out.  I then painted the clouds with Picket Fence Distress Paint and the starts with Brushed Pewter Distress Paint and adhered them to the page.  It's hard to see in the picture put while the paint on the clouds was still wet, I sprinkled on dry glitter (okay, I'm a glitter fiend & most of my projects have glitter on them).


At the bottom of the page I stamped the Weathered Tree in dark brown ink and then using a brown marker, added some scribbles to "ground it" to the page (it looked like it was floating in space). I then painted on Kona and Basil Velvets to give the impression of dirt and to add a horizon line. The quote is one I found in a book of quotes that really resonated with the stamps I had chosen. I used the small Scrabble ​Alphabet letters to stamp the saying onto white cardstock which I colored with the a Fiji Velvet and then outlined using my Micron pen followed by a yellow marker. Finally I added a line around the entire page in black and brown marker to give it a frame.


I've had a blast being a Guest Designer for VLVS! and want to thank DeeDee for giving me such an awesome opportunity!

Thursday, January 02, 2014

Challenge Inspiration -- POSTCARD

Hi Folks! :)

DeeDee here today bringing you a little inspiration for our Monthly Challenge!


I'm a big fan of our nature related stamps, as well as the water color background in the challenge bit. I brought both together in preparation for inspiring you today. I put together this postcard for a swap we recently hosted through our facebook group! Find us @ Viva Las VegaStamps! Groupies and join in our swaps, share all your VLVS! goods, and participate in contests!

The postcard base is Canson watercolor paper. I created the background using Distress Paint by Ranger and water. Just put some paint down on a kraft mat, spritz with water, and run your paper through it. Dry once with a heat gun, and repeat for an even more mottled effect. I have found the paint a bit hard to stamp on, especially when water is added, because there are different concentrates of paint spread around the paper. TIP : After you're done working in the background, spritz it with a fixative and you'll have an easier time getting a nice even dark stamp on top! 


The stamp along the bottom is the Tree Background, giving the illusion our bird is flying high above the trees. To embellish this area I've used some gesso through an UmWowStudio Mask, some silks acrylic glaze, a little May Arts Ribbon (447 series, 363 series, BY series,) some Gaffer Tape, a Prima Marketing Finding, paper clip, staples, and a sewing machine.


And here you can see the gorgeous Large Bird Flying, stamped in Archival Ink by Ranger. I also punched some random holes in the card for a bit of contrast using my crop-o-dile.

So! Be inspired and join the Monthly Challenge to win some goodies!

Friday, September 27, 2013

be an ADVENTURER - GDT Post by Chrissy Colon

We welcome back Chrissy Colon as our September Guest Designer! Check out her 1st post here. She's brought us a beautiful striking card today.
 
Chrissy says: I wanted to play around with my alcohol inks and this wonderful tree stamps.  I figured a sunset would provide a perfect backdrop for a stamping "adventure".

I simply applied my inks in an ombre fashion starting with the red then working toward the yellow.  They are super easy to blend.
I added some fabulous UmWowStudio chipboard chevrons for my finishing touch.
Stamps Used:
Be An Adventurer (http://www.vlvstamps.com/latest-releases-summer-2013/be-an-adventurer-3-4-x-2-1-4.html)
Leaves Blowing From Tree  (http://www.vlvstamps.com/latest-releases-summer-2013/leaves-blowing-from-tree-4-1-4-x-3-1-2.html)
Whimsical Cloud (http://www.vlvstamps.com/whimsical-cloud-1-x-2-1-2.html)

Thanks so much Chrissy!! You card is striking and we've really enjoyed having you as a guest designer this month! You're welcome back any time!!

Friday, March 29, 2013

Clearsnap + VLVS! Final Day!!

WOW! What a week jam packed with BEAUTIFUL inspiration!!

Here's a GIANT thank you to Clearsnap for partnering up with us :) Both design teams have presented some beautiful work using their inks and our stamps!


It's a sweet sadness that I get to share with you today.. the final day of our collaboration! At least it's one more chance to revel in beauty.

So one more time... I'm sharing THREE projects with you today!!

The first by Sandra Strait!


Supplies:
VLVS! Stamps

Art Is The Last 1 1/2 x 1 1/2

Charred Wood BackGround 4 1/2 x 5 3/4

Clearsnap Colorbox Inkpads
Archival dye-Gooseberry, Coral, Key Lime Pie
Fluid Chalk-Peach Pastel,,Aquamarine, Alabaster
Clearsnap Smooch Pearlized Accent Ink-Molasses, Green Apple
Other
5x7 Vellum Bristol paper, Golden Clear Granular gel medium, Ultra High Gloss Embossing Powder,

White gel pen, 3D foam dots, Palette knife, Ink blending tools--bullet and brush tips.
 To create this beauty she says "Recently I've been painting landscapes using inkpads for color.  When I was allowed to choose some products from Clearsnap for this blog hop, I went hunting through the catalog for just the right colors to match a photo that I had.


I blocked in all the colors by pouncing the inkpads where needed.  I dotted part of the Charred Wood stamp and embossed it to create ripples in the water (whichh doesn't show well in the scans). Then I loaded up a brush tip ink blending tool with Gooseberry and Aquamarine to draw the trees. I added more colors with the ink blending tools and when satisfied, I slathered on the granular gel medium.  When it was dry, I colored it with the molasses smooch, and added some Green Apple smooch for the leaves.  When you hold it up to the light the smooch glimmers as though the sun is shining through.  The last step was to stamp the 'Art is the last form of magic that exists' on a seperate piece of paper and adhere it with 3D foam dots.  Including drying time for the gel medium to dry, this took about 45 minutes to do."
Second we have Lyneen:


  Lyneen says "Spray Smooch Spritz on Kromcote Cardstock 5 1/2 x 8 1/2 for base background.  Use star shaped puncinella and ColorBox Raspberry Ink with finger dauber. Cut in half to make two cards.  Stamped images with ColorBox Chocolate Ink and hear embossed with VLVS! Ultra High Gloss Embossing Powder.  Highlight images with Smooch. Trim with May Arts fibers. "

She's used the following supplies:

Kromcote Cardstock
Miracle Tape
Ultra High Gloss Embossing Powder
Chevron Banner
Walkies for Otto
Large Flying Bird
Men in Balloon Basket


Clearsnap Products:
Smooch Spritz - Pink Sprinkles
Smooch - Mocha
Smooch - Silver Fox
Smooch - Gold Lame
ColorBox Chocolate Ink
ColorBox Raspberry Ink

And we're rounding off the week with Pinky!

 Pinky says these cards are easy peasy and that's great because they're sarcastic, witty, snarky, and so perfect for SO many of our closest friends! Whip a couple up and pop 'em in the mail!
Products Used:
Clearsnap Colorbox Inks
VLVS Plate 1404
Clear Scraps acrylic
Bazzill Cardstock
Miracle Tape 1/4"

1. Trim Acrylic to 4X6.
2. Trim Bazzill to 4X7.
3. Punch Bazzill edge.
4. Use bone folder to fold card at 6" mark.
5. Adhere to acrylic using Miracle Tape.
6. Using Colorbox ink pads, VLVS images and white cardstock. Graduate color on stamp and stamp onto white card stock.
Repeat with second word image.
7. Adhere stamped phrase to front of card.

Here's a great big THANK YOU to everyone who's participated this week and everyone who's shown up to be inspired.

Don't forget both Clearnsap and VLVS! are having giveaways.. comment all week long for a chance to win your choice of a plate o' rubber.. and enter Clearsna's rafflecopter giveaway for some of their favorite inks!!

Friday, October 26, 2012

Fan Feature + Free Shipping!!

Morning stampers!!

I thought it would be nice to share some Fan Features with you again, today.
We really love seeing our products in use and are so thrilled each and every time someone shares a project with us that shows off our wonderful stamps! So don't forget to share them on our facebook wall!

Today I'm sharing projects from TWO fans... 


Michele has done not only one, not only two.. but SIX Cards using our Butterfly Spotted.


and this tag

is by Gerrie, who won during our Halloween Blog Hop!! She put together this tag using our Tree Background and Giant Head Skeleton which can be found on plate1433.

Thanks for sharing, girls!!

Don't forget about our free shipping... FIVE DAYS LEFT!