Showing posts with label punchinella. Show all posts

Monday, October 24, 2022

KISSING SKELETONS AT HALLOWEEN by Fran Chalmers

Hi everyone!

Today I have made a Halloween tag! We don't really celebrate Halloween here much, but I love these two kissing skellies! 


First of all I cut my tag and then used inks and brushos on a gel plate to make the background.


I then stamped the outside edges in purple, and used a background stamp for some texture


I added some dripping blood at the top of the tag and embossed it


I stamped the skellies and used a white gel pen to emphasise the bones.  I used a stamping platform to make sure the image was black enough.


I coloured in some of the dots round the edge of the tab, and then blended purple and black ink round the edges.


I used washi tape to ground the skellies and lastly splattered orange posca pen onto the tag, and lastly added some ribbons.


Stamps Used:

Other Items Used:
Gel Press
Brushos in Orange and Purple 
Elements ink in Graphite
White gel pen
Orange Posca Pen
Purple Posca Pen
Distress inks in Black Soot and Villainous Potion
Versafine Clair inks in Fantasia,, Nocturn and Tulip Red
Clear Embossing Powder
Washi tape
Ribbons

See you next time!


Friday, March 13, 2020

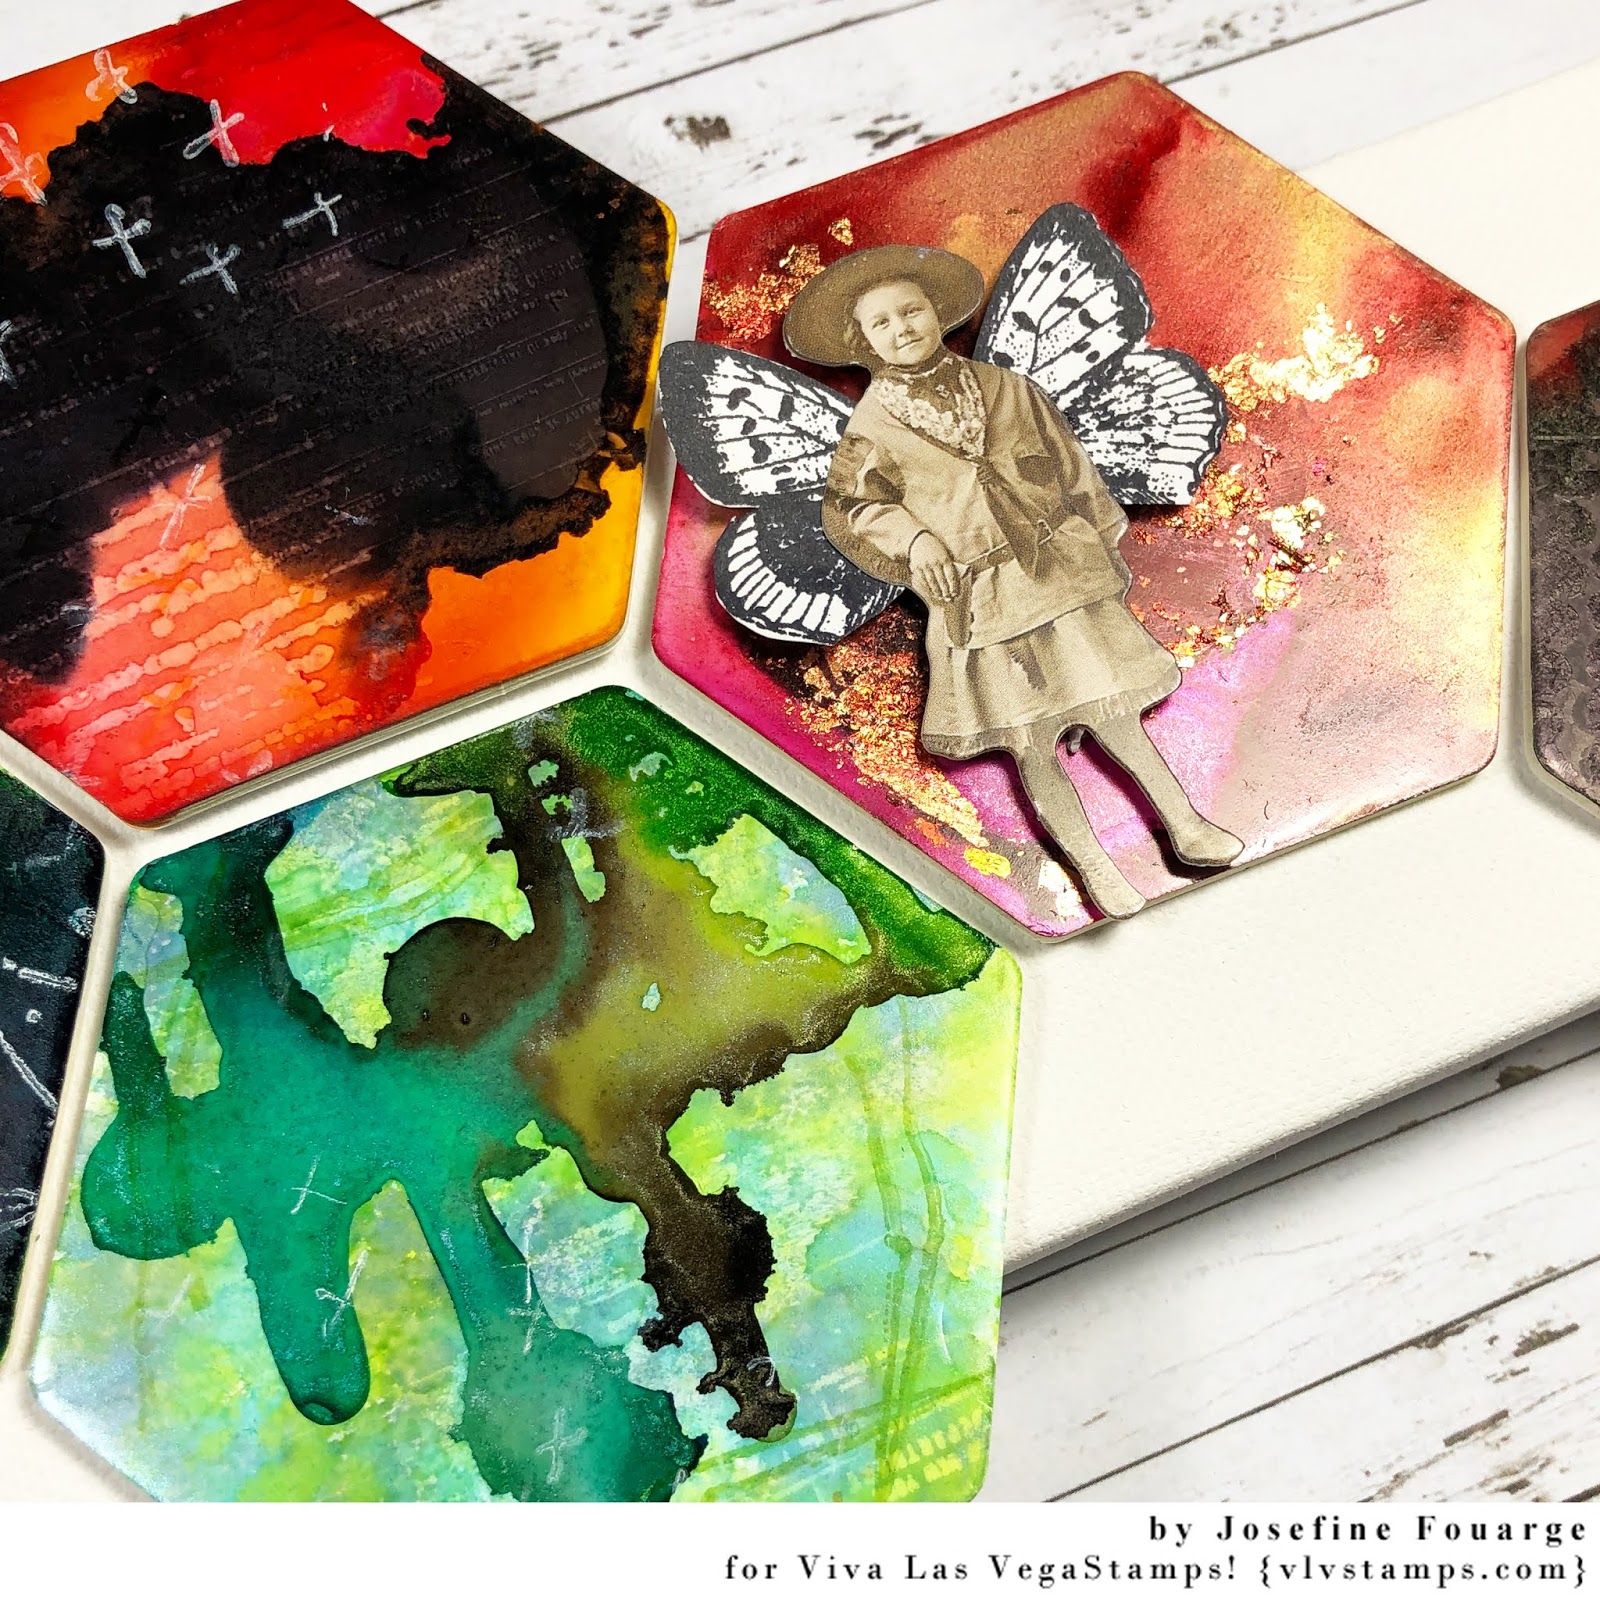
Shopping your stash - Alcohol Ink Art with Josefine

Hands up if you have craft supplies that you've bought a long time ago and then never really knew what to do with it. Probably not just one thing, but several, right? One of those items for me are alcohol inks. I like the effects but everytime when I attempted a project I never knew what to do with it. So, again I was looking through my random craft stash and grabbed my alcohol inks (and between us, I have quite a few bottles...). This time, I was determined to make something with it. Ha!


A few weeks back, I found small panels for the use with alcohol inks at my local Hobby Lobby. They were on sale and I decided that this is the sign for me to try it one more time. As you can imagine it took me a few more weeks till I then finally decided to use them. 

First panel, and I added a few drops of alcohol ink with the blender. The colors looked nice, but I was not really convinced. Texture was missing, so I went with the Police Tag and some Alcohol Lift ink. And voila, much better.


Of course, I had to experiment with a few layers of alcohol ink. You can see that my fingers started to switch colors too.


One more panel. Different color scheme now. But I'm starting to see why people like them.


I ended up with five different panels. All using a mix of alcohol inks and alcohol pearls. I guess, it is quite fun. But then again - what to do with them? 


So, I continued with the Alcohol Lift ink, but a different pattern. The Punchinella/ Sequin border looked really nice.


For whatever reason it took some time for all that ink to dry, so while waiting, I stamped the Pair of butterfly wings onto a scrap piece of paper, fuzzy cut it out and adhered it behind a paper doll. At this time, I wasn't sure what to do with it.


I actually let the alcohol panels sit over night and continued with some more texture the next day. Trying white pigment ink turned out to be very interesting. The partial scribble adds a fun feeling to it.


Adding one more item from my "lost craft stash" - glow in the dark embossing powder. By now, I knew that I wanted to create a cohesive piece with these 5 art panels, so one had to have a sentiment on it. Since I had the paper doll ready to go, I thought this "you are beautiful" sentiment works well.


A few more extras, like this stitching lines on the border of two of the pieces and some cross marks using colored archival ink and white pigment ink interchangeably. 


And at the end, I adhered them to a small, long canvas. As you can see, I added a bit of foil to one of the alcohol inked panels. I did that while it was still wet. Just a bit more glimmer, that's all :)


Here you can see in a bit more detail the dimension that the different stamp techniques added - a mix of lift ink and stamping on top with colored and white ink.


And of course, the glow in the dark sentiment. Pretty neat.


Thanks so much for stopping by. I hope you enjoyed my little experiment using craft supplies that are usually hidden somewhere in my craft room.

Stamps I used:


Saturday, August 10, 2019

You gotta fight - Art Journal Page || by Elisa Ablett


Hi everyone,

Elisa here from the design team for VLV Stamps with my latest design team inspiration for you, a very bright and funky art journal page.

I adore the Banksy Wall Singer stamp and decided I wanted to create something a little different with her. I was at a craft retreat recently and I pulled out my stash of stamps ready to create my latest design team projects and a friend of mine suggested using little pieces of paint chips!

I was intrigued by the idea and took it a bit further by expanding the paint chips to look as though they were coming from her mouth as she was singing....

Let's take a closer look - 


To create a multi coloured embossing effect can be quite tedious but the results are amazing, you just have to layer in lines of colour and clean up in between each colour!

Torn bits of coloured washi tape over the top of the Rows of Numbers stamp to create a grungy effect.

I also like to recycle old paper a fair bit so I used a small piece of old dictionary paper, fussy cut a circle out and stamped with punchinella-sequin-waste-border , Cross Marks background and Cross Stitch stamps to create a 'spotlight' or focal point for our main stamp - Banksy Wall Singer.


I created the lines of paint chips by brayering paint onto white cardstock, letting it dry then randomly cutting small pieces and patterns from each colour. Then the painstaking part..... adhering them to your page using glue. Then once dry, I added a border of doodling to the paint chip rainbow and then adhered the musical-notes over the top.


The quote are lyrics from a song by the Beastie Boys called - 
Fight for your Right and printed from the computer but I think it would make an awesome stamp.

Thanks for stopping by the blog today, make sure you leave me some love 
💙💚💛💜

Hugs 

Elisa xx

Stamps used:


Other materials used:

Art by Marlene Art Journal
Black Gesso
Colour Blast Embossing Powders
Versafine Ink
Washi Tape
Decoart paint
Dictionary Paper
White Posca Paint Pen


Monday, May 06, 2019

Whimsical Snail Mail

Hello Crafty Friends!
Happy Mail Art Monday!


Today I want to share a fun and whimsical envelope for mail art Monday.


Stamps Used:

I started with an A2 envelope, and began by stamping the whimsical snail in black memento ink. I then masked him off, and stamped the punchinella/sequin waste along the bottom in Mowed Lawn- Distress Oxide ink. 


Next, I stamped my creepy creature sitting.  I used a mask to create an address box.  Last, I stamped doodle circle on the boarder. 


I used various alcohol based markers to color my base images, then I masked everything off. 


With everything masked off, I used salty ocean- distress ink to color the background. I used more salty ocean ink and mowed lawn distress oxide ink, through Tim Holtz layering stencils. 


I hope you enjoy this fun little envelope!


Monday, April 22, 2019

"Love.Repeat" Art Journal Page | Sue Plumb


Hi everyone!
Sue Plumb here with my latest design team project for you. Today I have a mixed media art journal page to share that I created using a variety of stamps, inks, and assorted collage materials. This piece was inspired by a gorgeous art journal page shared last month by Jenn Engle. (You can see Jenn's page HERE) I really loved the balance between colour and white space on Jenn's page and wanted to create something similar - but with my own twist, of course.


I was working in my 9x6" Jane Davenport journal for this one (it has watercolour paper pages and takes wet media fairly well with no bleed through). I started by putting down multiple layers of Colour Blast Colour Artist Ink; drying between each one with a heat gun to get the "hard" water lines.


Once I had the colour down, I began adding some structure. I started with the Punchinella/Sequin Waste Border; which I stamped vertically using black Staz On ink.


Next, I used the Double Coffee Rings stamp with 'Mowed Lawn' Distress Oxide; stamping it several times over the top. 


I then used the Cross Marks Background with black Staz On to add some marks around the edges of the colour.


Now it was time to add some texture to my page. I used small torn pieces of washi tape and some snippets of punchinella.


I also added a piece of paper doily, some plasterer's tape, and some frayed gauze - all layered in the central focal point of the page.


I then stamped out the focal image for my page using the Squiggle Heart stamp and Staz On ink onto some white cardstock and fussy cut around it. I used a shimmery watercolour paint to colour the heart before sticking it down onto the page.


To finish off, I stamped the sentiment Love.Repeat a few times and then splattered a little bit of blue ink around the edges.


I was really happy with how this page came out - thank you Jenn for the inspiration!


That's all from me today, thanks for stopping by. I hope I have inspired you to get inky too!

Stamps used:
Punchinella/Sequin Waste Border
Double Coffee Rings
Cross Marks Background
Squiggle Heart
Love.Repeat

Other materials:
- Jane Davenport art journal
- Colour Blast Colour Artist Inks
- Tsukineko Staz On ink
- Ranger Distress Oxide
- Colour Blast Colour Shimmer Cube
- Assorted collage materials (as listed in post above)