Showing posts with label scribble circle. Show all posts

Thursday, August 27, 2020

Procraftinate - Quick ATCs

 Hey everyone,

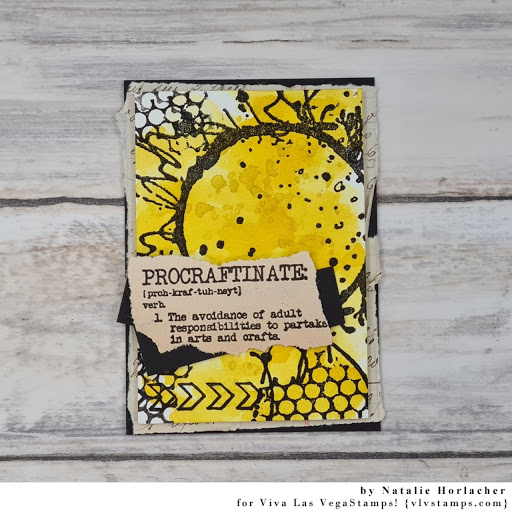
you don't always have to spend endless hours on the crafting table to create something beautiful. So, even if you are quite busy, just take yourself a little time, craft and relax. Today's project is a set of four artist trading cards that I created in less than an hour.


The base layer is just black cardstock. The middle layer is some old paper from my stash, torn to the size a little bit smaller than the base.

Anf for the top layer I mixed four colors of Brushos with water and added them to a piece of watercolor paper. I just used one color for each card, but you can achive some cool effects by just adding layers with that one color.

 
I added a bunch of mixed media stamps and used foam tape to adhere it to the card base.
Now I just needed to add a quote and chose the "procraftinate" definition, stamped on some of the old paper to coordinate with the middle layer. I also added some pieces of the black cardstock that I had left behind the quote.

Hope you found some inspiration with my ATCs.


Stamps used:
Scribble Circle (20166)
Punchinella/Sequin Waste Border (20161)

Row of Chevrons (19829)

Doodle Dots (19827)
Procraftinate (19638)

Other material:
- black cardstock
- vintage book and ledger paper
- Canson watercolor paper
- Brushos (turquoise, violet, lemon, emerald green)
- Versafine Ink Pad (onyx black)
- foam tape


See you soon!


Thursday, July 23, 2020

A Tag and Train


Tag You're It!

Today I want to share some tag love with you!

I just love creating vintage grungy tags!


Stamps Used:


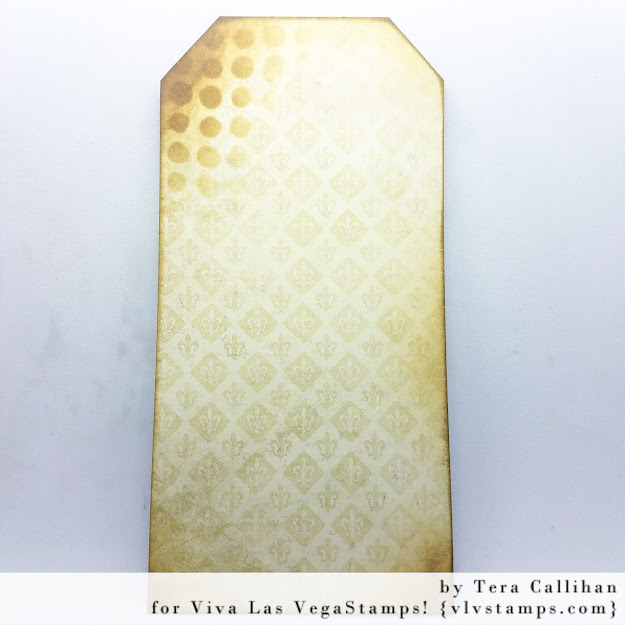
I chose to start with some scrapbook paper I had left over from a project. I created a 3x6 in tag and used various brown distress inks to ink the edges and add a bit of color through a Tim Holtz layering stencil.


Using Archival ink, I then stamped my row of numbers and my scribble circle. 


To add visual interest I ripped up some scrap pieces of book pages then glued them down.  To make them pop, yet blend i used brown distress ink to watercolor around the edges.  I wanted this piece to be grungy, so added flicks of vintage photo and antique linen distress stain. 


To finish everything I mounted this tag on a piece of dark brown card-stock, and stitched around it.  I stamped my train on a separate piece of paper and inked it to match the tag.  When it was just like I wanted I added some string in the area of the scribble circle and glued the train down on pop-dots. 

The stickers and metal tab I used are both by Tim Holtz

Tuesday, May 12, 2020

Greeting cards with a little surprise by Josefine Fouarge

Hi everyone, there is a snarky theme over in the Viva Las VegaStamps! Facebook group and I couldn't resist. So, I made a few greeting cards with a twist - and I'll show you that at the end of the blog ;)


I recently had a surgery (no worries, nothing major) that kept me tied to the bed and I didn't have much energy for a couple of days. But I still wanted to craft and get a bit messy. So, I thought about a few techniques that require breaks in between anyway, to spread the energy over a couple of days.

I started by heat embossing my focal point onto a piece of watercolor paper using clear embossing powder.

Then I added just a bit of spray paint on top and let that sit over night. The next day, I also added a few extra splatters that also had to dry for a bit.

All together, I stamped three different images, heat embossed all three of them and then added a variety of sprays.

For the fourth card, I played with the clear embossing a bit by adding different colors of embossing powder on top. I kept the clear embossing powder all heated up and then sprinkled the other colors on top, melting them into the clear powder.

I then cut out the shape, stamped the Scribble Circle onto a new piece of card stock and adhered the woman on top.

At the end, I picked a few pieces of colored card stock and adhered all of it together. The main piece is 4x4 1/4; the colored card stock is 4 1/8 x 5 3/8 and the card base 4 1/4 x 5 1/2.

For the inside of the cards, I picked a variety of sentiments that hopefully create a smile on the recipients face.


Check out all the cards in close up:


All the stamps I used:


Thanks so much for stopping by! I hope you enjoyed my greeting cards with a little surprise inside :)

See you soon!


Saturday, April 11, 2020

What I want

Happy April..  
I know I'm a little late.. 
Late on April..
Late getting my post done..
just Late.. but I'm here now to share with you a little piece I recently finished...

"What I want"

 She's pretty funky...
she started out as an image transfer and I went from there.
I have used several stamps in different ways.
I stamped Row of Scribble Squares, Measuring Tape, and Waybill/Invoice stamps traditionally with Stazon Jet Black ink.
the Carved X's and Doodle Circle i stamped with white paint...
and the Scribble Circle i stamped and Embossed with White embossing powder.


Added some scraping of white and black paint, a dash of crackle, some stitching, finished with a little snarky comment, and called it a done. 
I love how grungy and full of attitude this piece is.

VLVS! used:
Measuring Tape (sku: 19565)
Doodle Circle (sku: 19823)
Carved X’s (sku: 20162)
Row of Scribble Squares (sku: 20164)
Scribble Circle (sku: 20166)
Waybill/invoice Background (sku: 19416)

Other materials used:
Magazine image
Liquitex Matt Gel Medium
Atelier Gesso: White, Black
Tim Holtz Ideaology: Snarky Words
Ranger: Weathered White embossing Powder
Viva Facetten-Lack crackle paste

Don't forget about April's challenge...
STRENGTH... 
holy shitballs aren't we all using every drop we have at the moment.
so why not challenge it and put it to paper.
Use a VLVS.
upload your piece with the #April20 for your chance to win a 
POUND OF RUBBER....


live with Respect.
Leanne 
xo

Friday, March 13, 2020

Shopping your stash - Alcohol Ink Art with Josefine

Hands up if you have craft supplies that you've bought a long time ago and then never really knew what to do with it. Probably not just one thing, but several, right? One of those items for me are alcohol inks. I like the effects but everytime when I attempted a project I never knew what to do with it. So, again I was looking through my random craft stash and grabbed my alcohol inks (and between us, I have quite a few bottles...). This time, I was determined to make something with it. Ha!


A few weeks back, I found small panels for the use with alcohol inks at my local Hobby Lobby. They were on sale and I decided that this is the sign for me to try it one more time. As you can imagine it took me a few more weeks till I then finally decided to use them. 

First panel, and I added a few drops of alcohol ink with the blender. The colors looked nice, but I was not really convinced. Texture was missing, so I went with the Police Tag and some Alcohol Lift ink. And voila, much better.


Of course, I had to experiment with a few layers of alcohol ink. You can see that my fingers started to switch colors too.


One more panel. Different color scheme now. But I'm starting to see why people like them.


I ended up with five different panels. All using a mix of alcohol inks and alcohol pearls. I guess, it is quite fun. But then again - what to do with them? 


So, I continued with the Alcohol Lift ink, but a different pattern. The Punchinella/ Sequin border looked really nice.


For whatever reason it took some time for all that ink to dry, so while waiting, I stamped the Pair of butterfly wings onto a scrap piece of paper, fuzzy cut it out and adhered it behind a paper doll. At this time, I wasn't sure what to do with it.


I actually let the alcohol panels sit over night and continued with some more texture the next day. Trying white pigment ink turned out to be very interesting. The partial scribble adds a fun feeling to it.


Adding one more item from my "lost craft stash" - glow in the dark embossing powder. By now, I knew that I wanted to create a cohesive piece with these 5 art panels, so one had to have a sentiment on it. Since I had the paper doll ready to go, I thought this "you are beautiful" sentiment works well.


A few more extras, like this stitching lines on the border of two of the pieces and some cross marks using colored archival ink and white pigment ink interchangeably. 


And at the end, I adhered them to a small, long canvas. As you can see, I added a bit of foil to one of the alcohol inked panels. I did that while it was still wet. Just a bit more glimmer, that's all :)


Here you can see in a bit more detail the dimension that the different stamp techniques added - a mix of lift ink and stamping on top with colored and white ink.


And of course, the glow in the dark sentiment. Pretty neat.


Thanks so much for stopping by. I hope you enjoyed my little experiment using craft supplies that are usually hidden somewhere in my craft room.

Stamps I used:


Tuesday, February 25, 2020

Clean and simple art journal pages with Josefine

Hi everyone! Can you believe it's the end of February already? So much to do and not enough time in the day. Does that happen to you? I'm in the middle of several projects at work, doing my MBA, life in general - sometimes there is just not enough time to craft. But crafting is what keeps us sane, right? That's why I wanted to share some "clean and simple" (CAS) art journal pages with you that can be done in a few minutes. Just some fun, crafting, mess - and at the end, happiness.

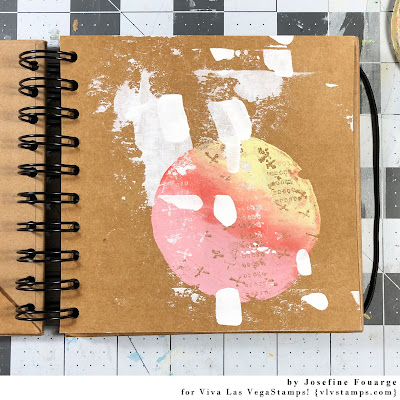
To do that, I found a small art journal, so it feels less daunting to start. A small page is easier to fill, at least that was the idea. I added just a bit of white paint as my first layer.


Next, I used my small, round Gel Press, added three little paint drops to it, and spread it out. Then I used the "Cross Marks" and "Row of Numbers" stamp to remove paint from the Gel Press. Because I didn't want to waste it, I stamped them onto the next page.

To incorporate the mono print a bit more into the background, I used my palette knife to scrape a bit more white paint on top of it.

I added a few additional marks using a white gel pen and then stamped "Witch with Scarf on Broom" on top of the page. 

For the sentiment, I stamped the "Black is the new Black" stamp onto a separate piece of paper, crumbled it up a bit, and then adhered it to the page.

And here is what I did with the second page. I also added a mono print with the same colors, but then stamped the "Scribbled Circle" on top in a slightly darker color.

For my focal image, I stamped "Death riding Pegasus" onto a piece of tissue paper and adhered it onto the page. Unfortunately, the tissue paper didn't disappear far enough into the background, so I had to get creative.

First, I added some white, watered-down, paint to simulate a cloud...

and then I added the "I'm not afraid" sentiment around it. Now it's barely noticeable.

Here are the two CAS art journal pages. I hope you enjoyed them and got some ideas for your quick projects when you have just a few minutes time.


Thanks for stopping by!


Stamps I used: