Showing posts with label scrapbooking. Show all posts

Thursday, December 27, 2018

Alice in Wonderland on Scrapbooking Layout | by Elina

Hi!
Hope you had a wonderful Christmas. My Christmas days were all about relaxing, spending time with my family, eating a lot of chocolate, and some crafting, too! :)

On Boxing Day I took out a pile of photos I had planned to use on scrapbooking layouts, chose some of my favorite patterned papers, and started playing. I had to start with a cute photo I had taken in Singapore summer '17; I knew my VLVS! 'Alice in Wonderland' stamps were going to match to it perfectly:


I started with stamping, coloring, and fuzzy cutting the stamped images:

The background I decided to keep quite simple; layers of patterned papers, splashes of white paint and black ink, and stamped patterns were all I needed.

The rabbit had too many fine details to cut out, so I re-stamped the image on the background, and glued the fuzzy-cut image on top:


Then it was all about placing the lovely images on the page! It was such a fun project to create.


My kids had a lot of fun when looking for the small Alice in Wonderland statues in the beautiful Flower Dome garden. I'm happy that this precious memory is now recorded

For this project I used the following VLVS! stamps:
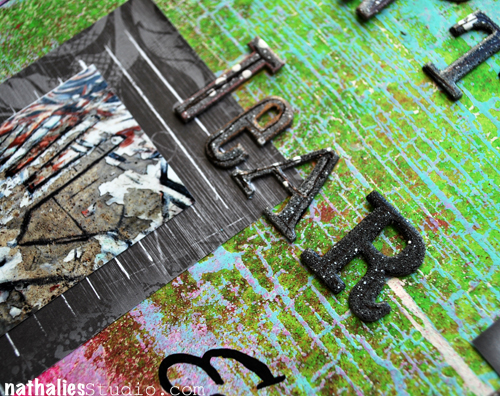
Queen Of Hearts 3 x 3
March Hare 2 3/4 x 3 1/4
TweedleDum And TweedleDee 2 3/4 x 3
I'm Late I'm Late 1 1/4 x 2
Mad Hatter 1 3/4 x 2 3/4
Pocket Watch 2 x 2 1/4
Cross Marks Background 2 1/2 x 3 3/4
Staple X 3/4 x 3/4
Three Staples 3/4 x 3/4

This was my last project for this year and for VLVS! design team. What a year it has been! I want to thank you all for your lovely comments and your heartfelt support.
In 2019, my VLVS! inspired projects can be viewed in my blog Elina's Arts And Crafts. Hoping to see you there!


Thursday, July 19, 2018

Travelers Notebook Pages | Sue Plumb


Hi everyone!
Sue Plumb here to share my latest design team project with you. Here in Australia, my children have just finished their winter school holidays; and as much as I loved spending extra time with them, it did make it more difficult to find time to create than usual. It also meant that every time I did create, my mini crafters were right there sharing my space. The solution was to work on a smaller scale, so I switched to working in a travelers notebook.

The beauty of working in the notebook meant I was able to create these pages with far less supplies than I would usually use for a traditional scrapbook layout. (It's also a great way to use up some of those phone photos that aren't the best quality, as they are printed in a smaller size.)

Here are a couple of pages I created documenting some daily moments...


The process for creating the pages was simple. I started by deciding where my photos were going to be placed and then just sat them on the page without sticking them down. I then tore some pieces of washi tape and added them to the page to provide some structure to work from, and also a splash of colour. Next, I chose a stamp as my focal image that supported the theme of my photos and began constructing the page. 


For the bike riding page I chose the Whimsical Wheeley Dog as my main stamped image, and She Spread Her Wings as the title. I added the Let Fear Be quote at the bottom of the page; and the I Do All My Own Stunts quote at the top of the page; then used the Row of Chevrons stamp to draw attention to the title and main photo.  


I used Miracle Tape to fix my photos my photos in place before adding my handwritten journalling with a felt pen. Watercolour pencils were used to add colour to the page, which were blended out with a water brush. To finish off, I used the Doodle Dots stamp and green ink to add some extra interest, and tie in further with the green spotted washi tape I had used. I also stamped the date.


For my second page, which was about our outing to see "Hotel Transylvania" at the movies, I followed the same process as for the previous page - first deciding where my photos would go, then adding the washi tape before moving onto the stamps. 

To tie in with one of the characters from the movie, I chose the Mummy stamp as my main focal image. I also stamped the Freaks stamp several times for the title of my page. I then looked for other stamps that supported my theme, choosing the Blood Dripping and Escape stamps to use in the top part of my page. To draw attention to the main focal image, I used the Row of Chevrons stamp.


For the bottom portion of my page, which was about our trip to McDonalds after the movie, I used the Oh My! and Biohazard stamps. (Not sure McDonalds would appreciate the humour in that one! haha)
I then followed the same process to finish as for the previous page - fixing my photos in place with Miracle Tape; adding my journalling; using watercolour pencils to add colour; then stamping the date and adding extra interest with the Doodle Dots stamp.

Thanks for stopping by today so I could share this with you.
Have you tried working in a travelers notebook before? If not, I would highly recommend giving it a go! There are no limits to what you can create - you can use it for documenting memories like I have here; for making lists; or even like a mini art journal. The scale is perfect for stamping, and I know they will be fun to look back through in future.
I hope I have inspired you to get inky too!


Stamps used: 
Mummy
Freaks
Escape
Oh My!

Other materials:
- White cardstock
- Washi tapes
- Staz On ink
- Ranger Archival ink
- Faber-Castell watercolour pencils
- Date stamp
- Felt pen

Monday, June 08, 2015

You Are My Home.

Hello!!  Mary here today with an altered hanger and a layout!

I've been in an organizing and beautifying mood lately, and I happened to notice that I have absolutely ZERO recent pictures of my family displayed in my home.  Tons of the kiddos, tons of my husband and I, but nothing of us all together.  So, I set out to create a layout and I wanted to display it in a  fun way.

I found a set of wooden hangers at my local thrift shop during my last trip, and instead of hoarding them in my closet, I thought they'd make a great display for my layout---with a little help.

I began by painting my hanger with a coat of white paint...


...and giving it a quick sanding when it was dry to give it a bit more texture.


I then stamped the Waybill/Invoice Background and the Grunge 5 repeatedly with StazOn.


Then, I added a little age with some Distress Ink.


As a final embellishment, I tied some of my favorite May Arts ribbon, lace and twine to the top of my hanger.


And here it is with the layout I've created!


If you look closely, you'll see more of the Waybill/Invoice Background and the Field Of Stars images...


Here's another look at the hanger.


And here's a closer look at the house.


The base of my was created in the same way as the hanger.


And now, to hang it on my wall.  How cool would an entire wall of layouts on hangers look?!!??  I may have my work cut out for me!

Thanks so much for joining me today.

xx Mary

Friday, March 15, 2013

March Guest Designer : NAT KALBACH!

I have to start out by thanking each and every person who has ever used VLVS! -- each month I'm so ecstatic to introduce another guest designer. They always provide us with the most beautiful work using our stamps. I also thank each and every customer who uses our stamps. I especially love it when they share what they've created with us :) And our Creative Team is no exception. They provide beautiful inspiration day after day. 

I think I got a little mushy because we have such amazing artwork that is continually shared with us using our stamps. And today is no exception.. 

I introduce to you (as if she NEEDS an introduction) NAT KALBACH.


"Hi, my name is Nathalie Kalbach. I live with my husband Jim and our spoiled rotten cat in Hamburg, Germany.
I discovered Scrapbooking and Mixed Media in 2004. I was always drawn to the more messy and painty side of Mixed Media and I love to mix and match colors and paint products. I think everyone can be creative and that creativity just has to be freed. Just like it had to be freed in me, since my professional life was one of a paralegal …I just quit my job 2 years ago to be a full time Mixed Media Artist.
My layered work is an explosion of texture, dimension and jewel tone colors. In my workshops I share my secrets for using paint and ink to reveal texture, give tips for embedding found objects and show how to unlock your personal creativity.
I have worked and still work with many different manufacturers like Prima Marketing, Scrapbook Adhesives by 3L, Derwent and Liquitex. I am a Prima Educator since 200." 

 
I am so thrilled to be a guest designer for Viva Las Vegas Stamps. I used the Charred Wood Background Stamp to create my own background for a grungy layout. The layout is about the East Side Gallery - a tiny remaining bit of the Berlin Wall that was painted by different artists in 1990 and now unfortunately is supposed to be torn down to make room for some luxury flats. 


I love to create my own backgrounds using stamps to emphasize photos or the feelings and emotions that go along with photos. For this background I had stamped the background with the awesome Charred Wood Back Ground Stamp and embossing powder and then used Wow Bonding Powder and Foil on top. This created a kind of resist. So when I sprayed soem Dylusion spray inks over the stamp image and texture of it got fully revealed. 
 
 
Other Suppliess used:
White Cardstock
WOW Bonding Powder
WOW Foil
Versamark
Ranger's Dylusions Spray Inks
Liquitex Professional Spray Paints
Heidi Swapp Chipboard Letters
Rose Moka Journaling Cards
Posca Marker
Zig Journaling Pen


Huge hugs
nat

Monday, February 18, 2013

I'm Not Weird.....

Good morning Viva Las VegaStamps friends!!
Pinky here today with a fun project to share!

So, what do a mustache stamp, triangle banner stamp, 
and an "I'm not weird. I'm just gifted" stamp have in common?


 Ok nothing I know.....except that they go really
 well together on this fun little layout! 
When I tell you that Viva Las VegaStamps makes a stamp for every occasion
I really do mean it! Even for my warped little life!

Raising 3 amazing boys can be a laugh a minute and when I saw this mustache
paper from Bella BLVD I just HAD to dig into my VLVS stamp stash
and grab the Mustache stamp, and use it for my layout!

You know stamping is especially fun on 6X6 layouts, they are a great
gateway into stamping on full size layouts. 

I definitely used my handy dandy Miracle Tape- it is amazing! You need to try it. 
To create this layout you just need to:
Trim layout base to 6X6"
Trim out mustache paper to 4.5X5.5"
Trim out extra paper to 5X2.6"
Adhere papers using Miracle Tape
Adhere photo (2.5X3") using same Miracle Tape. 
Stamp VLVS Mini Handlebar Mustache onto paper in brown ink
Trim out mustache using scissors
Stamp VLVS Triangle Banner Stamp using same brown ink
Trim out using scissors
Stamp VLVS I'm Not Weird  using same brown ink onto cream paper
Trim out in shape of banner
Apply stamped images onto layout using foam pop dots
Add title! 
That's it! So adorable and a memory for the books! 

I hope you enjoyed today's post! 

 Supplies Used:
VLVS Triangle Banner Stamp 1X2 Item 19043 Plate 918
VLVS I'm Not Weird 3/4X1 1/4" Item 16338 Plate 1302
VLVS Mini Handlebar Mustache 3/4 X 1 1/4 Item 18806 Plate 1423
Miracle Tape
Patterned Paper
Clearsnap Truffle Ink
Westcott Scissors
American Craft Thickers
Mister Huey's Mister

Monday, February 04, 2013

Don't Be Afraid To Stamp A Scrapbook!

Good morning VLVS friends!

Pinky here today with a fun stamped project....a LAYOUT!
The number one thing I hear from my friends about stamping is 
"Oh I don't make cards so I don't stamp" but I am here to tell you that
it is amazing to stamp on a layout!

I LOVE LOVE LOVE being able to create my own images/die cuts 
and really personalize my scrapbook pages! 
Here I simply used this amazing (and new) "Be Adorable" stamp- I stamped it
in bright cherry red ink onto a textures cardstock, and created my own pennant. 
This is just one of 1000 ways to create you own stamped images for a layout. 
 It really adds something to the layout that I would have a hard time creating
with just an alphabet sticker set or journaling. 
I encourage you to go give it a try today!
Come one all you scrapbookers! Let's play with stamps and get our fingers messy!

Happy Monday my friends, until next time!

American Crafts Ink
Scraptastic Kit Club Feb 2013 Kit

Friday, December 28, 2012

Layout x2 by Guest Designer Louise Nelson!

Today I bring the last post by Guest Designer Louise Nelson, and she has TWO layouts to share!!

First up is layout It Awaits:


And Louise says "For this layout and the next I have used the stamps to create subtle background patterns with clear embossing, which I have then highlighted with the use of water color paint and mist."
 

Materials List;
Viva Las Vegas Stamps - Line of Chevrons
12 x 12 grey board - Imaginarium Designs, Flower, alphas, bling - Prima, Paint - Hero Arts Water Colour Wheel, Cotton Thread, Top Boss tinted Embossing Ink, Embossing Powder - source unknown, Krylon Spray Gesso, Signo black gel pen


Second we have Two Hearts:

 
Materials list;
Viva Las VegaStamp! - Flying Bird Trio 3/4 x 1
12 x 12 grey board - Imaginarium Designs, Leaves, flowers, alphas, bling - Prima, Paint - Hero Arts Water Colour Wheel, Mist - Tattered Angels, Heart - Studio Calico, Cotton Thread, Staples
Top Boss tinted Embossing Ink, Embossing Powder - source unknown, Krylon Spray Gesso
 

A big round of applause to Louise for sharing her beautiful work with us this month!! Thank you so much!!!

Wednesday, September 12, 2012

A VLVS! Inspired Layout

Hey all :) DeeDee here filling in! Today I'm sharing the full reveal of the sneak peek I hinted with recently.

I've since worked up a different project for the swap so I can now share with you the full layout!

I really have a ridiculous huge love for rubber stamps and use them on e.v.e.r.y.t.h.i.n.g.! Including scrapbook pages :) 


Sometimes I frequent back to the same stamps... when they're good they're good right? Like
the Pen tips 
the Pointed pen tip, and

But sometimes I get creative and use a stamp I normally wouldn't... in this case I used the Arrow to create a chevron pattern to the right of my layout. I just laid down a piece of paper as a mask along the right edge. Then inked my stamp in archival black and stamped along the edge of the paper and onto my layout background!

Other supplies include: May Arts ribbon in ivory and black stripe. Recycled cardboard, Tim Holtz Tag and bookplate die, Basic Grey epoxy brad, Prima canvas resist flowers, Ranger Archival Ink, vintage buttons and pearls, paper clips, faux stamen, a sewing machine and black thread, Creative Imaginations Stencil, Luminarte Silks in Solar Gold, Tattered Angels Glimmer Mist in Roll top desk, MM eyelets, Gauche Alchemy Punchinella, Distress Inks in Black Soot, Walnut Stain, Vintage Photo.

Wednesday, May 30, 2012

Sew Much Fun Scrapbook Layout


 Each summer, for the last 3 summers, my son and I have attended the annual 4H sewing camp. Even though he is often the only boy at the camp, this is something he looks forward to doing every year with me. He takes to camp the 1930s Singer Featherweight that my mother took with her to college to sew and that I learned to sew on! It's a fabulous machine and Will has sewn award winning projects on it!  I knew immediately these Viva Las Vegastamps! were perfect for this layout! I hope you enjoy!
For this project you will need:

Distress ink pads 
[Walnut Stain, Frayed Burlap, Antique Linen & Old Paper]
Versamark
Bazzill white cardstock
dry soft brush and stipple brush
ribbon & hardware

The background of the layout was constructed on a piece of white card stock. I stippled on layers of the lighter Distress inks and then stamped the entire background with the machine and notions stamps with the Versamark pad. I dusted the stamped watermarks with Viva Las Vegastamps! Ultra High Gloss Embossing Powder and heat embossed the images. I then stipple over the tops of the images focusing attention on the edges with the darker ink. I spritzed the entire page with water to subdue the color and wiped the tops of the embosses images. I then dried the entire page with my heat tool--re-warming the embossed places so that they would "hold on" to dry mica powders. I then dusted the images with Terri Sproul Mixers and wiped off the excess residue.
Next I created a simple background my rubbing the Antique Linen directly onto a page. I swirled a bit of Walnut stain into the background creating a marbled look. After drying that piece completely, I stamped with the walnut ink the tape measure stamp on the skinnier strip and the spools and tape measure on the journal box. Both stamped pieces were immediately dusted with embossing powder and heat set. 
Finally I heavily edged the journal square with my ink and dusted it with embossing powder as well to give that extra aged look.
The matte behind the photo was created by simply adding Antique Linen and Frayed Burlap directly to the paper and Stippling some Walnut Stain around the edge for emphasis. The ribbon was colored with the distress inks and a ribbon slide was added to the top ribbon to highlight the word sewn.
Thank you for looking at my scrapbook page! I hope you enjoy it. For more scrapbooking ideas, visit my blog!