Sunday, November 10, 2013

A Wintery Tag + {SALE}

Did you know -- the first Sunday of every month we do a free demo at a local place called The Crafting Place? It's located on Russel -- and we always do some sort of new mixed media technique and some stamping! For November we delved into some wintery snowflake goodness.


The technique we explored this month was all about using Clear Embossing Powder (Like VLVS'S Ultra High Gloss) to emboss images (In this case the Small, Medium and Large snowflakes) into the background of our tag, creating a resist.  We then built up layers of Distress Stain in broken china and brushed pewter with a bit of water to create a wintery sky. Splatter a little stain and Glimmer Mist then.. Iron off those embossing powdered snowflakes to reveal the halo styled resisted goodness!


You can see the beautiful effect that the ironing does for the background. You could leave it embossed, but when you iron it off it creates a flat surface ready for more layers and relieves the stress of a broken image due to the mounded embossing powder.
We also used the brand new Xmas Silhouette Collage stamp in Archival Black by Ranger and finished the tag off with some washi tape by Gauche Alchemy, a hand drawn border using Sakura Of America's Archival Micron Pen and some May Arts Ribbon.


ALSO>>>>>

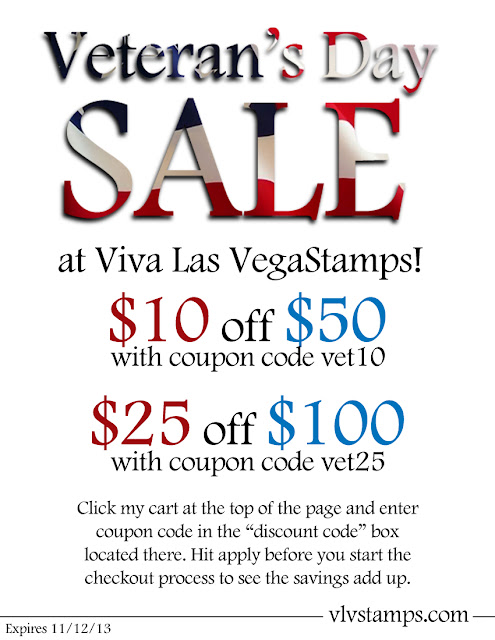
We've got one FANTABULOUS Sale going on in honor of Veteran's Day!

http://vlvstamps.com

Friday, November 08, 2013

October WINNER

It's time for our October Challenge winner!

And that winner is... GERDA!!! with this Halloween stunner:


Please email me @ deedee430@gmail with your shipping address to get some FREE RUBBER! YAY! :)

Want to win your own rubber? Get entered into our NOVEMBER CHALLENGE!

Thursday, November 07, 2013

Do you believe in fairies?

Hello, Nataliya here :)
I want to ask you, do you believe in fairies? I believe! Because one of them moved in my altered-book:


And this is just the beginning of our history!


My fairy dressed in a shiny attire, as it should to all the fairies:)


"Home" for fairies I made from 7Dots paper (Domestic Gooddes Collection). And here is the fairy -

Winged Girl Under Umbrella 2 x 3 3/4


Winged Girl Under Umbrella 2 x 3 3/4

Have a nice fairies day!

Wednesday, November 06, 2013

Be true

Hi guys.. Karen here with you again, Hope you have had a wonderful week.. Today It's  my turn to share with you my swap tag made using some amazing 7 Dots Studio .

I love all of their paper lines and find it so hard to pick which ones to use.  But for this one I've decided to use the reverse side of Deep Water from the 9th Wave collection.


- the colours in this line are just stunning!


I started off by covering my tag with the Deep Water paper.. I used the top left hand section to cover my tag so that I could get some of the more plain and the grungier sections of the paper on the one tag.
 
My next step was to ink up some VLVS Rubber...
 
 
Coffee Ring Stain 2 3/4 x 2 1/4
 
stamp with Distress Ink, I used both Walnut Stain and Black Soot at once to give it a bit depth. I then did the same with the Chicken Wire
 
Chicken Wire 3 3/4 x 4 1/2
 
 stamp, and randomly stamped both on the tag. I also stamped Be True
 
Be True 3/4 x 1 1/2
 
on a piece of the Deep water paper the same way to use in the ornate frame. The ornate frame has been painted with Antique Linen Distress crackle paint, and inked with a bit of black soot distress ink when dry.
 
The next thing I did was of course to sew around the edges with my trusty sewing machine.. To finish off I added in a fussy cut butterfly coloured with distress markers ,some wire and twine, a metal corner, and number and some gorgeous Star Confetti from UmWow Studio..


So don't forget to drop on by the 7 Dots Studio Blog for a visit!
 
 I'll see you a bit later in the month, Thanks so much for stopping by today..
 
Happy Stamping xxx


Tuesday, November 05, 2013

My a-MAZE-balls Hat!

amazeballs, title
 Happy November and welcome to our swap with 7 Dots Studio! It's Amy here today, to share a project with colors, Viva Las VegaStamps!, 7 Dots Studio papers, and textures I just love.
my amazeballs hat, FULL, ALLassiter For this project, I started with a page of paper from 7 Dots Studio's Dreamer collection, "Sweet Dreams.". Because the paper already has lovely texture, I grabbed my paints, added a patch of acrylic iridescent green and some splashes of pink (from Folk Art/Plaid), and some splashes of Walnut Distress stain, and black Mix'd Media Inx re-inker (Clearsnap). When the paint dried, I grabbed the Lace Background Stamp (I ordered mine unmounted, and cut them into individual strips), and layered them horizontally across the page....creating even more textural eye candy. I also stamped the background randomly and at different angles, using the French Writing background , Stars 2 x 2 1/4Bullet Hole, and Worn Clockface <===(my go to, on almost every project) Stamps.
layers paper and stamping When I finished my background, I began layering up 7 Dots Studio papers from the Messy Head, Domestic Goddess, and Dreamer collections. I added them in torn strips, and then layered on some stickers from the Domestic Goddess collection, as well.
feather close stamping When it came time to embellish, I used this gorgeous UmWowStudio feather, and stamped with Momento Ink in Tuxedo Black with just the hair portion of the New Age Lady With Hair stamp, and embossed with the Ultra High Gloss Embossing Powder....for some fun, natural, and wavy texture.
rose and flair I finished off my project with layers of embellishment, and a title worthy of the hand- crocheted hat my daughter had made for my birthday (the tail reaches to my waist). The a-MAZE-balls stamp was a perfect sentiment for the love of my warm and fuzzy hat, and formed the perfect title with alpha stickers from 7 Dots Studio's Domestic Goddess collection.
Thanks so much for stopping by and having a look at my project offering today! Keep your eye out for many lovely pieces of stamped art and 7 Dots Studio throughout the month!!
~Amy

Supplies Used:
Viva Las VegaStamps! (or found in the VLVS! Store): Lace Background,French Writing, Stars 2 x 2 1/4, Bullet Hole, Worn Clock Face, a-maze-balls, New Age Lady With Hair, Momento Ink (tuxedo black), Ultra High Gloss Embossing Powder, Miracle Tape.
7 Dots Studio:  collections: Dreamer, Domestic Goddess (stickers, alphas and papers), Messy Head. 
UmWowStudio:  Wild Flowers Flair; Chipboard: Contoured Feather, Gear Mash
Ink: Ranger (distress stain, walnut), Clearsnap, Tsukineko (momento).
Paint: Plaid/Folk Art
Washi Tape: Tim Holtz
Metal Embellishments: Tim Holtz, Bead Landing
Snaps, gold and silver jewelry cord, library card, tags--from my stash

Monday, November 04, 2013

Coloring with 7Dots Paper

Viva Las VegaStamps! is having a swap with 7Dots Studio for the whole month of November!  For my post I decided  that instead of using pencil, pen or paint, I'd color my stamped images with 7Dots paper!


Supplies
VLVS! Stamps Used:
Split Globe - Item 6505 Plate 617 
Worn Clockface - Item 19039 Plate 918
Washi Chevron Background - Item 19072 Plate 917

7Dots Studio 'Love is in the AirScrapbook Paper

Sakura of America Gellyroll Silver Metallic pen

Miracle Tape
Stillman & Birn Zeta Sketchbook
Adhesive Paper Drywall Tape
Golden Clear Granular Gel
Golden Micaceous Iron Oxide
Golden Fluid Acrylics-Hansa Yellow Medium, Transparent Red Oxide
Adirondack Paint Dabbers- Willow, Juniper, Terracotta
Black steel-tipped pen
Alphabet Stencil
Palette Knife

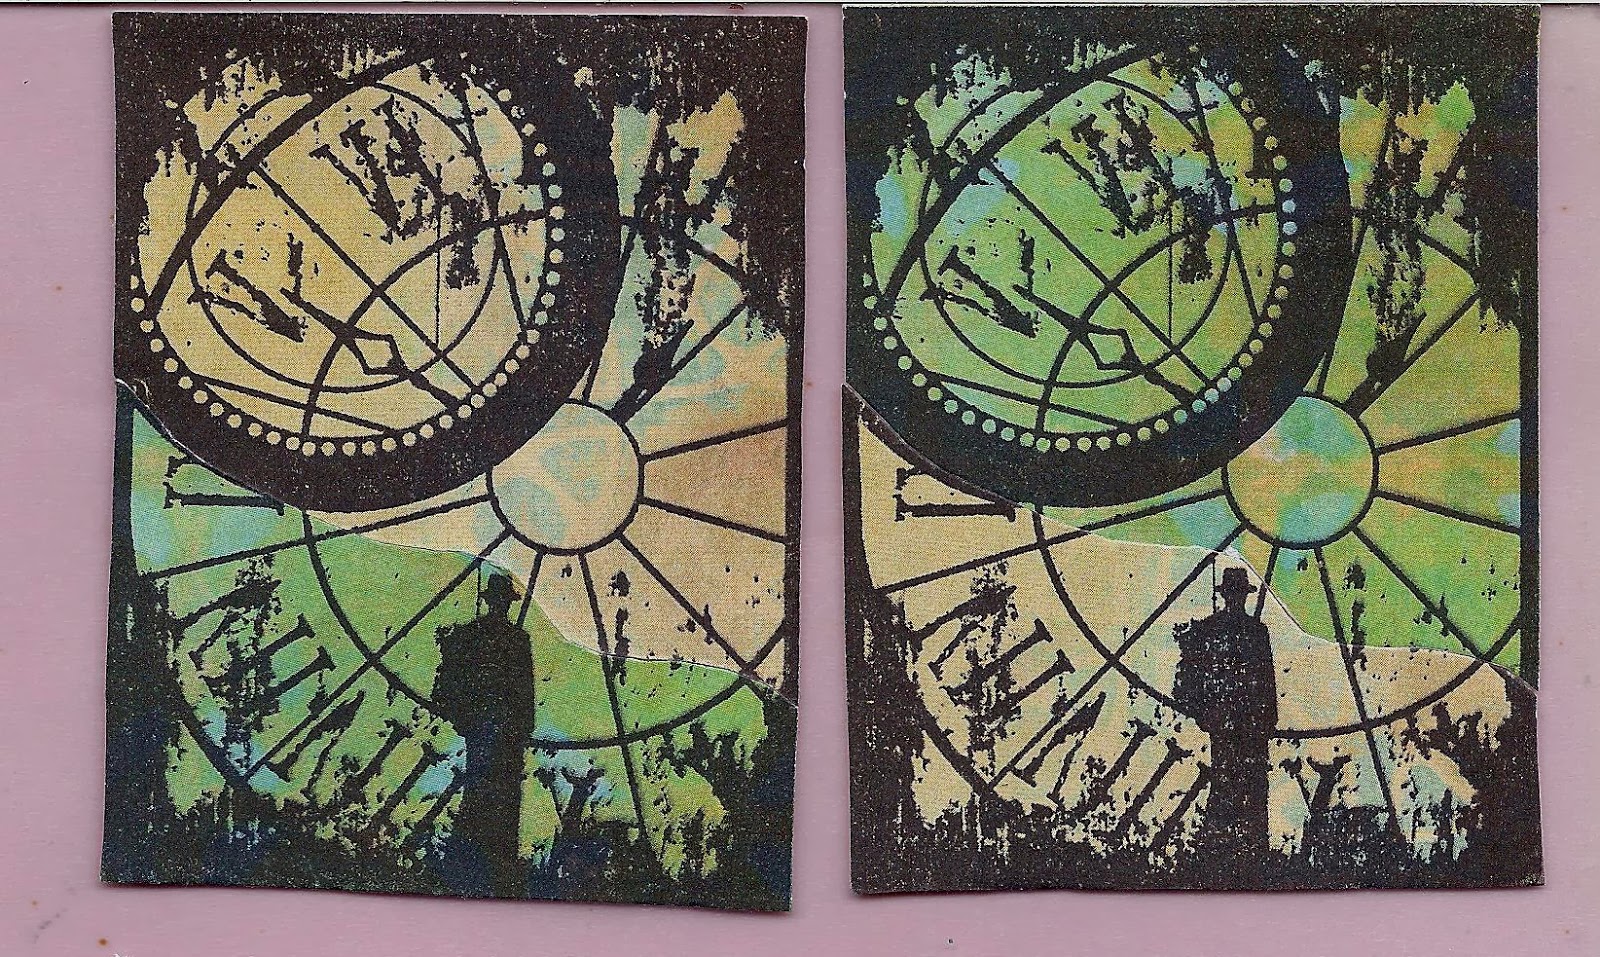
So what do I mean--coloring with paper?  It's paper-piecing, in essence.  I stamped the same image on two or three different sheets of  7Dots Studio scrapbook paper, and cut the images out.


Then I paperclip the two images together, making sure they are perfectly aligned, and cut them at an angle or with curving lines.  I take half from each color of paper, and tape them together.


I place Miracle Tape all along the back, leaving the backing on the tape until I'm ready to use the piece.


I end up with two embellishments with subtle, yet dramatic coloration. (I only used one of my Worn Clockface in this project, so I have one to use later). I repeated this with the other stamped images I'd done.  


For my globes, I stamped the image on three pieces of 7Dots Studio paper.

And while I was at it, I stamped some Christmas images onto 7Dots Studio 'The Queen's Heart' for later use.


For my art journal page, I created a background by painting at random with Micaceous Iron Oxide. I left much of the paper uncovered and I painted the spread with fluid acrylics -- in some areas, Hansa Yellow Medium and, in other areas, with Transparent Red Oxide.  I taped strips of drywall adhesive paper here and there.


I peeled the backing off the Miracle Tape and added my images.  I used an alphabet stencil to add my saying, using a steel-tipped pen, because Micaceous Iron Oxide is abrasive.  I went around the words with silver metallic gellyroll pen, and used it to add some doodling as well.


To add some texture, I scraped on some clear granular gel with a palette knife, and let it dry overnight.  I dabbed Willow and Juniper acrylic paint over the granular gel.

My last step was to go over the words again.  The scan doesn't really show it, but they appear to be incised into the paper.

I like this method of coloring.  Creating embellishments like this will be a nice project for days when I want to create but don't have much oomph.  It will be nice to have a collection of these stamped images for use whenever I need them!

Don't forget to check out the VLVS! November Challenge for a chance to win (plus it's fun!).

Thank you for stopping by, and I hope you've enjoyed sailing on Haunted Seas!For more of my work with Viva Las VegaStamps!, Amazing Mold Putty, zentangle-inspired art, and daily links to tangles, tutorials, and giveaways please visit my "Life Imitates Doodles" blog.   ~ Sandra Strait

Helpful Links: VLVS! Store for all your stamping needs; the  VLVS! Blog for new projects; VLVS! on  FaceBook,  Pinterest and Twitter

Sunday, November 03, 2013

A bitter sweet goodbye♥

I'd like you to take the time today, and help be wish a very heartfelt goodbye and good wish to one of our Design Team members.

It's with regret that we'll be losing Lea Cioci. 

She has some things coming up that will need her time and effort, and we wish her the best in those! 

She's been with our team for near 3 years, and will always be a part of the VLVS! Family. 

GOODBYE LEA!!! 

We'll finish out the term without her, but this means we'll have at least one spot open on the team for NEXT term -- which will start in January! So please keep an eye out for a design team call :).

Saturday, November 02, 2013

Inspiration November challenge - how to decorate a wine bottle

Hi Hermine here. This time is was my turn to make an inspiration piece for the november challenge. Down below a little tutorial on how to decorate a bottle, its an awesome way to make a present.

 
Used the colours to make this inspiration piece.  

 
The template for a wine bottle of 750 ml

 
First you use the template and make the holes for the eyelets already, this way if the lines disapeare when you colour it with inks or paints you still know where to carve your lines.

 
Colour your paper, I used Dylussions spray ink

 
Take a stencil and make the checkered part and stamp with white ink the washi grid background 19074 and the Blowing Dandallion with seeds 19048. Stamp with Stazon Black the Chevron Banner 19042 at the top.

 
Take a scrap piece of paper and stamp with Stazon Black Drink me 19289, Untill further notice 19172 and the Dancing Lady 19183. Colour them and cut out. Glue them on the background

 
Put the eyelets in and use some matching washi tape. At the right hand side I made a little hole and put a charm on it, they are meant to put around the stem of a glass so everyone knows which glass is from whom. Funny thing is that once you put it around the bottle and remove it again it keeps its shape.

 
A second sample with a champagne bottle, different colours and stamps. And instead of 6 bands I used 7.


Hope you like it. It makes awesome present for birthdays, anniversaries, thank you's or just because...  and you don't need wine or champagne bottles, think shower/bath gels or anuthing else that goes in a bottle.
 
Here is the inspiration board for the november challenge:


Used stamps:
for wine bottle:
 
for champagne bottle:
 
Stazon black ink

Friday, November 01, 2013

November Challenge

Hi Friends!! Welcome to the frigid November weather eh?? BRRR!! It's time to open up our November Challenge, and it's inspiring in browns and oranges, wheat and warm colors -- like by the fire! So kick back, grab your favorite VLVS! stamps and work on a bit to win some stamps!

See you this time next week for the WINNER from October's Challenge!


Don't forget the rules:
-Create a new project based on our inspiration board
-Use at least one (but certainly more if you want) Viva Las VegaStamps! rubber stamps (please no competitor stamps on your entries)
-Post it to your blog with a link back to us
-Upload to our linky using your direct blog post link (You may also upload via facebook, flickr or other gallery)
You could win a Project Spotlight post on our blog + some new rubber of course!
You are welcome to draw inspiration from any portion of the board, as well as create any type of project. Cards, layouts, tags, altered bits n bobs. Draw inspiration from the color, the stamps, the FEEL, the images.. whatever! You do it, we wanna see it!

Don't forget to visit tomorrow for Inspiration from Hermine!


-

-

Thursday, October 31, 2013

Happy Halloween!!!

Hi Folks!! DeeDee here today sharing with you the outcome of our most recent swap... Halloween Themed Altoid Tins!!

I cannot tell you how much it feels like Christmas every time I get a new swap in the mail! We're always so thankful for any and all artwork that arrives at our steps here @ VLVS! -- We proudly display each and every one! This collection of tins will have customers drooling for a long time :) 

 The outside of Anne Squire's Tin


  The talented artist behind this piece is one Christina Anderson! Flip the Devilish Face around and reveal a Ruffled Collar Clown!


I created this piece! 


 This beauty is by Eileen Wood!

 She used the 31, Nevermore and Full Moon stamps.


This one is by Lyneen Jesse!


 Mary Lozinak altered this spooky bit!!


 Marilyn Hughes has put together this deliciously glittery bit!


 And last we have this little book covered tin by Michele Kosciolek!
 She utilized the Fly, Cemetery, Full Moon, All Hallow's Eve and Dictionary Page for her tin!!

Can you believe all the talent contained in this one blog post? Every time I see them again I just die! And isn't that the point? SPOOOOOOOOOOOOOOOOOOOOOKY! ♥

Leave these girls some love!

Interested in being in our next swap?? We're currently taking SIGN UPS for a MAIL ART swap! Join our Facebook Group here, read the rules (pinned to the top,) and let us know if you'd like to sign up!!