Monday, March 11, 2019

Guest Inspiration Team : Elisa Ablett

Hi Viva Las Vegas Stamp fans,

Elisa here from the Guest Inspiration team with my next project for you featuring a load of gorgeous VLV Stamps.

My husband went on his first international trip last year to Spain for work and was under strict instructions to take loads of photos for me to Scrapbook with and create a travel journal for him.

I decided to create a travel themed Scrapbook page with one of his snapshots of the Basilica in Barcelona (it was under construction). Add some vintage themed papers from 13Arts designed by Fiona Paltridge to the VLV stamps with a bit of mixed media and I am so happy with the result. This design can be easily reproduced as an Art Journal page or as a page in a Travel Journal.


Let's take a closer look at the great VLV stamps that feature -


The 'Map of the World' Stamp was used with great effect in the background along with a few of the great background stamps from Plate 1495.

To fit in with my vintage travel look for the layout, I stamped 'One Way Sign' and 'Pointing Finger' and then coloured them with a Distress Oxide Ink Pad. I also included a Kraft Pocket Envelope to slip train tickets, entry tickets, memorabilia etc.underneath the photo cluster.

I stitched old sewing patterns to cardstock to create my own background paper, this is a great tip for those who love junk journalling!

To draw your attention to the photo cluster. add background stamping 'X Circle' and 'Row of Distress Lines' along with a wood veneer arrow and a cityscape die cut.


VLVS! Supplies: Stamp name :
Ink pads : Staz on - Black

Other Supplies:
Sewing Patterns
Sewing Machine
13arts Conversations on a Train by Fiona Paltridge
Wood Veneer - Here Sign, Location Arrows
Map Scrapbooking Paper - Unknown
Black Pico Embellisher
City Scape Die Cut - Uniquely Creative
Kraft Pocket
Decoart Tissue Paper
Ranger Distress Inks - Fired Brick, Vintage Photo, Walnut Stain

Thank you for stopping by the blog today !

Hugs
Elisa xo


Friday, March 08, 2019

Book Week 18 | Sue Plumb


Hi everyone!
It's Sue Plumb here with my latest design team project for you. Today I am sharing an 8.5x11" mixed media scrapbook layout I created to document some photos of my daughter from last year. These were taken when her school was doing a book character parade to celebrate Book Week.


To create my page I first decided where my photos were going to be placed, then painted a quick background using Dina Wakley acrylic paints. Once the paint was dry, I added my stamping using black StazOn ink.


At the top of my page I used the This Book Belongs To: stamp, adding it twice, then once again below my photos. I then added the Chevron Banner and Triangle Banner, so they would adjoin each of my photos and help create flow across the page. 


At the bottom of my page, I added the Be Adorable quote stamp (which is filled with sentiments that I absolutely love that are very appropriate for my daughter). 

I then added a few papery layers to go under my photos. First, I stamped a pair of paint sample cards with the Library Return Card stamp. I love using these cards in my layering, as it makes it so easy to coordinate colours and they are free from my local hardware store. 


I also added some book paper, a paper doily, washi tape, frayed gauze and some black cord into my layers before sticking the photos on top. 

For my title, I used Cocoa Vanilla Studio alphabet stickers, then stamped the "18" using the Grunge 1 and Grunge 8 stamps. 


After that, it was simply a matter of adding some quick journaling with a felt pen and I was done. I couldn't believe how quickly this page came together - I love it when things just fall into place! 
Thanks for stopping by today so I could share this, I hope I have inspired you to get inky too!


Stamps used:
- Grunge 1 

Other materials:
- white cardstock
- Dina Wakley Media acrylic paints
- Tsukineko StazOn ink
- paint sample cards
- assorted collage materials (as mentioned above)
- Cocoa Vanilla Studio alphabet stickers

Wednesday, March 06, 2019

Wonderland

Suddenly I find myself falling down a rabbit hole...

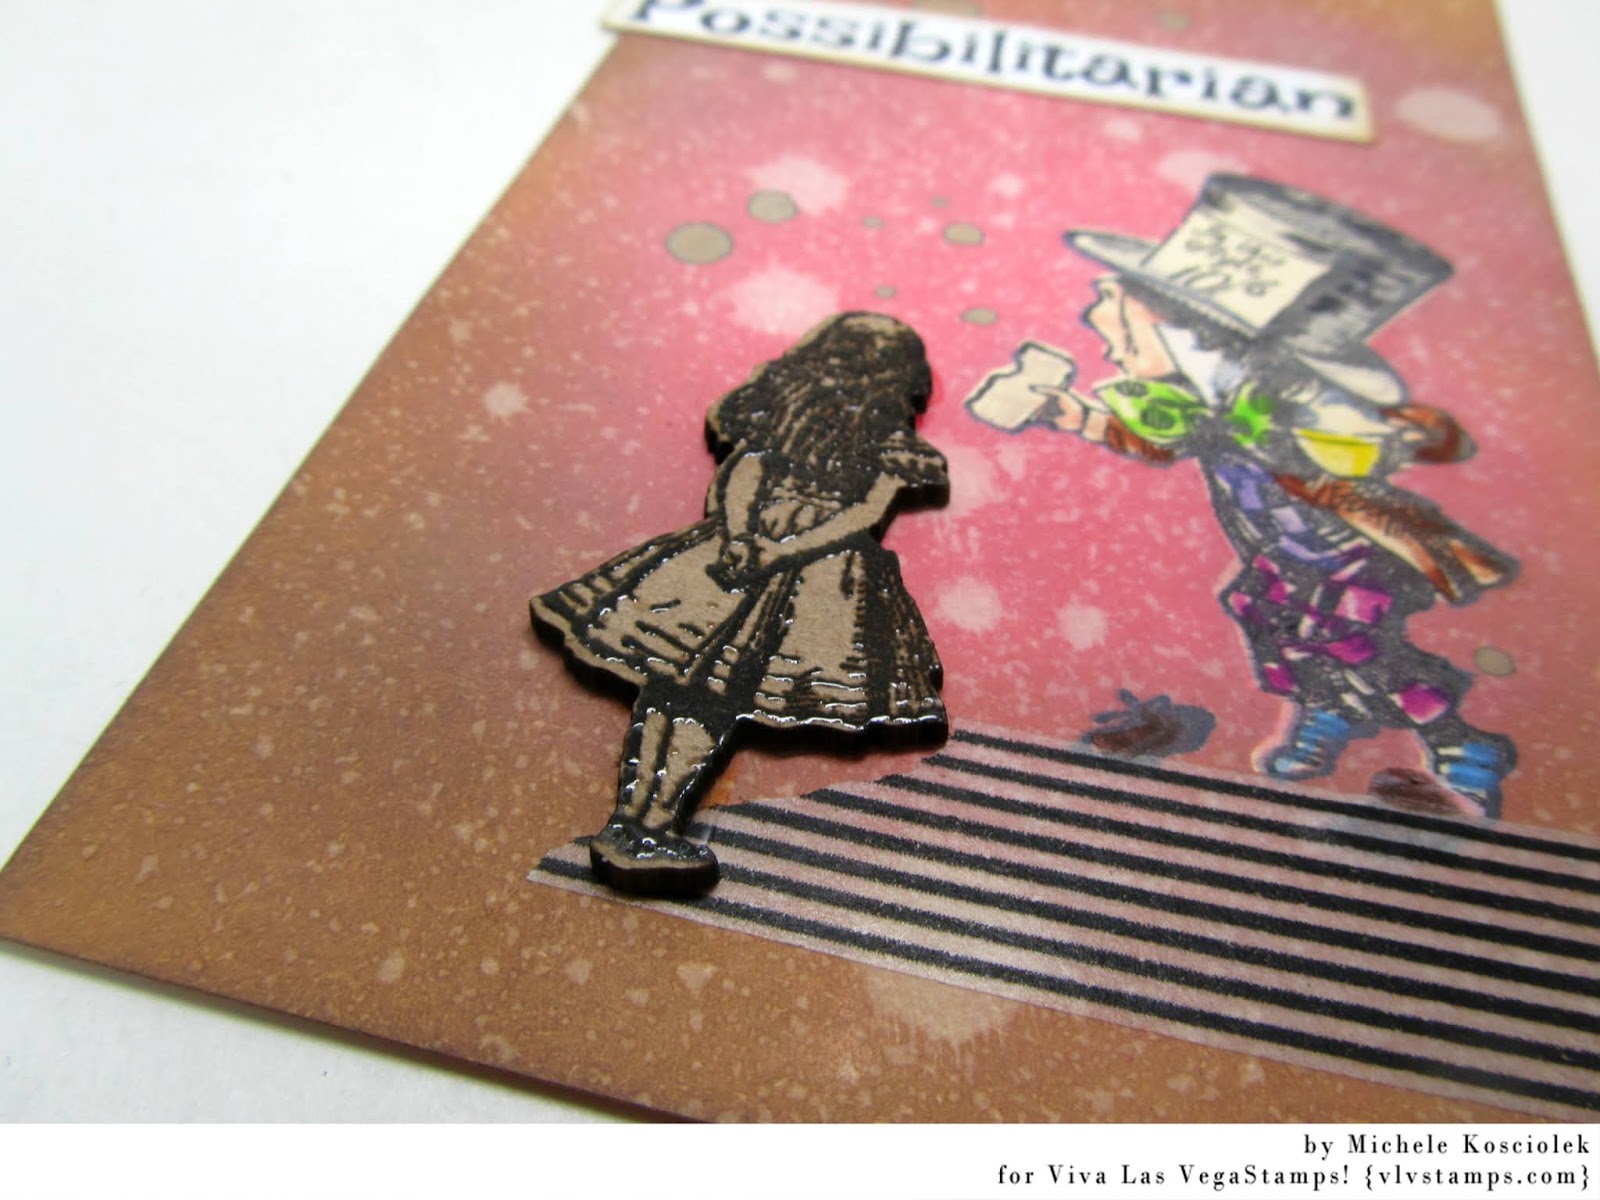
Michele here today with a set of tags, four to be exact, all using the Alice in Wonderland stamps.  I am OBSESSED with these images.
(This is going to be a picture heavy post so grab a cuppa and take a peek!)


With Distress Oxide inks and sprays I created my awesomely blended background.  I even did a little bit of masked stamping...

Stamps used:Chesire Cat Sitting, #whatever, That's a Horrible Idea, TweedleDumm and TweedleDee, March Hare, Alice with Hands Behind Back, Mad Hatter, Possibilitarian, Extra Extra


This background is oxide spray splattered on oxide ink...oh la la!!!


The oxide inks blend SO good!!!


I used Um Wow Studio coordinating chipboard piece to stamp the images on and them heat embossed with Ulta High Gloss Embossing Powder.


Water spalttering on these oxide inks is background perfection!!


The stamping is done with architval ink and the images are SO crisp!!


The contract of the raw chip with the color is also SO good!!


The washi tape grounds the images so they don't look like they are floating.

I was on a WONDERLAND roll so be on the look out later this month for some cards with these fabtastic characters!!
Until next time...get inky!!


Tuesday, March 05, 2019

#Hastagthis

Hello everyone,

Welcome to my blogpost, the first one of March! I have made another art journal spread. It is still my favourite thing to do.


I started out with painting the pages from blue at the top via yellow to orange at the bottom. 
Next I stencilled the whole pages with a Tim Holtz stencil and white acrylic paint and then used a brayer to tone it down even further. 


Next I stamped, and stamped some more, lol, I love stamping and usually do it in clusters. I also added some washi tape. 


Next I stamped the sentiment and the main image and adhered them to the pages. I also doodled along the edges and around the sentiment. 


I think it turned out OK. 

I have used the following stamps :

Other materials :

Amsterdam Acrylics in the colours:
- Napels Yellow Deep
- Azo Orange
- Sky blue light
- Azo Yellow Medium
- Titanium White

Archival inks: 
- Jet Black
- Watering can

Distress Oxide Inks:
- Tumbled Glass
- Carved Pumpkin
- Mustard Seed

Tim Holtz stencil:
- Ornate THS076

Dina Wakley Washi tape 

Bookpages

BLack Pen


Thank you so much for stopping by today ! 


Monday, March 04, 2019

Nervous Breakdown Mailart Monday

Hello crafty friends!

It's Monday!
And, do you know what that means?
 Mail art of course! One of my favorite days of the week!!

Today I want to share an extra special piece with you is so fitting with how my last week has gone! I hope you all get a kick out of this and we'll up and matching card.


Stamps Used:

Other products:
A2 card and envelope
Distress ink- candied apple, wild honey
Archival ink- jet black
Zig clean color markers 
Distress stain- black soot

I started by stamping my angry man on both the card base and the envelope base. As well, as on a separate piece of paper to create a mask.


I used post-it notes to create my address box, which also double as a mask for this area.


Next, I partially stamped the warn clock face on the top left corner of my envelope to give some depth. Or extra added depth I then used the dictionary page for more partial stamping all over.


With all my base stamping completed, I started to lay down my ink background. I used Wild Honey distress ink to cover the entire background layer.


With my inking done I felt they needed a little bit more texture and detail oh, so I used the tiny chevrons to add extra depth in the top left since eventually there will be a postage stamp on the top right.


After the background layer was where I wanted it, I used a Tim Holtz layering stencil to add candied apple distress ink for some texture. I also use the same color to Inca round the edges of the envelope.


I removed all of the masks, and decided to add my stitching to the sides of my address box. When I was satisfied with how everything looked I used my Zig clean color markers to color my main image.


I used the same colors to color the image on the card as well. To finish everything off I stamped my quote on my card oh, and added a few flicks of distress stain to my envelope.


To give extra flair, and top everything off...I added a basketball postage stamp. 
Which is perfectly fitting, since March is called "March Madness" for basketball season. 
This guy definitely looks like he has some Madness going on.

Thank you For joining me today!
Hope this inspires you!

Wednesday, February 27, 2019

Art Journal Page "Bee" by Jenn Engle

Hey everyone! I have a super simple art journal page to share with you today.


STAMPS USED:

I started out by adhering tissue paper to my background for texture. I then took several colors of Dina Wakley Acrylic and just smeared it all around, with my fingers.


I then did some background stamping and applied my vintage postage stamps.
I journaled some song lyrics and popped my bee stamp on there and done!


STAMPS USED:

Other Supplies:
Tissue Paper
Dina Wakley Media Acrylic in Ocean, Evergreen, White, Sky
Vintage Postage Stamps
Fude Ball 1.5mm Pen


Thanks for looking!
~Jenn

Monday, February 25, 2019

Best Selfie Ever | Sue Plumb


Hi everyone! 
Sue Plumb here to share my latest design team project with you. Today I have a mixed media scrapbook layout to share that features an assortment of VLVS stamps; a painted background; and (what I consider) my best selfie EVER!


During my recent trip all the way from Australia to Arizona to attend Creativation, I was lucky enough to also squeeze in a day trip to the South Rim of the Grand Canyon. The canyon has been number one on my bucket list of places to visit for as long as I can remember, so to finally tick it off was an absolute dream come true!  (And hence why I have called this my best selfie ever.)

To compliment my photo, I chose to use some stamps from plate #927, which features a number of travel themed phrases and images. I decided to pair the stamps with a painted cardstock background using Dina Wakley acrylic paints by Ranger.


To start my page I began by brushing on some of the blue "Sky" paint using a wide brush, then added some of the deep blue "Marine" over the top using the same brush. Next, "Elephant" grey paint went over the top using a small brayer to apply it. Finally, I added some highlights using "Evergreen" with the tip of my finger.


With all the colour in place, it was then time to turn to my stamps to add some depth to my background. I started with the Stitching Lines and Sawtooth Stitching Lines stamps, which I used to add lots of horizontal lines to my page using StazOn ink. This was to mimic the textures and layers of rock I saw in the canyon walls.


Next, I wanted to add some extra interest in the top section of my page around where my photo was going to be placed. With so many lines already on my page, I wanted to use a more organic shape, so what could be more perfect than trees? 
I used the Leaves Blowing From Tree and Weathered Tree, stamping them both out a number of times using "Faded Jeans" and "Iced Spruce" Distress Oxides. I also added some text to my background using the Wanderlust stamp and StazOn ink.


At this point I also added some small torn pieces of woodgrain and chevron print washi tapes before I moved onto creating a layered mat for my photo to sit on. I used a combination of tissue paper, paper doily, tag, small kraft bag and some frayed gauze, which I secured to the page using staples before adding my photo on top.


I love adding things directly onto my photos on my pages, so I decided to stamp out a couple of things that I could adhere to the photo. I used the You Are Here and one of the Set of 2 Hands Pointing, which I stamped onto white cardstock using "Faded Jeans" Distress Oxide, and then cut around them.


Now it was time for the finishing touches. Alongside my photo I added a denim handmade heart from Charms Creations, which I topped with a flair button from Cocoa Vanilla Studio.


For my title, I used a wood veneer word from Corbett Creations and some Cocoa Vanilla Studio alphabet stickers.


I also added a few wood veneer hearts around my page and splattered some copper coloured mist.


The final piece of my page was to add my journalling (although to be honest, I could have written 1000 words about this day and still not come close to expressing how I felt.)


That's all from me today, thanks for stopping by. I hope I have inspired you to get inky too!


Stamps used: 
- Stitching Lines
- Sawtooth Stitching Lines
- Leaves Blowing From Tree
- Weathered Tree
- Wanderlust
- You Are Here
- Set of 2 Hands Pointing

Other Materials:
- Miracle tape
- Bazzill cardstock
- Dina Wakley acrylic paints
- Tsukineko StazOn ink
- Tim Holtz Distress Oxides
- washi tapes
- Collage materials (as specified in post above)
- Charms Creations heart
- Cocoa Vanilla Studio flair button and alphabet stickers
- Corbett Creations wood veneer word
- wood veneer hearts
- Colour Blast 'Sienna' Colour Shimmer Spray
- felt pen