Thursday, July 31, 2014

New Plates O' Rubber!

Hi hi hi :)

We have 3 new plates o' rubber to show you today! 


Plate 1448 is a beautiful whimsical bold patterned set of images drawn by Mary Vogel Lozinak (sans the Twinkle Twinkle Little Star) and is so super fun.


Plate 1449 is a plate full of exploring, paradise seeking, worldly images.


Plate 1450 is full of Halloween Apothecary bottles, ingredients and labels! 
Get ready for Halloween folks, it's coming!


And ALL are ready for you to PREORDER for a whopping 20% off! Get your orders in before we start pressing them and save save save!

Tuesday, July 29, 2014

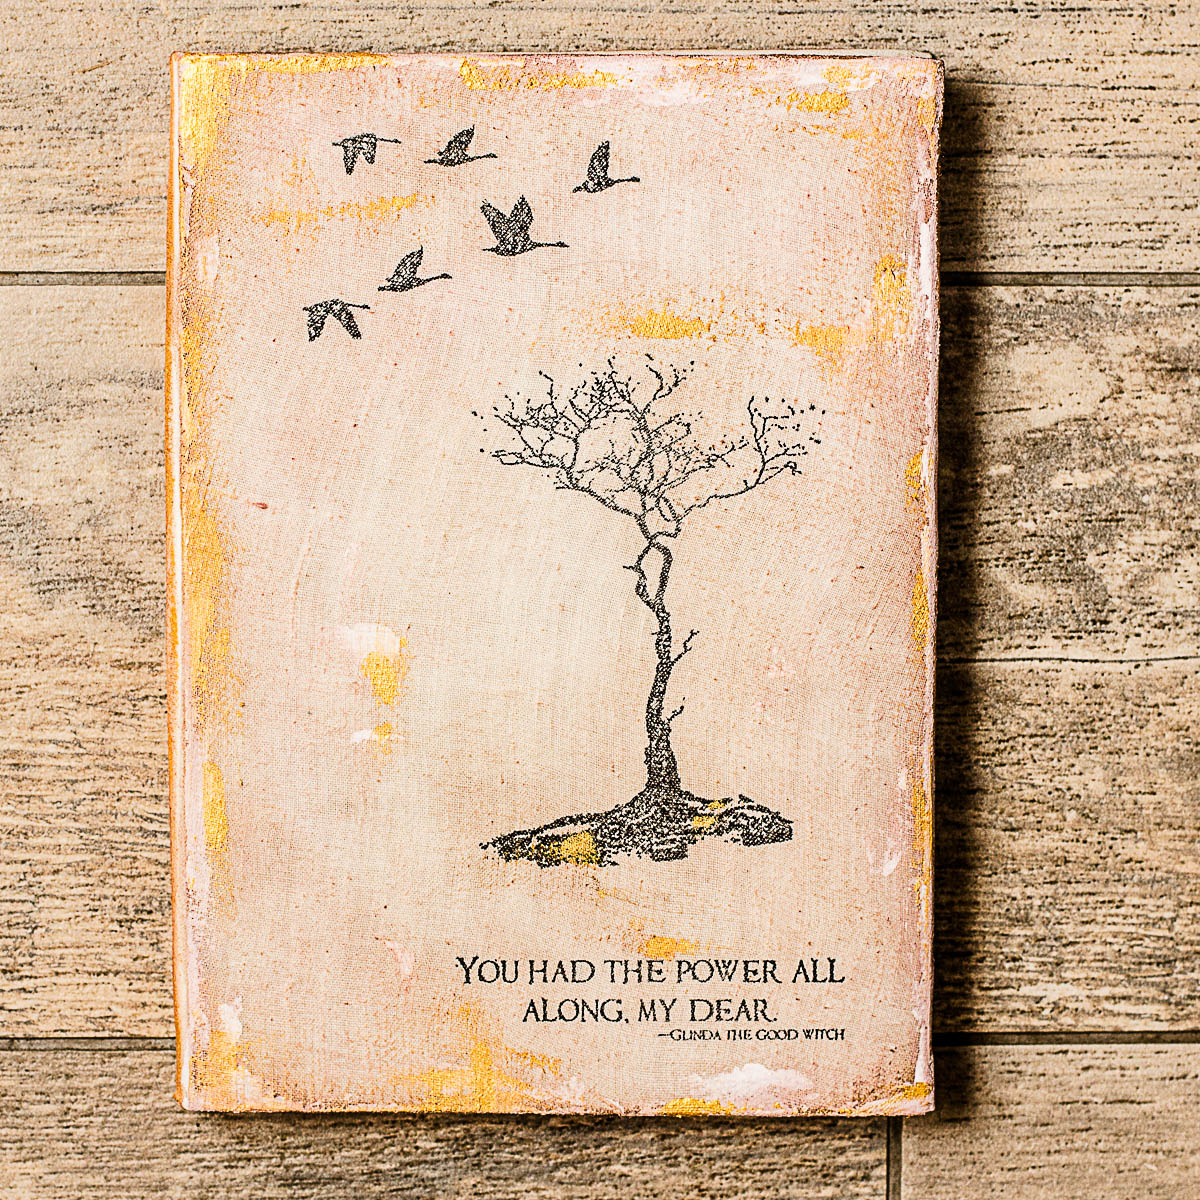
"You had the power" notebook

Hi, hi, hi)))

It's Maria Potapovich (melpellmell) and a little notebook here for you today))

As you know, I love to do notebooks "from scratch"))

And I love do just fabric covers for notebooks.
This means that the stamps that I'm going to use to decorate the cover should beapart from anything else very clear to imprint has not lost its distinctiveness due to the fabric's rough.

Let's see whether today's stamps coped with this work?


I've used

What do you think? Do they coped? ;)

Monday, July 28, 2014

Journey to your soul, Art Doll

Hello and Happy Monday!  Tina here today with a off the page, mixed media project.


My creative style and design evolve and change over time.  To be honest, I get bored with myself when I create the same project type design frequently.  I believe that change keeps my creativity flowing and I embrace the change instead of fight it.

One of my current creative obsessions are Art Dolls.  I love the free form, whimsy appeal and love the serene, deep feelings that are often evoked from my dolls.

Using products from some of my favorite companies, including VLVS of course, I created my next Art Doll.

My Art Doll base is actually a failed mixed media project.  I had been playing with several Stencil Girl stencils and Shimmerz paints with the hopes of creating a mixed media canvas for VLVS.  I'm not sure if the color palette or design wasn't working, so I started over.
(the original color palette on my base was blue and purple, and had text texture all over the piece).


I covered the blue/purple wood canvas with a coat of gesso and began again.

Once the gesso was dry, I used the Fractured Glass Stencil  from Stencil Girl, with Shimmerz Texturez to create my new background.  I added several shades of Shimmerz sprays to build my color.

I also applied the same technique to a blank wood piece that would 'hold' my Art Doll in place.


Now it was just a matter of building the individual pieces of my Art Doll, with paint, embossing powder, spray mists and stamping.

The 'throne' that my Art Doll rested on, was created using the Dictionary Page stamp, (a must for any mixed media artists) over a piece of vellum.  I love how you can subtly see the background through the stamped image and vellum.


Stamping does not have to be 'in your face' to get the impact you are looking for.  For my Art Doll wings, I stamped embossed the wings with Filigree Heart.  I LOVE how this looks on the wings.  The embossed stamped image adds to the whimsy feel I was looking for.  I also added a bit of the same technique on her halo.


I completed my Art Doll, using bits and bobs from my stash.


Oh yeah...I forgot to show the sides of my wood canvas.  I also stamped embossed the sides of my canvas using Lacy Lines.  This stamp is a perfect compliment to the stencil used previously.  Perfect!


What do you do to keep your creative MOJO flowing?  I'd love to know any tips or hints you have to share!

Thanks for stopping by!  Have a great day!


Friday, July 25, 2014

Dream Vacation

Hello all, Nataliya is here :)
Summer, vacation...Now I am still dreaming about vacation. And so I did a small card-visualization ... What could be better than a lazy afternoon on the lake, surrounded by friends?


And, of course, my fav violet & pearl spray:


I used watercolor, Distress Ink, StazOn, Radiant Neon & violet Pigma Micron:


And Stencil Girl (Swatton Flowers Version 1), VLVS! Design Open Circles 1 3/4 x 1 3/4 & 3 Women in Tubes 4 x 2 1/4 stamps:


Nave a great vacation!

Thursday, July 24, 2014

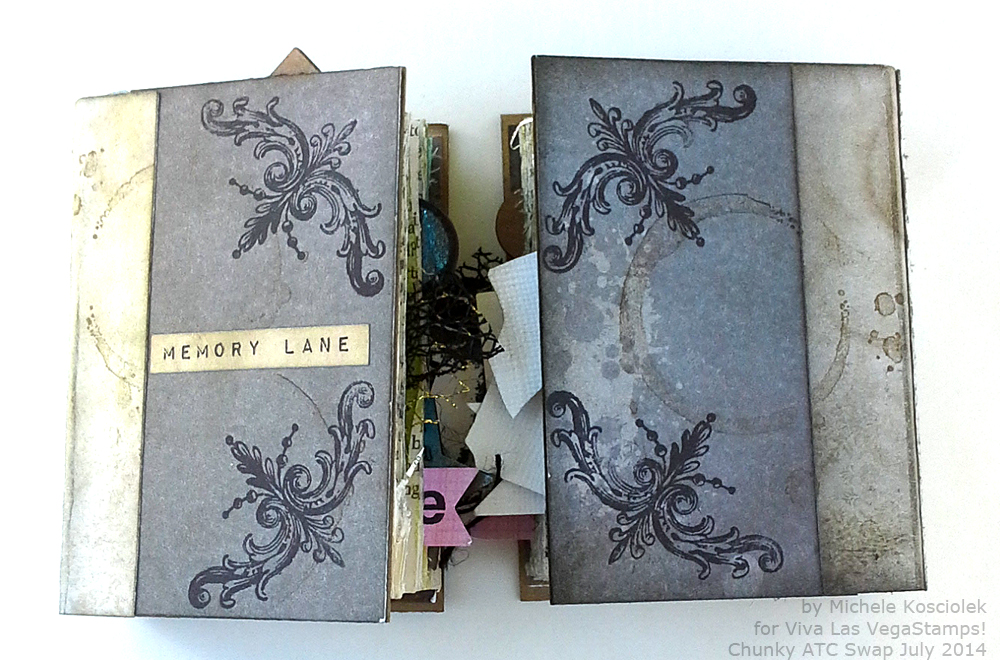
Chunky ATC Swap results

Hi stampers :) DeeDee here today! I shared a sneak peek on our Instagram account a little while ago showing you the Chunky ATCs that were arriving here on my desk. Well today I get to share with you the entire collection! We have some AMAZING ATCs to share, so get to seeing. In alphabetical order we have chunky ATCs from ....


What do you think?!???!?!?!

SO GOOD RIGHT?

:)

Leave these ladies some love, and join us in our facebook group to keep an eye out for our next swap.

Tuesday, July 22, 2014

My mail ran away with the circus (mail art part 2)

Hello it's me Tera again here with a super fun 2 part Circus Mail Art series. 
you can view part 1 HERE
I really really love this awesome plate of rubber, It is super awesome with the new USPS Vintage Circus postage. (Also how cute would these be in a MINI album!?!)
Also I apologize ahead of time but my scanner wouldn't work so its hard to see the amazing details of these stamps... you'll just have to buy some and try them!! you'll love them!


Stamps used: 

Admit One Ticket 1 1/4 x 2 1/2Striped Border Arrow 1 1/4 x 2 3/4Strong Man 3/4 x 2 1/2Zoltar Machine 2 1/4 x 4Circus Lady 1 1/4 x 3 1/2Bearded Lady 2 1/4 x 2 1/2Shoes Hanging From Wire 1 1/2 x 5Circus Strongman 3 3/4 x 3 1/4Spinning Swing Ride 3 1/4 x 4 1/2Under The Big Top 1 1/4 x 3Bulls Eye Target Solid 1 x 1Be True 3/4 x 1 1/2Bulls Eye Target Open 1 1/4 x 1 1/4The Greatest Show 3/4 x 1 3/4


I started by stamping out my envelopes and a set of "masks" to mask off the areas i don't want covered by sprays. (Below you can see I used scarp paper to create my masks)


I even love how these envelopes look even with out color, the detail in these stamps is just unbeatable! 

Next I masked of the parts is wanted to stay white, and sprayed the envelopes with "kiwi" tattered angels ink spray then removed the masks and allowed to dry
(in the 1st two below I decided to leave them at this step so a friend could color them to match her art journal... they are still really cool though and the stamps seam to pop off the page!)


To finish off my piece I added my postage stamps and tried to match the colors in them by using my distress markers and a water brush for a fun vintage feel.


I hope you are feeling inspired to send some at through the mail now!!
Happy stamping!


Monday, July 21, 2014

You & Me

Hi everyone, Glenda here with a scrapbook layout using 5 Viva Las VegaStamps!  I know I said I was doing project life my way but I also did a regular layout. Yeah I'm a rebel like that! haha  I had a bunch of pics of the hubs and I and decided to do a layout on us and how many years we have been together. I had a lot of fun making this layout using some pictures that I had of the hubs and I.
What I love about stamps is that if you don't have the right embellishment you can custom make your own!  I used the Banksy painter (love this guy!!)


and the You color my world
and the Admit ticket
and last but not lease the checkerboard border 
 and here is a closeup
 I wanted to make it look like the banksy painter had paint dripping from his brush so I sprayed different colors of Glimmer Mists and let them drip down and then dry before gluing him onto the page.
I hope you enjoyed seeing my layout and until next time,


Friday, July 18, 2014

Bird of Flight, ATC Card.....


Hello and Happy Friday!   

Tina here today with a quick, but super FUN project, ‘Bird of Flight’ ATC card.


ATC cards are the perfect little size.  When I want to create a super quick project, or when I want to experiment with a new stamp, paint, or ink, I pull out my ATCs.  There is something about the little, compact size that does not overwhelm the creator and when you only have a short period of creating time, you can finish a project.


Before stamping my 'Bird Head' image, I created a wash of color using Spray mists as my paint.  I also inked the edges of my ATC with Distress Ink and spritzed water to create little drops of goodness.


Knowing that I wanted to use the 'Bird Head' stamp as the head to my creature, I stamped the upper portion of my card, then added the bottom portion and wings.  Just like that, it was done.  My mythical Bird of Flight has been given wings!

Thank you for stopping by today.  

Have a great day!

Tina