Showing posts with label Christina Anderson. Show all posts

Thursday, July 24, 2014

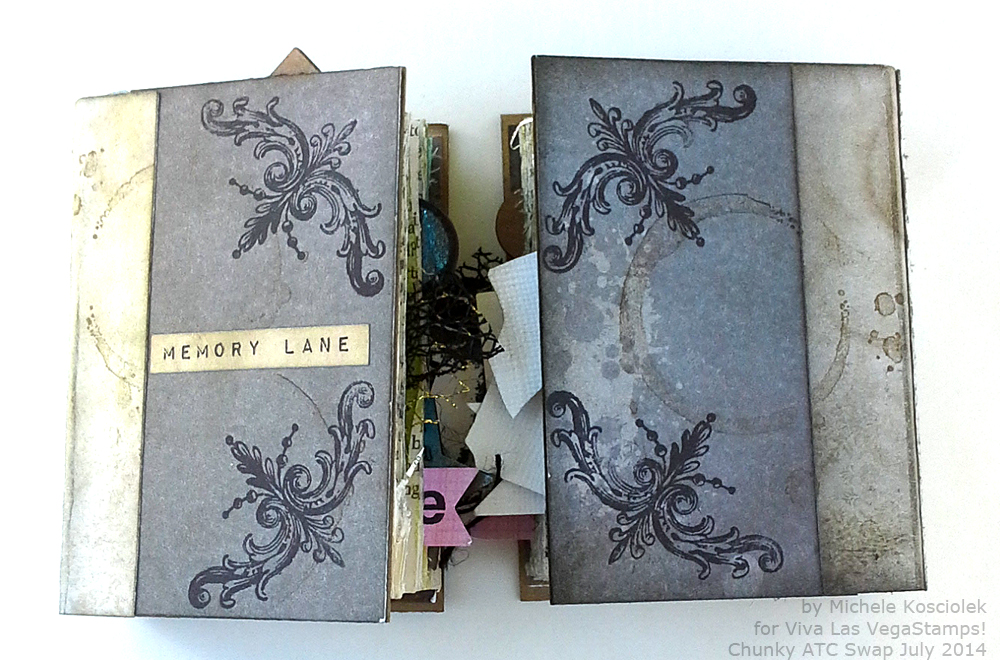
Chunky ATC Swap results

Hi stampers :) DeeDee here today! I shared a sneak peek on our Instagram account a little while ago showing you the Chunky ATCs that were arriving here on my desk. Well today I get to share with you the entire collection! We have some AMAZING ATCs to share, so get to seeing. In alphabetical order we have chunky ATCs from ....


What do you think?!???!?!?!

SO GOOD RIGHT?

:)

Leave these ladies some love, and join us in our facebook group to keep an eye out for our next swap.

Thursday, June 26, 2014

Guest Designer - Christina Anderson x2

We have a 2nd post from the super talented Christina Anderson here for you today!!


“La Diabla,#13”
CM Anderson-Salvaged Remnants Studio
2014

Supplies:
VLVS #17584-Large Art Doll Set    &    #14339-Bat Wings
Stazon Ink pad-Jet          Acrylic Stamp block         
Copier/Printer      Heavyweight White Cardstock. 8.5’’x11’’    White copier paper
2-Metal Tart/Gelatin Molds, Small in size (approx. 3”-4” in diameter  x 1.5”-2” tall)
the “skirt” tin needs a flat bottom surface to attach the paper doll
 Tins available in thrift stores, on Etsy,import stores, etc.
Decorated Scrapbook papers, one sheet each of a heavy weight  and a lighter weight      
Decorative tissue paper       Mod Podge     
4”x4” wood block (1/2” to ¾” thickness)      10”x1/5”diameter wood dowel    
¾”x ½” electrical reducer (Home Depot) 
19 gauge Dark Annealed Steel Wire-16 feet (Hardware store, craft store, on-line supplier)   
10-20 feet of 24 gauge copper or jewelry wire  
E-6000 Adhesive     Permanent Glue Stick    
Acrylic paints      Colored Pencils      Pencil    
Mini Paper Brads-10
1 ¼” long Thin finishing nails-6       ¾” long, thin nails-2      
1 small ½” long wood screw and small diameter washer
Assortment of Czech glass beads

Tools:
Scissors    Exacto knife    Ruler    Ball peen hammer      Phillips head screwdriver     
Variable Speed Drill     1/8” Drill Bit     Wood scrap plank to drill on
Pliers-Side cutting, Round nose, Chain nose     Flat Needle File          Metal cutting Shears
1/8” paper hole punch     Artists’ paintbrushes
Large Nail to punch holes in metal    Awl or large upholtery needle    
3M brand scrubbie pad     Protective eyewear


#1- Gather your supplies. (A) On white copier paper, print the large art doll stamp, minus the legs, and the bat wings in the corner of the paper. (B) Increase the size of the stampings to a total of 125%, print out on the heavy, white cardstock.
Some adjustments may be needed according to your stamp layout, size of tins, intensity of printout.


#2-On your wood block, measure and mark the center  for the electrical reducer. Center and trace around the reducer.

#3-Using the instuctions from the “Romp & Frolic” tutorial, take the variable speed drill with the 1/8” drill bit, drill a hole opposite each other on the sides of the reducer.Drill 6 holes around the perimeter of the reducer (where the points stick out the furthest). (A) Clean out the burs with your Exacto knife. (B) Nail the reducer to the wood block, use the rounded end of the ball peen hammer to tap the nails all the way down. (C) Set the dowel into the reducer, drill a pilot hole into the dowel using the previously drilled side holes as a guide. (D) Apply a generous amount of E-6000 to the pre-drilled end and set back into the reducer. Make sure to line the dowel holes up with the reducer holes. (E) Tap a small nail into each side of the reducer/dowel end to keep the dowel in place while the glue cures.

#4-Mark your tins for holes as follows:
Base/bottom tin- measure the edge of the tin for eight holes, evenly spaced. If this tin does not have a center opening at the top, mark for center. (A)The top (“skirt”) tin needs four evenly spaced holes on it’s edge and four evenly spaced holes on the flat surface in a square pattern, with a hole for center.Looking ahead at step #8- the square patterned holes on top, are centered over one of the the four edge holes! This is important to do for building this art doll.
Use the large nail,hammer, and wood plank to punch holes through the tins.
(B)-Use the needle file to smooth out the burs. (C)- Ream out the holes with the end of a pointy file and smooth out with the flat file, alternating, making sure that the holes are large enough to accommodate the wire brads, nails, and steel wire.


#5- Closer views of holes for “skirt” tin and dry fitting for brads.


#6- For the “base” tin, enlarge the punched hole at the center top with metal cutting shear in a radial (pie slice) pattern.
(A)  Use the round end of the ball peen hammer to gently tap the “slices” inward, then tap the slices closer to the tin.
(B)  Take the 3M scrubby and gently clean the outsides of your tins.
              

#7-Crinkle and re-flatten the tissue paper. Collage the tissue paper onto the dowel and base of the doll. When dry, use acrylic paint washes to enhance/distress/age the tissue paper. Set aside to dry. When dry, remember to glue paper to the bottom of the base, then sign and date your artwork.


#8- Cut out the enlarged, cardstock stampings, taking care to leave a 1” long “tab” at the bottom of the torso stampings.
In the inset of #8, I lined up where the torso tab needs to be folded to have room to punch out holes for attaching the doll.
Mark/measure that crease for further reference. Use the permanent glue stick to FIRMLY attach all 7 sections to the BACK of the heavyweight piece of scrapbook paper. Use a bone folder, brayer, etc, to make sure the pieces are well adhered.

Step #9 has been condensed and included into Step #10-so, no, you aren’t going crazy!

#10- Cut out the pieces fron the scrapbook paper. Glue the lightweight scrapbook paper to the exposed side of the torso sections; cut out. I colored in the head,wings, & arms with pencils BEFORE I trimmed them. Better grippage while coloring! (A) Line up the head section on one of the torso sections, punch shoulder holes with the 1/8” hole punch. Align the two torso sections with the “insides” together (purple paper on this doll) and punch through the previous shoulder holes. (B) Select the position for the bat wings, punch holes and attach wings to shoulders with the brads.


#11- Remember the crease measurement from Step #8? Time to use it! Line up both torsos at said measurement, set a ruler on top of the INSIDE of the torsos at that measurement, THEN, veeeeeery carefully, using the BACK of the Exacto blade, score a crease into the paper! Voila! (B) Crease & trim the tabs to fit on the skirt tin, attach with the mini brads. I had to punch another hole in this doll as it was a bit “twisty” when I dry fit the shoulders together.

#12-Slide the large hole tin on to the doweled base. Line the 8 holes at the edge as best as you can with the side centers & corners of the wood block. The CORNER HOLES are nailed first! If necessary,drill shallow pilot (starter) holes at an angle through the tin hole through to the wood block.Tap these four nails in until they touch the surface of the tin.
The 4 nails that center the block sides are tapped in about ¾ of the way. These are anchors for the steel wire.

 #13-(A) Use the awl or upholstery needle to punch a hole through the cardstock on the tin skirt. Make sure this set-up will accommodate the wood screw without being too tight, otherwise the wood dowel may split. Ream and debur with the needle files from step #4, as needed. (B) Find the center of the dowel at the top end, carefully drill down deep enough to fit the wood screw later. (C) Hand start the wood screw through the washer and skirt tin BEFORE setting into the dowel end. Add a generous amount of E-600 to the dowel end.Fit the point of the screw end into the dowel hole, tighten down sloooooowly with the Phillips head screwdriver.
Now,in this order, attach the paper doll head, torso front, arms and torso back together with the mini brads and get ready for some (messy) steel wire FUN!

A little info on “dark annealed steel wire”…..
First, it is my all time favorite staple to use in my art. Jewelry,collage,assemblage,this inexpensive,forgiving,lowly construction material, cannot be BEAT! However, two minor drawbacks, it takes stronger hands to use, so pliers are the way to go for shaping. Because of the annealing process to make it pliable, it is oily when you first get it & covered in carbon powder. Use a 3M brand kitchen scrubbie to clean it off before shaping and keep lots of handwipes around!
#14- With the side cutting pliers, cut four 30” lengths of the annealed wire. Fold the scrubbie in half and pull the wire through the fold a few times to remove the oil and carbon. Take each length of wire and make a large, even ended “hairpin” shape.
Using the round nose pliers, tighten the “U” shape bend down to the pliers and the roll the pliers around twice to twist the hairpin together.Repeat with the other 3 hairpins.
                                      
#15- Thread each hairpin through the back side of  a hole on the tin skirt edge ( the loop will be on the inside of the tin skirt).(A)At varying lengths down each of the 8 wire “tendrils”, make a loop with the round nose pliers to hang embellishments from later. (B) Here you can see where the longer end of the wire is wrapped around the back part of the loop. Straighten out the tendrils after you have completed the loops.


#16- (A)  Take a tendril and wrap it once around a corresponding nail that you tapped into the tin/base. From that point, take the next tendril and wrap it around the next nail. (B) There should be four  long “V”s where the wire meet at each nail. Throughout this process, keep checking the balance of the doll at the top. You can unwrap the wire, straighten with the chain nose pliers, and rewrap to keep the top from being wonky.                                                                                           


#17- (A) I curled the ends of the brads at the doll’s shoulder with the round nose pliers. It was aesthectically more pleasing than leaving them flat. (B) The doll wass a bit tippy looking still, so I bent some of the wires to form a diamond sillouette and create some tension where,structurally, there was a little slack. (C) With the round nose pliers, create some little,vine-like, curls. Weave the wires back through each other to give the bottom of the doll a fuller look. No rules, just play! This wire can take a lot of abuse before it breaks, unlike other metals.
I LOVE THIS STUFF!


#18- Time for adornment! (A) I ended up, at the last minute, making her a crown of gears,beads and wire. The actual join is not as well hidden as I would like it to be, so better planning next time. (B) I cut a variety of lengths from the 24 gauge copper wire to make some beaded embellishments to hang from all those loops. (C) I made some primative looking
eye pins, strung a bead, and then hooked them through the steel wire loops. They are closed off by loosely wrapping the end around the “dangly” part. Some of the ends were long enough to make some vine-y ends.
I wired up some chain to the loops of the hairpins that were put through the tin skirt edge and hung some extra beads from it. You can use ribbon, thread, charms, bits of paper ephemera, etc., to fill out your doll’s skirt.
It’s however you feel she needs to “be”!


Instructions,Assemblage Sculpture,Photos,
By
Christina M. Anderson aka CM Anderson/Salvaged Remnants Studio
2014
Intellectual Property of CM Anderson
 Please contact CM Anderson, ChristinaAndersonArt@gmail.com for further inquiries.


Friday, June 20, 2014

Guest Designer - Christina Anderson


‘Romp and Frolic’
CM Anderson
Salvaged Remnants Studio
2014


Using Stazon Jet black ink pad, apply ink to stamp, press onto heavy white cardstock, repeat. You should have two copies of this stamp on your paper. With scissors, separate the stampings. Prep your space to paint/color the images.

1a

1b


1c 
Select a color scheme that pleases you. I like to use a color wheel device (1a) to to help me sort out this type of decision. It also helps to keep in mind the tulle and frame colors that you have chosen. I love using complimentary colors in my motifs/schemes.
Chose a medium to tint your images. I am using watercolor crayons to fill out my images. They are easy to use, tidy, and somewhat forgiving in application.
Scribble a dot of a crayon into the lid of the tin (1b), add water to your micro-sized brush and dampen the pigment (1c). Don’t make it too watery, paint unto area of your image. Adding water to the pigment on the paper will help blend additional strokes of paint or new colors. Use the embossing heat gun ( with a heat mat under your images) to gently dry the paper as you go to prevent “bleeding”. Layering and layering the paint will build up the color in the image to achieve a specific goal. Tiny crosshatching strokeswith a semi-dry brush, will aid in shading specific areas.

2a 


2b 
The rubber stamp image in this project is going to be seperated into two subjects-the octopus and the lady.
Therefore, some areas of the subject need to be filled in with a fine point permenant marker (2a). Using small dots/dashes, fill in the areas of the octopus’ tentacles on the horizontal bar of the lamp post. Add paint to soften the markings. Once the paint is dry, cut the lady away from the lamp post as in photo 2b. Set the octopus aside in a safe place until it is time to trim both sections of the image. Using the second stamped image (2c), repeat the steps for painting the octopus for the woman. Keep the painted octopus handy (2d), for referencing the “swing” that is comprised of tentacles.

2c  

2d  

 
3a  

3b   


3c   


3d 
Prepping the frame. Remove the faux photo from the frame and save for future template (3a). Cut the back easel insert away from the frame (3b,3c). Store easel in safe place, as we will be coming back to it. Remove glass. Or in this case, remove the clear vinyl with an Exacto knife, you may toss it into the trash can or use in another project (3d).


4a  
 Utilizing wet/dry sandpaper (4a) or a fresh, clean green scrubby, distress the front and sides of the frame. This will remove some of the paint and add texture to the surface for adding the acrylic washes.


4b    


4c  

 4d 
Color washes. I prefer Golden Brand acrylic paints for mixed media art (4b). They are specially formulated for this type of art and worth the investment. Liquitex is a great option,  just try to stay away from craft-type acrylics as they are not capable of creating the effects used for this project. The colors for this project are as follows in order of use:
   Golden brand-Green Gold; Liquitex brand- Prussian Blue; Golden brand- Irridescent Brilliant Gold.
The first two colors were applied watered down (4c,4d), dried with an embossing heat gun between applications. As with the watercolor crayons, build up layers of paint to achieve your specific goal. If so desired, remove extra/unwanted wet paint with the baby wipes, then set with the heat gun.


4e  

4f 

With a dry brush, straight from the tube, add a gilding of gold paint over the acrylic washes (4e) by skimming over the relief parts of the frame. Let dry for next steps. Pretty! (4f)

 5a   

5b   

5c
 
Remove frame hardware using the side cutting (5a) and chain nose (5b) pliers. Take care with the cardboard easel, making sure not to rip or tear (5c).


6a  

DeWalt 20 watt Variable speed drill-my best friend in my studio!
Okay, we need some holes in this frame and it is time to use “Big Girl” tools.
A variable speed drill has a motor that can be controlled via the trigger. Barely pressing the trigger will get the drill bit just started for a pilot hole, OR, in our case, can go through strange substances, like resin or some metals, without a big mess! This $2 frame from Micheal’s craft store is comprised of a hardened epoxy resin that melts when too much friction/heat is applied. So, a SLOOOOOOOOOOOW rotation of the drill bit is required!
If you have never used a drill like this before, ask someone that has to show you the how. You will need to know for this project, or you may have to get even more creative!  Wear protective eyewear, PERIOD!
Note the small plank of wood under the drill. This is the surface for the frame to sit on to prevent extra holes being made in your workbench. Use clamps to hold the plank to your work surface.


6b  

6c    

6d
Mark holes for hanging a ribbon and decorative bead drop later (6b). Using a 1/8 drill bit, rest the drill bit perpendicular  to the surface, on your first mark. Very slowly, press the trigger to start the hole. Let the weight of the drill press down into the surface to create the hole. See that white powder (6c)?  That’s the resin being raised to the top of the hole.Stop drilling and dust away that powder before continuing drilling all the way through the frame (6d). Repeat steps for the 2 remaing holes. Groovy!

Now, don’t put that drill away,yet! You’ll need a couple more holes in the frame in a few more steps!


7a-e     
Adding decorative scrapbook paper to the former “easel” part of the frame backing. Trace the opening with a pencil unto the paper, cut with an Exacto knife. Insert the backing back into the frame to trace the opening, center the paper unto the outline, and glue down with a permanent glue stick!


8a-d    
Tulle background. I cut a continuous strip of tulle netting, 3” wide by 24” long to weave onto the 18” piece of 20 gauge copper wire. I made a little hook at one end to keep the tulle from sliding off. Weave one end of the wire, in and out,  about a 1/4” from the edge of the strip.


8e-h       
Crimp all the gathers together at the center of the wire. Make sure the 1/4 “ edge is bunched together and not twisted into the longer side of the tulle strip. Slowly twist the wire ends together and clip of ends about 1.5” from the tulle.
Measure and mark the paper covered backing’s center and punch a 1/8” hole for the tulle wire to go through. Tear up some small strips of masking tape to be ready for the next steps.


9a-d    
Insert the twisted tulle wire through the front of the backing, bend and tape twisted wire to the back. Using the masking tape, fold down the tulle strip end to the back of the cardboard. Tape down the other end. Using a criss-cross pattern, tape down the edge of the tulle to the cardboard,until all the tulle is adhered to the frame backing. Your scrapbook paper should look like 9d. If it’s a bit wonky, adjust accordingly by resituating the tulle on the back.


9 e-g

On the back of the frame, put E-6000 glue on the area where the back sits in. Gently nudge the tulled section into place. Let cure for about 30 minutes, remove tape and trim tulle with Exacto knife.


10 More prepping of the stamped graphics.
This is the section where the painted stamp graphices need some structural reinforcement. You can strengthen them with any number of solid backings, i.e.,layers of heavy cord stock, mat board, cereal boxes, metal, balsa wood, OR something you usually toss into the garbage/recycling, a flexible,medium to heavyweight, blister pack! You know, that stuff you need to buy a “Package Shark” for! Apparently, this material makes wonderful shrink film, but I like to use it as backing for paper. It needs to be on the thick/flexible side, not thin and brittle. This pice was perfect, because it didn’t crack when I cut it with scissors. But, you can use mat board or 400 lb watercolor paper to make the stamp graphics stronger.


10 a-c

I cut away the sides of the packing and am using the top which is about 6”x4”. To give the surface some “tooth”, wet/dry sandpaper scuffed it up nicely. Go diagonally across in one pass and then diagonally across in the opposite direction. I did both sides so I wouldn’t have to guess which was the proper side to glue.
Trim up the painted stamp graphics with sharp scissors, leaving just the slightest margin outside the black outline. Place the film on the frame to find the proper placement for the octopus (the same process for any other stiffeners), as it will need longer tabs to fit across the frame.
The girl can fit into a remaining corner of the film.


10 d-g

In a well ventilated area, using a bamboo skewer, spread some E-6000 on one of the figures. Adhere it to it’s place on the film/stiffening material, flip the film over and firmly tamp down on the back surface. This helps spread the glue out and make it less “bumpy”. Repeat for the next stamp graphic. Let cure for about 30 minutes. Sometimes longer for the film.You can add weight to the back, just take care that any glue oozed out does not create complications later.


11  After the glue has cured sufficiently, you can roll off some of the excess glue with your fingers or a clean bamboo skewer.


11a-c

Separate the two figures with an Exacto knife. You can snap the scored lines by folding the film forward at the cut lines.Leave plenty of additional space for the octopus at each end.


11 d-e Center the octopus figure over the frame to draw extensions fitting over the frame.


12  Tint the white edges with Distress ink & a sponge on both figures.


13 a-d

Alignment of the Lady & the Octopus. Set the 18” length of hanging strap below the holes previously drilled for the ribbon. Make sure a small hole is designated “center” for the piece of hanging strap. Use a Sharpie to make marks for drilling. As seen in Step 6, begin drill process. Place octopus over holes, center, and mark for hole punches over drilled areas.


13 e-g  

Center for the octopus is shown in photo 13e. Use 1/8” round hole punch for marks at each octopus extended areas, designated center of octopus, and at the TOP of the LONG tentacle on the girls figure’s “swing”. If the figures are stuck to the hole punch, ease off with a metal ruler, back of scissor blade,etc., DO NOT PULL! Be patient and take your time.


14 a-b    Apply Stazon ink to both sides of hanging strap, let dry, then distress by lightly going over with a clean,green scrubby.


15a-d

Assembling the figures to the strap and frame. Cut an 18” length of 18gauge copper wire, bend into a “U” shape (15 a).
String a size #8 glass seed bead on to the center. Gently squeeze wire ends close together  with the aid of the chain nose pliers (15b). String a decorative gear unto both ends, then a spacer bead. String on the girl figure last (15d).


 15 e-g

Pull the wired girl figure through the center hole of the octopus and the small,center hole of the hanging strap (15e). Add a little brass washer to the back and bend wire down (not too tight) parallel to the strap (15f).weave each end of the divided wire back through the coordinating hanging strap hole and octopus end (15g). each end should now be coming through to the front of the octopus figure.


16a-b

With the help of the chain nose pliers, straighten out the wires. Add a gear,brass nut and glass bead to each wire and very,very carefully, without kinking,pull the wire end back through the brass nut,gear,octopus,and hanging strap.use the chain nose pliers to assist the wire back through. It should end up looking like photo 16b. The girl should be able to swing to and fro.


16 c-e

Draw the wires from the combined figures on the hanging strap through the holes drilled for the octopus. Secure the wires behind the frame by crosing the wires together (16e). Gently twist the wires together as in photo 16d. Clip off at about 1”, bend twisted end next to the cardboard, and affix masking tape to keep it held down (16e).
Check your work from the front. Make adjustmens with pliers to straighten out bent wire areas.


17   Remember the photo insert from step 3? Use it as a template to cut a pice of fabric to glue over the back of the frame.Cut a small piece of muslin to use as a label to sign & date your work with a Sharpie pen.


18a-c

These are metal cutting shears, note the tin lids. You can also use a pair of aviation snips to cut through the ends of the hanger strap. Cut into the ends of the strap with the back part of the shears/snips to shape a ribbon “tail” (18b). Use a flat needle file to smooth out the strap ends, rempving burrs and sharp points (18c).


18 d-e 

Using a mandrel of some kind (bail making pliers, Sharpie pen, large nail,etc) bend each end of the hanging strap in half toward the center of the frame. Use your hands to bend the strap over (18d) instead of twisting the pliers. Bend the tail ends back toward the outside of the frame and squish c the “ribbon” ends closer together with a pair of chain nose pliers or a rawhide mallet (18e).


19a-b  Cut a 4”-5” pice of 20 gauge wire for the beaded drop. Coil one end to make a type of headpin, add ta brass nut and gear o the wire (19a). String the wire through the front of the frame at the bottom, bend at a right angle. Add three round beads and the glass drop. Trim the wire down, if necessary, leaving a tail to coil back a “stop” to prevent the beads from falling off (19b).

Check your work by holding frame up and adjust and areas of the wire as needed. Double check to see if the swing can sway back and forth.
Almost finished!


20 a-c

Cut 2 6” lengths of 18 gauge wire. Use pliers to bend into a “u” shape (20a). Slide one of the U-shapes through the pre-drilled holes left at the top of the frame. Bend the wire ends over with the chain nose pliers to form a rectangular shape (20b). Using your fingers and the pliers, twist each wire end around the rectangle shape, like in photo 20c. Tuck the wire ends in close to the rectangle shape with the pliers.


21a-c

Last step!
Cut an 18” piece of wired edge organza ribbon and 2 5” lengths of 20 gauge copper wire (21a). Thread the ribbon through one of the wire rectangles, fold down the edge of the ribbon and fold that edge back toward the ribbon long end over the wire rectangle. Weave the 5” piece of wire back and forth through the three layers of the folded ribbon, cinch the ribbon to the center of the wire (like you did with the tulle in step 8). Coil the wire ends back over the ribbon to keep it in place (21c). Tuck the wire end in the coil with the chain nose pliers. Repeat for the other side.
Congratulations! All finished!