Showing posts with label die cuts. Show all posts

Saturday, March 07, 2026

Hello there mini slimline by Cathy N

 Good morning, Cathy here with a mini slimline card for you today.


                                                                     Stamp Used:

                                                         10619 bunny in sunglasses

I made the background with some picked raspberry distress ink. I then stamped bunny in sunglasses with black ink.


 I then used some gel pens on the sunglasses and then layer it on black and white cardstock. I then made a mini slimline card with partten paper then used an die cut sentiment. 

Monday, June 23, 2025

Filmstrip card by Cathy N

Hello and good morning, Cathy here with a fun card for you today.


                                                                     Stamps Used:
                                                                19219 whimsical elephant 
                                                                17545 writing background
                                                                20572 doodle triangle 

I started out cutting an die cut of a large film strip with black cardstock. Then I cut out the center die with white cardstock and smooched 3 different distress inks on a plastic sheet and the smooched it on the cardstock. I dried between colors so they wouldn't blend together. 


 I then stamped whimsical elephant with black ink in the middle of the card. I then added writing background in the same 3 distress colors I used on the background in the same color area. After that I stamped doodle triangle in black ink randomly on the background. Lasty, I added washi tape for the elephant to stand on and add it to the black die cut piece. 

Saturday, March 08, 2025

Good with ketchup by Cathy N

 Good evening, Cathy here with a round card for you tonight. 


                                                                                Stamps used:

                                                                   11066 Meddle not saying

                                                                   20208 Vornii the bookish

                                                                  17545 grunge 1787 writing background

I started out by die cutting the circle from white cardstock and then stamping grunge 1787 writing background on the background and then edged it with drown distress ink. 

Next, I stamped Vornii the bookish and colored him with copic markers. 


I then added a die cut so he could be grounded, and stamped Meddle not saying on a separate white cardstock and then I layered it on black and added it to the top of the circle. Lastly, I added some green glitter circles to the front.  


Wednesday, January 29, 2025

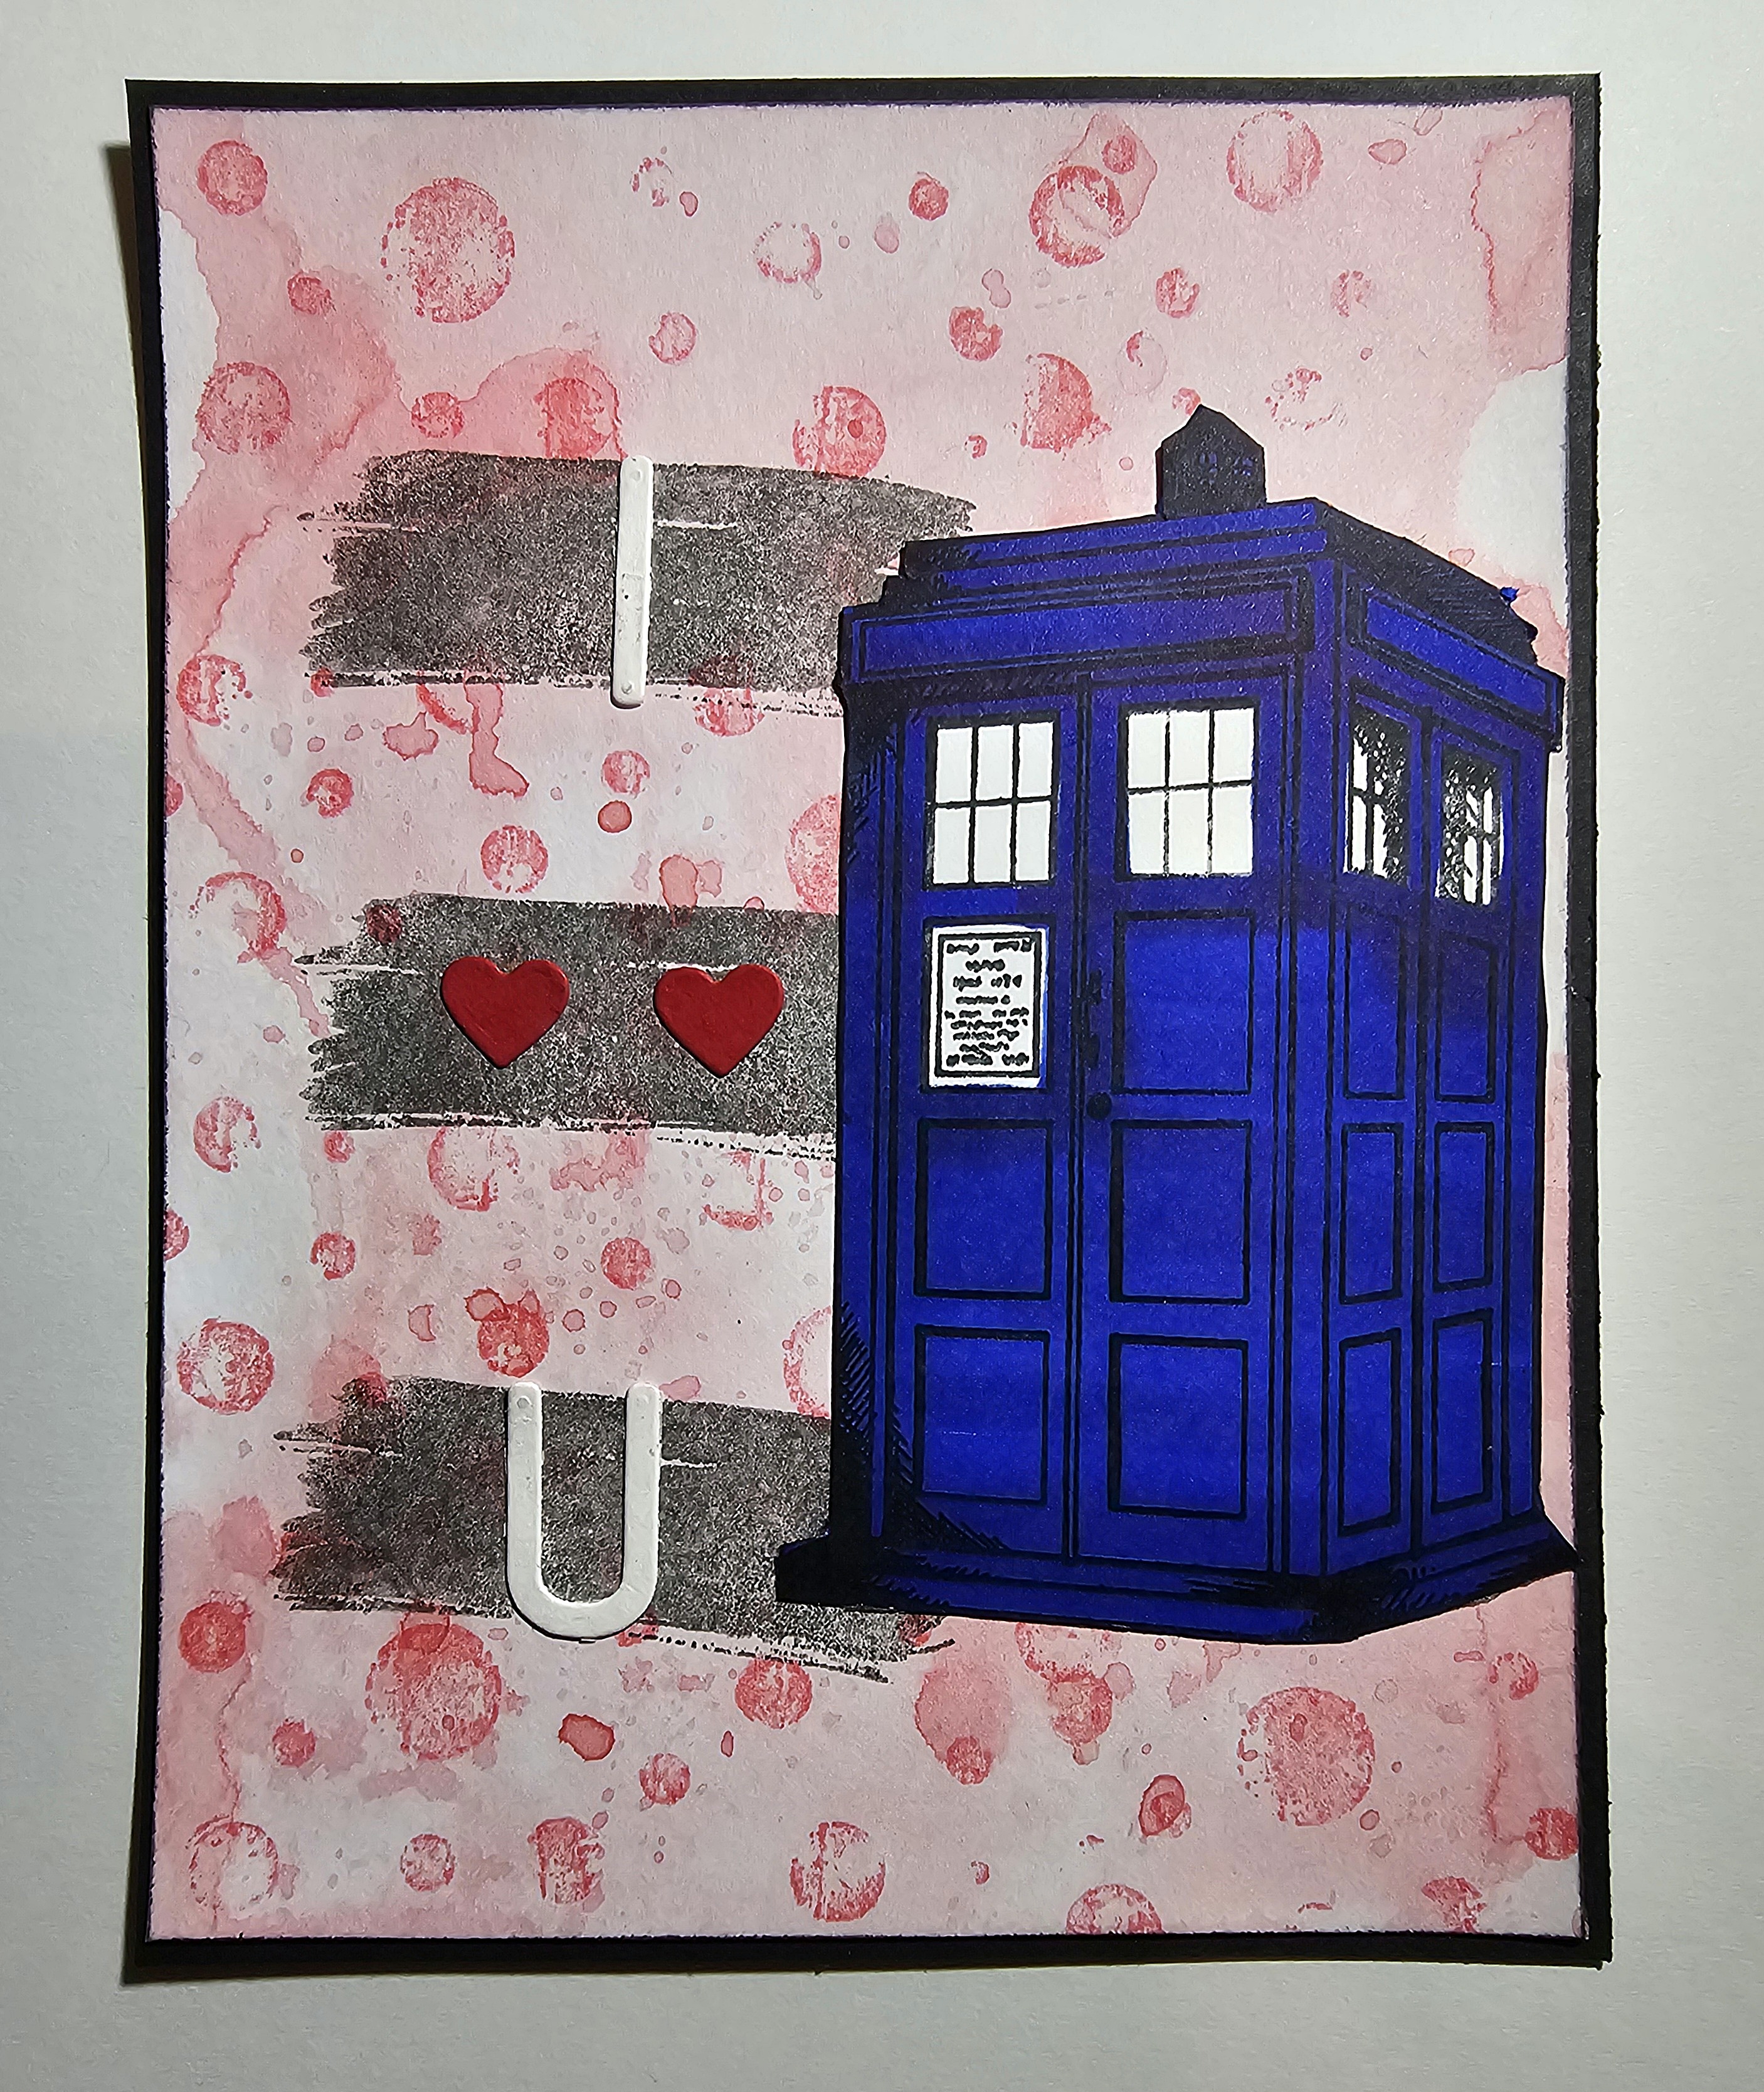
I ❤️❤️U by Cathy N

Good morning all Cathy here with a Doctor Who Valentine card for you.


                                                                         Stamps Used:

                                                          19054 blue police box

                                                          19563 grunge circles

                                                          20575 brushstroke


I started out by making the background. 


Then I stamped brushstroke 3 times in a dark gray ink on the background. After that I stamped the grunge circles in the same pink distress ink as I made the background. 


I stamped blue police box on a piece of white cardstock and colored it with a blue marker, after I colored it all in, I restamped it so you could see the image again.


Lastly, I added some die cut letters and ❤️' s .


Sunday, November 03, 2024

Big Ben postcard by Cathy N

                                Good morning, all Cathy here with a postcard for you today.


I stated out by making the background with some lost shadow distress ink.


Then I stamped Big Ben and the dragon and colored them in with copic markers. I did add some glimmer pens to the dragon wings.


I had part of the moon from another card I made so I added that to the top of the postcard. I edged it all in brown ink. and the last thing I did was add some cloud die cuts.


                                                                       Stamps Used:

                                                                 3226 dragon side view

                                                                 19391 Big Ben

                                                                 20157 The Moon

Thursday, January 30, 2020

Simply Masculine

Hello Crafty Friends!

It's me, Tera here again to share with you a super simple masculine card.

(you know you always need those!)


Stamp Used:

Other Supplies:
Hickory Smoke distress stain spray
black soot and frayed burlap distress ink
Park Lane papers
Tim Holtz stitched rectangle dies
Memento ink- Tuxedo Black
 Tim Holtz "snippets" pack
Voltage Die (by Tim Holtz)


I wanted to create a slightly grungy yet simple card that would be good for any occasion.  I started by picking a background paper that was simple with a light colored pattern.  (The papers I used came from the park lane packs called - Maps, text & ledgers, as well Neutrals)

I began by cutting my focal paper out with a Tim Holtz stitched rectangle die. I then stamped my Fabrique stamp in black Memento ink. To add a grungy effect I used black soot and frayed burlap distress ink lightly around the edges and a few flicks of Hickory Smoke distress stain spray. 


Next, I cut the next to layers of mats for my card. I sanded the edges of the textured card-stock for some extra texture and grunge. I also used black soot distress ink on both of these additional mats to lightly distress them.  Finally, I used the edge of my scissors to rough up the bottom mat layer. 
(the bottom layer is bigger than the biggest die, so I was unable to die cut it with the stitching. It is 4in x 5.25in)


To finish, I matted my card on a black A2 card base, and added my finishing touches.  The rusty bolts I created with my Tim Holtz voltage die, and the tiny ephemera is from the Tim Holtz "snippets" pack. 


(Just a note for the bolts- I used distess oxide sprays to color them as well as distress crayons)

I hope you enjoy this fun and easy card! 
Stay crafty!


Tuesday, July 18, 2017

July Challenge Inspiration (+ Time2Stamp video) with Cheetarah

Hi everyone!
It's Cheetarah here and I've got something fun to share with you today. It's mid month so time for some July challenge inspiration and this is our current challenge inspiration board.

It's all about summer this board and from this glorious image I have chosen the beautiful background color, dots and script text. Also with summer holidays coming around, I always send post cards to people whom I wish were with me. That is what prompted to make me this Index card.

I have used some yummy new distress oxides for this background and lush VLVS! that have some script elements in them. A list of supplies can be found at the bottom of this post. I have filmed the process and hope you enjoy watching it :)


Hope this has inspired you to join our challenge this month :) 

VLVS! used; 

Others:
Tim Holtz Distress Oxides ; Broken China, Cracked Pistachio, Salty Ocean, Peacock Feathers and Lucky Clover
Memento Inks; Tuxedo Black and Paris Dusk
Script Stencil from Panduro 
Tim Holtz Washi Tape 
Sticker paper
Alcohol markers 
wink of stella markers
Sizzix die cuts, wild flowers and handwritten celebrations by Tim Holtz 
Faber Castell Pitt Artist pen 
White pentel gel pen

Thanks for stopping by and have a wonderful day!


Thursday, May 11, 2017

Mixed Media Art Journal: Persistence by Cheetarah

Hi all, it's Cheetarah here today and I would like to show you this art journal page I made recently with by now my fave stamps from the new releases at VLVS! The Leaf Lady is just so gorgeous, I've absolutely fallen in love with this stamp!! I had made an art postcard which I showed you last time and based on that design I made a bigger journal layout you see above. The size is about to fit an A5 journal. I used a lot of different media for this page and as usual a full list of stamps and media used is at the bottom of this post. First let me tell you how I created this journal page. 

To get the texture you see on the background, I used a bunch of left over pieces from Tim Holtz Mixed Media dies. I just stuck them on with matte medium and then used white gesso to create a starting base. To create the first layer of color, I sprinkled some Lindy's Magical Shakers in Guten Tag Teal, Bavarian Blue, Polka Purle and Yodeling yellow over the page and spritzed it with water. It gave a beautiful shimmering base. Then I went to dry brush some Deco Art Media antiquing green patina and metallic gold over the textured aria's to create some dimension. The specimen butterflies were stamped with Staz-On Royal purple on a piece of gelli printed deli paper which I adhered with liquitex gloss varnish. The Gelli paper gets a nice gloss and turns transparent so you get the design visible over your background. I stuck a few pieces of the gelli paper randomly on the page with the gloss varnish. I also stamped the butterflies randomly on the page with a darker blue color. The sentiment "Nevertheless, she persisted" was stamped on a trim of the background and I colored the edges with chipped sapphire distress crayon and antique bronze distress stain. It's popped up with foam tape. 

A close up on the texture of the background. I colored the leaf lady and doodle leaf the same way I did with the Art postcard, so with alcohol markers, but I also spattered the DecoArts Media patina Green and gold metallic over her hair to create more interest and texture. 

Before I adhered the page to my journal I added pops of color with Caran d'Ache neopastels (oil pastels) in turquoise and yellow.  A mixed media tip for you; if you have sealed your piece (like I did) with a varnish (I used the Liquitex gloss varnish) and you use oil pastels over it, you can use your heat gun to slightly heat up the oil pastels. The varnish protects the layers below it and the oil pastels turn a bit more liquid and you can easily smooth out the colors over your page with your fingers and not have streaky lines. 
Lastly I rubbed some distress stain antique bronze on the edges to frame the piece and called the page done! 

Hope this inspired you to create some texture with your left over pieces from your die cuts :) 

VLVS! used:

Others: 
Lindy's Magical Shakers in Guten Tag Teal, Bavarian Blue, Polka Purle and Yodeling yellow
Alcohol markers (Letraset promarkers) 
Die cut left overs & gelli printed paper
Distress stain antique bronze 
Distress crayon chipped Sapphire
Staz-on midnight blue, teal, jet black, royal purple
Caran d'Ache Neopastels 
DecoArt Media paints; Antiquing green Patina, Metallic Gold 
Foam Tape
Liquitex Gloss Varnish

Thank you for stopping by and have a wonderful day!

Monday, November 24, 2014

VLVS! & Die-Namites Dies Day One

Welcome to day ONE of the Christmas Blog Hop between 


All week long our Design Team is hopping with the Die-Namites Dies Design Team to bring you tons of Christmas inspiration just in time for the holiday! Be sure to visit each day and leave comments on all the posts involved, because there ARE Prizes to be won! Two big prizes full valued at $50 full of DIES and STAMPS!

Today Tina Walker is joining us :


VLVS Stamp used:
Writing Background

Die-Namites used:
Winter Fir, Cardinals & Holly

Tina says "I used a vintage Bingo Card as my backdrop, and added sprays, embossing powder, and stamping to continue the handmade feel. I used the 'Writing Background stamp on my Bingo Card. This is a great stamp for any mixed media project! It adds the perfect little touch.Using 2 Die-Namites die-cut shapes (cut from a cereal box), I sprayed/painted them Shimmerz Paints. I love the beautiful shimmer and glitz from the paints! It was a great compliment to the embossed background.
To finish off my home decor project, I added some handmade embellishments from my stash, painted in corresponding colors, and glued them in place. I love the tone on tone look! It has a timeless feel."

Leave her some love and be sure to stop by the Die-Namites blog to see what those girls are up to today!

Monday, January 21, 2013

Be Mine


This adorable boy with hands behind back is holding a heart to give a “Be Mine” Valentine.
I hope you enjoy seeing how I made this framed canvas piece. 


    The boy with hands behind back image was inked with Memento black on kromecote card stock. Copic markers were used to color boy image and then cut out. Use Copic markers to color white edges with coordinating colors.  I do this each time I cut out images. It seems to make the images pop.

Use scissors to cut a small heart, stamp Be Mine on heart. 
    Use ink blending tool to apply festive berries distress ink and then frame edges with frayed burlap distress ink. Adhere heart to hand and set aside.
        Ink harlequin diamond background stamp with stormy sky distress ink, stamp image on manila ATC. Use ink blending tool to apply frayed burlap distress ink to edges.
  Adhere tiny 3-D foam dots on back of boy image and heart, removed film, adhere to ATC.
   Apply Miracle Tape on back of ATC, remove film apply to designer paper. Set aside.

Frame:
    Die cut one scallop frame and one back frame with chipboard. Die cut addition cutout frame with white canvas. (This is the heavy unprimed canvas found at fabric stores)
Adhere canvas die cut frame to chipboard die cut frame using a generous amount matte gel medium, smooth around edges for a good fit. Set aside to dry. 
    Ink harlequin diamond background image with white dabber paint, stamp image over canvas. Set aside or heat set to dry.
 Paint weathered wood distress stain over canvas. Set aside to dry.
(Note: the diamond background on the canvas is soft and subtle.)
 Paint canvas with thin coat of decou-page, this will seal the canvas and stop it from fraying. 
Set aside to dry.
  Apply Miracle Tape to back of chipboard frame, remove film add designer paper with the little boy image centered in frame. 
Apply additional layers of Miracle Tape to back of designer paper, remove film, add frame back to cover.
Apply narrow gold line stickers around frame, trim at corners.
 If you have the easel die make one with chipboard, adhere Miracle tape to easel and adhere to frame.
This project makes a wonderful gift! 
Finished piece 4 ¼” x 6.”


Other supplies:
Sizzix Frame and Frame back, Scallop
Sizzix ATC die
Sizzix Easel die
Copic markers
Starform stickers 
Ranger Distress ink; festive berries, frayed burlap, stormy sky
Ranger weathered blue distress stain
Ranger white dabber
Deco Art Decou-Page sealer glue finish
3-D foam dots
1/2" paintbrush
Matte gel medium (adhesive)
Vagabond die cutting tool
Chipboard
Unprimed Canvas material
Designer paper
White and manila card stock
Small sharp scissors