Showing posts with label adventure awaits. Show all posts

Wednesday, July 29, 2020

Adventure Awaits - ICAD

Hi everyone,

This year's ICAD challenge is almost over and today's index card is already no. 60 out of 61. Of course, I had to do one more with some VLVS stamps that I want to share with you today. It's a simple one and you could easily recreate this design for a card. So I'm giving you a quick overview about how I made this.


I started with collaging old book page fragments for my background. I added a layer of gesso as well as some Distress Paints so it does not appear too busy.
I chose the world map for my background, but wanted it to kind of fade into the background. Therefore, I did some second generation stamping, which means that I stamped the image onto a scrap paper and then onto my card without reinking the stamp. This way you can get a lighter impression.
To finish the background I used a blending tool to ink the egdes in brown.


For the focal points I used another trick: My background had some texture from the book pages, but there were some fine details in the stamps I wanted to use. So instead of stamping them directly onto the card, I used a napkin (one of the white layers when you seperate the napkin). I like using pigment ink for this technique because the impression is a bit better and even with a stamping platform I'm not able to stamp the image twice.
After leaving the napkin to dry for a minute or two, I tore the images (a slightly wet brush helps) and glued them to the card with matte medium. Make sure you don't use this technique on a water-reacvtive background.


Just added the quote that I stamped onto another piece of a book page and that's it for my card.


Stamps used:

Other material:
- Index card 3 x 5 inch
- old book/ledger paper
- Archival Ink (Potting soil, Blue violet)
- Versafine Ink (Onyx black)
- Distress Paint (Stormy sky, Broken China, Tumbled glass)
- napkin (white or plane layer from seperating printed napkins)
- matte gel medium (not a heavy one)


See you soon!


Monday, July 31, 2017

Mail Art Monday with Susanne

Hi my dear crafty friends!

It's Mail Art monday and I'm sharing a vintage mail art envelope today.


I used the Whimsical Door, Tall Stork and Baby, Elves on a Line as my main images on the homemade envelope from tea dyed paper.


I hope you enjoy my video tutorial:


Thank you for stopping by today.
xx Susanne


Supplies:
Viva Las VegaStamps!:
Wild Mushrooms
Whimsical Door
Tall Stork and Baby
Elves on a Line
Adventure Awaits
harlequin Diamond Background
Leafy Twig
Others:
Distress Oxide: Vintage Photo, Peeled Paint
Colored Pencils


Monday, September 28, 2015

August WINNERS!

We have some winners to announce for AUGUST's Challenge! :)

Our voted winner is the talented Kristiina Majuri with this beauty:

Congratulations on your beautiful win Kristiina! 

Don't forget to display our badge, Kristiina.


And our random winner is Sheri Levitt! 

Both ladies please email me @ deedee430@gmail.com with your shipping address and we'll get you a grab bag o' rubber! Congrats to the both of you!!

Just a few days left to enter our September challenge to win yourself. 


Wednesday, May 14, 2014

Stamping with Pan Pastels {with technique video}

Our 2nd post today is brought to you by Amy Lassiter and she's stamping with a paste made from her PanPastels -- CHECK IT OUT!

 
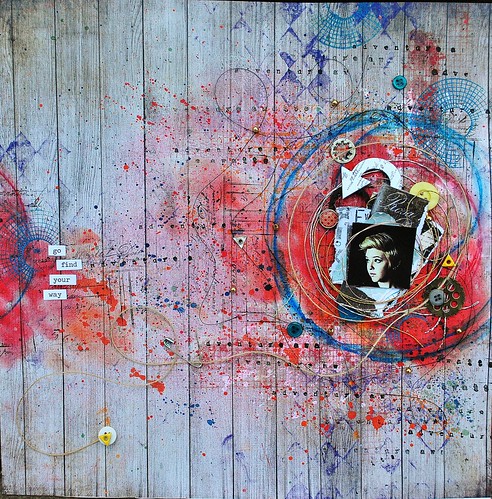
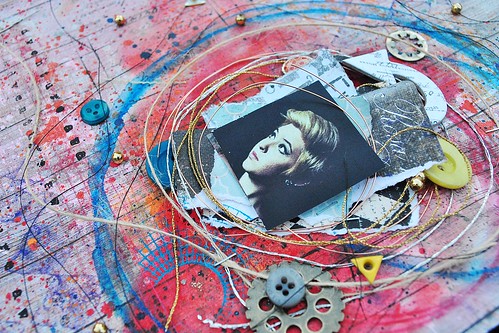
Hello stampy friends! It's Amy here today,to share a layout I created using some fun techniques with Pan Pastels AND Viva Las VegaStamps! It was so fun to play with a new medium, and to create something a little bit out of my box in style. :)
go full, VLVS, allassiter


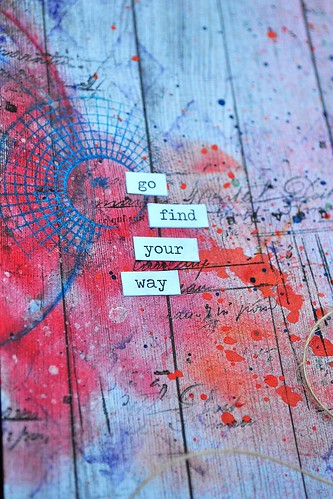
I used the Pan Pastels both wet and dry. I had fun finding a few techniques, that were easy and gave a big impact at the same time. The vibrant colors were great to blend and layer, and I used them all over the page, to give the paint splash look, as well as to stamp with!
photo, go, close
top stamping, go


For the wider sections of the page that are covered in color, I used the sponge wand, and gently blended colors from the inside out. Between each layer I added, I sprayed the page with Fixative to keep the pastels from flaking off. As you can see in my video below, even after using the pastels wet(which makes for a great texture relief), the fixative keeps it all in place. I could even stamp with black and blue ink over the top,as well as draw and blend (using water) with Aquarelle without smudging the pastels.
pan pastels, side, close


Have a look at the quick video I created to show the stamping technique I used with the Pan Pastels:
 If you'd like to see how I created a chalky type texture "paint splatter....." head over HERE to watch that video.
Thanks so much for having a look today....and give Pan Pastels a try, you may find a new medium you love (like I did!)  
Supply List: Viva Las VegaStamps!: Harlequin Diamond Background, adventure awaits, color wheel lines,, waybill/invoice background
Paper: 7 Dots Studio- Nature Walk, Prima, Glitz Design, Graphic 45
Ink: IMAGINE Crafts/Tsukineko, Liquitex, Lindy's Stamp Gang, Heidi Swapp Color Shine
watercolor pencil: Faber-Castell Design Memory Craft Aquarelles
 Fibers: May Arts (twine), vintage Chipboard: UmWowStudio, Pink Paislee
Embellishments: 7 Gypsies, Bead Landing, Gauche Alchemy (yellow color kit), vintage
Pan Pastels: Violet, Permanent Red, Orange

Wednesday, December 04, 2013

Tropical Dream Journal

Hello stampers! It's Amy here today, to share a journal I created to contain all of my hopes, dreams, and future plans. Because I hope beyond hope that my future means living in Hawaii, I created the cover of this book with tropical flair.
I started by taking an old paperback children's book and covering it with a thick layer of gesso. When it was dry, I put little drips of acrylic paints in tropical colors all along the book, and went over them with a brayer.
When the paint was dry, I stamped the background using the Map Background 4 1/2 x 4 3/4 using Momento Ink in Tuxedo Black . I then layered up some scrap papers (7 Dots Studio and vintage book pages) to create a palm tree trunk (using miracle tape), and a bit for layers along the side.

I colored on the Fancy Grass/Weeds stamp, using Copic markers in mistletoe and burnt sienna, stamped them onto a library card, and fussy cut them out. I then layered them onto the base of the "tree trunk." When that was complete, I stamped the Anchor 1 1/2x2 with the black Momento ink, and fussy cut it out as well.
I created the palm fronds, by cutting cheesecloth, and spraying it with Heidi Swapp Color Shine in Mint until it was saturated. When it was try, I arranged it to create the top of the tree, and added two brown buttons from my stash, as coconuts!
Adding the adventure awaits sentiment (stamped onto a library card), a few stamped Stars, and 7 Dots Studio alpha stickers spelling out "Dream"; as well as some UmWowStudio chipboard, completed my book cover.

This was a fun, quick, and exciting project to create, and it gives me a place to journal my dreams......which is an added bonus!

Thanks so much for joining me today, and I hope I inspired you to get inky!

Supplies Used:
Viva Las VegaStamps!: Map Background, Stars, Adventure Awaits, Anchor, Fancy Grass/Weeds.
Ink: Tsukeinko Momento, Tuxedo Black; Copic Marker, burnt sienna, mistletoe
Paper: 7 Dots Studio
Chipboard: UmWowStudio