Showing posts with label Distress Paints. Show all posts

Wednesday, October 25, 2017

Silently Correcting Your Grammar - by Cheetarah


Hi all, it's Cheetarah here at the VLVS! blog today and I am sharing this postcard I made. You might have noticed, I like to take the "tongue in cheek" approach to conventional celebrations (and really almost everything else in life ;) . With Halloween coming up, I thought about the most horrifying thing to "dress up as", and that would be a "belittling know it all" - far more annoyingly terrifying than any monster in my book! ;) 

VLVS! has these AMAZING text stamps and the "I am silently correcting your grammar" is one of my favorites. As always full list of stamps is at the end of the post.


I started off by making a background with sticking left over bits and pieces to a card. And then roll over some distress paints in orange, smoke and yellow. Stamped over some wonderful mixed media stamps and spatters some liquitex while ink over it. I stamped the cute Whimsical Horned Boy on a coffee stained paper and colored it in with alcohol markers.


I stamped the sentiment also on the coffee stained paper and adhered the focal images to the card. Added some washi tape for more texture and to ground the image.


Lastly I added some gold spatters and a border with distress crayon in black soot.

Stamps used:
Whimsical Boy with Horns
Carved X's 
Rows of numbers
Pile of bones and skulls
I am Silently Correcting your grammar

Thanks for stopping by and have a wonderful day!

Wednesday, March 22, 2017

Courageous Mother Nature - Mixed Media card by Cheetarah


Hey everyone, I'm back this week to show you a Mixed Media card I made inspired by this month's Challenge Inspiration Board.

Beautiful isn't it? I got inspired by the nature elements and the green and purple colors.

To start off I went on building layers to get the background texture you see in the card.
The base of this card is a 6x6 scrapbook paper on which I applied light a coating of gesso and then glued on all the paper scraps I keep on collecting at the edge of my desk into a square / diamond shape. I glued it all with modge podge so it's also sealed well. When I was satisfied with the basic shapes I went on to add more texture with a stencil and modeling paste.

I chose dots for a nice contrast with the square shapes and applied messily and let dry and adding more in various places over the card. It's going to be covered up with paint so it doesn't matter if some paste seeps though or is uneven, because it's about the texture! You can see the process of the base HERE. When I was done with the modeling paste I sealed it with Modge Podge shimmer varnish to smooth it out and have a secure base to get the paint to run.

Then comes the fun part, dabbing distress paint on your textured background and get it all colored up! I started off with lighter colors first, chose the left edge, dabbed ink and sprayed water on to get it to run to the right. Dried each layer with a heating tool to set the colors and to get them to stay crisp. I went on until I was satisfied with the color blend and saturation. 

I chose the whimsical tree lady to be my focal point and I stamped and colored her on tissue paper. Adhered it with soft matte gel medium. Did the same with the "she was courageous" sentiment. Before I adhered these to the card I stamped some more nature themes stamps on the card with Staz-on inks in corresponding colors. 

Mother nature was written with Zig wink of Luna in purple and green. And then with a faber castell pitt artist marker. Also doodled around the edges with these colors. I like how it pops from the card. 

Oh by the way, the sun I made on the top left is done with stamping Doodle Circle stamp inked with mustard seed and carved pumpkin distress paints. I just used a brayer to adhere the ink and stamped until the color was opaque enough. I adhered the piece to a turquoise color double card, rounded the edges and called it done.

Stamps used:

Others: 
Modeling paste
Modge Posdge Matte Medium and shimmer varnish 
Distress paints 
Zig Wink of Luna brush pens
Faber Castell pitt artist markers 
Staz-on Inks 
Memento Inks 
Alcohol markers 
Tissue paper
Carabelle Studio and the Crafter's workshop Stencils

Hope this inspired you to play along with this month's challenge :)

Thanks for stopping by and have a great day!
Thursday, February 02, 2017

Art Journal Challenge Inspiration and Video with Shanna


Hey everyone. Shanna here with some new challenge inspiration for you! In case you missed it check out the new challenge inspiration board! Aren't these bright colors awesome.


Well I couldn't resist and am super happy to share with you all my take on the challenge. Sit back and watch this video I made for you all to enjoy! 


Here are some photos of my finished art journal page.


Stamps Used:

Other Items:
Distress Paints - Cracked Pistachio and Wild Honey
Distress Inks - Abandoned Coral and Black Soot
Distress Strain - Abandoned Coral
Stabilo Black Pencil 


Tuesday, December 13, 2016

Index Card Art by Jenn Engle

Today, I have a simple index card to share with you. I had some extra paint from a project I was working on, so I used my brayer to apply it to my index card. With these new stamps, you don't need much effort to get a beautiful project. 

You can check out the process video at the end of this post to see exactly how this card was made!


STAMPS USED:


SUPPLIES (in order of appearance):
Index Card (Super thick, 100lb, great for mixed media)
Speedball Soft Brayer 
Distress Paint in Mermaid Lagoon 
 Distress Paint in Twisted Citron
Distress Paint in Cracked Pistachio
Stamping "Mesh Texture
"Numbers Set"
"Doodles Dot"
Archival Ink in Watering Can
Doodle Circles 
"Magic Maker Paintbrush"
 "Find Your Tribe” Stamps
Copic Marker in Aqua Mint
White Gelly Roll Pen
Black Gelly Roll Pen

Thanks for looking
~Jenn


PLACES TO FIND ME:
Instagram @mixedmediajenn


Wednesday, September 16, 2015

September Inspiration Tags


Shanna here to share with you some inspiration for this month's challenge.  Check out the challenge here doesn't this inspiration board look fun. 


I really wanted to play with some paints and inks I have.


I started with Distress Paints and sprayed the paint with water. I smooshed the tag in the puddle. 


After I heat set it I used a Twinkling H20 (Lucky Apple). 


And made it dripped down the tag. 


I want to play with some black embossing glitter. I used the stamp Poison Apple - 19702 to add the embossing too. 

I ended up making two tags. 


The first tag I added some alpha stickers to make the tag "spooky".


I used India Ink to have running black ink from the top of the tags. 


For the second tag, I loved the witch in this stamp Witch Holding the Broom - 19705. 


I followed the same background technique. 


I added the sentiment In the Pale Moonlight - 19351.


I finished off the tags with some seam binding ribbon and twine. 

Hopefully your inspired. We would love to see you play along. 

Tuesday, June 09, 2015

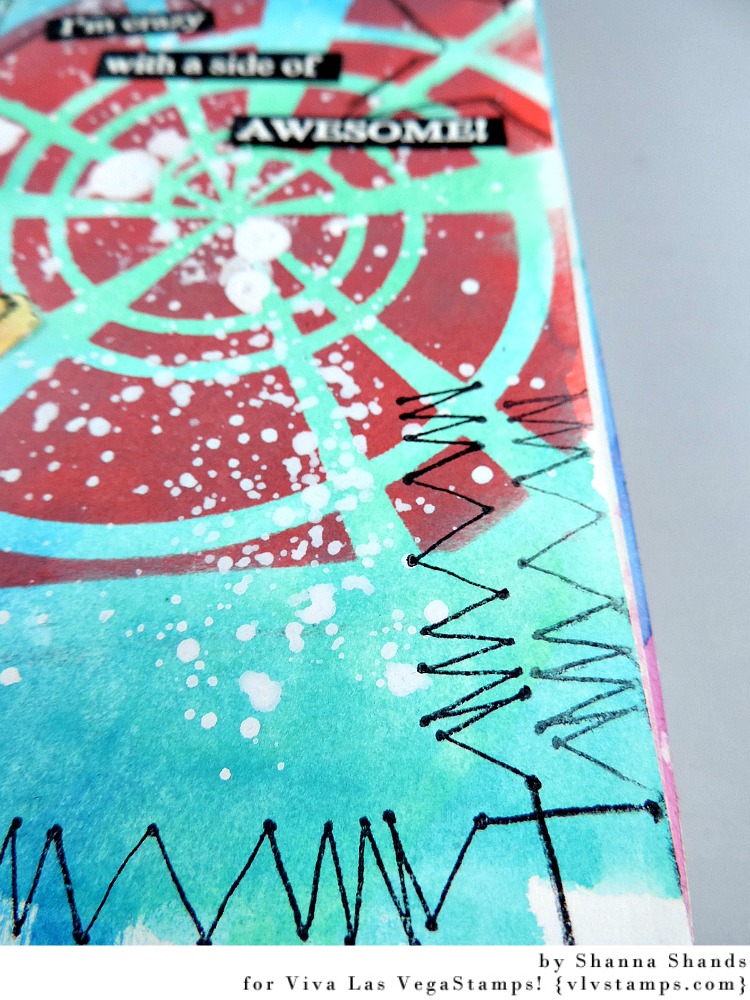
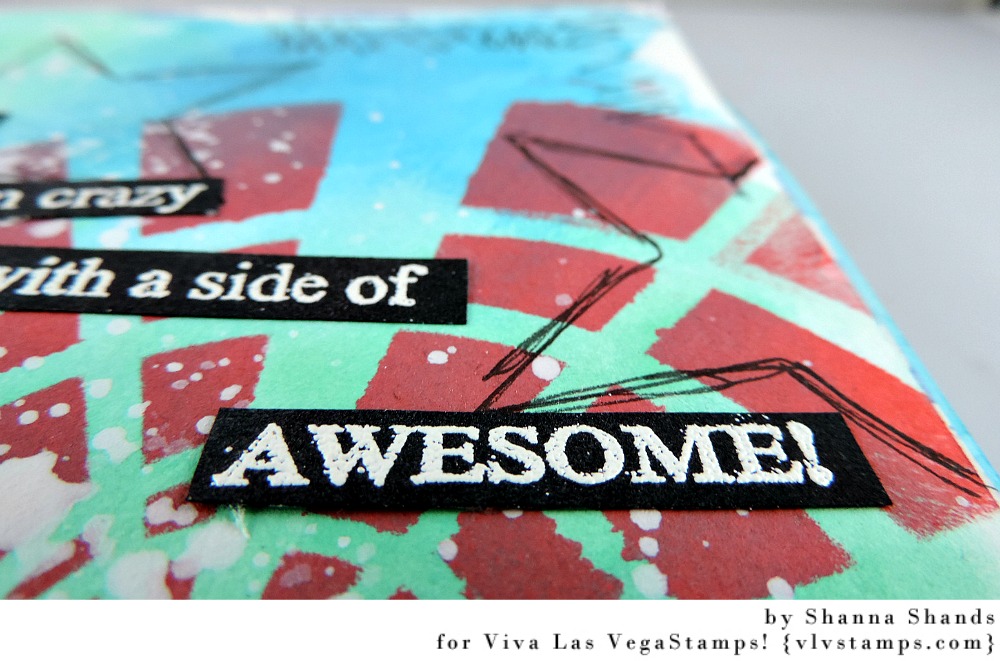
I'm Not Insane

Hey everyone. Shanna here to share a new art journal piece I created to share with you!

Can you believe I had not done the VERY FIRST page in my art journal??? Yeah I know right!!!
Well I decided to make it fun and exciting and really kick my journal off. 


First I started with the background. I put down some of the new 2015 Distress Paints, spritzed it with water, smeared the colors around, and then heat set it. After that I used another Distress Paint with a stencil to create the swirl.  Then I watered down a little gesso to create the splatter in the background.


I then used some Staz-On Jet Black ink to stamp the Lid Lady #997 and cut her out. The colored parts I used Distress Ink like a watercolor to color the image.


I wanted more in the background so I used the stamp Stitching #19575 to add more texture to the page and I grabbed another stencil using a PITT Pen to draw around the shape.  


Then lastly I used the stamps I'm Not Insane #18514 to emboss with white powder on black paper, cutting it up and gluing it down. I thought the embossing added some good texture and gloss to the project. 


Items Used:

I do hope you were inspired to do a little project yourself because we are all AWESOME! 

Thanks so much for stopping by DT Member Shanna!


Thursday, May 14, 2015

Caution

Welcome to a little mixed media creation for the day. I am so in love with the new stamps from Viva Las VegaStamps. There are 4 new stamp sets so make sure you go and see them. They are all different and just fabulous.

So I had no idea what I wanted to do but I have seen some people create these amazing altered postcards. So I have a couple postcards and wanted to give it a go. I played with several stamps to create texture and just love the outcome.   


Want to see how I created the background for the postcard? Then you can check out the video below. 


I used the stamp Kids in Futuristic Hats - 19656 on white paper, colored the little bits with Distress Ink, and cut them out. 


The background was fun to create using Distress Paints, using the stamp Writing Circles Background - 19567 with Distress Ink, and the stamp Texture Background - 19570 with Shimmerz Lemon Drop Dazzlerz. I then stamped Caution Safety Glasses -19560 stamp the on white paper, it it out, and colored that with more Distress Ink.


I also used the stamp Three Staples - 19576 to add just a little bit more to the postcard!


So glad you stopped by. Don't forget head to the store and check out the new stamps!

Items Used:

Viva Las VegaStamps
19649 - E=MC2
19652 - Super Freak
19576 - Three Staples

Thursday, April 30, 2015

The Life

A friend of mine at work had been talking a lot about getting a fish for our office so when the new plate came out with the fish bowl I was itching to get it inky!!

I created this tag with a shaker fish bowl. :)

Viva Las VegaStamps!:  Fish bowl, numbers set, harlequin diamond background, whimsical diver and high gloss embossing powder.
Other items used:  UmWow Studio fishy confetti and hashtag banner, Distress Spray in Abandoned Coral and Mermaid Lagoon. Distress Paint in Abandoned Coral, Crushed Pistashio and Fossilized Amber, Distress Ink in Gathered Twigs, Tim Holtz mask, gesso, sequins, seed beads, archival ink and foam tape.


I upcycled some acetate from product packaging for my shaker.


The numbers floating in the water make me happy!!


Swimming around in that bowl, wouldn't it be #thelife!!

If you are looking for more inspiration, to participate in swaps and chat with other VLVS! stampers join us on the Viva Las VegaStamps! Groupies facebook page.

Friday, April 17, 2015

It's 5 o'Clock Somewhere... With a TWIST!


Welcome to Viva Las Vegastamps! Susan here with a tutorial perfect for celebrating happy hour. It's been quite a week and I can certainly use one of these after tax day.


For my creation today, I'm using just one image - "Martoony #9179". By stamping on deli paper, I'm going to seamlessly layer this onto another monoprint on deli paper to get a painterly feel without all the fussy cutting. I stamped the image onto deli paper using black StazOn ink.


While that is drying, I quickly paint a sheet of white cardstock with DecoArt® Americana ® Neons Thermal Green acrylic paint using a recycled gift card to spread the paint over the sheet. WHOA that is bright! I will use this as my base layer.


I place my stamped image over my monoprint and plan placement. I want to add a little color to my martini before tacking down.


Using a small paintbrush, I fill in the liquid with some of the neon green diluted with a bit of water; and tint the glass with diluted Mermaid Lagoon Distress Paint. 


I tear out my image from the larger section of deli paper and now I'm ready to assemble. Using a matte gel medium, I spread a layer onto the base green painted cardstock and press my monoprint into it. I use my makeshift scraper to smooth down and add a layer of gel medium to the top. 


I repeat the process with the martini glass. I used a small paintbrush to apply gel medium to the back of my image, pressed it down, then used the scraper to flatten down. I love the seamless look and my three layers are now one. Now I'm ready to do my favorite part... hand color!


I used my Sakura of America Gelly Roll® Stardust® Pens to add color to the glass and lime twist - this makes them pop! Using the Versamarker {this is a pen filled with Versamark ink} I strategically placed the clear fluid to apply a small amount of Violet Pearl WOW Embossing Powder to give that liquidy shimmer.

"Time for Happy Hour with Van Gogh"


• • • • • • • • • • • • •


Other Supplies: Deli paper; monoprinted deli paper using Liquitex Soft Body Acrylic paints {Cadmium Orange Hue and Cerulean Blue} on a Gelli Arts® Gel Printing Plate; white cardstock; DecoArt® Americana ® Neons Thermal Green acrylic paint; Mermaid Lagoon Ranger Distress Paint; Versamarker; Violet Pearl WOW Embossing Powder; Sakura of America Gelly Roll® Stardust® Pens; paintbrush; recycled gift card; and Liquitex Matte Gel Medium.

• • • • • • • • • • • • •


Thanks so much for dropping by! It's a brand new month - check out the April inspiration board... just makes you want to get inky. Join us and play along with the April inspiration challenge {CLICK HERE for details}. Just make a creation using the inspiration above and your stash of VLVS! stamps... you could win more RUBBER!

Have you seen the four new plates of stamps that are on pre-sale??? CLICK HERE to feast your eyes! Take some time to browse around the blog here and the amazing creations from the entire VLVS! Team... there's so much amazing inky inspiration to see!

If you would like to see more of my creations please visit my blog, sbartist : painting in the dark HERE. Hope you have a fabulous day!!  Sb