Showing posts with label Doodle Flower Garden. Show all posts

Tuesday, September 10, 2019

She Was a Wildflower - Art Journal Page | Sue Plumb


Hi everyone!
It's Sue Plumb here with my latest design team project for you. Today I have a simple, but fun, art journal page to share that I created using a variety of stamps; Distress Oxides; a Sharpie; watercolour pencils and inks.


I began my page with an A4 sized sheet of white cardstock and Distress Oxides in the colours of Twisted Citron and Cracked Pistachio. I began using a foam blender to apply the Twisted Citron to an area in the centre of my page. I then blended some of the Cracked Pistachio into it to give it some extra depth.


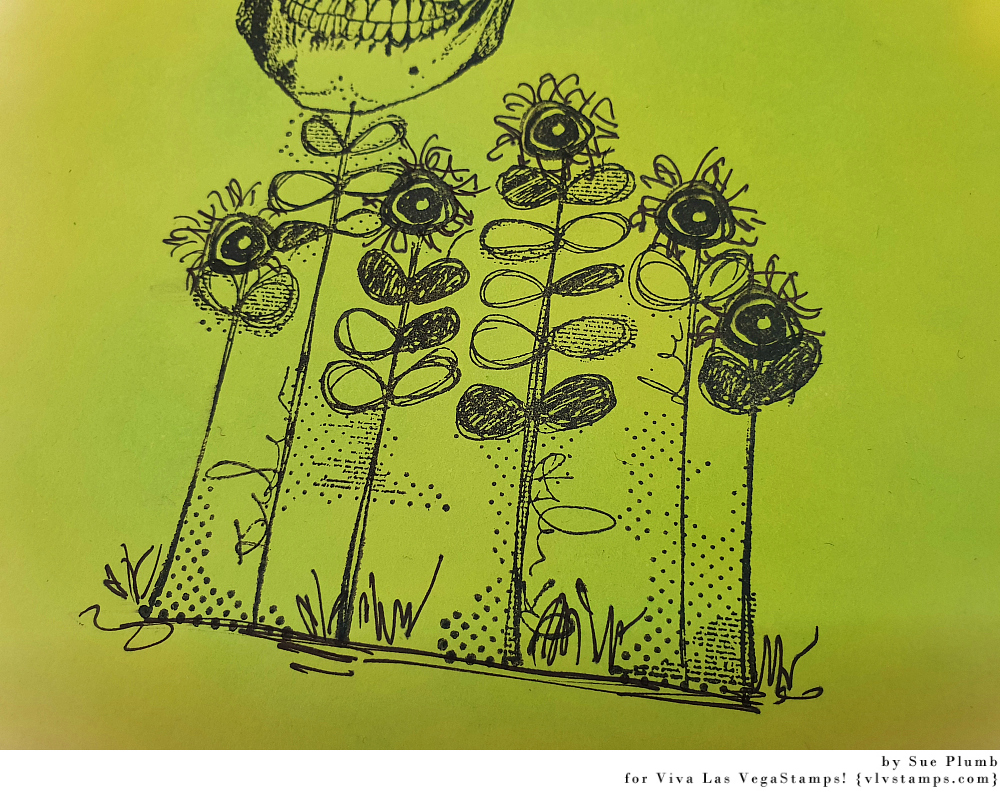
Once I had the colour down, I grabbed the Doodle flower/garden stamp to form the base of my focal image. I then stamped Skull stamp on top of one of the flower stems so it appeared as though it were growing in the garden.


I then used the Row of scribble circle/eyes to add "flowers" to the tops of the remaining stems.


I then added some extra detail by using a Sharpie to doodle some "petals" and also to add some grass amongst the bottom of the stems.

Next, I took the Striped pattern circle and stamped it out onto some extra white cardstock. I then fussy cut around the image before using watercolour pencils to colour it, and then blended it out with a water brush.


I then stuck the flower I had made onto the skull (like a flower in her hair). 


With the flower in place it was time to add my sentiment. I chose the She was a wildflower stamp and placed it alongside the skull.


I then added a little extra detail to my background by splattering some inks around the page using a small brush. I used 13Arts Ayeeda Ink in white and Colour Blast Colour Artist Ink in Slipper.


To finish off, I used the Sky of stars background to add some fine stamped detail.


That's all from me today, thanks for stopping by so I could share this with you. I hope I have inspired you to get inky too!


Stamps used:
Skull

Other materials:
- White cardstock
- Ranger Distress Oxides
- Tsukineko StazOn ink
- Sharpie pen
- Faber-Castell watercolour pencils
- 13Arts Ayeeda acrylic ink
- Colour Blast Colour Artist Ink

Monday, March 26, 2018

Flower Garden Journal Page by Fiona


Hello my creative VLVS! peeps. Fiona here with you today to share an art journal page i have made using the fabo Viva Las Vegastamps!!!


My background is all gel printed. I printed directly into my art journal. A little bit challenging but definitely worth the effort!

 I stamped once it was dry with basic black ink so the images would stand out against the busy gel printed background.

 I just love the "Doodle Flower" stamp and so I emulated it by painting in some extra flowers to make a very colourful garden on my page.

Viva Las Vegastamps! used include:
Writing Chevron

Lots of colour in this one .... A feast for your eyes. Thanks for popping by. I'll see you all again very soon xx

Monday, February 12, 2018

"Jelly Fish" Mail Art | Sue Plumb


Hi VLVS friends!
Sue Plumb here today to share my project for Mail Art Monday. I was actually inspired by the current "Under the Sea" Monthly Challenge to design this sea themed piece. Although I have created mail art before, it has usually been on a bigger scale (pizza boxes); so creating on this envelope was a good push to do something outside what I am used to. 


When I started this piece, I realised I didn't have any larger sized white envelopes left at home, only some yellow ones. The answer? Gesso of course! And then lots of lovely layers over the top!
I started with some Colour Blast Colour Artist Ink, which I applied directly over the gesso, along with lots of water to help move it around before drying it off.


Next, I wanted to blend the edges of the envelope, so I used a Faber-Castell Gelato to scribble some colour around the edge before blending it with a baby wipe.


Then it was time to turn my attention to my focal images for my envelope. I had previously stamped some gorgeous jelly fish out onto tissue paper using the Jelly Fish stamp. Because the tissue paper is so thin, it means the image can been seen well from either side, which allows you to flip its orientation to face the other way. 

I added some subtle colour to the jelly fish bodies using another Gelato, then used a Faber-Castell watercolour pencil to add some colour along the tentacles before sticking them down onto my envelope.


Once I had the jellies in place; I then took a piece of scrap cardboard to mark out the address box, before I used the same blue Gelato to blend around the edges of it, and also around the edges of my jelly fish.

Next, it was time to add a little greenery to my under sea scene, so I used the Doodle Flower/Garden stamp to add some plants along the bottom edge.


I also added some "bubbles" to create a sense of movement using my favourite Doodle Dots stamp. (I told you, there is no project this stamp can't be used on!) I also added some more pink to the jellies with a darker pink Gelato, as I didn't think they were "popping" enough.


I used a green Gelato to roughly scribble some colour over the top of my stamped plants before blending with a wipe.


To finish off my envelope, I added some blue ink splatters before removing the cardboard to reveal the address box. To help further define the box, I used a watercolour pencil to quickly draw around the inside border.


I am really happy with how this piece turned out; although sadly, I don't think it will make the mail. As soon as my daughter saw it she said "can I have that?" (she loves the ocean and its creatures) and I didn't have the heart to deny her. 
If I was planning on posting this however, I would recommend a quick spray with a water based sealant to protect it from the mail handling process and prevent the colours being rubbed away.


Thanks for stopping by so I could share this - I hope I have inspired you to get inky today!


Stamps used: 

Other materials:
envelope
tissue paper
Colour Blast White Heavy Gesso
Colour Blast Colour Artist Inks (Calypso & Marine)
Faber-Castell Gelatos
Faber-Castell watercolour pencils
Staz-On ink

Monday, June 12, 2017

Mail Art Monday with Susanne

Hi there!

Susanne here and I'm sharing a mail art envelope video tutorial today. Mail art envelopes are awesome! If you don't send it to a penpal you can use it in your art journals or as a gift packaging.


I hope you enjoy the video:


Here are some close-ups:


Thank you for stopping by today,
xx Susanne


Supplies:
Viva Las VegaStamps!
Doodle Leaf
Doodle Flower/ Garden
Row of Chevrons
Doodle Circle
Bubble Wrap Texture
Smear/ Smudge
Color Wheel Lines
Others:
Acrylic Paints
Gesso
Gelli Plate
StazOn Ink
Distress Marker Mermaid Lagoon

Wednesday, April 12, 2017

Altered Paper Houses by Susanne

Hi my dear crafty friends.

I'm sharing two altered paper houses today. I cut the pieces with my Silhouette Cameo from Kraft cardstock.


Here are the step by step instructions:

Add some pieces of old book paper before you cover every piece with gesso. Use acrylic paint together with a baby wipe to add some color. I used DecoArt Fluid Acrylics.


Add some details with different stamps and waterproof ink. I used Archival Ink Jet Black.


Use Crackle Paste with a stencil to add some texture.


After the paste is dry, cover the texture with DecoArt Antiquing Cream Carbon Black. Let it dry and wipe it away with wet baby wipes. Wipe away the color just in one direction to get a deep shadow on one side of the stenciled image.


I added the Pair of Butterfly Wings, stamped on tissue paper, onto the roofs. And some dimensional Flowers and sentiments to the front of the houses.


The flowers are from the Sizzix Susan's Garden Collection and colored with PanPastels. I glued the pieces together with Miracle Tape.


Thank you for stopping by today!
xx Susanne.

Supplies:
Viva Las VegaStamps!
Miracle Tape
Doodle Flower Garden 3
Tired of Trying to Cram 1
Pair of Butterfly Wings
Flowers are Love's
Where Flowers Bloom
Butterfly Specimens
Writing Circles Background
Sizzix Susan's Garden Flowers
DecoArt Fluid Acrylics (Carbon Black, Green Gold, Cadmium Orange Hue, Quinacridone Burnt Orange)
DecoArt Crackle Paste
DecoArt Gel Medium
Americana Stencil Doily
PanPastels


Monday, July 25, 2016

Mail Art Monday - FlipBook - by Jenn Engle (and GIVEAWAY!!!)

Hey everyone! For today's Mail Art Monday I made a Flip Book. A Flip Book is basically a little handmade book stuffed with goodies that you mail out to your friends.

A lot of work went into this little book. So rather than tell you how I made it, you can watch how I made it. The process video will be up at the end of this post.


Stamps Used:


Now for the GIVEAWAY!
All you have to do is leave a comment on this post telling us what your favorite kind of mail art is and you'll be entered to win this Flip Book! (Be sure to check out the video to see the goodies that went in here!) 
Giveaway will close at Midnight EST August 1st. 
For an extra entry: "Like" us over at our Facebook page. Leave a comment below saying you did this for another entry. https://www.facebook.com/vlvstamps/


Thanks for looking!
~Jenn