Hello my dear crafty friends!
Irit is here and this time I made an art journal page tutorial.
I know that making art page tutorial is almost mission impossible. There is no right or wrong way to make the art page and there is no workshop that can teach you " copy writing" of those book pages.
So it's just to show you my way to use products and to cluster techniques on one single page with just bit of real dimension.
Step by step instructions:
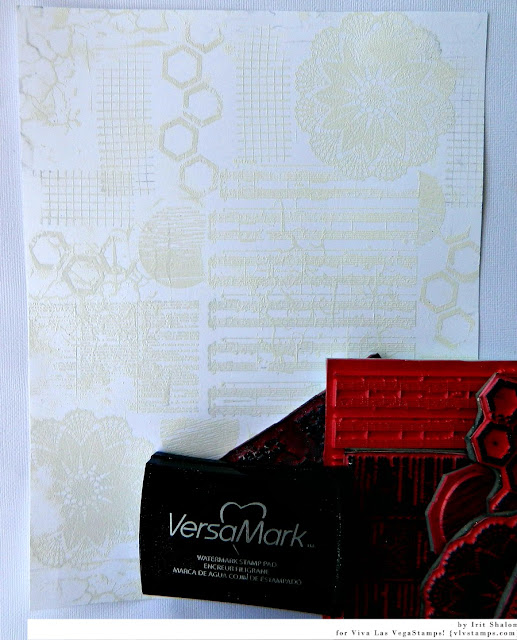
1. Gather your favorite VLVS backgrounds and make a full letter size stamped piece with them. I wanted those stamps to stay a background ones, so I used VersaMark ink and white embossing powder only.
Most of the stamps are not even masked, but just stamped one near another.
3. Now we need to add some dimension and the best way to do it on Mixed Media piece is with stencils and some paste. The paste I used is our Israeli Sand Texture one, but it's just similar to any non smooth texture paste on the market. I used a couple of Tando Creative stencils around the page and left the central part clean as we are going to add the focal point there anyway. Let the paste dry.
4. While waiting for the texture paste to dry, I stamped my big focal image using Whimsical Lettered Man stamp. I know it's a man; so what? It looks like a strong courageous woman to me, kind of an Amazon.
I decided to use pigmented ink and clear embossing powder for this main image: glossy one and durable too as it goes to the front.
5. As I was still waiting for the texture paste to dry I heat embossed a pair of bare chipboard wings with a mix of colorful embossing powders and added a bit of clear glitter too.
6. From this point and on it was just to arrange all pieces over the background and to add whatever you want to add.
So I added a bit of stamped blue images using Solid circles stamp and Butterflies row stamp.
I arranged the hand cut head and the wings over the page. Then I stamped two sentiments with the same Crafter's ink over the sticky canvas (this is a perfect ink for fabric stamping and all you need to do is to heat it/iron it to make it permanent). Some splashes of mists were added and my art page was done.
Here are a couple of close- ups to this page:
As you can see this time I decided to make a page according to sentiments. If it says" bold and bright"- it will be bold and bright, even if those are not my usual art colors.
Thanks for reading my tutorial and see you soon again!
Product list:
VLVS
Whimsical Lettered Man Item 19679 Plate 1457
Other products:
Chipboard wings- Creative Embellishments
Stencils- Tando Creative
Cardstock, fabric- Ranger
Inks- Tsukineko, Clearsnap
Mists- Tattered Angels
Embossing powders- WOW! Embossing Powders
Other- texture paste


2 comments:
I love your page Irit! The colors are awesome!!!
Irit! This page is gorgeous!! I adore the color combination!
Post a Comment