

This is the end result of my tutorial, below you find a step-by-step of how I did this.

start by making you stamp a little damp (not to wet, if you make it to wet put a piece of paper towel on it to absorb the water)
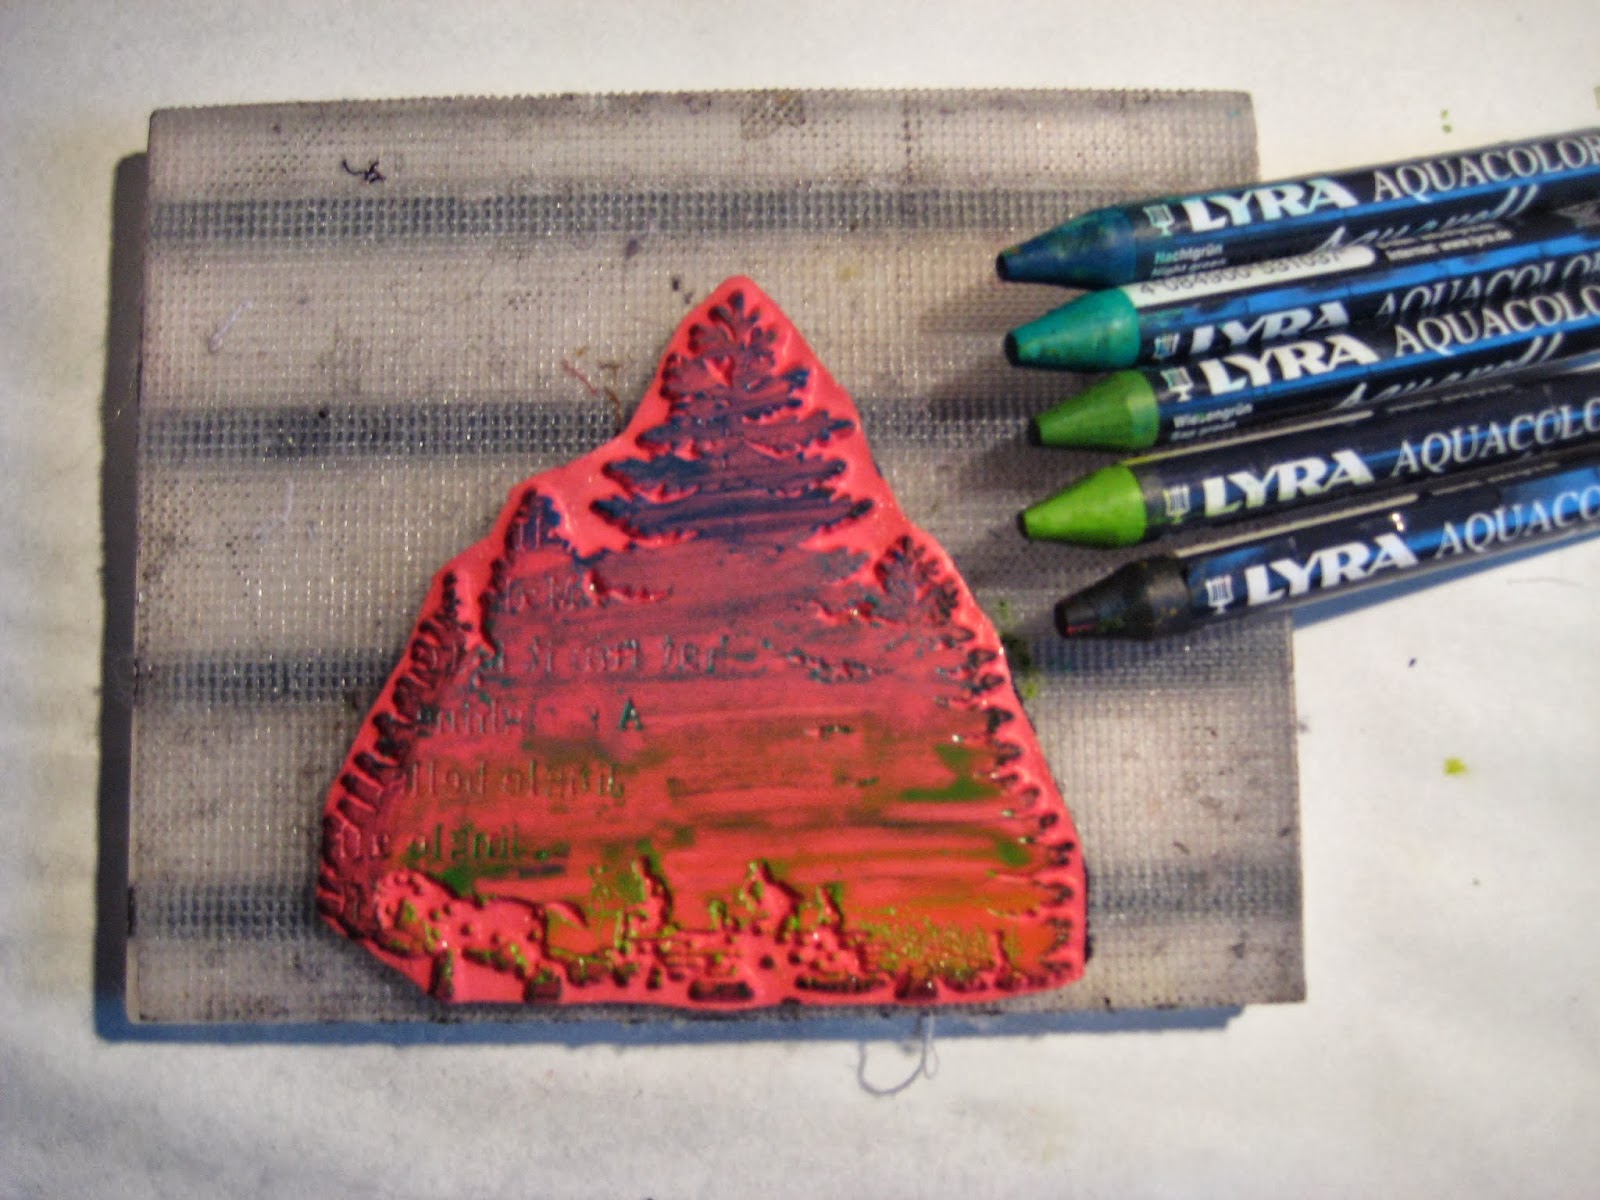
Take different colours of Lyra aquacolor and scribble on your stamp.

Take a spray bottle and spray water on it (again not to much)

Stamp on paper and let dry, I prefer to let it dry by air, but you can dry it with a heattool.

Take a Sukura of America micron 005 pen and outline the stamp.

This is a close-up after I outlined it.

Take a water brush and take some colour directly from your crayon.

Splatter this on the right hand side of the card.

Take a scrap piece of paper and stamp the tekst on it, colour this with a water brush and the same colours of the Lyra crayons you used for the main image. Glue in place.

Another sample I made with the same technique and same colours, only different stamps.
Used Stamps:
Xmas Silhouette Collage 19317
Bring on the twinkle 19313
Set of three ornaments 19309
with love 19302
All these stamps can also been found on plate 1411
Stazon jet black
Sakura of America micron pen 005
30 comments:
I like the card with the 3 ornaments--very pretty. ALso, it was good to refresh about using Lyra crayons to color directly onto the rubberstamp,mist,then stamp! I watched MaryJo Mcgraw at a convention years back, demo these but forgot all about it!
Outlining the stamped image of the trees was very nicely done!
Prachtig!
Both are gorgeous. Thank you for sharing
Erg mooi
Love it!! Thanks fir sharing!
These are beautiful cards and not too difficult! Thanks for the tutorial.
This is awesome! Thanks for sharing the technique!
Thanks so much, so quick and easy and yet so beautiful!
Love the cards! Thanks for the idea and the great tutorial!
Fantastic technique, beautifully done!
these are beautiful cards! thanks so much for the tutorial
Great ideas here! Jenny x
Bedankt voor de (foto) uitleg Hermine! Heel leuke techniek
fabulous!
Beautiful, thank you for the tutorial !
Stunning! These look like some of the designer cards that are available on the market.
Simply beautiful.
Love your cards - this is a technique that I learned many years ago and you have refreshed my memory of it! Thanks for the great tutorial.
These turned out amazingly!
Hermine! OMG amazing!! I am off to buy some Lyra aquacolor...
never used these, cool to see them in action!
Superr mooi!! Zowel de kerstbomen als de kerstornamenten!! Geweldige kleuren.
Love this card and was so happy to find a tutorial for it! Thank you so much!
beautiful card, very interesting done. Thanks for the inspiration
Brilliant tutorial and two stunning cards, thanks for sharing!
Watercolor paper or regular card stock? Beautiful.
Love these cards and the idea to use the fine black pen to add details, amazing!! So smart. :) thanks for sharing.
beautiful!
Beautiful Hermine! I can't wait to try this out!
Beautiful cards. Thank you for the tutorial.
Post a Comment