Showing posts with label Gellli plate. Show all posts

Thursday, August 24, 2017

Whimsical Bird ATC

We have our August inspiration challenge

 AND our August swap still going on.  The August swap is for ATC's and the theme is: colors of the sunset.

If you have been watching the challenges and swaps lately you might have npticed that we have been picking themes for the swaps that go with our inspiration challenges.  That way you get more bang for your buck!  You get to swap art and link up for a chance to win!

So now that you have the insider information...on to the project I am sharing today...  I created ATC's for our swap inspired by the colores from the inspiration challenge that just HAPPENED to be colors of the sunset or at least my interpretation.


I started with a piece of watercolor paper, my gelli plate and Dina Wakley acrylic paints.  Oh and stencils too, one from Um Wow Studio.


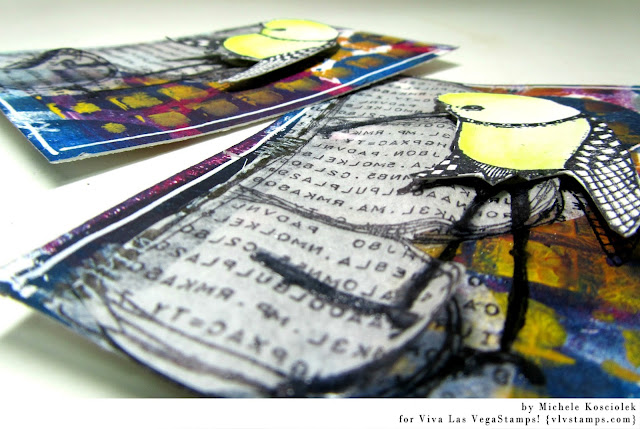
I cut my two ATC bases from one of my prints.

I built up my layers by first stamping on a piece of tissue paper, fussy cutting and adhereing to my background.  Then I did another of the same layer and adhered only on one edge.


This is the Typeset Scallop stamp, one of my favorites from the latest release.


I love the texture.

The Whimsical Long Beaked Bird is stamped on all of the layers and then the body is stamped fussy cut, colored and popped up.


This bird is SO cute!

Here is a close up of the background...glorious colors!!!


Thanks for stopping by and I hope you are inspired to join us in either our swap or our challenge.  You can find the swap deatils in the events page of The Viva LasVegaStamps Groupies Facebook Page and the challenge info our our blog.

Until next time...get inky!

Wednesday, January 25, 2017

Forget Your Age!!

Hydi Hoe stamp lovers!  Michele here today with a quick gelli plate background technique tutorial I used on a super fun birthday card.


Viva Las VegaStamps! used:


I started with a piece of watercolor paper that had a book page pieces layer added with some gel.


A little bit of drywall tape for another layer.


Now a couple dots of Dina Wakley acrylic paint on my gelli plate.


Rolled out with the brayer.


Then some stamping on the paint with the awesome wire rings stamp.


Here is what my layered paper picked up.


This layer is finished with a few stamps of the wire ring stamp in archival ink.


I repeated the layering step with another color of Dina Wakley acrylic paint and the writing circles stamp.
This background technique is so fun and really a powerful pop of texture and depth and color.


And just look at the awesomeness of that wire ring stamp!!


It is hard to see in the photos but these polar bears SPARKLE because they are colored with a clear Wink of Stella.  Who doesn't love a polar bear in a tutu riding a unicycle??!!!


I hope you are inspired to try this background technique and that you share what you create over in our Facebook group!!

Until next time...get inky!!


Friday, July 08, 2016

Women

Hello everyone,

and welcome to post for today where I am sharing a mini book that I created after doing a gelli printing workshop and making a similar book but a lot bigger. First off I printed some cards....


These are the four cards I used. They are approx. 15 x 10 cm. 


One of the prints was cut in half to make the front and back of the book... 


This is the first of three mini art journal spreads. 


This is the second...


And this one is the last. 
All images were coloured with Copic Markers. The backgrounds were stamped with Archival inks in colours similar to the paint colours used and some black as well. 

I have used a whole stack of stamps for this little book:


Thank you for stopping by today !