
Hi guys, It's Tera again here to share my fun blast the past stamp project with you!
This was such a fun challenge for me! and I hope it will inspire you!! I love that this stamp can be used in so many situations, from birthday cards, to girls night out, dog lovers, and just about anything!
For my project I thought I would do a piece on celebrate who you are and your own style!

Stamp used:
Shoe Dalmatian Dog 3 x 2 1/4

Start by inking your stamp in black ink, then carefully wipe the ink off of the shoes/spots that you would like to be a different color and stamp on card stock. Next clean off your stamp and color the shoes in with brick red distress marker and carefully line the stamp up over your already stamped image...
(it doesn't have to be perfect :-D ... if you would rather you could also mask the area off)

Next if you are like me and need to touch up your edging from wiping the ink off just fix it with a black marker


Next ink your desired embossing folder (or stencil) in your desired ink color. I used Brick red again then spritz the distress ink on the embossing folder with water. Carefully set the tag on the embossing folder and brayer it or gently rub it to be sure the whole tag touches to pick up enough color


this is something similar to what you should see after lifting straight up (I heat dried mine, but you can wait on it to dry naturally if you are more patient than me!)


Now comes the fin part sponging on ink!! I used Wild honey and Fired Brick on a make-up sponge

I made two so i could have options to which I liked best when finished and because it is so fun!
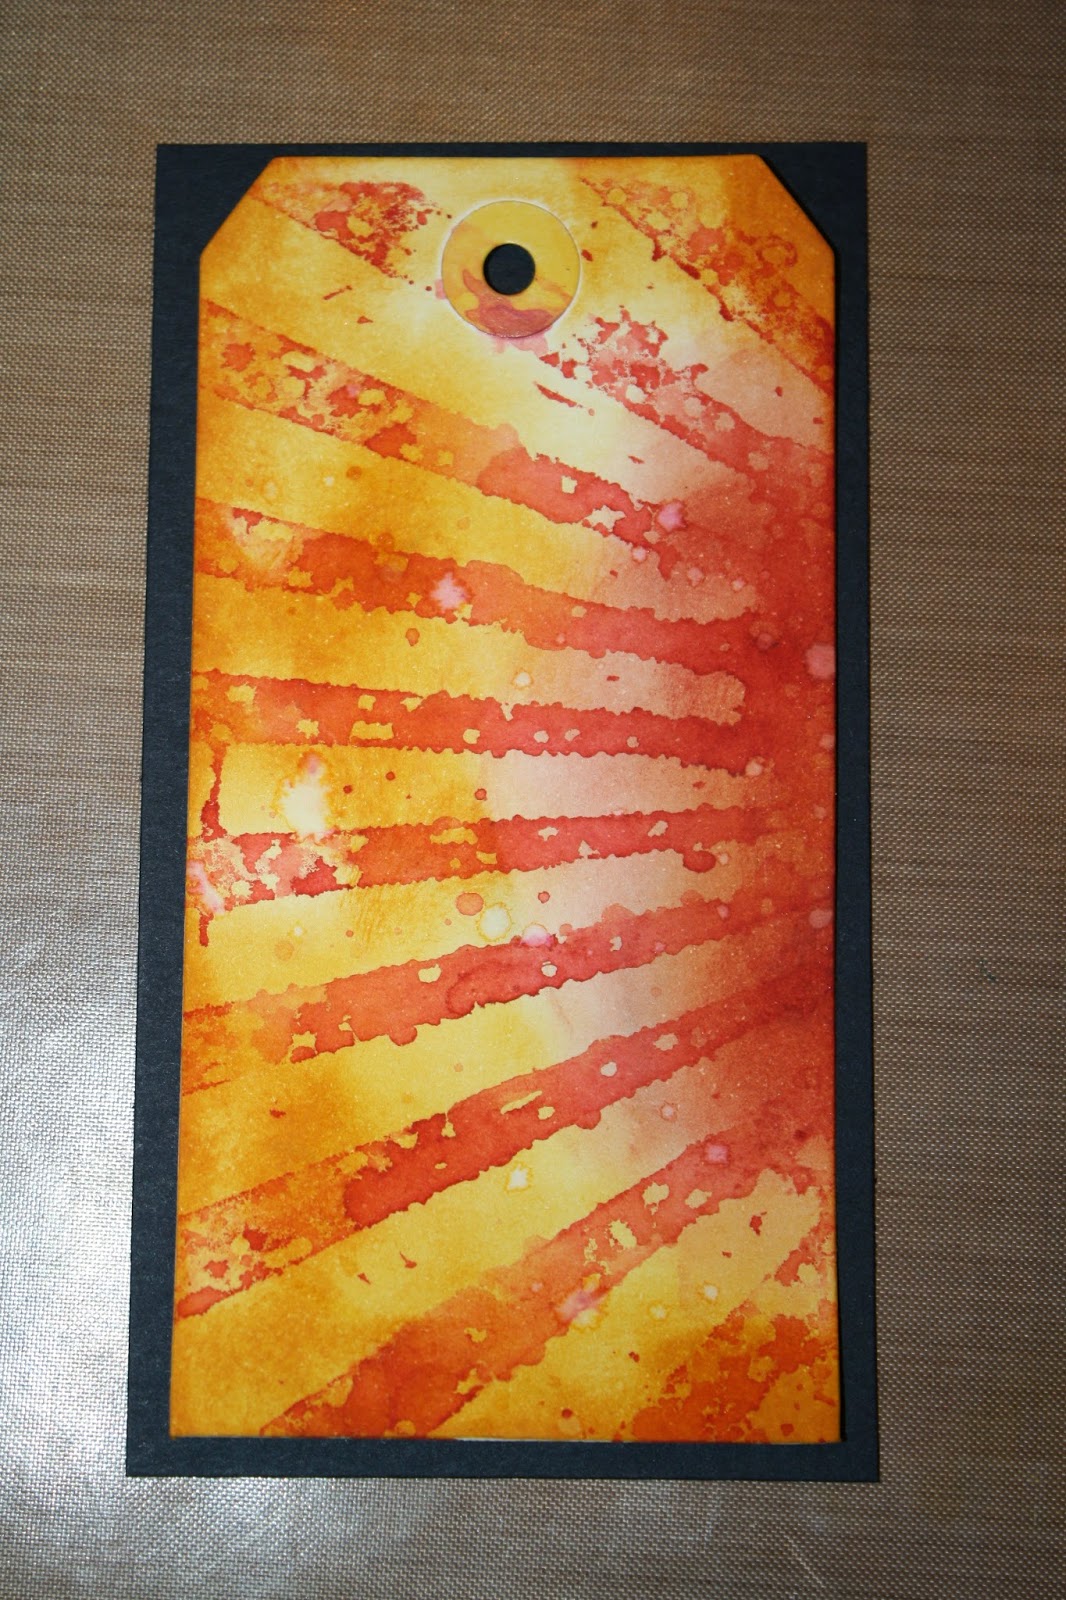
this is when you want to measure out a piece of cardstock about an 1/8 inch bigger to really make your colors pop.. it also fits and looks awesome as a card front for an A2 card!!! (set this piece to the side)


Next Create your desired quote with a Dymo maker if you have one
(or if not another stamp even!! goodness knows I love stamped quotes!!! hehe)


Next take your two ink pads and stamp them on your craft mat. spritz the ink with water again then rub your seam binding ribbon (or any that you have) around in the colors until you get the look you want adding more ink as you go. I also crinkle mine and heat dry it

make a pretty bow for the top of your tag and tie it on

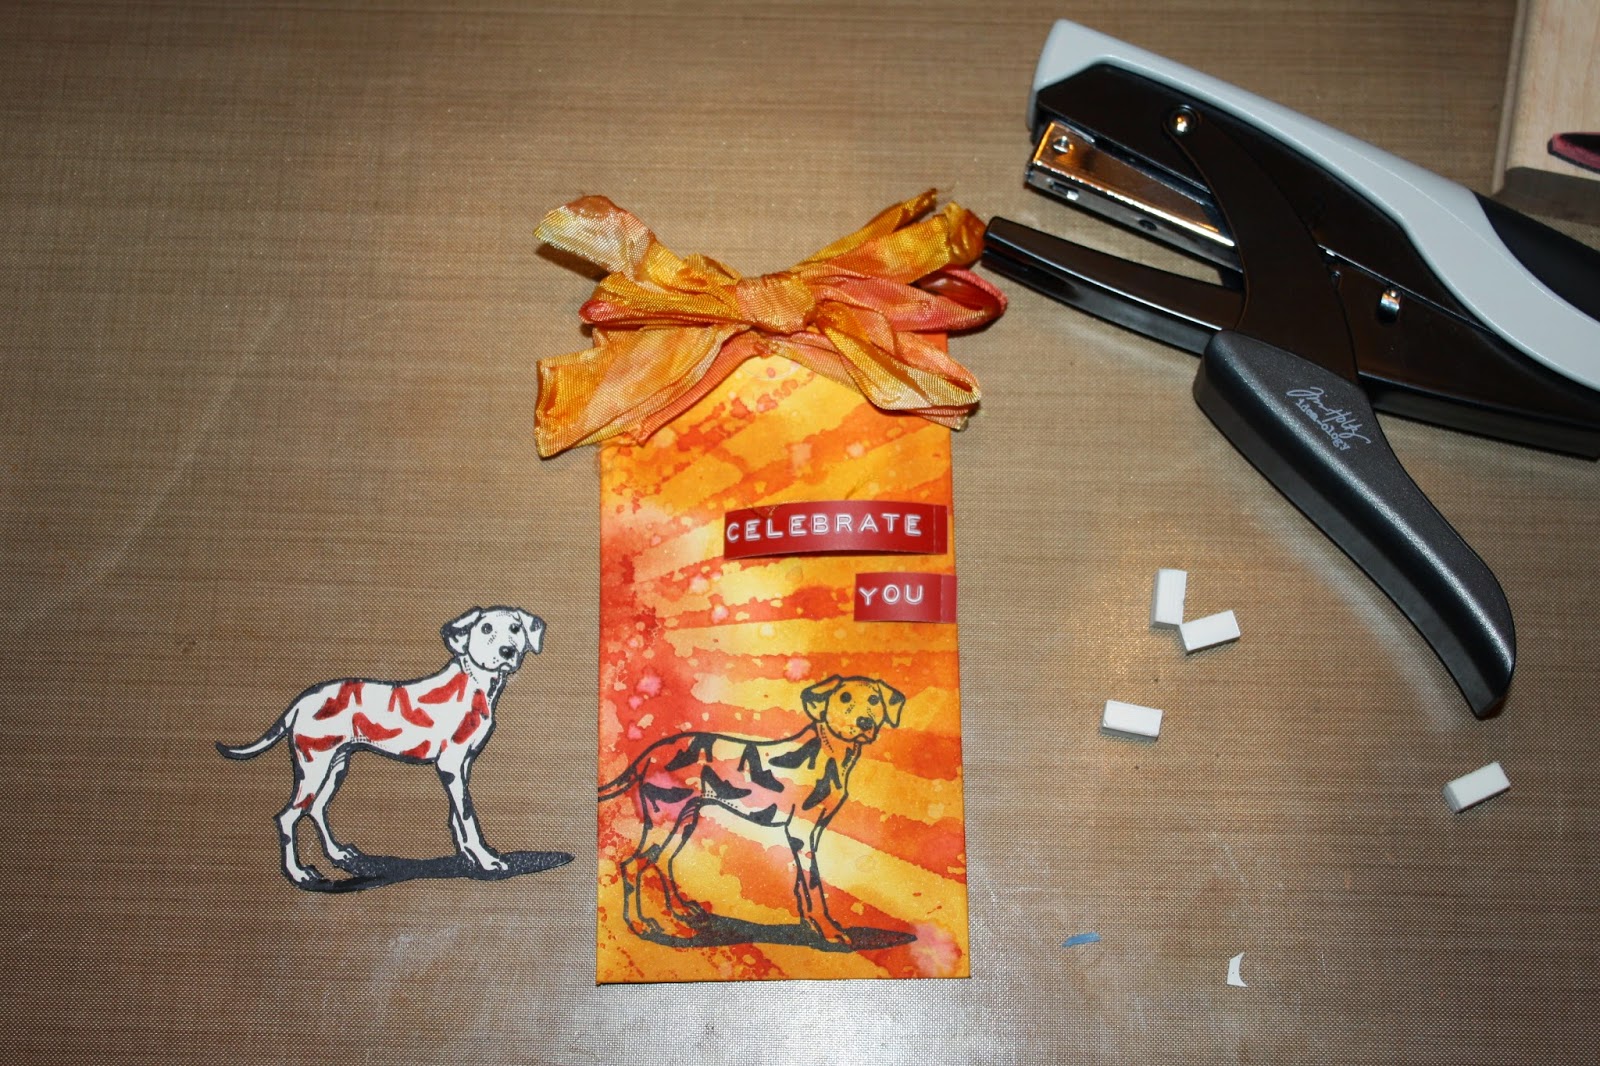
next lay your pieces out and decide where you want your stamp to go. Stamp it in black ink then color it in solid black This helps add a nice finished look behind your image and a hint of a shadow


At this stage you are almost done!! add your pop dots, and staple down your quote! If you are pleased with the look attach your back with Miracle Tape and Enjoy!!!!
(here you can also see the nice shadow added by coloring the back black)
I Hope you enjoyed this tag inspiration!! I had so much fun making this piece and I know that I will have to use this Awesome stamp for some more super fun projects!!
9 comments:
I love, love, love this Dog stamp!!! How cute is that!! Great tutorial. Thanks for sharing your talent with us, Tera. Hugs!!
Thank you! :) that is the cutest dog isn't it!?!
That shadow is great! Something to try myself... Great tag; the summercolours and stencil are things I love to work with too... Hugs, Gerrina
I love it. The color burst is super cool to. The whole is just super cute.
Such a great tutorial. Thank you so much for some fun inspiration!
Love your adorable tag! Great idea to black out to make the shadow.
this could be Toto, with the red shoes on him :) love the colors of this!
What a sweet stamp! We do love the combination of colors and the sentiment added with the Dymo embossing tape. Great job! ^CP
Thank you All!!
Post a Comment