Thursday, March 30, 2023

A gentle heart .... ► Majo


Hi Lovelies,

 today I show you a card I made with one stamp only. I have had it for some time and never used it. 

I think it needs a place on its own.

The background panel is a gelli print I made ages ago.


I created the background with some thinlits and gave the sentiment all the room it needed.


The sentiment from Plate 1483

 Have a good time crafting and enjoy spring!

 Luv ya


Wednesday, March 29, 2023

Fish-tastic birthday by Tracy Blackwolf

 Hello All! Today I made a Birthday card that will work for anyone in your life...


So first I Sprayed my card with a variety of spray stains, let dry then spray some more to get that water look.


next I stamped the corona virus image and added a bit of brown ink to  the tops of each blob for what will become my puffer fish balloons.
I tried drawing the faces on, on a different card for a test run and lets just say I stamp because I cannot draw. So that lead me to my trusty computer  where I googled puffer fish so I could  find a cute face to use. I still had to draw the fins but that was okay. Once I found a suitable fish face, I printed them out in different sizes to fit each balloon. I cut them out and glued them on. I then added Some fishing lure eyes I have a stock of in different sizes. I also stamped the shark and painted him in adding a glow in the dark eye to him.


Next I cut some waves from a wave die and also used a wave stencil to add waves to the card. I used just a part of the die cut waves and sponged ink onto it. then I added some glitter glue for a bit of sparkle.

I used foam tape on the back of the shark for dimension, placed him on card, then added die cut waves. Last I took a fine black marker and drew the balloon strings down to the shark like he's got them tied to his fin or something. I needed a saying so again, Typed them out on the computer and added ink and foam tape and stuck to card. Couple layers of cardstock and done!
I hope you enjoyed, it was a fun card to make! Until next time- stay crafty!

Stamps used:
Corona Virus      20547
Shark head,lg.    4018

Other Supplies:
Distress spray stains: Salvage Patina, Blueprint Sketch, Speckeled Egg, Squeezed Lemoade, Weathered Woood, Pumice stone, Tattered Rose, Victorian Velvet

Versaclair: Nocturne, Warm breeze
Stickles glitter glue- Crystal
Waves die- Sizzix thinlet Mystical seascape #665269
Ocean waves stencil- The crafters workshop TCW2322
Fishing lure eyes- can found on amazon


Monday, March 27, 2023

THANK YOU CARD - by Fran Chalmers

Hello everyone!

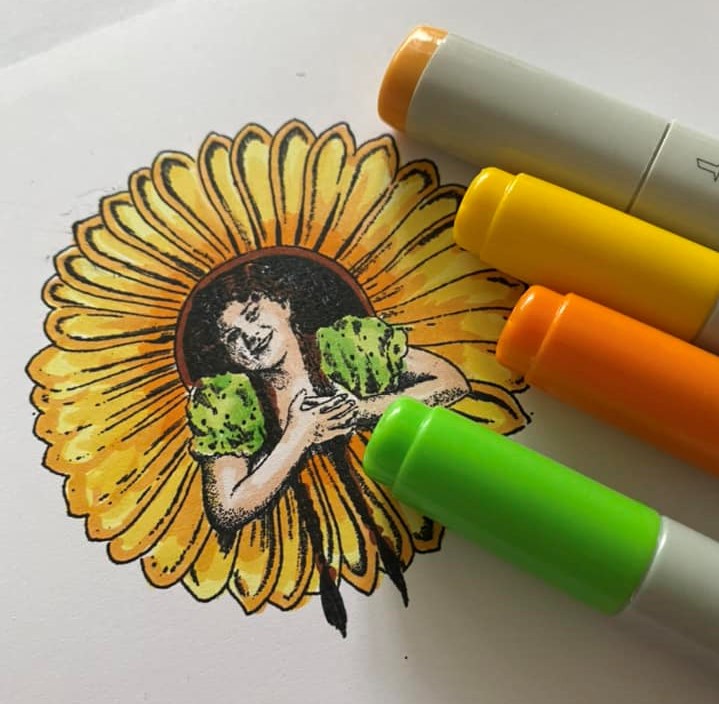
It's finally Spring, and as I had to make a thank you card for a friend, I decided to use bright, Spring-like colours.  I loved this stamp and thought it would look great in yellow!


 I made the background by inking up only part of the stamp and randomly stamping over the card.


I stamped the main image onto card, coloured it in Copic pens and fussy cut it out.  It was easy to cut despite the edges of the petals.


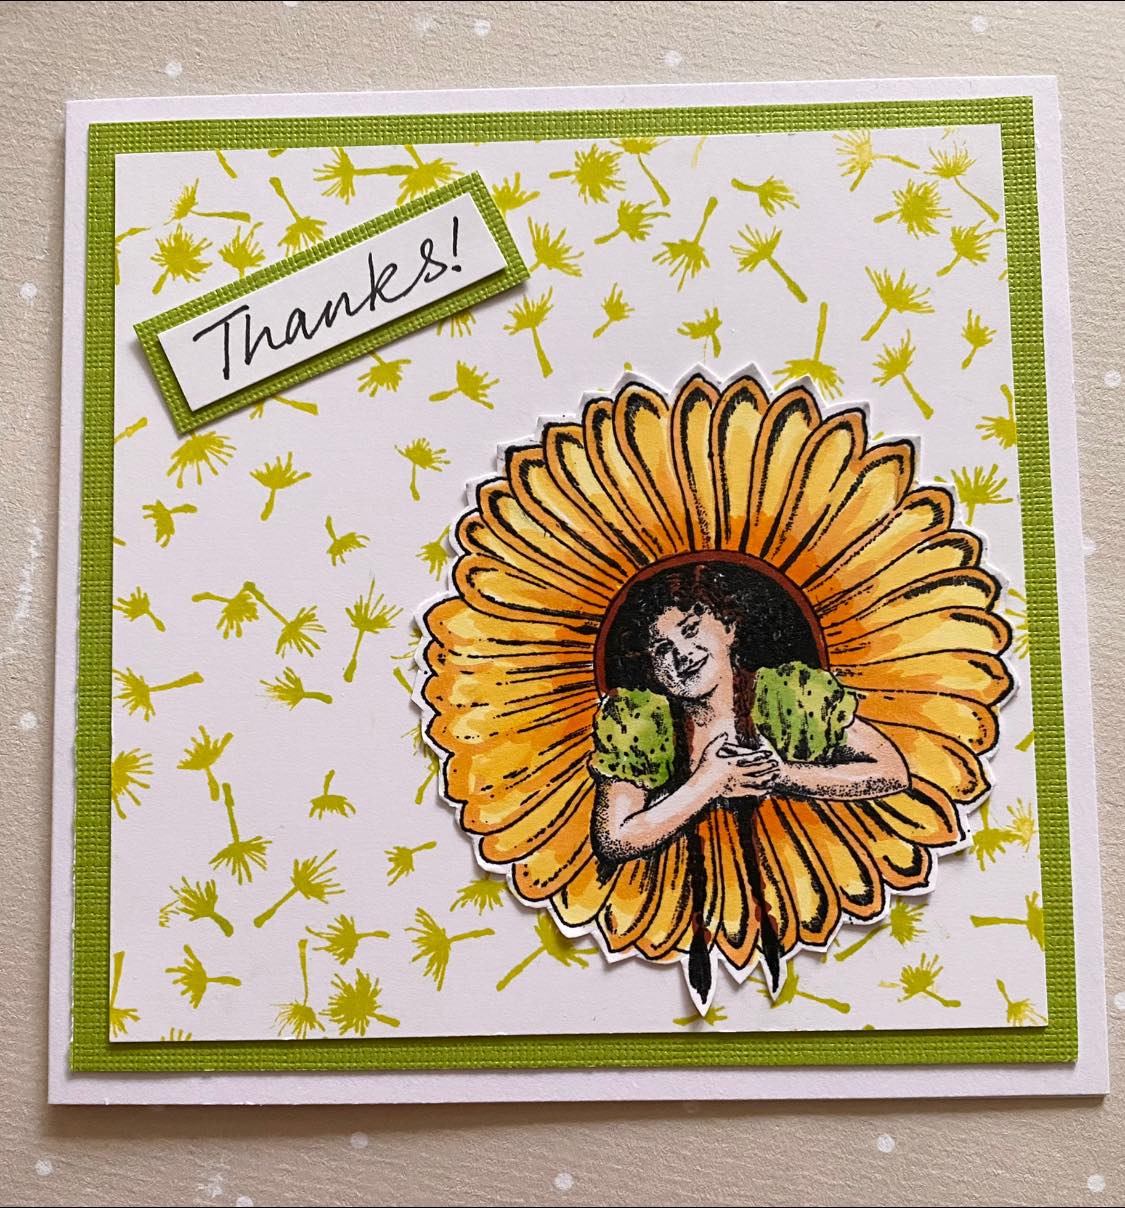
I mounted the card onto a green mat, and added the sentiment (handwritten, as I don't have a printer at the moment!).


I hope you like this card.  It made me look forward to Summer even more!

Stamps Used:

Blowing dandelion and extra seed 19045

Girl in flower Plate 1410

Other Items Used:

Versafine Clair ink in Verdant

Memento Ink in Tuxedo

Copic Pens


Saturday, March 25, 2023

Intro : Gosia Du

 Hi !

My name  is Gosia Du. I am beyond happy to be a part of VLVS team!

I live in Poland with my hubby and our two little ones. I’m a proud owner of a few art journals

 ( stopped counting after my 5th one :).  I have been crafting for a few years and simply cannot stop. 

Most of my projects come to life at night, this is when I’m most creative. I like making albums and cards 

and just love playing with colours . I’d love to share with you a few of my older art pages created with 

gorgeous VLVS.

This granny is probably one of my favourite stamps.


Tuesday, March 21, 2023

Some kind of matchbox by Arwen

 Hi Lovelies

Back on the Blog with a new project :)


And that's the way, I made it:

1.) You need 2 leaves of sound box. The dimensions are in the picture.
Then both sides are folded.
The large piece (19cm wide, 21cm high) is folded at 1.5 cm - 6.5 cm - 12.5 cm - 17.5cm
Turn 180 ° and fold at: 1.5 cm - 6.5 cm - 14.5 cm - 19.5cm
The smaller piece is folded at 5cm and 10cm, then turn 180 ° and fold at 2cm and 7cm.


2.) With the big piece you have to cut a lot away so that the dimensions remain from the picture. Part 2 is only folded.


3.) After cutting out, all fold lines are kept in one direction. You do the same with the smaller piece of cardboard.


4.) All 4 tabs of the box are now stuck. After drying, glue the outer tabs inwards. Part 1 is ready.


5.) So that the drawer is properly adjusted, the smaller piece folded wraps around the box and marks the circumference with a pen. The box is glued together on this marking.


6.) Now you can push the box into the finished tunnel. The blank is now ready and can be designed


7.) To design the box, I cut out coverings from watercolor paper and colored it with watercolor color.


8.) With a chalk pillow, I stamp my selected motif on all pieces. A little shimmer spray sprinkle, a saying and the box is ready.


All stamps, I used:

- Checkerboard Heart large

- Swirl

- with love


other stuff:

- cardboard

- Prima Watercolor

- Chalk ColorBox

- Staz on

- ScorePal

- Dylusions Shimmer spray

- watercolor paper


See ya soon *mwah*


Saturday, March 18, 2023

Bitch by Birth, by Madisen Hernandez

 Hi Stamping Friends! My name is Madisen and I am a pediatric psychiatric registered nurse in sunny southern California. I'm coming to you today with an introduction post and art-journal entry! I like to do maximalist art, always adding something just before I think I'm finished! I rarely have a plan and just stamp with my heart! I hope you enjoy!


I began with this image of myself on a film print, one I took while hiking in Idyllwild California. I wanted to incorporate the blue, green brown I saw in this photo. 


I began to brush random distress oxide inks on the page to single out the targeted colors, I used tumbled glass, mowed lawn, ground espresso and faded jeans. I then began to stamp the abstract background images using 
https://vlvstamps.com/cross-marks-background-2-1-2-x-3-3-4/


I then accentuated my crass personality with the Bitch by birth sticker

Lastly, I added my sassy bored chick next to me, colored with alcohol markers and fussy cut her out!


Thank you for your time and viewing my art! Until next time!


Thursday, March 16, 2023

BADASS ► Majo


Hello, my friends.

 Time for another fun card with the lovely ladies designed by Tina.


I inked a watercolor panel and after stamping the wire I cut a few squares from it. On two squares I stamped the ladies on the backside, on one the word on the front. I glued it to a second panel.

 I adhered all other squares with pop dots to make them stand out a bit.

A little wooden heart finished my project.


I used the following stamps:

 Wire rings

Badass from Plate 1517

Ladies from Plate 1523:

Scribble Girl Spiky Hair

Scribble Girl Pigtails 

 Have a wonderful weekend and find time to craft!

Luv ya


Wednesday, March 15, 2023

Off to work by Cathy Norton

                                                                   Hello everyone. 

Today I have a vintage, grungy postcard for you today. 

I started off with some watercolor paper and 2 brown distress inks. I put some inks on the glass mat and I smooshed the watercolor paper into it. I dried it with a heat gun and repeated it till I got my postcard looking like this. 
I then stamped vintage tobacco advertisement and writing background randomly over the background with the darker of the brown inks. I edged the sides of the postcard with the same ink
Next, I used some Kraft cardstock and stamped the businessman with black ink and I made it into a tag. I also edged this with the brown ink.
After I added the tag to the center of the postcard, I then added some of Time Holtz snippets around. 

Stamped Used:

20669 shadowgraphs tobacco 

17545 grunge writing background

19418 businessman silhouette

Other supplies:

Ground espresso, vintage photo distress ink

Versafine Clair Nocturne ink

Watercolor paper

Kraft paper

Tim Holtz snippets