Tuesday, June 10, 2014

Who are you?

Hello all :) Nataliya is here :)
Today I'm brought to you my new card about our real "I" that we often hide from everyone, even from ourselves. So who are you really?


I just adore this effect with pearl powder...hidden pattern)


And little tutorial for you :)
I very love to do stamping background! Maybe you have noticed it :)
For the beginning I stamping on the scrap paper using Gelato - what lovely color blends are obtained!


I did a little "script" details with StazOn and Memento Luxe:


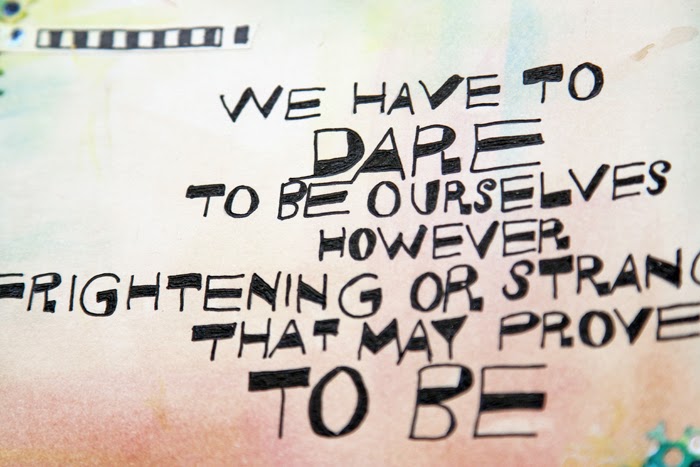
It is time to pearl powder! I did stamping with VersaMark.


As you can see, powder stuck on VersaMark and Memento Luxe, but drawing with VersaMark visible only at certain angles.


Adding some blots:


and my fav Be Adorable stamp :)


For Men I used black StazOn, again:


And with Gelato I add shadow:


My VLVS!
Harlequin Diamond Background 4 1/2 x 5 3/4Writing Background 4 x 4
Waybill/Invoice Background 4 1/4 x 5 1/4
Victorian Flourish 2 1/4 x 5
Be Adorable 1 3/4 x 4 1/2
Businessman Silhouette 1 1/4 x 3 1/4

My other products:
Paper - Lemon Owl
Ink - StazOn (Jet Black), Memento Luxe (Rose Bud), VersaMark
Spray - Walnut Ink (Cornflower), Mister Huey's (Inky Black), Adirondack (Red Pepper)
Gelato - Earl Grey, Guava, Metallic Melon
Pearl Powder

Monday, June 09, 2014

Birthday Cards made Easy

Hello again everyone!! It's me Tera here with another fun tutorial.
Today I am going to share this cute but simple card that I created for my cousin for her 13th Birthday! I know you wouldn't normally think Dragons for a girl, but Kenzi is extra awesome and sort of a tom-boy so I think she's like it, and this stamp is so adorable it can be used for boys or girls!!


Supplies Used:
VLVS:

Dragon on Egg 2 1/2 x 3

PanPastel in dark Blue
StazOn ink in Black
Adhesive
scissors
cardstock (black, green, White)
K &Co Adhesive Chipboard
Embossing folder (not sure of name)

To start, I took my roll of masking tape and traces two connecting circles to make the base of the card. then i trace 1 more circle that was separate.

after you cut your circles out (making sure you don't cut apart your connecting ones...see photo) fold your connecting circles in half. then fold the top part/circle of your card in half so that the circle touches the center fold line (this is the popped up part of your card)


next glue the extra circle to the bottom 1/2 of your folded circle on the front. Next take your PanPASTELS and color the edges


I then cut out a contrasting black circle which was slightly smaller and embossed it using an embossing folder that looked like dragon scales to me. After doing this I adhered it you the new front of the card


I stamped my dragon on white card stock, then colored using markers before cutting it out and gluing it to the front of the card


to finish everything off I added the chipboard stickers to help prop the card open and add a little extra visual interest

 Below you can see it from a few different angles : )


Thank you all for visiting!!
Don't forget about the June challenge board!!!


Thursday, June 05, 2014

Art journal fun

Hi everyone, Glenda here with some art journal fun.  I love using magazine images in my art journals and I had this really cool picture of a woman's face so I tore out the image of her eye and glued it onto my journal page.  I then added paint and inks to the paige so that you could just see the eye poking out.
Then I used a whole bunch of stamps for added interest and to help decorate the background
as well as a die cut and a sticker, some clear washi tape and a single rhinestone tear!  Here is the finished art journal page
and a few closeups of the stamps


Here are all of the stamps I used to create this journal page:
the road not taken
wanderlust
censored
stars
row of stars
french writing background
waybill/invoice background
And before I go I was inspired by the colors of this journal page so I made an ATC as well
and for this ATC I used the banksy painter 
isn't he cool?? I love all of the new Banksy stamps!!! I hope you enjoyed my projects and until next time,


Wednesday, June 04, 2014

Dare to be ourselves...


Hello and Happy Wednesday!  Tina here today with my last month of projects.  I am SO enjoyed my time with y’all and I hope you have been inspired!

Today, I created a project that is very special to me, for several reasons.  1)  I consider myself to be very unique and sometimes struggle with staying true to myself while ‘still fitting in’.  I am sure that many of you can relate.  And 2) This Art Journal page is not the typical ‘Tina project’, but when I finished it, it resonated with me in an unsual way.


When looking through the 1000’s of VLVS stamps, I kept getting drawn to these 2 stamps, 'Eye Close-up' and 'Eye Design'.  I’m not sure if it was the unique, Picasso-esk look, or the fun, doodle-y nature of the image, but I knew I had create something with them.


I had envisioned a page using them both as the ‘eyes’ into my soul.  By stamping them off-set from each other (and I think 1 is actually upside down), I stamped them so they eyes ‘lined up’.  Using 1 of my favorite techniques, I colored in the image with Glaze pens and Doodling markers.  


I had not originally intended to add a mouth and nose, but as my page evolved, I knew it needed it.  I hand-drew both elements to create the face image I had in mind.  

The quote I used on my page reflected the feeling I was trying to portray exactly, and I thought it was a perfect fit.

Do you Dare to be yourself?  In what ways?

Thank you for stopping by!  I hope you have a great day.
Tina

Tuesday, June 03, 2014

CD art journal

Hi Hermine here. This CD case was a present from a dear friend and instead of using it as a storage case I decided to turn it into an art journal. Using old CD's as pages.


This is how it looks when the firsts page is added to the case. Below you will find the describtion of this page.


step 1: sand the CD to remoce the metallic layer. I did this in my art room but because the metall is so static it clings onto everything, so i advice you to do this outside. I know I will do so next time.
step 2: Take 3 colours of Memento de Luxe and cover the CD, using the yellow in the middle, sponge  the dge with orange and then a little with red. Heatset untill completely dry.
step 3: Stamp the Harlequin Diamond background 18920 with blue and the spotty background 1461 with Radiant Neon orange. Heatset untill completely dry
step 4: Stamp the Vintage Lighthouse 19288 , Lighthouse scene 19125 and tekst In the pale moonlight 19351 with Memento de Luxe Black. Heatset untill completely dry
step 4: make some accetns with a white Sharpie pen.

As you can see here the CD is semi transparant, I stamped on a piece of paper but the bird where on a spot that they weren't that vivisble anymore, so I used the paper for another page (see below)

step 1: is the same as above.
step 2: sponge the Cd with Memento purple and blue, don't heat set yet but put the large wasp 19014, Waybill/invoice background 19416, washi chevron background 19072, color wheel lines 19338 into the wet ink and wiggle a little, this way you remove the ink and get clear spots. Then heatset untill completely dry.
step 3: stamp pair of boots 19239coffee ring stain 19230pylon 19232 with Memento de Luxe black and heat.
step 4: make some accents with a white Sharpie

Finally I got to use the paper with the birds on a wire. 
step 1: Sand the CD
step 2: Stamped birds on wire 18098 and  the time flies 19008 on it with Memento De Luxe black. Put aside
step 3: colour the CD with Memnto de Luxe green. Heatset and then take a stencil and sponge some blue. Put the paper behind the CD and put it into the sleeve. I love how this looks

Hope you like the pages and get some inspiration of it.

Warmly Hermine


Used materials:

Memento d Luxe and Radiant Neon


Monday, June 02, 2014

Sm;)e.

Hello!!  Mary here with some fun inspiration for this month's challenge.


I decided to create a fun summertime journal!  It's perfect for scrapping a few summer photos, jotting down my musings and holding all those bits and bobs of goodness I just need to keep.


As you can see, I took the color palette quite literally!  I sprayed a bright yellow and also a teal Lindy's Stamp Gang spray mist  and a whole lotta water onto some watercolor paper.  When it was completely dry, I finger painted white paint here and there to give the illusion of clouds and soften it up a bit.

Then, I stamped the 3 Women in Tubes image in StazOn jet black ink as a focal image.  I then stamped the sm;)e image repeatedly in the same ink.  I love that it serves as my title and adds such lovely texture, as well.


Finally, I stitched a vellum sun, a border and some pretty blue seam binding down.  The seam binding started it's life in white.  I cut three lengths and gradually added more of the same Lindy's teal spray to achieve a pretty ombre water effect.  A few sequins for some sparkle and I'm ready to play!


Needless to say, I was super inspired by this months mood board!  I LOVE my book and can't wait to spend the summer filling her up :-)  I hope you've found a little inspiration today, as well.

Thanks for stopping by!

xx Mary

Sunday, June 01, 2014

June Challenge

It's time for our June Challenge -- JUNE.
First, thank you so much to each and every entry for May. Stop by and check out all the glorious VLVS! inspired pieces that were entered.

Now onto June's Challenge:

Please feel free to enter cards, tags, layouts, altered bits, art journal pages and more! You may draw inspiration from ANY part of our mood board; Tropical locals, palm trees, birds, flamingos, silhouettes, sunsets, suns, stars, celestial anything, sand, beaches, nautical, ombre effects, mint, teal, yellow, orange.. you name it!


Don't forget the rules:
-Create a new project based on our inspiration board
-Use at least one (but certainly more if you want) Viva Las VegaStamps! rubber stamps
(We are now allowing competitors stamps to be on your work, but please make VLVS! the focus of the project, thank you.)
-Post it to your blog with a link back to us
-Upload to our linky using your direct blog post link (You may also upload via facebook, flickr or other gallery)

You could win a Project Spotlight post on our blog + some new rubber of course!

And visit us back here tomorrow for some inspiration from Mary Brockway!