Wednesday, June 10, 2015

TOOT your STAMPED Party Horn!


Hello everyone! Susan here with a tutorial using Viva Las VegaStamps! and washi... washi... washi tape – my second obsession. Who needs paper when you've got rolls of colorful goodness??!

I've been on a bit of a washi tape kick lately and I've been having a lot of fun using it for crafty projects. To create this fun birthday card, I have a quick tutorial on how to incorporate stamping with and ON washi tape... including a variation of making DIY washi tape, too! Now I've shared previously how I make DIY tissue tape, but this new way gives a different effect.


The "happy happy happy birthday" background is DIY washi using this white paper bandage tape I found at my favorite place to find crafty goodness... the Dollar Tree. TaDA!!! You have to hunt around the aisle with toiletries and soaps, but it's there folks.


I layered three strips together and spritzed with yellow and lime green mists, then stamped "Happy Happy Happy Birthday" repeatedly to make the background.


Then I selected some yellow and blue striped washi to stamp some fun embellishments that I will mount on cardstock and fussy cut. I stamped everything using Royal Purple StazOn ink onto the washi tapes.


I picked a lime green and a blue polka dot tape to be the border and left a yellow at the top to help hold things together so I can transfer it as a whole piece onto white cardstock.


**A HANDY TIP** place removable tape over the seams where tape edges meet and rub down - so you can easily peel this up as one larger piece and mount to your cardstock... and your good to go!

This was super quick and easy to put together – the hardest part was fussy cutting the stamped party horn, streamers and confetti bits and popping them up. This card is so fun and I just I love how the striped washi tape contrasts with the scalloped border trim.

"Toot to your Happy Birthday Horn"


• • • • • • • • • • • • •


Other Supplies: white card blank, white and teal cardstock scraps for matting, detail scissors, various washi tapes; Paper tape from dollar store; Doodlebug "Fancy Frills" scalloped border; Royal Purple StazOn Ink; 3M Scotch Matte Finish removable tape; and 3D foam dots.

• • • • • • • • • • • • •


Thanks so much for dropping by! Have you seen the JUNE inspiration board... its AMAZING!  I invite you to join us and play along with the June inspiration challenge {CLICK HERE for details}. Just make a creation using the inspiration above and your stash of VLVS! stamps... linkup and you could win more RUBBER!

If you would like to see more of my creations please visit my blog, sbartist : painting in the dark HERE. Hope you have a fabulous day!!  Sb

Tuesday, June 09, 2015

I'm Not Insane

Hey everyone. Shanna here to share a new art journal piece I created to share with you!

Can you believe I had not done the VERY FIRST page in my art journal??? Yeah I know right!!!
Well I decided to make it fun and exciting and really kick my journal off. 


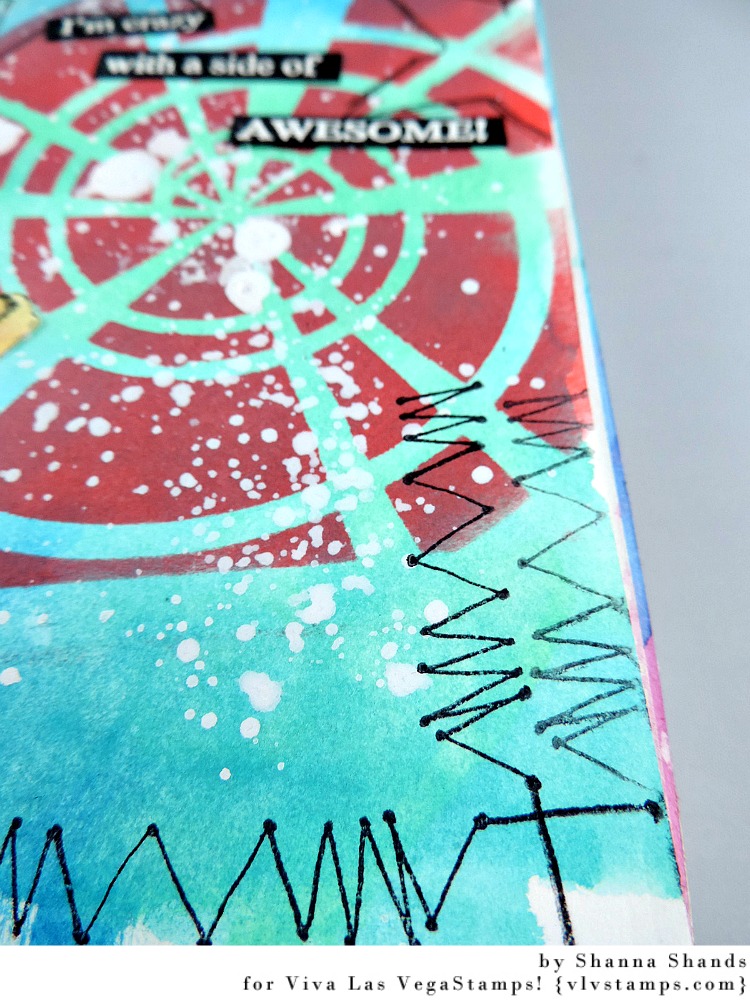
First I started with the background. I put down some of the new 2015 Distress Paints, spritzed it with water, smeared the colors around, and then heat set it. After that I used another Distress Paint with a stencil to create the swirl.  Then I watered down a little gesso to create the splatter in the background.


I then used some Staz-On Jet Black ink to stamp the Lid Lady #997 and cut her out. The colored parts I used Distress Ink like a watercolor to color the image.


I wanted more in the background so I used the stamp Stitching #19575 to add more texture to the page and I grabbed another stencil using a PITT Pen to draw around the shape.  


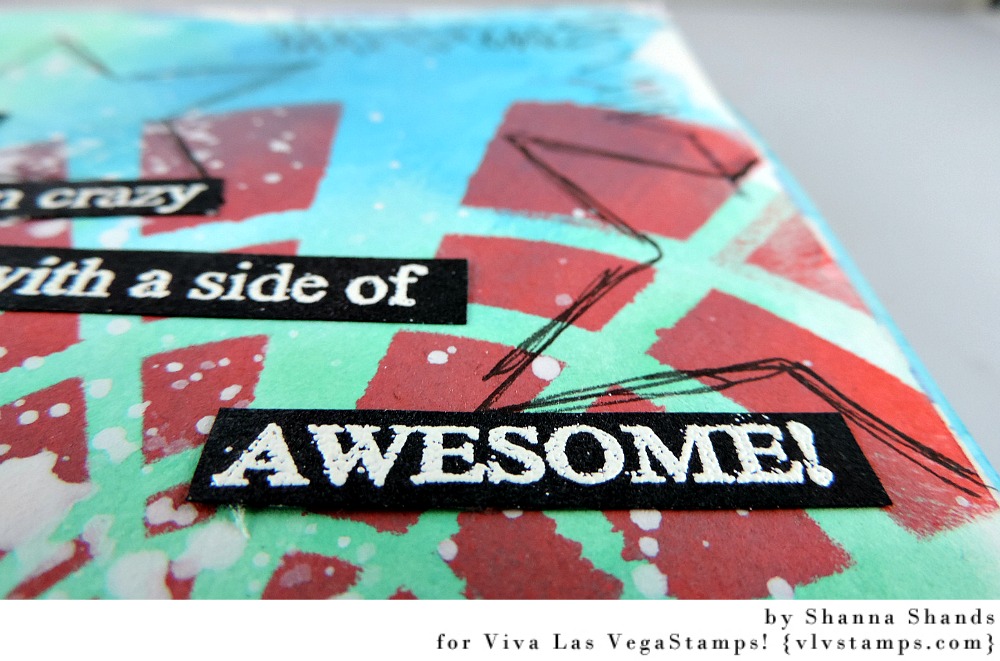
Then lastly I used the stamps I'm Not Insane #18514 to emboss with white powder on black paper, cutting it up and gluing it down. I thought the embossing added some good texture and gloss to the project. 


Items Used:

I do hope you were inspired to do a little project yourself because we are all AWESOME! 

Thanks so much for stopping by DT Member Shanna!


Monday, June 08, 2015

You Are My Home.

Hello!!  Mary here today with an altered hanger and a layout!

I've been in an organizing and beautifying mood lately, and I happened to notice that I have absolutely ZERO recent pictures of my family displayed in my home.  Tons of the kiddos, tons of my husband and I, but nothing of us all together.  So, I set out to create a layout and I wanted to display it in a  fun way.

I found a set of wooden hangers at my local thrift shop during my last trip, and instead of hoarding them in my closet, I thought they'd make a great display for my layout---with a little help.

I began by painting my hanger with a coat of white paint...


...and giving it a quick sanding when it was dry to give it a bit more texture.


I then stamped the Waybill/Invoice Background and the Grunge 5 repeatedly with StazOn.


Then, I added a little age with some Distress Ink.


As a final embellishment, I tied some of my favorite May Arts ribbon, lace and twine to the top of my hanger.


And here it is with the layout I've created!


If you look closely, you'll see more of the Waybill/Invoice Background and the Field Of Stars images...


Here's another look at the hanger.


And here's a closer look at the house.


The base of my was created in the same way as the hanger.


And now, to hang it on my wall.  How cool would an entire wall of layouts on hangers look?!!??  I may have my work cut out for me!

Thanks so much for joining me today.

xx Mary

Friday, June 05, 2015

Cheers!

Hi there, today I made a trio of pocket cards using the fabulous Viva Las VegaStamps! stamps and I thought the theme this time would be alcoholic beverages.  I myself love a great red wine followed by some Coors Light. :)

One of the great thing about doing pocket scrapbooking, or pocket pages or Project Life, whatever you want to call it, is that the little 3 x 4 cards come already embellished so it makes them easy to use.  I had this little book of pocket cards
so I picked out 3 that I wanted to work with
and then I picked out 3 lovely stamps (aren't they gorgeous?)
and then I colored them in with watercolor pencils and arranged them onto the cards
The first card is called "leftover wine" using the large lightbulb and the distressed lady
and this one is called "say them anyway" using the pinup in stockings
and the last one is called "another glass of wine" using the pin up girl on phone
and here is my double pocket spread using all 3 of the cards
I love being able to customize my own pocket cards depending on what I'm scrapping and I found that these sassy sayings about wine gave it the humour I was wanting.  I hope you enjoyed my project and I would love to know which card was your fave!

Thursday, June 04, 2015

.. two days slow...

Hello everyone,

I have an art journal to share with you today.  First here is the finished article, then sit back, get a drink and enjoy the tutorial... I have to apologise as I used my favourite colour combination yet again !  I love the green and the turquoise together....


Here's how I made it:


First I got out a piece of Mixed Media Paper and put a layer of gesso on it. 


Next I gave it some colour using Lindys Stampgang sprays. I used two flat Fabios, 'Merry go round Green' and 'Sea Breeze blue' and one Starburst spray 'Tibetan Poppy Teal'. 


Keep on spraying, painting and dripping until you are happy with the result. 


Next I used some model paste and a stencil to add some texture. 


Then the fun starts with stamping the background. I used a variety of inks: Black Archival, Distress Inks and Memento. There is a full list of stamps I used and their links to VLVS! website is at the bottom of this post. 


Next I stamped the main images I was going to use with Memento Ink as I was going to colour them with Copic Markers. 


Here's how they look all stamped, coloured, cut out and clear embossed. 


I then adhered them to my prepared page. Alice was adhered on some washi tape to ground her. I used a few bit of the same tape around the page for more interest. 


The last thing I did was type the sentiment, which is a quote from Alice in Wonderland, on my old trusty typewriter. I cut it out, adhered it to the page and doodled around the srtips with a black pen. 
That finished my Art Journal page. 

I used the following stamps:


Thank you so much for stopping by today ! 

Corrie x 


Wednesday, June 03, 2015

Relax

Hi Hermine here, in this part of the hemisphere its almost summertime, time to relax.


step 1: stamp with Stazon Black Man and Dog sitting 18968 and make a mask as well, cut out mask and put on the image. Stamp the vintage lighthouse 19288, make a mask and put on your image.
step 2: take a script stencil and use modelling paste to stencil with. Leave to dry, Then take a flower stencil and modelling paste and use this stencil only partial. Leave to dry.
step 3: remove the mask from the lighthouse but leave the mask on the man and dog on. Spray some water and sprinkel 2 colours Brusho.
step 4: take the flower stencil again and only put modelling paste on the large flower in the middle.
step 5: Colour the man and dog with some Lyra crayons and a water brush.


Hope you like it.


Warmly Hermine


Used materials:
Man and Dog sitting 18968
Vintage lighthouse 19288
Stazon black


Tuesday, June 02, 2015

Her Wings

Our June Inspiration board went live yesterday and OMG is it a doosey!!


Stunning right??!!
Michele here today with a bit of, well, inspiration.  Maybe you need a nudge to get you going...


My card was inspired by the main image, dots and even a bit of the blue and green.


Viva Las VegaStamps!:  Her wings were made, pair of butterfly wings, squiggle heart, bubble wrap texture and scribble heart.  I also used ultra high gloss embossing powder.

Other items used:  Prima soft matte gel, Art Anthology Coloration Sprays, mixed media paper and Bazzill cardstock.

I snuck the little scribble heart in side the card.

I'll be looking forward to your entry and wishing you luck because who doesn't want to win some awesome pink rubber?!??