Showing posts with label gears. Show all posts

Saturday, August 30, 2025

Steampunk postcard by Cathy N

 Good afternoon, Cathy here with a steampunk postcard. 


                                                                Stamps used: 

                                                        Plate 1386 all the gears 

                                                      18477 round lightbulb (from the same plate)

                                                      20165 cross marks background 

                                                      17545 writing background


I started with making a background with distress oxide inks and watercolor paper.


Then, I stamped cross marks background all over the background.


Next, I stamped all the gears on the top and bottom.


I then made a tag out of some Kraft paper and stamped round lightbulb and then I layered that on black cardstock and made a tag. I edged the Kraft tag with some brown oxide ink and then I stamped writing background around it. Lastly, I added some ephemera around the postcard.


Friday, July 22, 2022

Vitruvian Man by Tracy Blackwolf

Hello everyone~ hope you're all keeping cool !

Here is my new blog post for this week.

So for this project I used the "smooshing " technique to create the colorful background.

I put a bit of the three colors I used on a sheet of glass, spread them with my finger and then spritzed them with some water to blend a bit.


Keep smooshing card or tag on ink until you like the result. Let dry and then drip water onto it to give a more distress look. I used oxide inks for this card.
When it was dry, I added a little yellow distress spray to give a sun break like look. I then stamped the Vitruvian man  on card stock and on a sheet of acetate, I painted the cardstock one and fussy cut him out. I cut out the entire image on the acetate.
Then I used several inks and stamps and randomly stamped the background on the tag.
I put two strips of 3d tape on the back of the man as I wanted him to stand off the tag,. I went into my Dresden trims wings stash and found the perfect wings for him. Those coper wings gave him a steampunk vibe so I stamped some cogs around the edges of the tag.
I also added some metallic wax around the edges of the tag to pull it all together. Last, I found some verbage stickers  to finish the tag.

And that's a wrap! I hope you enjoyed my art tag today! until next time~ stay arty!!


Stamps Used:
Vitruvian Man-Lg.     19763
Periodic table        19449
Atomic structure     19451
Human heart    20143
DNA strand     19437
Nesting gears 2      18077

Other supplies:
Distress oxide reinkers: Abandoned coral, Fired Brick, Black Soot
Distress ink spray: Squeezed  Lemonade
Redesign decor wax- Cosmic ray
Dresden trims- copper wings
acetate
#8 tags -TH
Versaclair inks- Black, Pinecone, morning mist


Friday, May 19, 2017

All Part of the Plan...

Hello Again!

Today I want to share a fun, and sort of inspirational tag I created...


To Start I began with 2 of my new distress oxide inks (Broken China and Faded Jeans), as well and my original distress ink in Walnut stain. I layered the 2 blues on the tag and flicked a few water droplets to create the drop effect.


 (After I edged the tag in the walnut stain and added a few more flicks of water)
I also used some punchinella waste as a stencil for some light detail


Using StaZon black ink I stamped my gas mask guy (Man in gas mask).
To add detail I used a bit of corrugated cardboard, and some gear die cuts that I had "rusted" using Prima rust effect paste. (I blame Corrie for my purchasing this amazing stuff). 


Finally I added a Tim Holtz small talk quote layered on black. 


I hove how this piece came out, I hope you do also! 


Thank you for stopping by the blog today <3 


Monday, July 06, 2015

WOW & VLVS -- Mary Brockway

Welcome to our blog! This week we will be swapping with the talented team @ WOW! Embossing Powder. Stamps and Embossing Powder = a match made in heaven!


Find WOW! : 
Shop | Blog | Facebook

Find Viva Las VegaStamps! :
Shop | Blog | Facebook


Today we have Mary Brockway up with this beautiful piece!


Mary has used our Steampunk Gear, Sharp Edge Gear, Square Edge Gear and Gear Medium. All of her gears have been embossed with Primary Ebony and Metallic Platinum Sparkle by WOW! This photo clock is so striking and all the gear chip and stamps give it a great industrial look. You can learn more about the process on Mary's blog.


Don't forget to leave comments on all the blogs this week. You can win a prize! Stop by the WOW! blog to see what their team has worked up for our swap. See you tomorrow!

Saturday, December 27, 2014

Steampunk for New Years

Hello Again!!!! 
It's me Tera Here with my last post for VLVS.
I will miss you all but i'm so thankful for the opportunity that VLVS has given me and i hope to come back after I finish school. 

Today I want to share a fun steampunk tag just in time for New Years!


Supplies: 

- 1 Large tag cut from chipboard 
-Various chipboard die cuts 
-Metal embellishments (Tim Holtz or other) I used a Tim Holtz wing and metal fastener, as well as a button
-Black Dylusions spray ink
-perfect pearls shimmer spray
-InkaGold -Silver, Orange, Black
-Scrapbook paper ruler
-Favorite Adhesive (I used Glossy Accents)
-distress markers to color yours stamped image


Start by spraying your chipboard pieces and tag with black dylusions ink, then allow them to dry. Next use your finger to dry rub the inkagolds on your chipboard pieces for a metallic feel. Also add some inkagold to your metal pieces. :D 

I then arranged the pieces on the tag and glued them down with glossy accents. For my stamped image I stamped her on cardstockwith verafine ink, I colored her then misted with the perfect pearls shimmer spray to keep a consistent shimmery look.


Thank you for all of your support! 
Have a wonderful and Happy New Year!


Friday, August 22, 2014

Discover Chipboard Printer's Tray {GDT : Irit Shalom}

>>> We are welcoming Irit Shalom back today with a guest spot. Please visit her first post to learn more about her.

Hello my dear crafty friends! Today I am going to show you my second project made as VLVS Guest designer and this is my tribute to Steampunk. About a year ago I hardy knew that this word exists. Now I am a proud steampunk lover and I made this chipboard tray as my 2014: Steampunk year.

I should say that the only Steampunk stamps I own are from Viva Las VegaStamps! and I bought them long before I was asked to be their guest designer. I just think that VLVS have the best assortment of steampunk stamps in the world! I believe that this is true and not just my statement. Then I have a few steampunk chipboards and some Tim Holt
metals. That is practically all. But look how much can be done just with a bunch of lovely stamps, some inks and a lot of imagination!

So here is my tray: each window is heavily stamped, heat embossed and inked over. 


Some of the windows are collaged and some were made with a single stamped image only. The grunge 2014 letters were hand cut and adhered over 3d foam glue for the dimension. I even stamped this small letter in the bottle with Dictionary stamp and rolled into the tiny bottle. As for other techniques: I used crackled paint over the frame and added a darker shade with more ink over the dry paint. I changed the color of metal plaque with alcohol ink. I heat embossed the chipboards around with a mix of 2-3 embossing powders. Not much and maybe even too much. I like the final result and I am very proud of my steampunk project.


Tando Creative, Wycinanka, Ranger, Clearsnap, Meg's Garden, Prima, Tim Holtz- Advantus, WOW! Embossing Powders, Ranger, FWAB

And finally I want to thank DeeDee and VLVS for the great chance to be their guest designer. I hope I inspired VLVS blog readers and hope to be back here some day!

>>> Irit! Thank YOU! for being here, inspiring us, and sharing your beautiful work on our blog.

Monday, August 11, 2014

A Vintage Game of Tag

Hello, Its Me Tera here again with another fun project to share! 
Today I am sharing a fun Vintage themed Tag that I created. 

I started  with a base of patterned paper by Prima, and a main focal image that I wanted to build around. 
(From here I really got into the swing of everything and forgot to take progress shots as I went so bare with me while I try to explain my madness :-D) 

 I started by stamping Chicken Wire 3 3/4 x 4 1/2 randomly on the background in frayed burlap. 

Next I stamped the Big Ben 1 3/4 x 4 1/4 on the left side in VersaFine Sepia.
 I also inked and distressed around the edges in various shades of browns.  On a separate sheet of paper I stamped the Bearded Man 2 1/4 x 2 1/4  in verafine black and distressed it with versafine sepia. I also stamped the #7 from Plate 1430  then embossed it with black embossing powder before i cut it out and distressed it.  At the top right I stamped Butterfly Specimens 1 1/2 x 4 1/2 then also embossed it in black. To finish things off I added some film strip by Tim Holtz to the side, as well as some random spots of Tim Holtz washi tape. I popped up the 2 pieces on pop-dots, then embellished with UmWow Studio Gears

Below are a few more detail pictures :-D


Wednesday, June 11, 2014

She IS The Key

queenfullvlvs, alassiter Hello stampy friends! It's Amy  here, to share a layered and oversized ATC.  I'm not sure if that is something that has existed with a different name until now, but if not....I'm coining the term. ;)

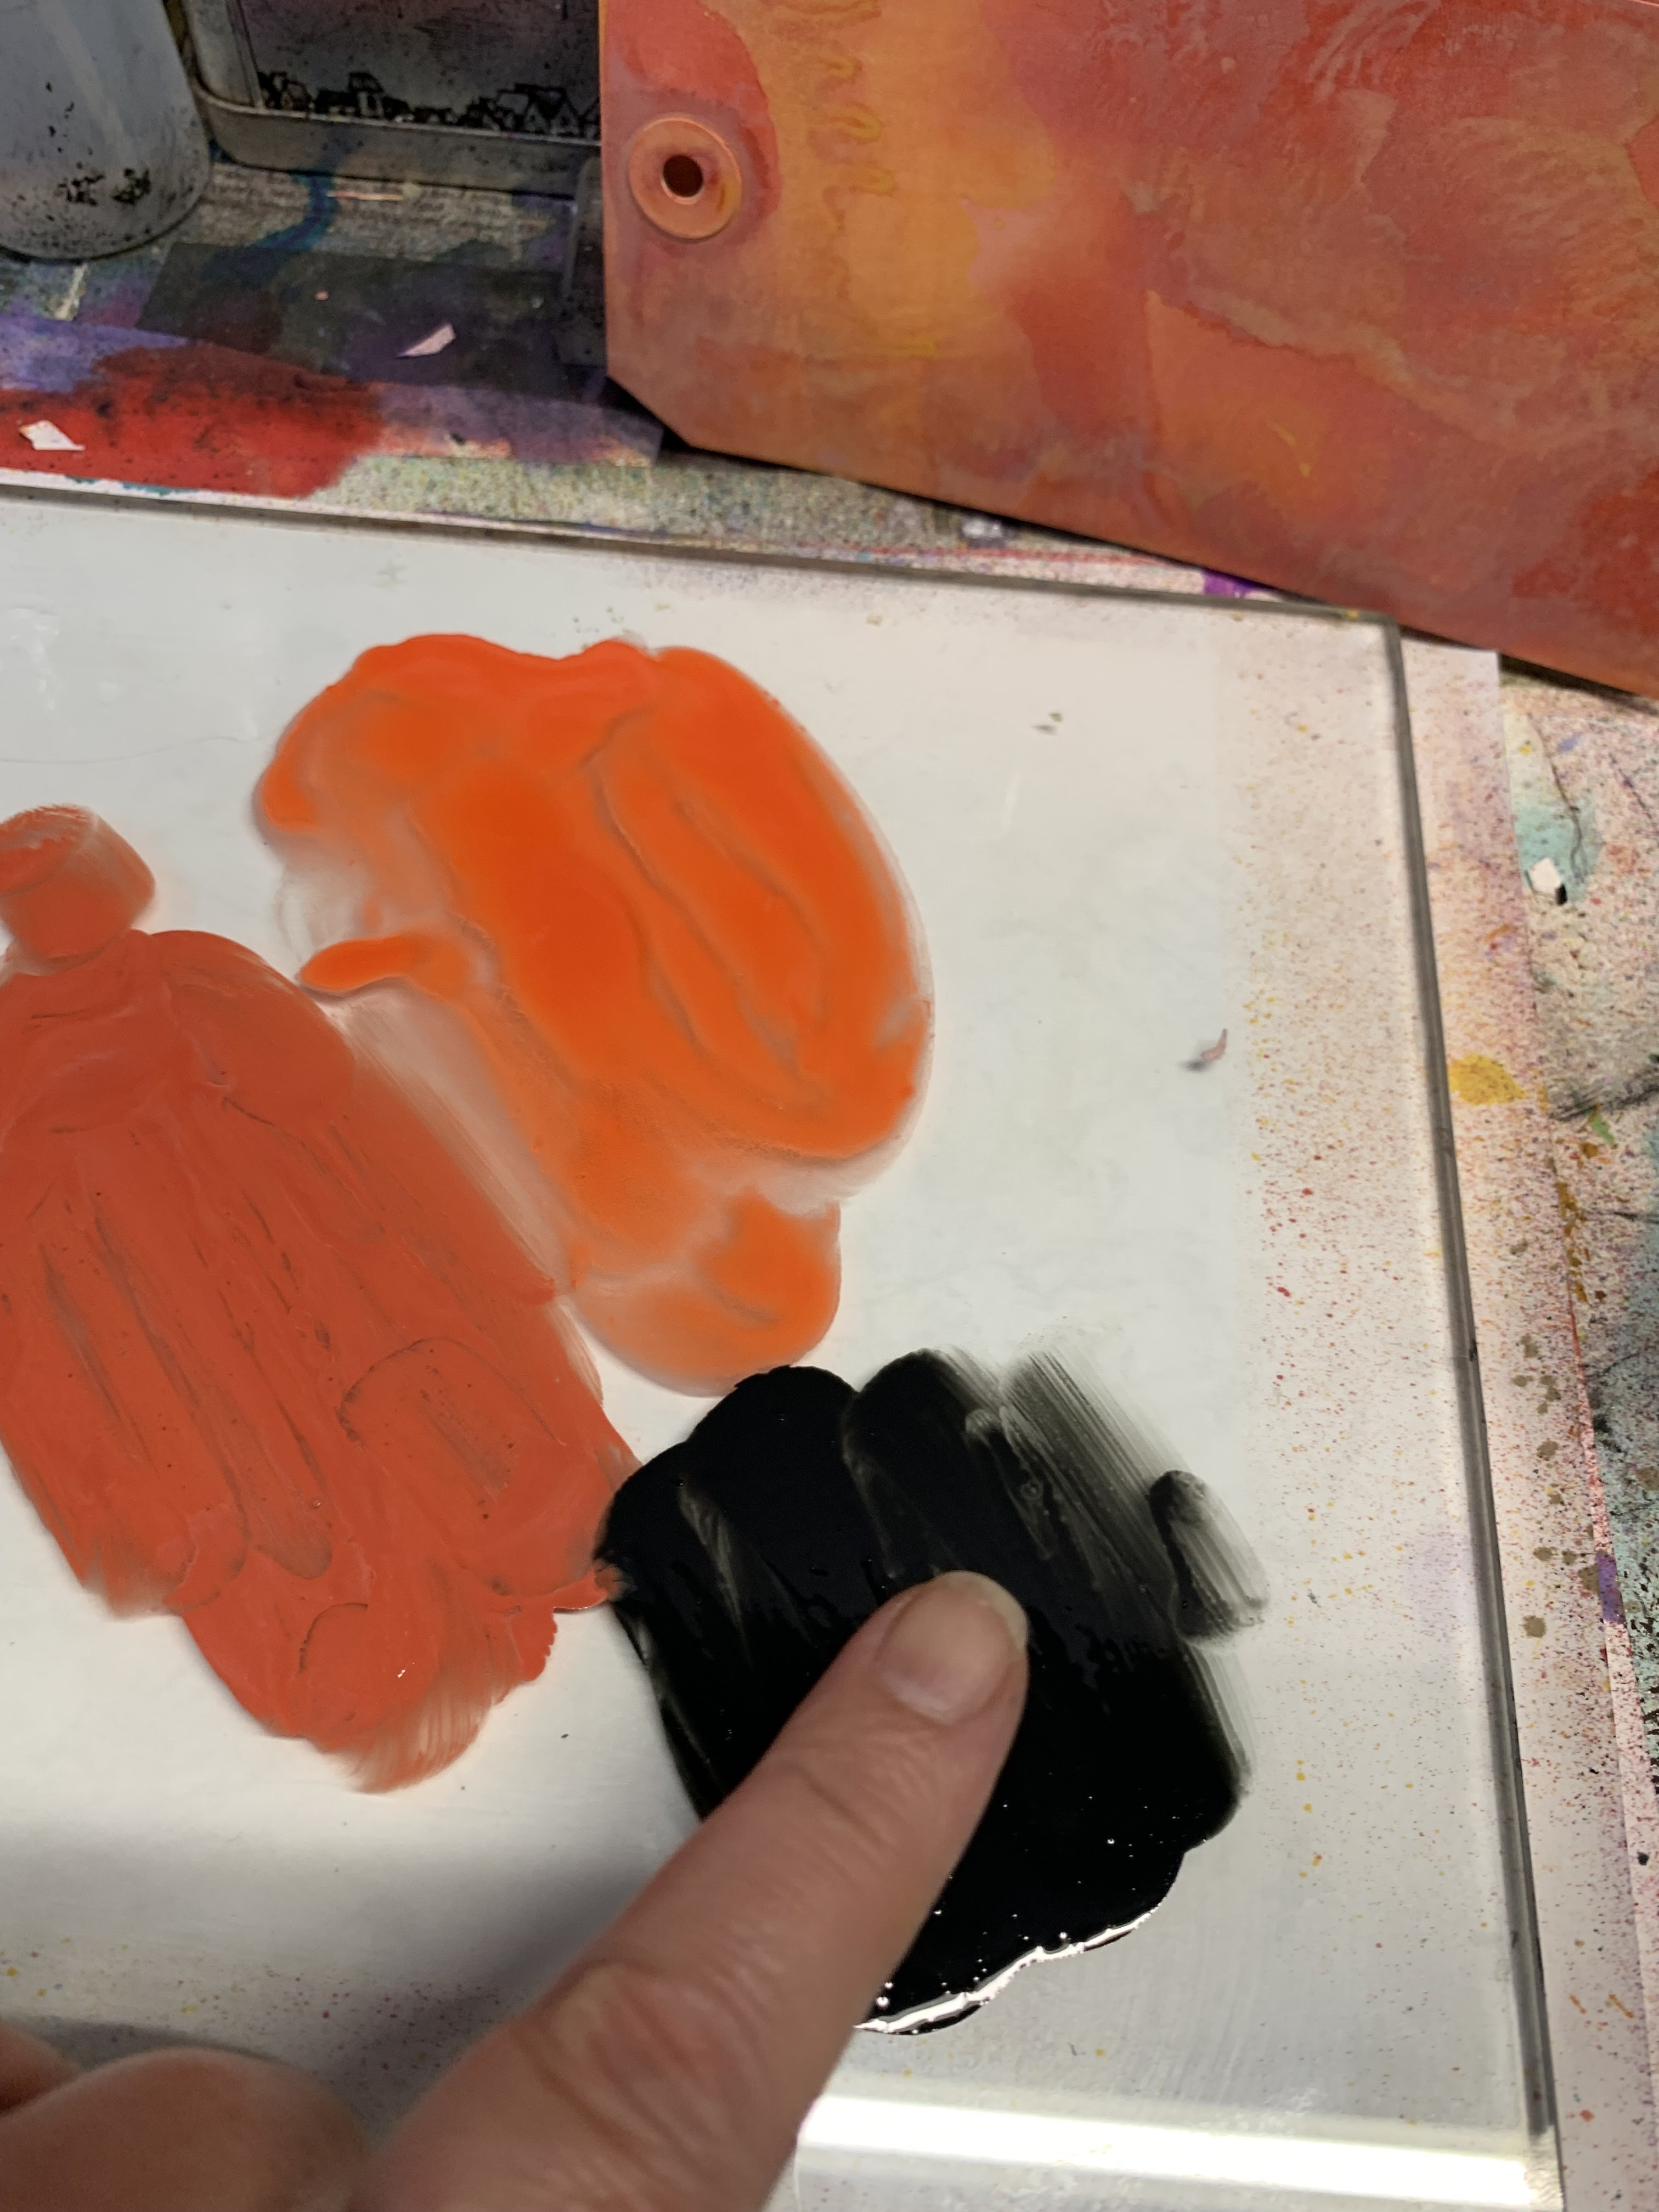
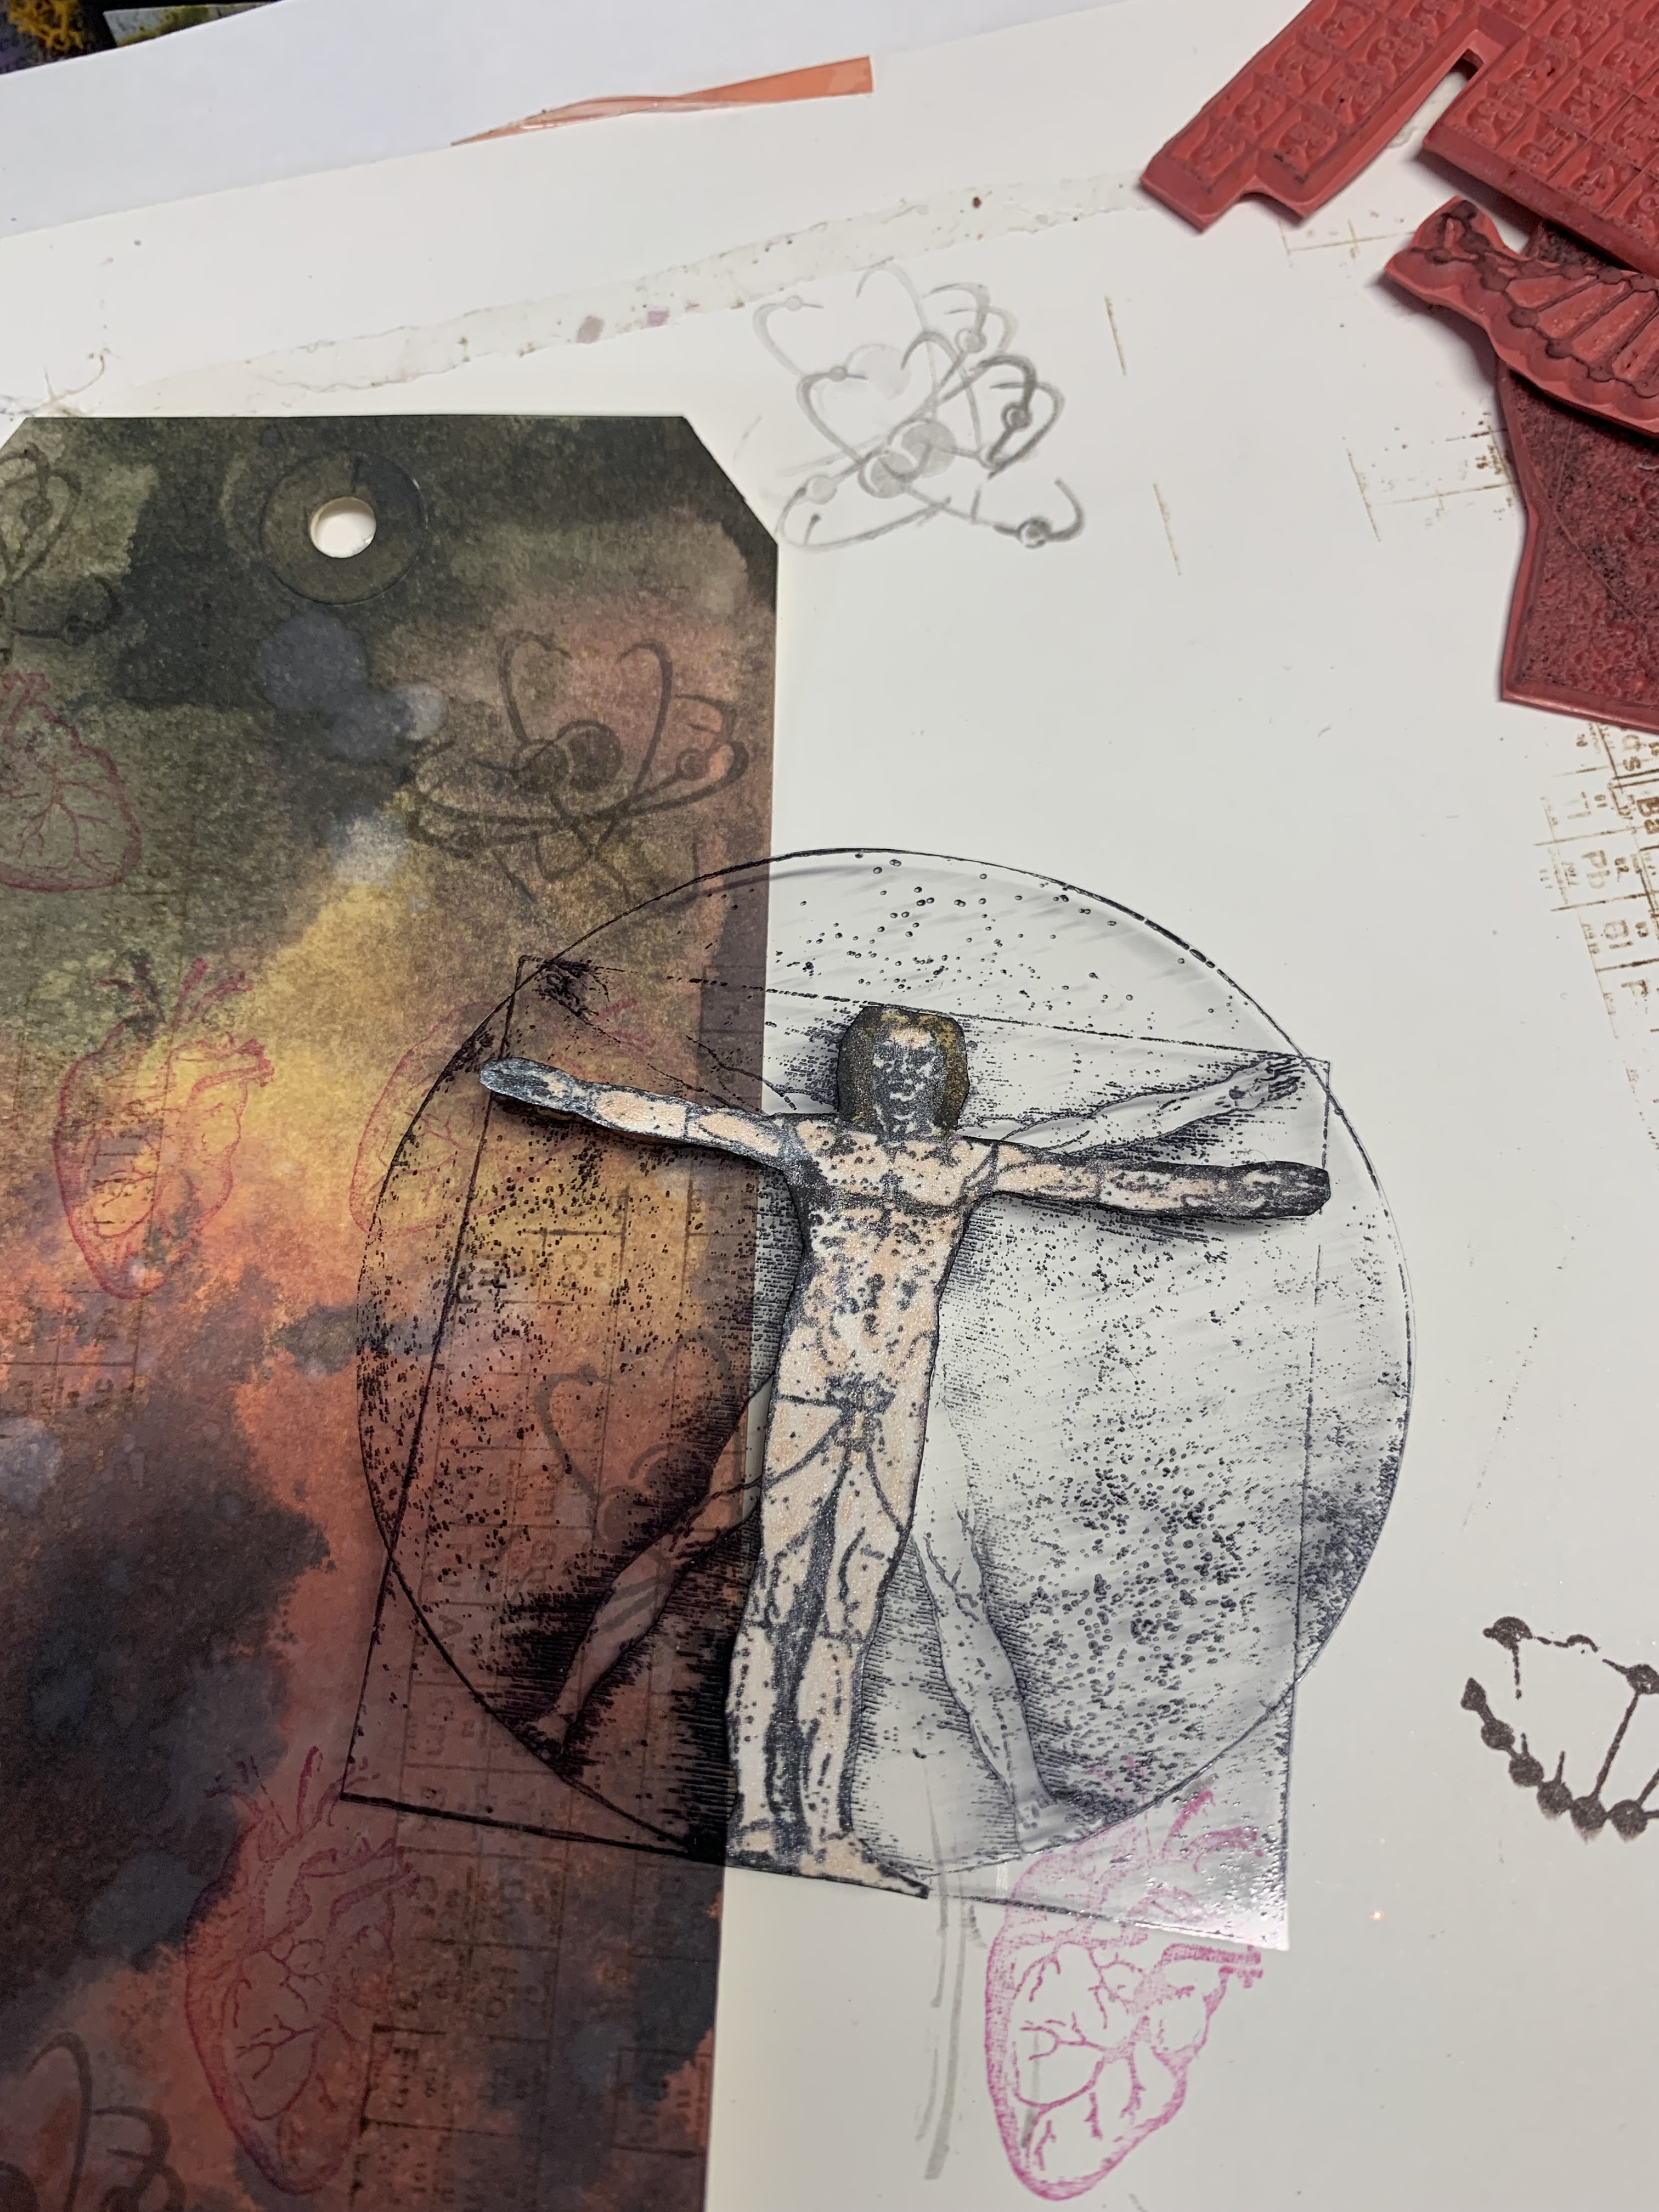
I began with a regular ATC card, and layered on some copper and green paints. When those had dried, I stamped using the Waybill/Invoice Background, using Delicata Ink from IMAGINE Crafts in gold. I attached a couple of little banner die cut pieces from 7 Dots, using a stapler.
A few fibers were pretty easy to adhere to the back, using miracle tape.
queencloseside
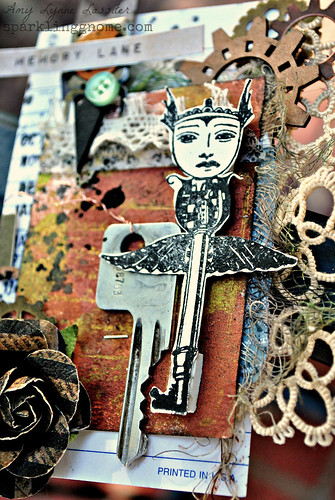
When all of that was complete, I added the ATC to a vintage library card. I stamped the Flying Face Key on a piece of cream cardstock, using Memento Ink in tuxedo black. I fussy cut her out, and added her to the card using foam tape. queentop
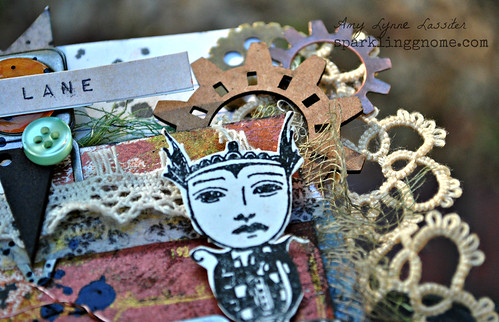
I finished my layered oversized ATC by adding plenty of chipboard, metal embellishments (including an old house key I had back in college), other fun bits, and a piece of lace from a vintage doily. When I stood back and had a look, I was quite pleased with my lady...who doesn't just hold the key..she IS the key. I think that's a nice metaphor in life. BE the key to your dreams. Have a lovely day, and go stamp up something wonderful. ~Amy

 Supply List: Viva Las VegaStamps!: Waybill/Invoice Background, Flying Face
Adhesive: Miracle Tape (from VLVS!), Helmar, Tombow
Chipboard: UmWowStudio
 Paint: Folkart, Luminarte Silks
Ink: IMAGINE Crafts-Tsukineko
Paper/Stickers/Die cuts: 7 Dots Studio, Fab Scraps
Flower: Prima
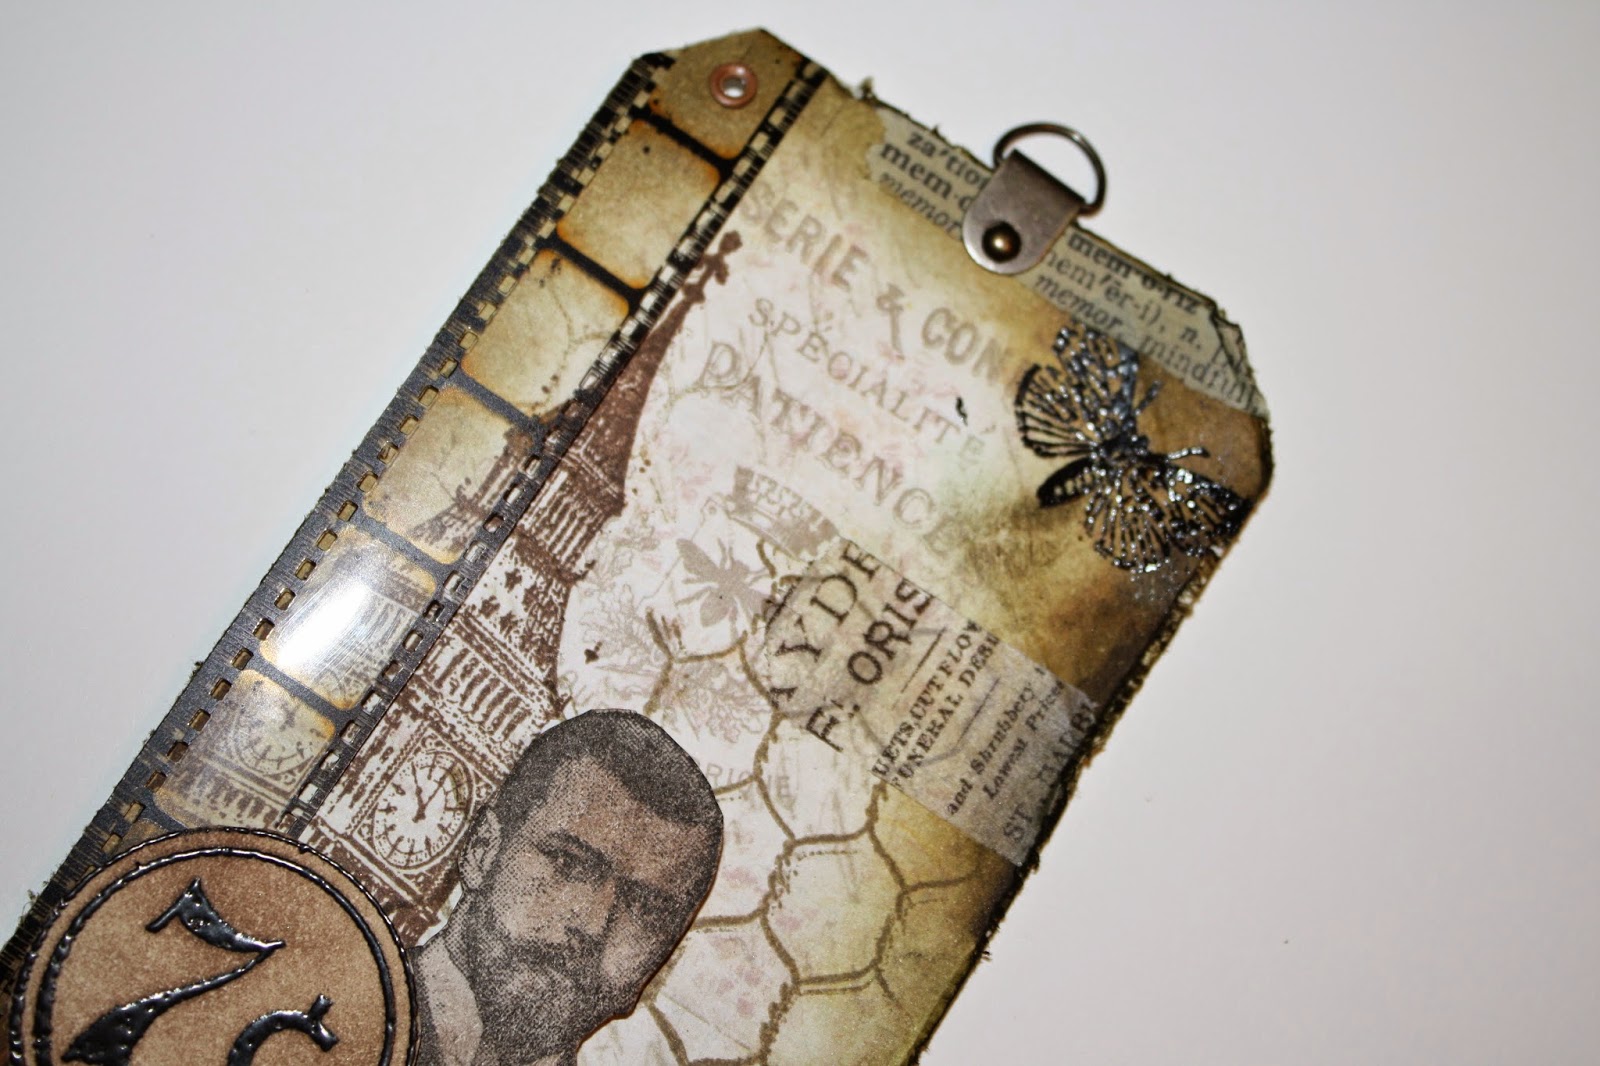
Metal Clip: 7 Gypsies Metal Tab: Tim Holtz
Fibers: Vintage (Fab Scraps paper and Flower from Scraps of Darkness Kits)

Thursday, January 30, 2014

The End Is Near

Hello again! It's me Tera here with another fun project. This time I am sharing a Small keep sake box I made for youngest brother. We just helped him move into his dorm a few weeks ago. 
For this box I've created a distressed Apocalypse style box! 
Fitting for a boys Dorm room Don't you think!?!


To start I painted all of the edges of the box black with the ranger acrylic paint dabber.
 
Next I cut out some vintage book pages, for all of the edges I cut parts of pages without words. All of the  pieces were cut so that there would be a 1/8 inch boarder. Next I added some text. 
  To start I stamped  Man In Gas Mask 2 1/2 x 3, next I stamped Apocalypse 3/4 x 2 1/2  on a scrap then layered it. 


Next I stamped Radioactive 2 x 2 and Crime Scene Tape 1 x 4  on two of the sides 
 

 On the 3rd side I stamped Biohazard 2 x 2, I also stamped The End is Near 1 1/2 x 1 1/4 and layered it on the top.  

  For the finishing touches I added one of the UM Wow Studio Gear Mash  gears. I added some gold and silver mica pieces to symbolize his hunt for money in life!  I also added a grunge board #4 and splatted black dylusions spray ink. 

(all images were stamped with Ranger Archival Pad #0 Jet Black)
Thank you all so much for stopping by! I hope you are all inspired! 
Stay warm It's a snowy mess here!! 

Friday, January 17, 2014

THE APOCALYPSE IS HERE!

Hello, Tera here. I'm so excited to be sharing my very first Design team project with you. My first DT project was actually inspired by Amy's piece HERE I love the idea of a piece that makes you think and creates a sense of mystery and wonder. I decided to use some of my favorite Viva Las VegaStamps! to create a post apocalyptic feel to my new altered book/Journal cover.

To make this I started by covering the book I wanted to alter with a vintage book page to create a fun background to work with (this was after I placed the Eyelets and wire wrapping). Next I stamped the Man In Gas Mask 2 1/2 x 3  on a separate book page and fussy cut it out so i could play with were to position it. I decided I wanted to add a little grunge to the book so I partial stamped Nautical Collage 3 x 6 1/4 on the bottom left then took a paper towel and immediately smudged the image out a bit. (I also stamped It on a piece of shrink plastic which I later added to the upper right to bring in symmetry to the piece.) The next layer was the fabulous Coffee Ring Stain 2 3/4 x 2 1/4. After the base stamps were placed I added a clock sticker, a lace Doily, a set of Tim Holtz wings and a fragment doll. I added some chain around the angel with a fabulous UMWOW Studio Gear Mash Gear with a tiny heart and golden chips inside. I also added gears above the clock the decide to add a clock key as well. Now that I had the cover built up I decided to add some detail to the spine, I made a fun label with some inked grunge board scraps I had, placed some Eyelets and used a word from the book pages (I adhered this with Miracle Tape, as well as the shrink plastic piece since this fabulous tape is super strong and clear). I decided the Apocalypse 3/4 x 2 1/2 stamp was the perfect word for the side and also stamped it on some scraps from the book page. The Finishing touches were the knob, chain and keys. As well as one of my favorite stamps the Pen Tips 2 3/4 x 2! I decided to only use one of them and stamped it on a piece of cardboard which I had colored with silver Inka Gold, I fussy cut the piece and bent the edges down to look like a real pen nib tip! :D I Hope you love this piece as much as I do. I love the feel of vintage meets apocalypse, the good vs evil, and the pieces of lost history like the keys and pen tips. 


All stamping was done with Ranger Archival Pad #0 Jet Black except the stamping on the shrink plastic which was done with StazOn Jet Black Ink Pad. 

Happy Stamping Everyone, I hope you enjoy the mystery and sense of curiosity that this piece invokes!
-Tera