Hello my friends,

I made
the strings a bit longer to fit my card and added some loops. I adhered the
panel to my card, ready to go♥


I
have used the following stamps:


Hello my friends,
Hi everyone! Today I made two tags using Banksy stamps.

Using brushos in Ost. Blue and Dark Brown with water, I tried to leave an area fairly clear where I knew the face of my stamp would be. This can be tricky with brushos as you never really know what they will do once sprayed with water, but I used white brushos to lighten the area too.


I coloured in the face and scarf with polychromos pencils.

I added a pearl for the earring

I backed the tag with black card, made a hole and added some matching fibres to finish it off.

With the second tag I used Brushos in White and Black (which actually has lots of different colours in it). I again tried to leave a clear space for the face of my stamp.

I stamped the image and coloured the flesh parts and used complimentary colours on her dress (picked up the orange in the brushos)

Again I backed the tag with black card, and made a hole and added fibres.


I hope you like the tags. See you next time!
Stamps Used:
Other Items Used:
Brushos - White, Ost. Blue, Dark Brown, Grey
Polychromos pencils
White card, black card
Fibres/ribbons

Hello all !!
Well its the start of the holidays for lots of people... Here is a snarky card for the occasion...Enjoy the humor!
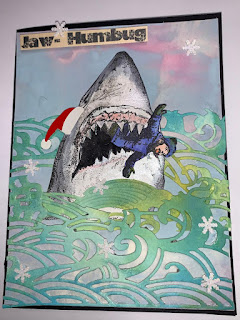


Hi everyone,
Here are two snarky and colorful artist trading cards that I want to share with you.

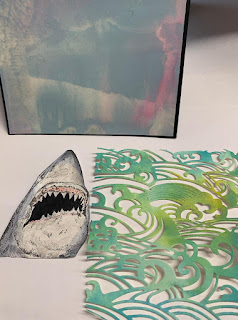
My
background is quite flat but although has a lot of layers. I started
with collaging a few book page snippets on watercolor paper that was a
little smaller than a regular ATC. I added a little white gesso on top
and then did some reverse stenciling with blue acrylic ink. Reverse
stenciling means using a stencil as a stamp which works perfect with
different fluid mediums.
Next, I added some yellow acrylic ink and
stenciled on top with another circle stencil and white gesso. I outlined
these circles with a blue posca pen.
I also stamped some marks to the background.

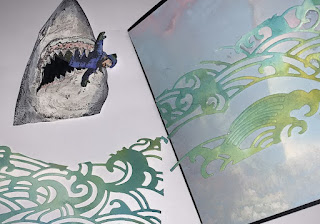
Then
I stamped my snarky focal image, colored the cross eyed fairy with ZIG
markers and cut her out. After inking the cutting edges, I glued her to
the page.
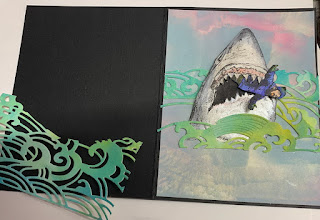
I adhered the cards to ATC sized bases that I cut from black cardstock.

All
thats left to do was adding a quote. I stamped it twice, cut both to
pieces and adhered them to some black cardstock so that it stands out a
little more from my busy cards.

See you soon!

Hi Lovelies 💜❤
I'm back again at the Blog with a new project.
Today, I wanna share my brainy shakercard :

Some close-ups:


And here are the single steps, how I made it:


2.) I stamped my main image onto the aquarellpaper.


4.) Cut out the inside of my jar image, as also all the brains. I kept the jar inside piece to design it.

5.) Now, every single piece is designed and waiting for the next step.
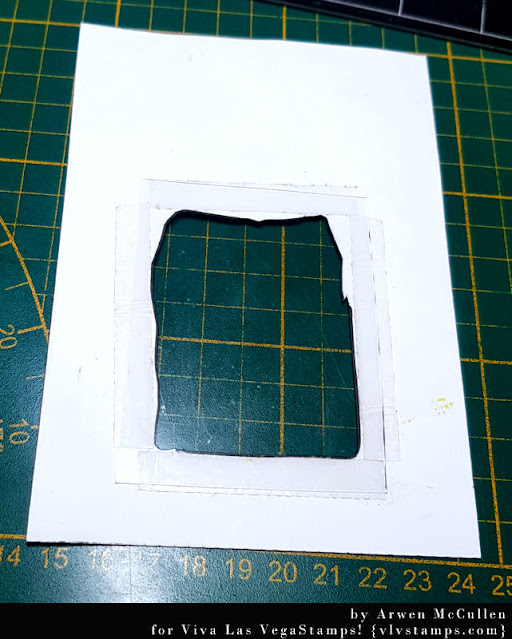
6.) I used duct tape around the image hole on the backside and stick a fitting piece of foil on it.

7.) Next step - stick some 3D pads around the hole. I used my selfmade 3D pads, so I can cut some larger rows.

8.) I filled the hole with my brains. Beware to make sure, the frontside looks down.

9.) Ok, before I stick my project onto the folded card, I framed the whole card with 3D rows at the backside.
Just stick it onto the folded card now and that's it!
All stamps, I used:
- Brain
Other materials:
- black cardstock
- aquarellpaper (Canson)
- Staz on
- Dylusions Shimmer spray
- Distress reinker
- Distress Oxides
- thick foil
- 3D pads
I hope, you like my card :)
See ya soon

Hello, my
friends!
Are you as anxious to start with the Christmas Decoration as I am? I bought
tons of new ornaments and stuff and now I have time to create all the boxes and
bags I need for friends and family.

This time I used the following stamps:
3766 Berry Background
1441 Sentiment
18847 Large Doily
I stamped the beautiful Berry Background in different shades of Green and matted it. The love the doily stamp and used it for my ornaments. I also hat embossed my stamping. The Christmas Greeting finished the panel, which I adhered to my bag. Of course, this also makes a beautiful Christmas card.
Have fun, my friends.


Hello everyone,
For today's post I have made a double artjournal spread. It is very colourful so get your sunglasses out!


