Showing posts with label Guest Designer. Show all posts

Wednesday, May 01, 2019

Just Because by Leanne Jago

Hello everyone,
I hope your Easter or Break or just this time of year has been fantastic.
Today I am sharing a Banksy inspired piece using some of the freaking fantastic Banksy stamps. Yes I love everything Banksy; his art, his message, his secrecy and the visual simplicity of his statement pieces.
So with that in consideration I set out to create a pretty simple but fun and unique piece.


To be totally honest, it was a pretty simple make but it had quite a few layers and steps. AND worst of all waiting…….
And I did for a minute think of leaving it once I finished stitching the pieces together…


How about joining me and watching the whole thing unfold …


But instead I continued on and ended up with a piece that I absolutely love, that much that it is already hanging up on my loungeroom art gallery wall..
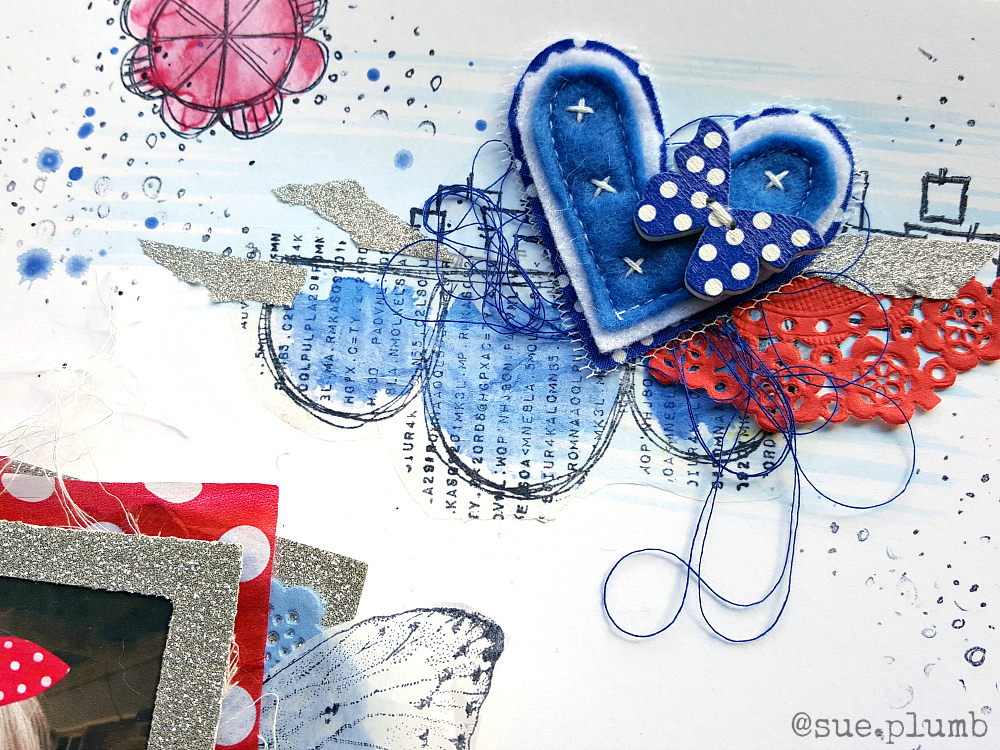
Here are a few more close ups.


VLVS! Supplies:
Banksy: Wall Singer  sku: 20303
                You have 0 Friends Kid  sku: 20077
                Enjoy Your Life  sku: 20064
                Just Because  sku: 20293
                Butterfly Shooter  sku: 20300
                Ladder Painter  sku: 20298
                Zebra Washing  sku: 20297
Cross Marks Background   sku: 20165
Carved X’s  sku: 20162


Other supplies:
Tea and Coffee Bags
Lindys Magical Shaker: Cowabunga Copper, Grab a Guy Gold
Stabilo All Pencil Black
Atelier: Gesso Primer- white
Matisse: Gesso – Black
Encaustic Wax


Thank you so much for stopping by,
Leanne

Thursday, March 28, 2019

Guest Team Inspiration : Julia

Hello!
I wanted to make unusual and colorful postcards with unusual and fancy stamps from Viva Las VegaStamps.


I stamped various funny characters on white paper and cut them out.


And prepared backgrounds for postcards.
 I took the gray paper, dyed it with acrylic paints and sprays, and then made holes in them with a special paper die.


On the reverse side I also decorated the cards with stamps.


Good luck!


Julia

Monday, March 11, 2019

Guest Inspiration Team : Elisa Ablett

Hi Viva Las Vegas Stamp fans,

Elisa here from the Guest Inspiration team with my next project for you featuring a load of gorgeous VLV Stamps.

My husband went on his first international trip last year to Spain for work and was under strict instructions to take loads of photos for me to Scrapbook with and create a travel journal for him.

I decided to create a travel themed Scrapbook page with one of his snapshots of the Basilica in Barcelona (it was under construction). Add some vintage themed papers from 13Arts designed by Fiona Paltridge to the VLV stamps with a bit of mixed media and I am so happy with the result. This design can be easily reproduced as an Art Journal page or as a page in a Travel Journal.


Let's take a closer look at the great VLV stamps that feature -


The 'Map of the World' Stamp was used with great effect in the background along with a few of the great background stamps from Plate 1495.

To fit in with my vintage travel look for the layout, I stamped 'One Way Sign' and 'Pointing Finger' and then coloured them with a Distress Oxide Ink Pad. I also included a Kraft Pocket Envelope to slip train tickets, entry tickets, memorabilia etc.underneath the photo cluster.

I stitched old sewing patterns to cardstock to create my own background paper, this is a great tip for those who love junk journalling!

To draw your attention to the photo cluster. add background stamping 'X Circle' and 'Row of Distress Lines' along with a wood veneer arrow and a cityscape die cut.


VLVS! Supplies: Stamp name :
Ink pads : Staz on - Black

Other Supplies:
Sewing Patterns
Sewing Machine
13arts Conversations on a Train by Fiona Paltridge
Wood Veneer - Here Sign, Location Arrows
Map Scrapbooking Paper - Unknown
Black Pico Embellisher
City Scape Die Cut - Uniquely Creative
Kraft Pocket
Decoart Tissue Paper
Ranger Distress Inks - Fired Brick, Vintage Photo, Walnut Stain

Thank you for stopping by the blog today !

Hugs
Elisa xo


Monday, February 18, 2019

Love. Repeat. By Guest Inspiration Team Member Elisa


Hi VLVStamp lovers/hoarders/aficionados,


Elisa here from the Guest Inspiration team with my first project and post on the blog and I am still pinching myself that I am here !

I was inspired to create this mixed media art journal page by all the lovely sunrises I have seen so far this year walking myself to better health and happiness in 2019. The gorgeous stamp set Plate1502 with the Ethos range of stamps by Tina Walker and sentiments were a perfect companion to my hand dyed calico fabric background.


The background was created using a tie dye kit and calico scraps. The colours represent the ocean, sky and sunrise. We have such beautiful sunrises here on the East Coast of Australia and I am lucky enough to sink my feet into the sand and watch the sunrise each morning while I walk.


VLVS! Supplies: 
Plate 1502 : https://vlvstamps.com/plate-1502.html
Ink pads : Staz on - Black 

Other Supplies:
American Crafts Black Cardstock
Calico,
Fabric Dyes - Navy, Teal, Coral, Cobalt, Orange
Cotton Thread,
Book Paper,
13Arts Ayeeda Inks,
Prima - Bloom Collection 6 x 12 Circle Stencil,
Ranger Distress Inks - Abandoned Coral and Cracked Pistachio


Thank you for stopping by the blog today !

Hugs

Elisa xo


Tuesday, October 31, 2017

Guest Blogger : Sue Plumb X3

We are back with a 3rd project from the uber talented Sue Plumb! You can learn more about her from the 1st time she visited us.

Today she is sharing a journal page with us -- totally killer!


"This is a Paint-Me-Dori paintable fabric journal cover that I won as a prize at a scrapbooking retreat. I wasn't sure exactly what I wanted to do with it, until I was inspired by all the VLVS images I had stamped onto tissue paper (courtesy of Fiona Paltridge's stash). 


I first gave the canvas cover a quick swipe of colour using a pale aqua acrylic paint; then cut out the images I wanted to use and applied them using a matte medium to create a collage. 


The beauty of this method is that as the tissue paper dries, it virtually disappears into the background, leaving only the stamped image behind. 


Once the cover was completely dry, I added splashes of colour using Posca paint pens and black and white gesso."


Here's a list of the stamps I used on this project:

Friday, October 20, 2017

Guest Blogger : Sue Plumb x2!

Did you wonder if you were going to get a DOUBLE dose of Sue?? because YOU ARE! and in fact.. you'll be getting a TRIIIIPLE DOSE! Today we have a 2nd project from the fabulous Sue Plumb! You can view more about her in the first post HERE.

Sue has put together a really incredible art journal spread for us!


"This is art journal page I created featuring a photo of me with VLVS design member Fiona Paltridge that was taken at a recent retreat.


I started by laying down my bright background colour before adding the stamping directly onto the page. 


I wanted to created a page where I could feature some of the fabulous Mary Vogel Lozinak whimsical "freak" stamps from plate #1383; so I created this to represent a shooting gallery, with myself and Fiona as the main targets. 


Thursday, October 12, 2017

Guest Blogger : Sue Plumb : Fancy

We have some really incredible people who grace our blog.. today I get to introduce one more of them to you!

We have SUE PLUMB Joining us today... she's an Aussie full of sass n spunk. Her work replicates that.. just you wait n see.


Hi everyone! 
My name is Sue Plumb and I am a mum of 3 (daughter Brielle, 9 and twin sons Hunter and Kaden, 5) and I come from sunny Queensland, Australia. I began scrapbooking approximately 9 years ago, shortly after the birth of my daughter. Since that time, my work has evolved from a very simplistic paper-based style, to where it is now - which is far more artistic and often incorporates stamping, mixed media and eclectic elements (including the odd swear word!)
I am currently on several Australian manufacturer design teams including Cocoa Vanilla Studio; Colour Blast and Flutterby Designs. I am also a design team member for both the Scrap the Boys and Scrap the Girls challenge blogs and a current Creative Team member for Scrapbooking Memories magazine.
I was absolutely thrilled when DeeDee asked me to be a guest designer for Viva Las VegaStamps, having become a fan some time ago through design team member (and fellow Aussie) Fiona Paltridge. (I now directly blame her for my addiction to the delicious smell of new red rubber!) Thank you for the opportunity to share some of my work DeeDee. 


For this layout, I started by brushing some soft blue watercolour onto my page before using my stamps to define the focal areas. 


I then coloured some of the images using more watercolours.
Most of the images on my page were stamped directly onto the cardstock, however some were also pre-stamped onto tissue paper, and then adhered using a matte medium. (This allows you to easily layer images and place them more precisely.) 


The Gossamer Butterfly image that was stamped onto tissue, I simply cut in half and incorporated each piece into the layers under my photo. I only adhered them at the inner edge that was hidden under the layers, allowing the wings to "float" free.


Here is a list of the stamps I used:

- Typeset scallop
- Butterfly Gossamer (large)
- Overlapping squares by Corrie Herriman
- Striped pattern circle by Tera Callihan
- Doodle dots
- Incredible as it seems

Friday, September 25, 2015

A dose of Tina Walker!

Hi...

Tina Walker here today with my second Guest Designer project for VivaLasVegaStamps!

 Today's project shows you how you can create simple, yet beautiful Home Decor using your VLVS stamps.


 To create this project, pull out your favorite VLVS stamps.


I will be using the following stamps:

Design Crosses
 Map Background
Bubble Background
Cancelled
Open Sign
Tangle

Stamp in blocks on sheets of vellum, using coordinating ink colors. 


 Make flower:  Cut vellum into randomly sized squares, approx 3 in x 3 in.

Stack squares on top of each each, alternating them so they do not line up.  Trim around the edge with a rolling cut.

Add a brad to the center of the squares and lift each layer, 'scrunching' for texture and lift.


Stamp another sheet of vellum, cut to size to fit your frame, and heat emboss with white embossing powder.

Stamp used: 
Crackle Background


Adhere paper flower,jewel embellishment, and sentiment.

Hang and enjoy!


Thank you for taking the time to stop by today!  I'll be back again in November with a couple more Guest Designer project.  Be sure and stop back!