Showing posts with label Steampunk. Show all posts

Friday, July 22, 2022

Vitruvian Man by Tracy Blackwolf

Hello everyone~ hope you're all keeping cool !

Here is my new blog post for this week.

So for this project I used the "smooshing " technique to create the colorful background.

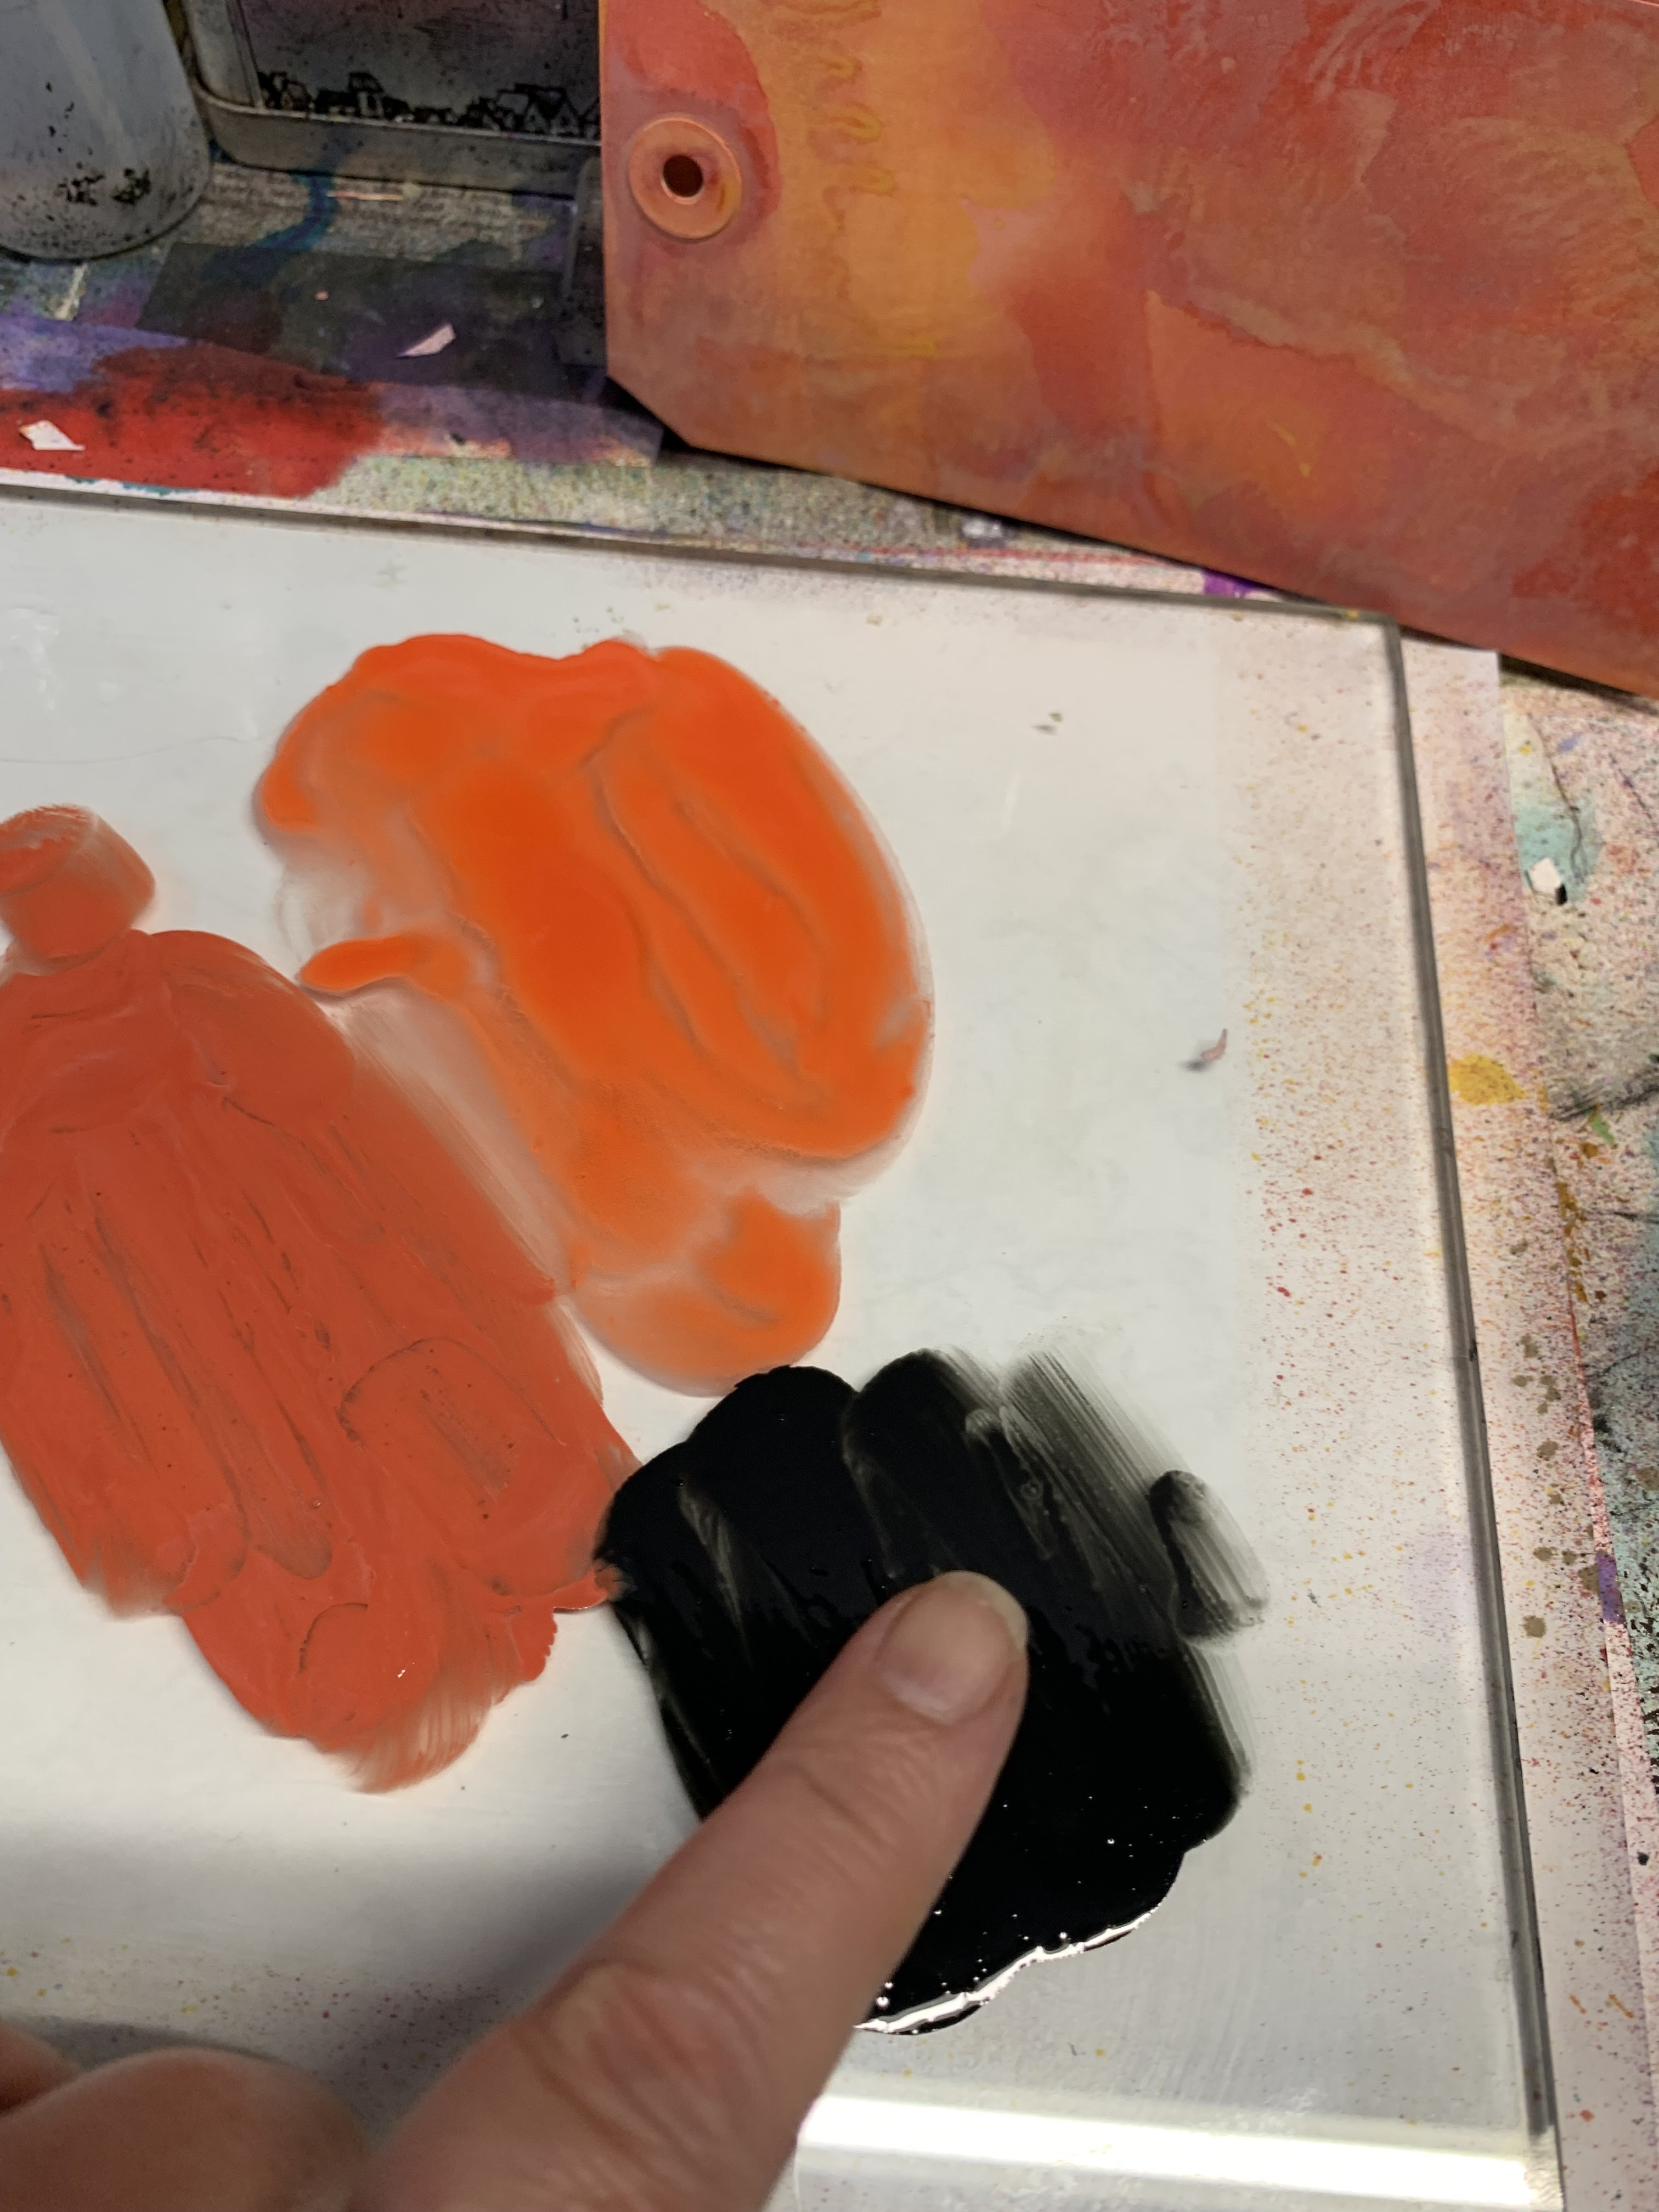
I put a bit of the three colors I used on a sheet of glass, spread them with my finger and then spritzed them with some water to blend a bit.


Keep smooshing card or tag on ink until you like the result. Let dry and then drip water onto it to give a more distress look. I used oxide inks for this card.
When it was dry, I added a little yellow distress spray to give a sun break like look. I then stamped the Vitruvian man  on card stock and on a sheet of acetate, I painted the cardstock one and fussy cut him out. I cut out the entire image on the acetate.
Then I used several inks and stamps and randomly stamped the background on the tag.
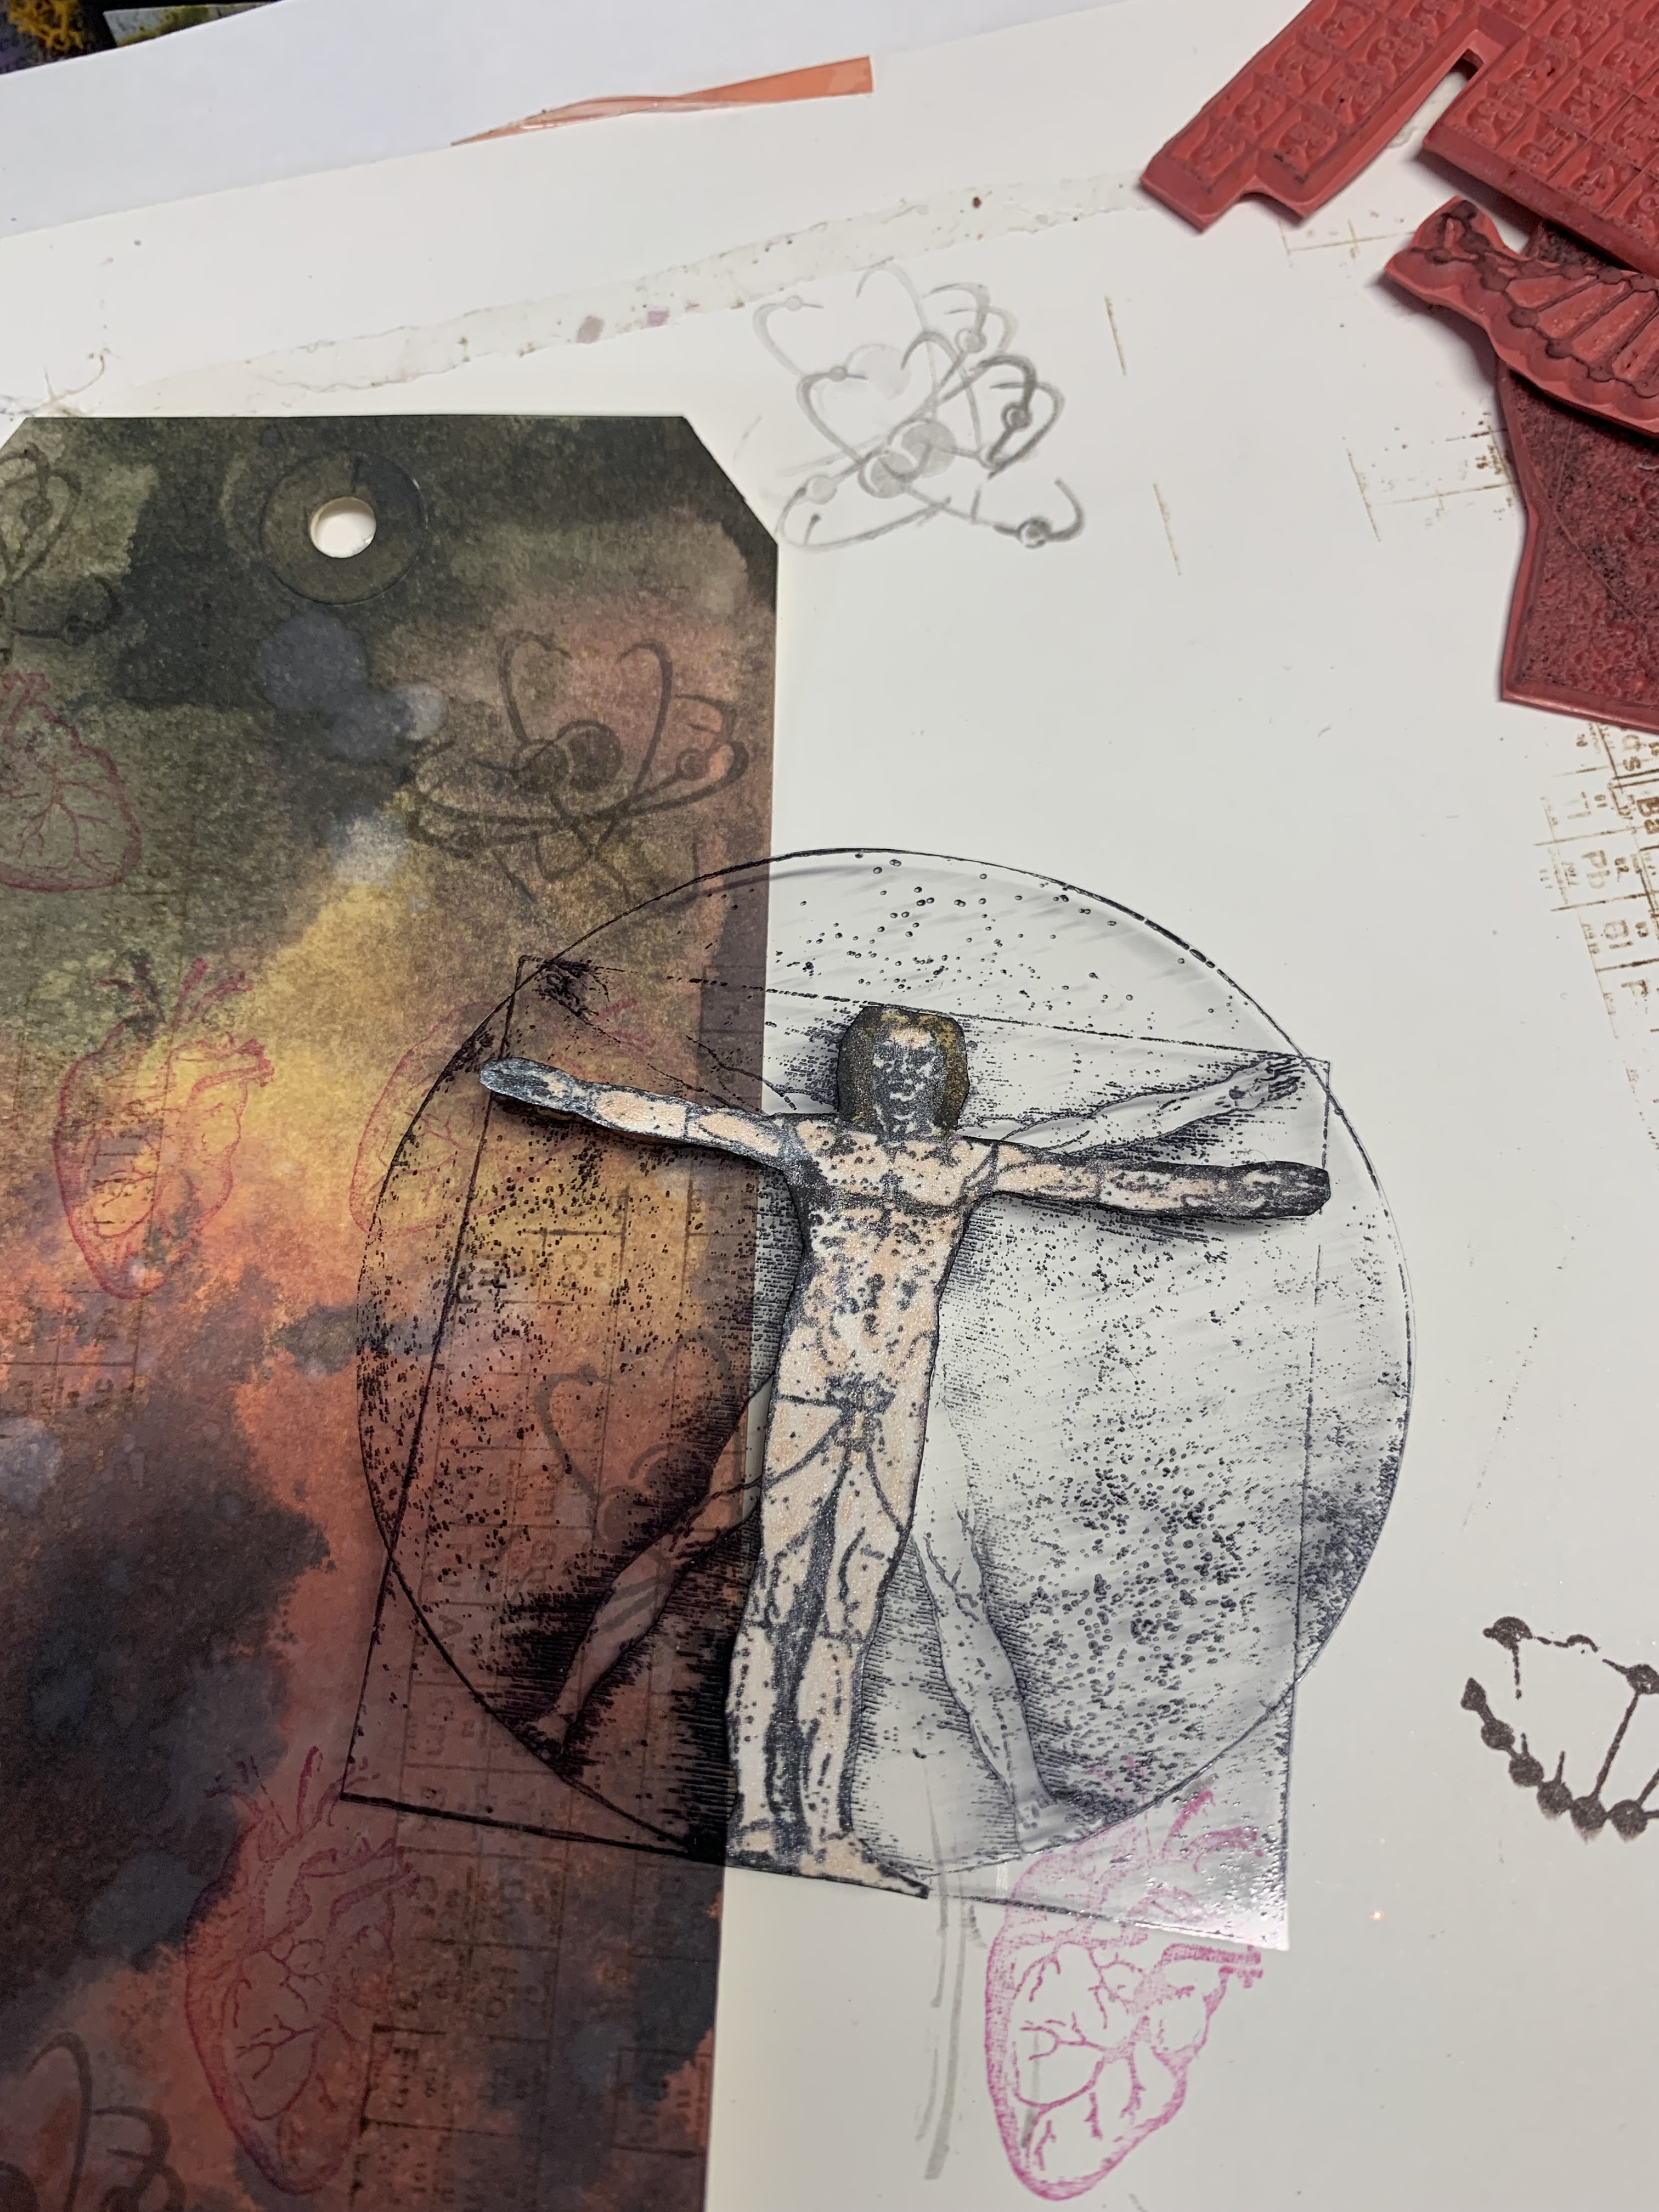
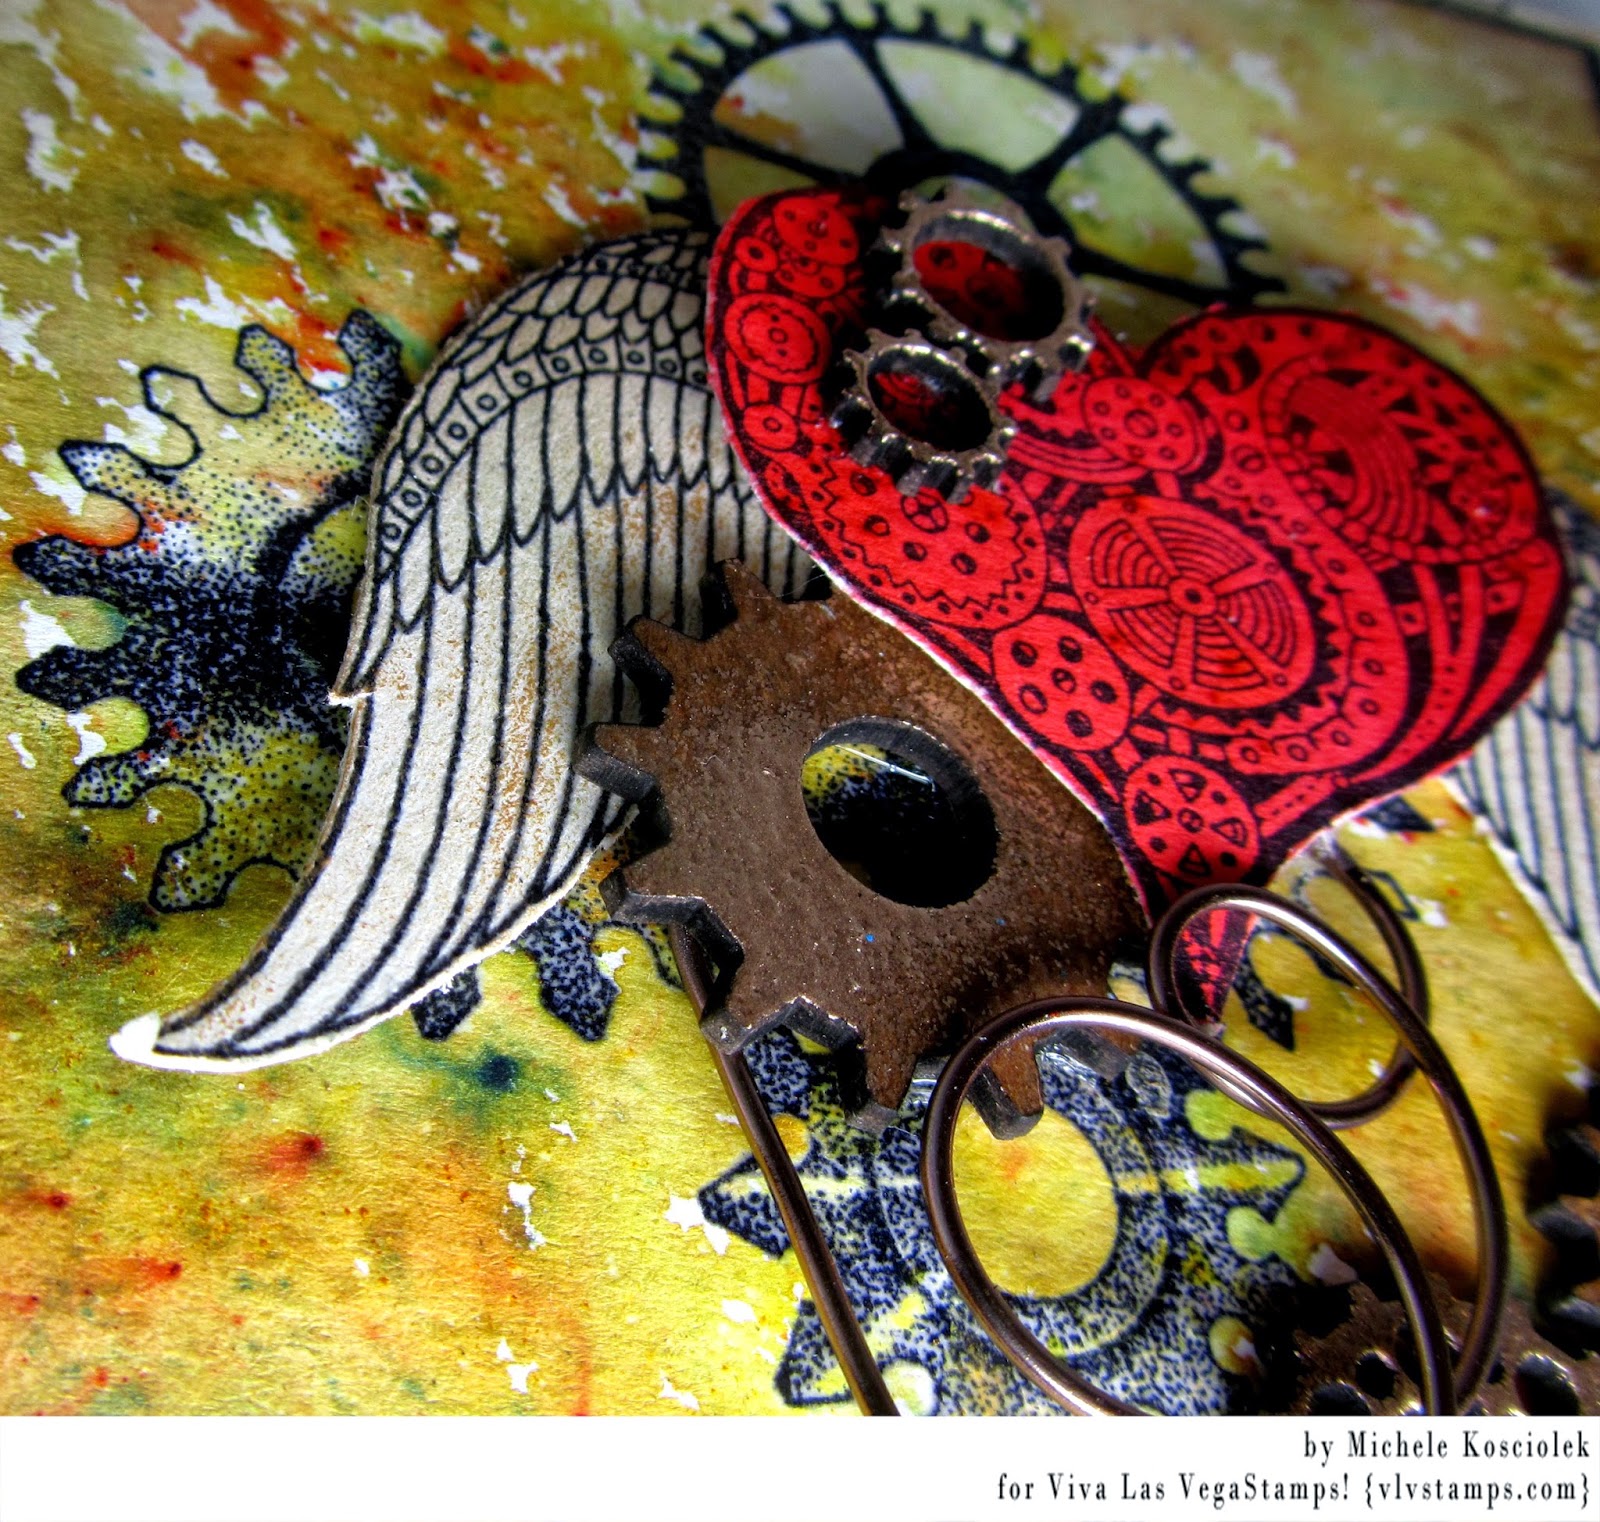
I put two strips of 3d tape on the back of the man as I wanted him to stand off the tag,. I went into my Dresden trims wings stash and found the perfect wings for him. Those coper wings gave him a steampunk vibe so I stamped some cogs around the edges of the tag.
I also added some metallic wax around the edges of the tag to pull it all together. Last, I found some verbage stickers  to finish the tag.

And that's a wrap! I hope you enjoyed my art tag today! until next time~ stay arty!!


Stamps Used:
Vitruvian Man-Lg.     19763
Periodic table        19449
Atomic structure     19451
Human heart    20143
DNA strand     19437
Nesting gears 2      18077

Other supplies:
Distress oxide reinkers: Abandoned coral, Fired Brick, Black Soot
Distress ink spray: Squeezed  Lemonade
Redesign decor wax- Cosmic ray
Dresden trims- copper wings
acetate
#8 tags -TH
Versaclair inks- Black, Pinecone, morning mist


Thursday, June 10, 2021

Index card - Into the abyss

Hi everyone,

It's June and that means for me it's ICAD time! If you are not familiar with this, it stands for "index card a day" and is about doing something creative on an index card every day for two months. This is the third year I'm participating in the challenge and I decided to follow the weekly prompts. This week is about typography, text and poetry and so today's card contains a few text and letter elements.

When I started, I knew I wanted to do something a little "steampunky" and had a rough idea for my focal point. With an eye towards the weekly theme, I started with this fantastic steampunk alphabet stamp set. I got out my quite dry Archival Ink and stamped the words "brave hearts dive deep", not caring too much about a perfect stamp impression.


I wanted to add some color and therefore chose two Moonshadow Mists. I sprayed them on top and also dipped the card into the puddles on my working surface to get some additional texture. When building layers with these sprays (or any other water soluable colors) it can be helpful to dry the piece in between as it adds some interesting textures.

Next, I stamped my focal image - the whimsical diver - with Versafine Claire Ink and used watercolor brush pens to color it in. I used some brown and orange/gold tones first and went over parts of the image with a very light blue wash then. Doing this wash is easy: Instead of adding the color directly to the page, I scribbled some on my glass mat and picked it up with a water tank brush. The blue wash created this pretty greenish metal look.


I cut my image and inked up the edges with a black marker. Then I decided where to place it on my index card. For more interest in the background I added some messy stamping with the "into the abyss" text stamp. As I wanted a stonger impression as I had with my first layer, I used my juicy Versafine Claire ink pad again and made multiple stamp impressions without reinking the stamp very often. With this technique I did two areas around the diving helmet and one in the right top corner.


To finish my card, I did two more steps. First, I glues the image down together with some washi tape to avoid a weirdly floating focal point. Of course I could have simply glued the image to the bottom, but I just liked it to be a little higher.
Also, I collected some text fragments from books. I have a few old/used books (novels and poetry) that I just keep for this purpose. I went through them quickly (just a quick skimming) and through the snippets I already cut from some of the books and chose some fragments to form a new text. I love when you can see that the fragments are taken from different books, and to be honest, I love that it turned out a little oppressive.

So heres my finished index card again, as well as a few detail images:

Stamps used:
Steampunk Alphabet Unmounted (5888)
Whimsical Diver (19354)
Into The Abyss (19352)

Other material:

- index card
- Archival Ink (jet black)
- Versafine Claire Ink (nocturne)
- Lindy's Moonshadow Mist (buccaneer bay blue, moonlit mulberry)
- ZIG watercolor brush pens
- washi tape
- old books / text fragments


See you soon!


Monday, October 08, 2018

Mail Art from the Great Unknown

Hello Crafty Friends! 

Happy Mail Art Monday
and Columbus Day if you are here in the USA.

Now, Time for some explorer themed mail art... (with a hint of steam punk)


Stamps Used:

I started by using an A2 envelope. I stamped my 2 foreground stamps and traced my mini playing card (address label block).  


Next I created a "cloud" background with scarp paper and ink in weathered wood, hickory smoke,  and broken china distress ink. 


Next, I used my waybill/ledger stamp to add random texture and detail to the background with cornflower blue archival ink.


I also stamped my numbers randomly in watering can archival ink.  Across the top, I also added a bit of texture with my punchinella stamp. (below you can see a close up of some detail for the numbers, ledger, and texture)... you can also see I added a few flecks of black stain, and glitter spray.... I also added white dots with a white gel pen. 


Below you can see the whole picture, I added color detail, and bits of washi tape, and glitter. 


More detail...


And even more details... 


I hope you have all enjoyed this explorer themed envelope. 


Friday, August 19, 2016

Winner WINNER ♥♥

Thank you so much to all the wonderful pieces entered in the July Challenge. What a great steampunky turnout!

Today we have the winners to announce..

Voted winner goes to... JULIE S.!!!


Congratulations Julie!!!

She's used our Worn Clockface in such a cool way, and totally won over the Design Team. Way to go!

Our random winner goes to... Tarah!

email me with your shipping addresses and we can get you a grab bag of rubber : deedee430@gmail.com


Also feel free to use the following graphic on your blog. Thanks so much for entering!


Don't forget >>> you can't win if you don't enter. Visit our current challenge now. 

Tuesday, July 05, 2016

Friday, July 01, 2016

July Challenge - Steampunk it!

Hellooooo and welcome to our monthly challenge. This month we are featuring some of our newer stamps to inspire you with a STEAMPUNK Challenge!


We are inspiring you with words like rusty, steam & steampunk, mail art, delivery, pipes, vintage, oceanic & under the sea, umbrellas, postcard, script, stamps, handwriting, metal, copper, gold, bronze, nickel, handles, diving, divers and more!

Also >> Starting this month we are pairing up our SWAPS with our monthly challenges! So if you're extra inspired.. pop on into our facebook group and sign up for our swap. Double the fun easy peasy!


Don't forget the rules:
-Create a new project based on our inspiration board (it has to be posted this month, but you can certainly link up to other challenges as well!)
-Use at least one (but certainly more if you want) Viva Las VegaStamps! rubber stamps
(We are now allowing competitors stamps to be on your work, but please make VLVS! the focus of the project, thank you.)
-Post it to your blog with a link back to us
-Upload to our linky using your direct blog post link (You may also upload via facebook, flickr or other gallery)
You could win a Project Spotlight post on our blog + some new rubber of course.
And visit us back here for inspiration!


Friday, February 12, 2016

Time To Dance Darling

Hello VLVS friends, Fiona here with you again with a new project I created using the awesome rubber stamps from Las Vegas!

"Time to Dance Darling"


This was one of my first VLVS purchases as soon as I knew I'd made the team and I was given the instruction to choose my favorite stemps, I went for this gorgeous "Steampnk Woman's Head".


I had a definite idea in mind of what I wanted to create. All I needed was a little cardboard box and some trinkets to adorn her!


I gave the box (which is actually a lid to a box) a light coating of gesso and then added some crackle medium. Once that was dry I added water colours and then some stamping with the Jagged Chain Link Fence background stamp.


Then all it took was ......... some depth (lots of layers of cardboard!), some old book pages, some Um WOW Studio chipboard and a Relics and Artifacts resin hand and she was ready to go to the ball!!!


I'm so pleased how it all turned out. I was getting worried towards the end but once I added the micro beads and some black and white ink flecks, it suddenly all came together.

Stamps I used to create this piece include:


I hope you like my crazy piece. I had a blast creating it.

Catch you next time.
Cheers
Fi


Monday, July 06, 2015

WOW & VLVS -- Mary Brockway

Welcome to our blog! This week we will be swapping with the talented team @ WOW! Embossing Powder. Stamps and Embossing Powder = a match made in heaven!


Find WOW! : 
Shop | Blog | Facebook

Find Viva Las VegaStamps! :
Shop | Blog | Facebook


Today we have Mary Brockway up with this beautiful piece!


Mary has used our Steampunk Gear, Sharp Edge Gear, Square Edge Gear and Gear Medium. All of her gears have been embossed with Primary Ebony and Metallic Platinum Sparkle by WOW! This photo clock is so striking and all the gear chip and stamps give it a great industrial look. You can learn more about the process on Mary's blog.


Don't forget to leave comments on all the blogs this week. You can win a prize! Stop by the WOW! blog to see what their team has worked up for our swap. See you tomorrow!

Monday, March 09, 2015

Adventure Awaits


Happy Monday!!!  Michele here today to share a quick steampunk card with you.  But first let me show you how a did my background layer.


I started out with some watercolor paper, stamped the nesting gears  (Item 18077 Plate 1373) in archival ink, sprinkled high gloss embossing powder on top and heated it up.


Next I sprinkled some Brusho in yellow ochre all around.


Then I spritzed with water and let dry.  I didn't do any blotting becasue I didn't want to smear the color around.


I also stamped a steampunk heart  (Item 16020 Plate 1273 Valentine) and steampunk wings (Item 18658 Plate 1406) on watercolor paper, which I fussy cut, colored and inked.  The gears are Um Wow Studio gear mash covered in WOW embossing powder.  I bit of wire ties it together.  The sentiment is adventure awaits (Item 19009 Plate 893). Oh and the card base is Authentique, I have been hord....er saving this piece for somthing special.  :)


Thanks for sharing a bit of your day with us and don't forget about this months inspiration challenge!!


I can't wait to see what you create!!

Saturday, December 27, 2014

Steampunk for New Years

Hello Again!!!! 
It's me Tera Here with my last post for VLVS.
I will miss you all but i'm so thankful for the opportunity that VLVS has given me and i hope to come back after I finish school. 

Today I want to share a fun steampunk tag just in time for New Years!


Supplies: 

- 1 Large tag cut from chipboard 
-Various chipboard die cuts 
-Metal embellishments (Tim Holtz or other) I used a Tim Holtz wing and metal fastener, as well as a button
-Black Dylusions spray ink
-perfect pearls shimmer spray
-InkaGold -Silver, Orange, Black
-Scrapbook paper ruler
-Favorite Adhesive (I used Glossy Accents)
-distress markers to color yours stamped image


Start by spraying your chipboard pieces and tag with black dylusions ink, then allow them to dry. Next use your finger to dry rub the inkagolds on your chipboard pieces for a metallic feel. Also add some inkagold to your metal pieces. :D 

I then arranged the pieces on the tag and glued them down with glossy accents. For my stamped image I stamped her on cardstockwith verafine ink, I colored her then misted with the perfect pearls shimmer spray to keep a consistent shimmery look.


Thank you for all of your support! 
Have a wonderful and Happy New Year!