Showing posts with label Viva Las VegasStamps. Show all posts

Saturday, December 28, 2019

Grungy Vintage Mixed Media Card by Preeti D.

Hi friends :)
Hope you are doing well.
Preeti Datta (Dutt Preety) here from the VLVS! Design Team. 
For today's post, I've created a Grungy Vintage Mixed Media Card. 
I've used some gorgeous VLVS! Rubber Stamps here.


I created the background by adhering design tapes to a panel of watercolour paper and then applied clear gesso on top.

Then, to add colour used distress inks and Oil Pastels.

Next, stamped the background using various archival inkpads and gorgeous rubber stamps by VLVS! 

Then stamped the focal image and quote, fussy cut them and distressed their edges with Vintage Photo archival ink.

Next, adhered black die cuts, the stamped image and quote to the card. Also, created white, black and brown ink splatter.

Distressed the edges of the panel using vintage photo distress ink and then matted the panel in black and kraft.

Finally adhered the panels to a 5 by 7 inch white card base. 


VLVS! Supplies:

Other Supplies:
Prima Marketing: Clear Gesso, Oil Pastels, Heavy White Gesso
Canson: XL Watercolour Paper
Ranger: Archival & Distress Inkpads
Tim Holtz Idea-ology Design Tapes
Scrapman Dies 

Thanks a lot for your precious time :)
Stay Blessed!
Preeti

Monday, December 23, 2019

Vintage Mixed Media Card by Preeti D.

Hi friends :)
Hope you are doing well.
Preeti Datta (Dutt Preety) here from the VLVS! Design Team. 
For today's post, I've created a Grungy Vintage Mixed Media Card. 
I've used some gorgeous VLVS! Rubber Stamps here.


I created the background by adhering design tapes to a panel of watercolour paper and then applied clear gesso on top. 

Then, to add colour used distress inks and Oil Pastels. 

Next, stamped the background using various archival inkpads and gorgeous rubber stamps by VLVS! 

For the layering, used a Vintage Paper doll, some gauze, black die cuts and old book paper. 

Layered the elements, stamped the quote using a VLVS! stamp and created white, black and brown ink splatter. 

Distressed the edges of the panel using vintage photo distress ink and then matted the panel in black and kraft.

Finally adhered the panels to a 5 by 7 inch white card base. 


VLVS! Supplies:
Other Supplies:
Prima Marketing: Clear Gesso, Oil Pastels, Heavy White Gesso
Canson: XL Watercolour Paper
Ranger: Archival & Distress Inkpads
Tim Holtz Idea-ology Design Tapes, Paper Dolls
Scrapman Dies 

Thanks a lot for your precious time :)
Stay Blessed!
Preeti

Friday, September 27, 2019

Mixed Media Card by Preeti D.

Hi friends :)
Hope you are doing well.
Preeti Datta (Dutt Preety) here from the VLVS! Design Team. 
For today's post, I've created a Mixed Media Card. 
I've used some gorgeous VLVS! Rubber Stamps here.


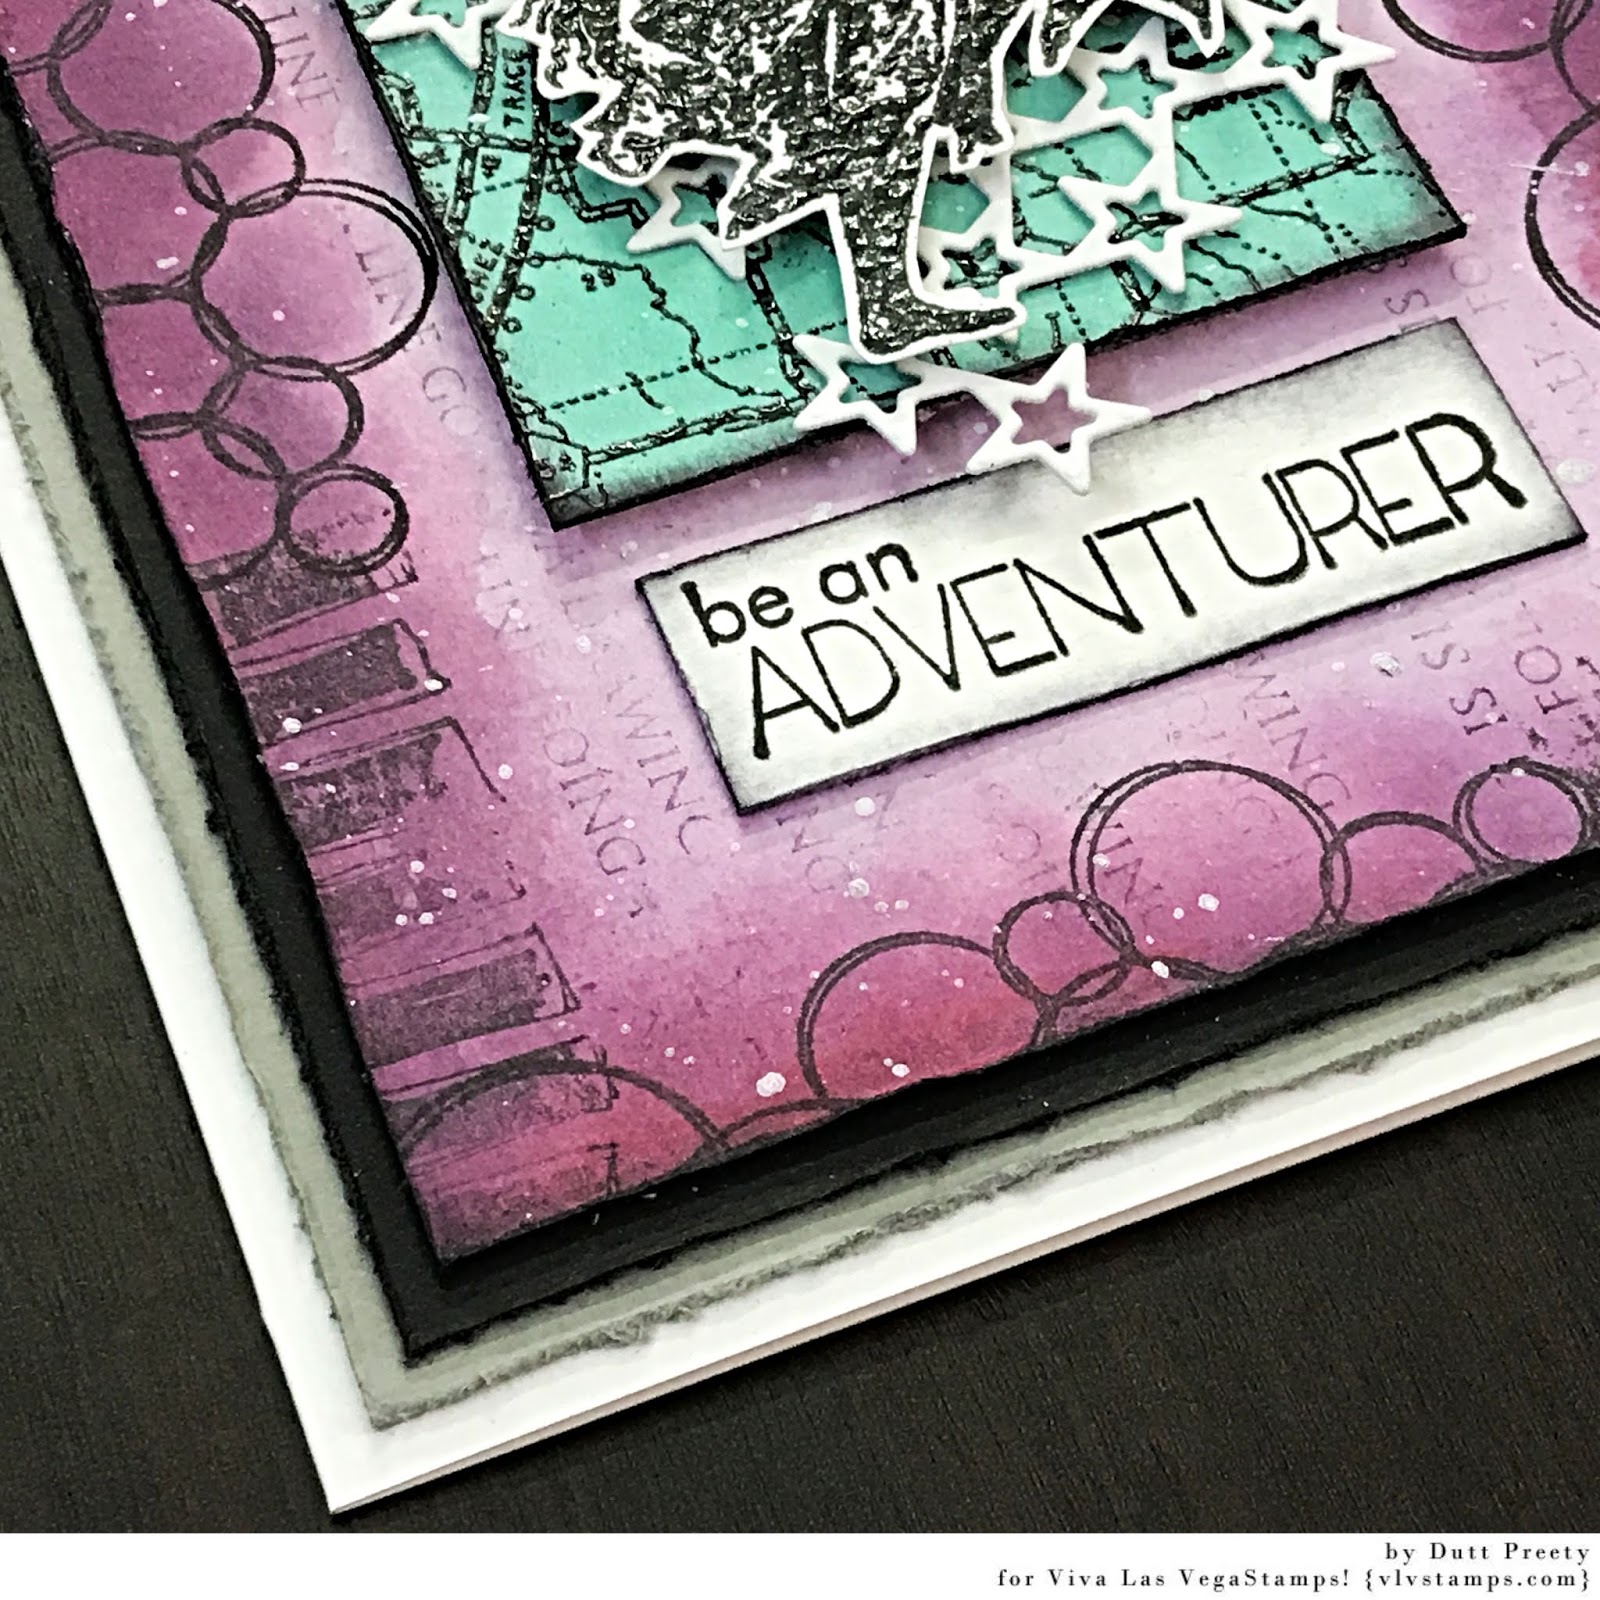
First, I cut a panel of 300 gsm watercolour paper to create the card base. To colour it, I used Lindy's Gang Squirts and Sprays in shades of purple and pink. Dried the panel & stamped around it's edges using Versafine Onyx Black Ink and VLVS! Stamps- Overlapping Circles by Corrie Herriman, Row of Scribble Squares and A Drawing Is. Then, deckled and distressed the edges of the panel.

Stamped and heat embossed a few small panels using VLVS! Map Background Stamp in black and then coloured the panels with Lindy's Gang Squirt in teal colour. Then deckled & distressed the edges of these small panels with black ink. 

For the focal element, stamped & heat embossed in black the beautiful VLVS! Dancing Lady Stamp and fussy cut it. 

For the sentiment, stamped the VLVS! Be An Adventurer stamp in black onto a watercolour paper panel and distressed it's edges in black

Next, die cut a starry design die using white cardstock and cut paper mats for the card. In the end, gathered all the elements, created a visually pleasing composition and adhered everything using a strong glue. Used 3D foam tape under some of the layers to create dimension. Created white ink splatter to integrate all the elements. Finally, adhered all the layers to a 5 by 7 inch white card base.

VLVS! Supplies:


Other Supplies:

Lindy's Gang- Squirts (Polite People Purple & Loonie Toonie Teal), Autumn Maple Crimson Shimmer Spray & Black Forest Black Embossing Powder
Tsukinenko- Versa Mark Watermark Ink Pad & Versafine Onyx Black Ink Pad 
Fantasy Dies
Tim Holtz Distress Inks 

Thanks a lot for your precious time :)
Stay Blessed!
Preeti

Wednesday, September 11, 2019

Mixed Media Card by Preeti D.

Hi friends :)
Hope you are doing well.
Preeti Datta (Dutt Preety) here from the VLVS! Design Team. 
For today's post, I've created a Mixed Media Card.  
I've used some gorgeous VLVS! Rubber Stamps here.


First, I cut a panel of 300 gsm watercolour paper to create the card base. To colour it, I used Lindy's Gang Squirts in shades of yellow and brown. Dried the panel & stamped around it's edges using Versafine Onyx Black Ink and VLVS! Stamps- Overlapping Squares by Corrie Herriman and Tired Of Trying To Cram. Then, deckled and distressed the edges of the panel. 

Stamped and heat embossed a few small panels using VLVS! Map Background Stamp  in black and then coloured the panels with Lindy's Gang Squirt in teal colour. Then deckled & distressed the edges of these small panels with black ink. 

For the focal element, stamped & heat embossed in black the beautiful VLVS! Whimsical Key Man Stamp and fussy cut it. 

For the sentiment, stamped VLVS!- Don't Waste A Moment stamp in black onto a watercolour paper panel and distressed it's edges in black

Next, prepared some more elements for the layers- coloured gauze with Lindy's Gang Squirts in yellow colour, created black and white die cuts and cut paper mats for the card.

In the end, gathered all the elements, created a visually pleasing composition and adhered everything using a strong glue. Used 3D foam tape under some of the layers to create dimension. Created white ink splatter to integrate all the elements.
Finally, adhered all the layers to a 5 by 7 inch white card base.

VLVS! Supplies:


Other Supplies:

Lindy's Gang- Squirts (Beaver Tail Brown, Maple Syrup Bronze, Poutine Gold & Loonie Toonie Teal) & Black Forest Black Embossing Powder
Tsukinenko- Versa Mark Watermark Ink Pad & Versafine Onyx Black Ink Pad 
Scrapman Dies
Tim Holtz Distress Inks 

Thanks a lot for your precious time :)
Stay Blessed!

Tuesday, August 13, 2019

Art Journal Spread by Preeti D.

Hi friends :)
Hope you are doing well.
Preeti Datta (Dutt Preety) here from the VLVS! Design Team.  
For today's post, I've created an Art Journal Spread titled Wanderlust.  
I've used some gorgeous VLVS! Rubber Stamps here. 


First, I applied heavy white gesso to the pages, to prepare them for mixed media work.

Then, stamped the background using VLVS! Stamps and Versamark sticky ink. Next, heat embossed all the stamped images with metallic embossing powder. 
 Added color to the background using Sprays & Starburst squirts. Sprayed with water to create movement.
Did additional stamping using archival ink & VLVS! Rubber Stamps.
 Next, stamped the sentiment and focal image using VLVS! rubber stamps onto white cardstock using versamark watermark ink & heat embossed them in black. Then fussy cut the images & distressed their edges. 
 Adhered a couple of die cuts behind the sentiment and focal element. 
 In the end, distressed the edges of the pages using distress inks and created white & black splatter using watered down gesso. 

VLVS! Supplies:


Other Supplies:
Lindy's Gang Embossing Powders, Starburst Squirts & Spray
Scrapman Dies
Versamark Watermark Inkpad 
Finnabair's Heavy White Gesso, Heavy Black Gesso, Soft Matte Gel
Ranger's Archival Inkpad- Potting Soil
Tim Holtz Distress Inkpads- Vintage Photo & Black Soot

Thanks a lot for your precious time :)
Stay Blessed!
Preeti

Wednesday, February 06, 2019

Junk Journal Style Envelope Package


Hello Everyone!

I'm excited to share with you today a small paper project using 
vintage paper, lace, metal elements and 2 of my favorite

They are:


The process for this project was very easy and fun! Some crunched 
paper, ephemera, stamping, and stitches did the magic! I wanted to
create a vintage envelope package for a special and talented friend 
who is a master at creating junk journals! I love the tiny scissors 
stamp. I used it for a little tag to show that the package needs to be 
opened from that side. 

Here are some more pictures from this project:


Hope to provide with some inspiration for your future vintage projects.
With me, until the next opportunity my friends!


Monday, January 21, 2019

Love for Ink Mail Art Monday


Hello fellow crafters!

MAIL ART MONDAY


STAMPS USED:


Here's my mail art project:


I made this happy mail for a friend in Germany, I chose these particular ink stamps because I love writing letters to my friends with fountain pens, just like in the old times. I stamped the images onto coffee dyed paper, cut them into a circular shape and sewn them. I also used brown distress ink, the bubble wrap texture stamp for the background and some authentic vintage ephemera to add more texture and eye candy. 


I love the texture and tri-dimensional look! I hope to provide some inspiration for you today and new ideas to use your viva las vegastamps!


Thank you so much for visiting!

Karen Tremblay