Showing posts with label Lindyy's Stamp Gang. Show all posts

Sunday, October 27, 2019

Not every piece of street art is Banksy

Hello everyone,

welcome to the VivaLasVegaStamps! blog where today I have a tag to share:


here's how I made this:


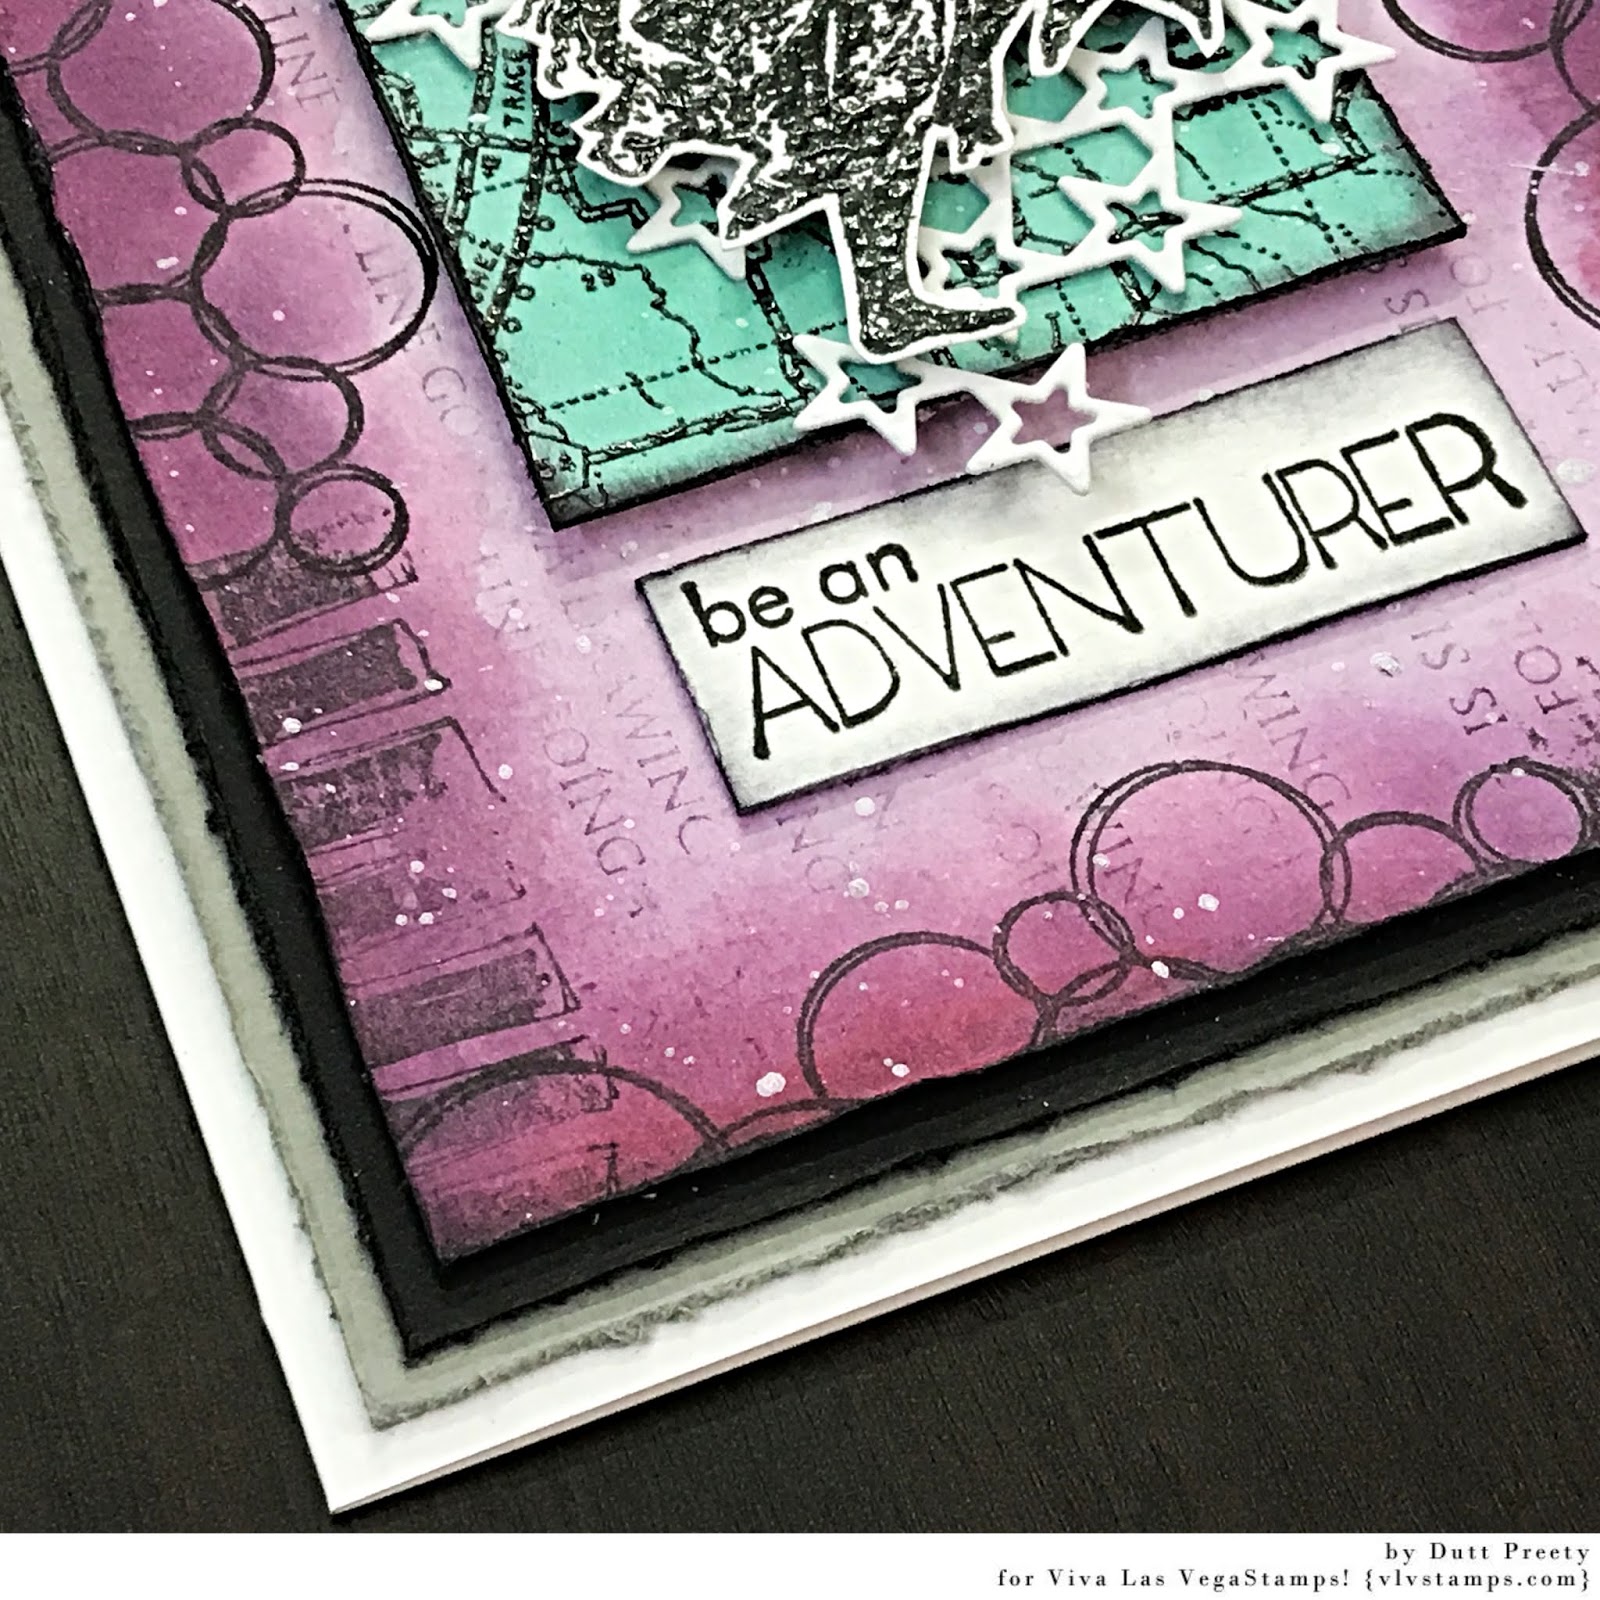
I started with cutting a tag out of Mixed Media Paper and colouring it with Lindys Stamp gang sprays. I used Star Burst sprays which are sparkly.


Next I stamped randomly over the tag with different VLVS! Stamps (list below) and I also used an Um Wow studio stencil called Dahlia with white paint. Because the sprays are watersoluble they react with the white paint.


Next I stamped this lady on the tag and on some more MM paper; I coloured her with Zig Clean Color real brush markers and cut her out. 


I then glued the cut out one onto the one on the tag; this was all the small details that are impossible to cut out, are there too. 


Next I stamped the sentiment, cut it into strips and adhered it to the tag. I doodled around the strips and also along the edges of the tag with a black pen.


Lastly I added a piece of ribbon. 

I have used the following stamps:

Other materials:
Mixed Media Paper; I used Daler Rowney 169 lb. or 250 gsm
UmWow Studio Dahlia stencil
Amsterdam Acrylic - Titanium White
Lindy's stamp gang Star Burst sprays: Marigold Yellow Orange and Yellow Rose of Texas
a piece of ribbon
Black pen
VersaFine Ink Onyx Black 
Distress Oxide - Carved Pumpkin 
StaZon - Dove Grey

Thank you for stopping by today ! 


Friday, September 27, 2019

Mixed Media Card by Preeti D.

Hi friends :)
Hope you are doing well.
Preeti Datta (Dutt Preety) here from the VLVS! Design Team. 
For today's post, I've created a Mixed Media Card
I've used some gorgeous VLVS! Rubber Stamps here.


First, I cut a panel of 300 gsm watercolour paper to create the card base. To colour it, I used Lindy's Gang Squirts and Sprays in shades of purple and pink. Dried the panel & stamped around it's edges using Versafine Onyx Black Ink and VLVS! Stamps- Overlapping Circles by Corrie Herriman, Row of Scribble Squares and A Drawing Is. Then, deckled and distressed the edges of the panel.

Stamped and heat embossed a few small panels using VLVS! Map Background Stamp in black and then coloured the panels with Lindy's Gang Squirt in teal colour. Then deckled & distressed the edges of these small panels with black ink. 

For the focal element, stamped & heat embossed in black the beautiful VLVS! Dancing Lady Stamp and fussy cut it. 

For the sentiment, stamped the VLVS! Be An Adventurer stamp in black onto a watercolour paper panel and distressed it's edges in black

Next, die cut a starry design die using white cardstock and cut paper mats for the card. In the end, gathered all the elements, created a visually pleasing composition and adhered everything using a strong glue. Used 3D foam tape under some of the layers to create dimension. Created white ink splatter to integrate all the elements. Finally, adhered all the layers to a 5 by 7 inch white card base.

VLVS! Supplies:


Other Supplies:

Lindy's Gang- Squirts (Polite People Purple & Loonie Toonie Teal), Autumn Maple Crimson Shimmer Spray & Black Forest Black Embossing Powder
Tsukinenko- Versa Mark Watermark Ink Pad & Versafine Onyx Black Ink Pad 
Fantasy Dies
Tim Holtz Distress Inks 

Thanks a lot for your precious time :)
Stay Blessed!
Preeti

Wednesday, September 11, 2019

Mixed Media Card by Preeti D.

Hi friends :)
Hope you are doing well.
Preeti Datta (Dutt Preety) here from the VLVS! Design Team. 
For today's post, I've created a Mixed Media Card.  
I've used some gorgeous VLVS! Rubber Stamps here.


First, I cut a panel of 300 gsm watercolour paper to create the card base. To colour it, I used Lindy's Gang Squirts in shades of yellow and brown. Dried the panel & stamped around it's edges using Versafine Onyx Black Ink and VLVS! Stamps- Overlapping Squares by Corrie Herriman and Tired Of Trying To Cram. Then, deckled and distressed the edges of the panel. 

Stamped and heat embossed a few small panels using VLVS! Map Background Stamp  in black and then coloured the panels with Lindy's Gang Squirt in teal colour. Then deckled & distressed the edges of these small panels with black ink. 

For the focal element, stamped & heat embossed in black the beautiful VLVS! Whimsical Key Man Stamp and fussy cut it. 

For the sentiment, stamped VLVS!- Don't Waste A Moment stamp in black onto a watercolour paper panel and distressed it's edges in black

Next, prepared some more elements for the layers- coloured gauze with Lindy's Gang Squirts in yellow colour, created black and white die cuts and cut paper mats for the card.

In the end, gathered all the elements, created a visually pleasing composition and adhered everything using a strong glue. Used 3D foam tape under some of the layers to create dimension. Created white ink splatter to integrate all the elements.
Finally, adhered all the layers to a 5 by 7 inch white card base.

VLVS! Supplies:


Other Supplies:

Lindy's Gang- Squirts (Beaver Tail Brown, Maple Syrup Bronze, Poutine Gold & Loonie Toonie Teal) & Black Forest Black Embossing Powder
Tsukinenko- Versa Mark Watermark Ink Pad & Versafine Onyx Black Ink Pad 
Scrapman Dies
Tim Holtz Distress Inks 

Thanks a lot for your precious time :)
Stay Blessed!

Friday, March 24, 2017

Let's Get Lost Art Journal

Hello to all you stampers out there. Shanna here to share a quick art journal spread I made.


So I had a lot of fun making this page. I started with the Jelly Fish stamp and used Versamark ink to emboss the stamp with white detail embossing powder. Then I used some Lindy's Stamp Gang Magicals to watercolor the background and the jellyfish. Then I used some Salty Ocean Distress Ink to stamp the Map of the World in the background. Then I added Let's Get Lost with black ink. 

Thank you for stopping by today and enjoy! 


Stamps Used:

Other Products Used:
Lindy's Stamp Gang Magicals - Ocean Breeze Blue, Plumeria Pink, Caribbean Blue, Hibiscus Rose
Distress Ink Salty ocean
Staz On Jet Black 
Veramark Watermark Ink
White Detail Embossing Powder


SaveSave

Friday, February 19, 2016

Four famous men....

Hello everyone,

For my DT post today, I have made a trio of ATC's with famous men.
I have made a little tutorial for this, so get a drink, sit back and enjoy !

As always I will start with the finished project:


And here is the step-by-step of how I made them:


I started off with 3 pieces of card stock measuring 3,5" x 2,5". 


With a bit of washi tape I connected them together so I could do the backgrounds in one go. 


I decided to use modelling paste and a brush to get some texture going.


I actually used a paintbrush for the first layer and then added another layer with a palet knife. 


Here's a close- up of the lovely texture. 


Next I got out my Lindy's Magicals. They are mica powders and I love them. Also the names of the colours crack me up..... (see top of pots)


I used the powder with water and also spattered some over the top. The light grey has other colours in it like pink and yellow and also blue... 


Look at all that lovely shimmer.....


Additionally I rubbed the texture here and there with my finger which was dabbed on the black Archival ink pad. The texture shows up even more like this.. 


Time for background stamping (There is a complete list of all the stamps I used at the bottom of this post). I tried to find stamps that I thought would go with the men... 


After I stamped it all, using grey and black Archival inks, I though it was too dark and uninteresting. So I restamped some of the stamps with VersaMark and heat embossed them with white WOW embossing powder.......much better... 
I also added some pink splatters from a Lindy's spray.


Next I stamped the famous men... I used Memento because I was going to colour with Copic Markers. 


Work in progress....


After colouring, I cut the images out and ...


adhered them to the ATC's. 


The next thing was the sentiments. I thought about this and came up with their professions. 
I typed this on an old type writer. Next I cut the words out and adhered them onto the ATC's..


And here is the end result again. I hope you like it and I have inspired you to go and create !! 

I used the following stamps:


Thank you so much for stopping by today ! 


Monday, April 06, 2015

Fly.

Hello!  Mary here with a Spring-inspired card set.

I began by stamping the Butterfly Gossamer/Large image with VersaMark ink and embossing it with Wow embossing powder in Primary Ebony.

I LOVE this image!!  Because it's 4 1/2 by 3 1/2 inches in size, it can totally rock the whole front of a card without much else needing to be done.


Next, I wet the inside of the image with a wash of water before I began 'watercoloring' with a few colors of Lindy's Stamp Gang spray ink.


In total, I painted up five cards, but here's a peek at three.

When I was done coloring them up, I spattered a bit of ink to fill up a bit of that white space.


Since I wanted to wrap these pretties up as a set, I decided to create a closure with another stamped butterfly on vellum.  StazOn ink is my favorite ink for stamping on vellum, as it dries well on non-porous surfaces.


To finish up my closure, I fussy cut out the butterfly, and added it to the top of a clothes pin with some thread and sequins.


And here's a peek at the set.  I decided to stamp a sentiment at the end and used the 'FLY' portion of the Get Cape Wear Cape Fly image.


To bundle up my set, I just wrapped some May Arts silk ribbon in a couple of colors around them and clipped it in place the butterfly clip.

LOVE!


Thanks so much for joining me today.  I hope you've found a bit of stampy inspiration.  Now, go grab your favorite VLVS! rubber and get to stamping!!

xx Mary