Hi my dear crafty friends!
It's Susanne writing today and I'd like to share a homemade phone case. I used some gelli printed white KraftTex and the "Whimsical Horned Boy" as my main image. KraftTex is a rugged paper that looks and feels like leather, but sews and cuts just like fabric. Some of you might also know it as SnapPap.
I cut my KraftTex matching my mobile phone (plus some seam allowance) and added some texture with the "Waybill/Invoice Background" and the "Number Strip" using different inks (Memento Luxe, StazOn). The main image is stamped on tissue paper and adhered with Gel Medium. I wanted a very good impression, so I decided not to stamp on the rough surface of the gelli printed KraftTex.
I added some stamping on the back, as well (Radioactive) before I sew it together. I cut a whole with my Crop-A-Dile in the top left corner to add a homemade charm. I made it with white Shrink Foil and the "Whimsical Face".
Finally I had some KraftTex left, so I decided to make a little key chain, too. I embossed the "Whimsical Key Man" with WOW! Primary Ebony before I sewed everything together.
Thanks for stopping by today!
xx Susanne.
Supplies:
Viva Las VegaStamps!:
Radioactive (Plate 827)
Whimsical Face (Plate 953)
Whimsical Horned Boy (Plate 1462)
Waybill/Invoice Background (Plate 1440)
Number Strip (Plate 1428)
The Truth Is Out There (Plate 1449)
Whimsical Key Man (Plate 1448)
Other:
Acrylic Paints
Gel Medium
Tissue Paper
Gelatine Plate
KraftTex (SnapPap)
Sewing Machine
WOW! Primary Ebony Powder
VersaMark Ink
Memento Luxe Ink
StazOn
Shrink Foil
Showing posts with label radioactive. Show all posts
Friday, January 06, 2017
Handmade Phone Case and Key Chain by Susanne
Labels:
DIY,
Plate 1428,
Plate 1440,
plate 1448,
Plate 1449,
Plate 1462,
Plate 827,
Plate 953,
radioactive,
Whimsical Face,
Whimsical Horned Boy,
Whimsical Key Man
Wednesday, April 06, 2016
Radioactive Trio of ATC Cards
Happy Wednesday!
Tina here today with my first Viva Las Vegastamps project post! For my first project, I thought I'd create one of my favorite types of projects, a trio of ATC cards. I love creating in three's and ATC cards are the perfect match.
When creating a trio of ATC cards, I love to repeat certain elements and design features for a cohesive look. To create the cohesive theme, I used the following stamps:
Crackle Background
Whimsical Face with Horns
For the background of each card, I randomly applied gesso, then heat embossed with white embossing powder. For a splash of color, I sprayed several shades of spray mist, letting me mix and mingle. Instant background!
For my face element, I stamped the image on white glossy cardstock, then sprayed with a white shimmer spray, just for an added element.
Now that I've created a common theme, I embellish each card with similiar, yet different elements. I may either use the same element in different colors, or different elements in similiar colors. I chose the later for this trio.
I used red molded resin casts, gold metallic pieces, and white painted chipboard. Even though the individual pieces are different, there is still a cohesive look due to the background and face elements.
As an added design element, I stamped words for the faces and added them to 2 of the cards.
Word Stamps used:
Radioactive
Biohazard
And just like that, you have a trio of ATC works of Art!
I hope you enjoyed my trio of cards! Here's to a wonderful Wednesday and beautiful week!
Wednesday, March 09, 2016
Weathered Wood Background
Who doesn't love a weathered wood background???
Michele here to share a quick and easy way to create one.
Start with a piece of cardstock.
I used gel medium and painted randomly on the cardstock using a brush in vertical strokes.
After the gel is completely dry use your scoreboard and with the gel side down score every 1/4 inch.
I used Antique Linen Distress ink, the ink pad directly on the paper, for the first layer of color.
Then with a blender and Vintage Photo Distress Ink I blended the next layer of color.
Banksy Gas Mask Flower Girl is watercolored with Distress Markers adn she is holding a Prima flower. ALong the bottom is the Wildflower Silhouette with some UmWow Studio flower confetti painted with Distress Paint. The sentiment is created with my Dymo Label Maker.
I was on a roll with my backgrounds so I also created this fun boy card.
This one has a bit less gel and some white drips on the 'fence'
Chevron Banner is stamped in Staz On directly on the fence. I also used Boy and Dog Looking Up, Wildflower Silhouette and Boys Just Want.
A little watercoloring with Distress Markers.
UmWow Studio flower confetti painted with Distress Paint.
And a tiny bit of May Arts burlap string.
Don't forget about our monthly inspiration challenge and of course join us on our Facebook Fan Page.
Until next time...get inky!!
Michele here to share a quick and easy way to create one.
Start with a piece of cardstock.
After the gel is completely dry use your scoreboard and with the gel side down score every 1/4 inch.
I used Antique Linen Distress ink, the ink pad directly on the paper, for the first layer of color.
Then with a blender and Vintage Photo Distress Ink I blended the next layer of color.
I added Barn Door DIstress Ink and some stamped caution signs, Radioactive and Caution Safety Glasses stamped with Staz On.
Here is the complete card.
Banksy Gas Mask Flower Girl is watercolored with Distress Markers adn she is holding a Prima flower. ALong the bottom is the Wildflower Silhouette with some UmWow Studio flower confetti painted with Distress Paint. The sentiment is created with my Dymo Label Maker.
I was on a roll with my backgrounds so I also created this fun boy card.
This one has a bit less gel and some white drips on the 'fence'
Chevron Banner is stamped in Staz On directly on the fence. I also used Boy and Dog Looking Up, Wildflower Silhouette and Boys Just Want.
A little watercoloring with Distress Markers.
UmWow Studio flower confetti painted with Distress Paint.
And a tiny bit of May Arts burlap string.
Don't forget about our monthly inspiration challenge and of course join us on our Facebook Fan Page.
Until next time...get inky!!
Labels:
banksy gas mask flower girl,
boy and dog looking up,
distress ink,
Distress Marker,
Distress Paint,
Dymo Label Maker,
may arts,
prima,
radioactive,
UmWowStudio,
Viva Las VegaStamps!,
wildflower silhouette
Saturday, August 23, 2014
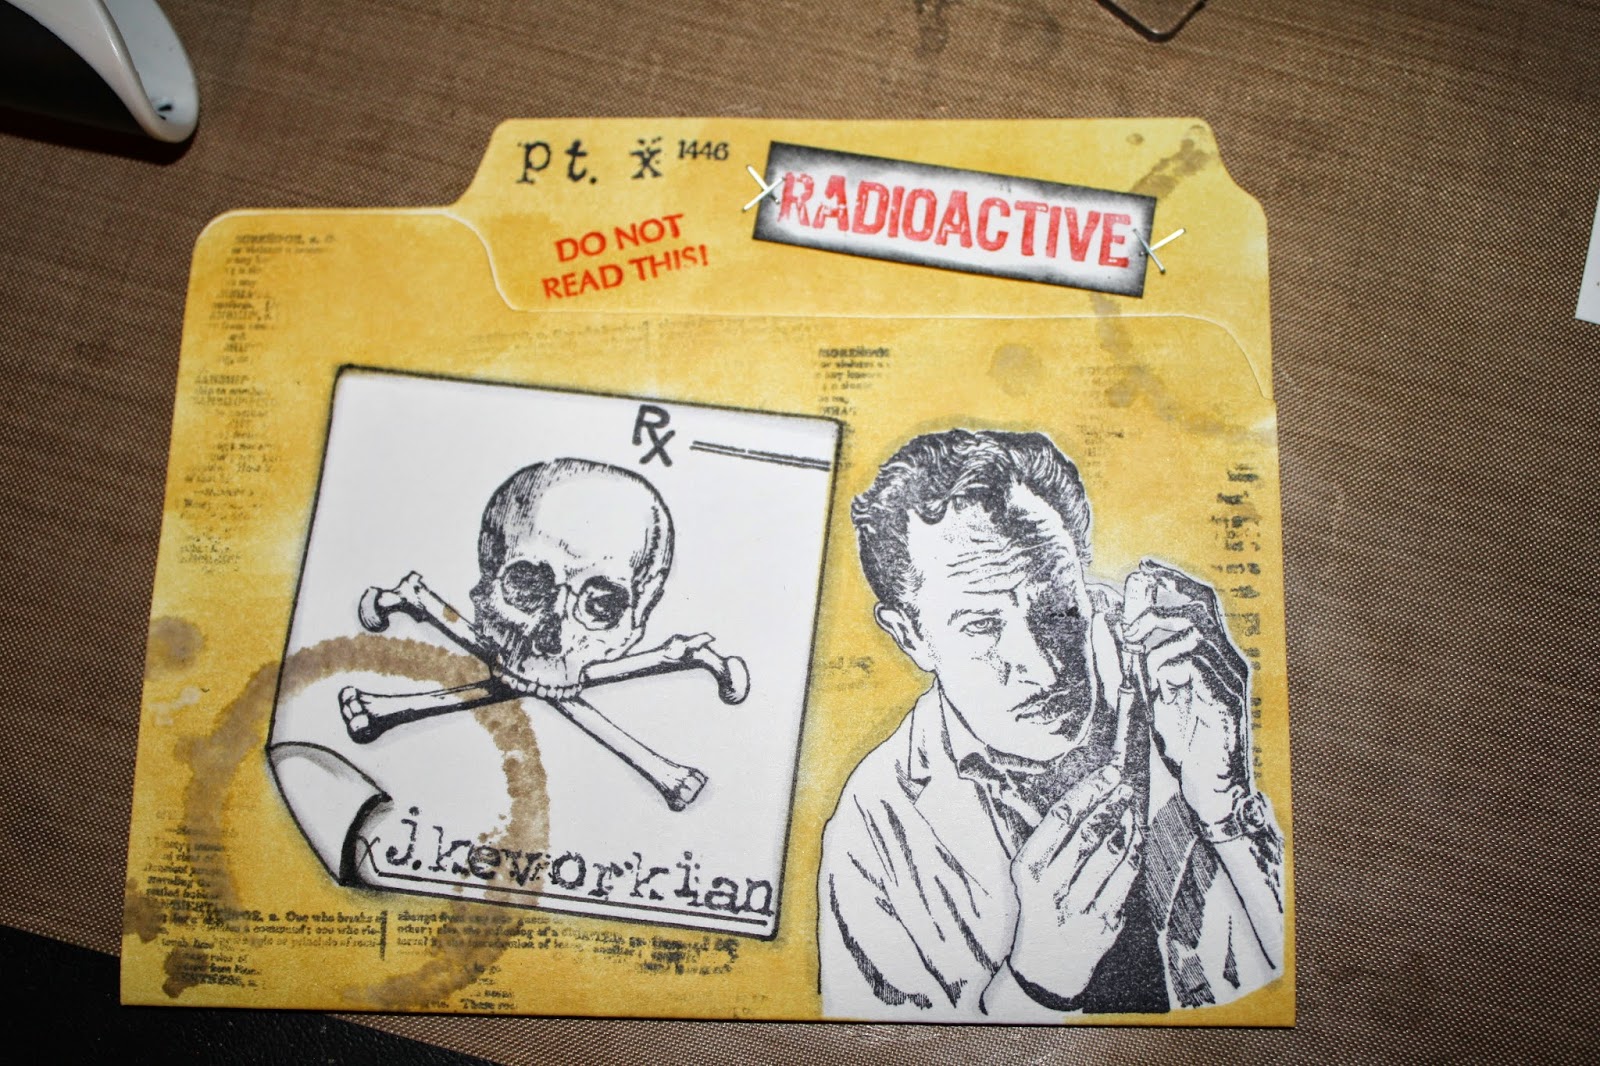
The Doctor is in....
WARNING: If you are easily offended or don't like strange or creepy themes this card may not be for you
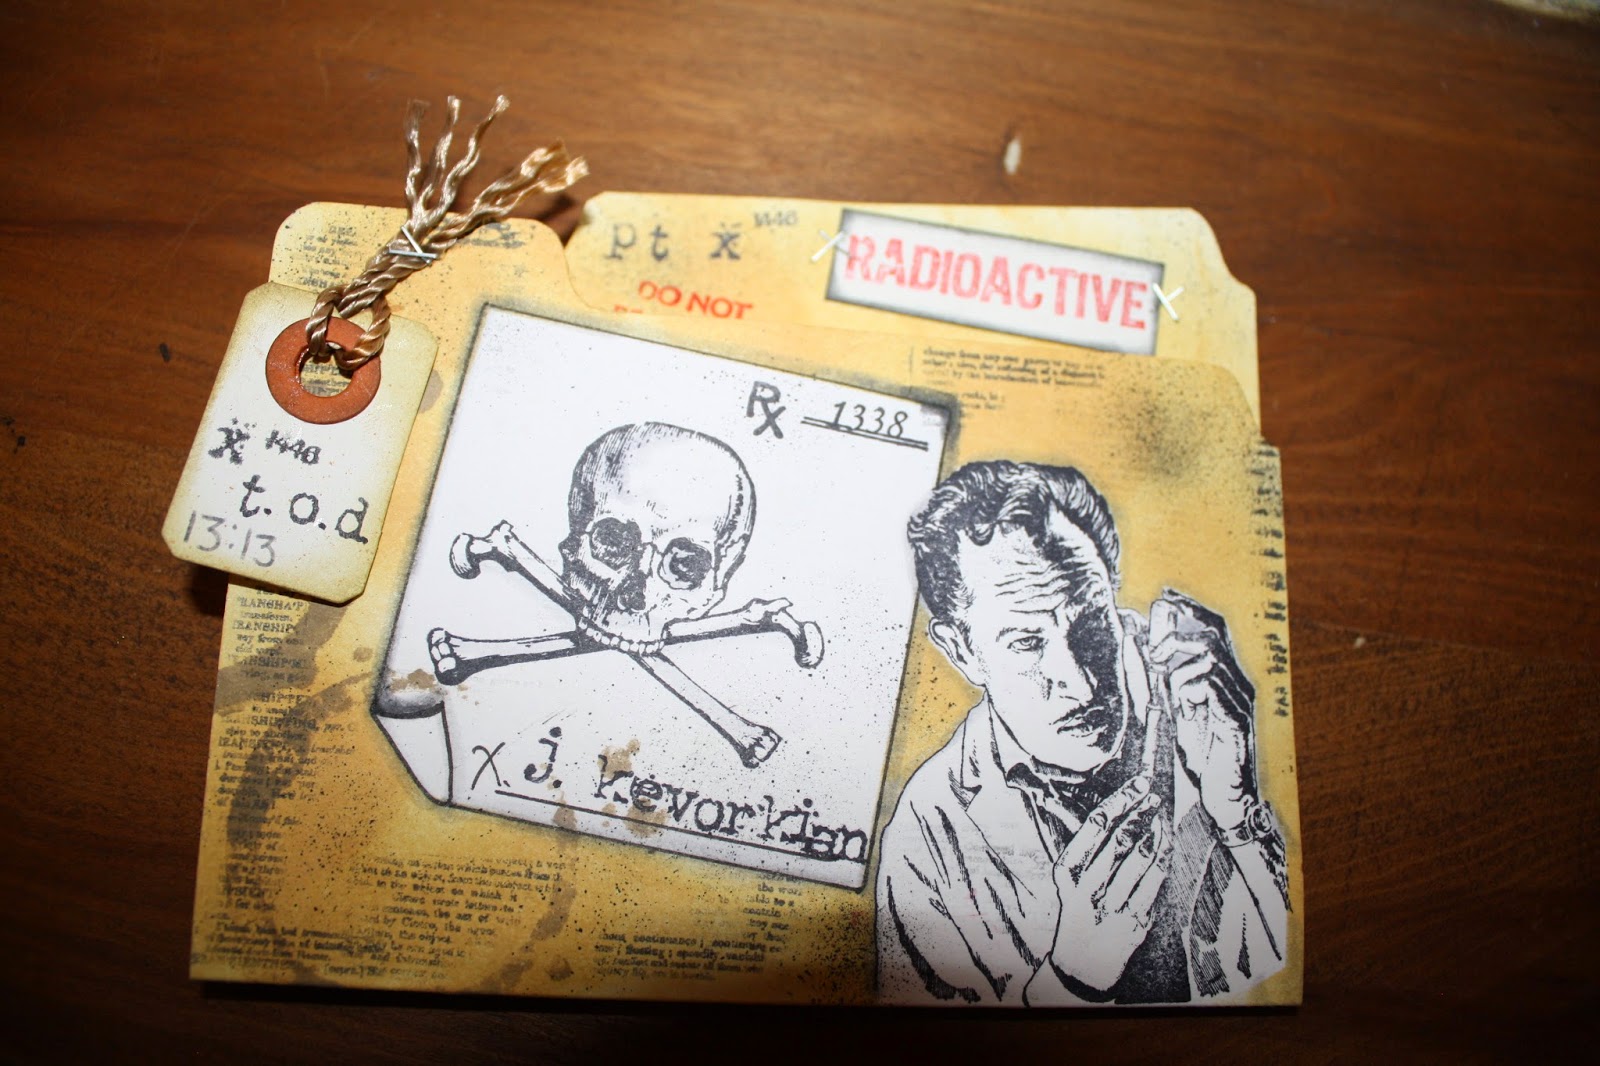
Hello again everyone!!! It's me Tera again, today I am going to share the card I created for the VLVS Shaped Halloween Card swap on the Facebook VLVS Groupies page If you are not a member I recommend joining, So much fun and inspiration going on over there!!!
Stamps Used:
Coffee Ring Stain 2 3/4 x 2 1/4
Other Supplies--A4 card cut into a file folder shape
Ink- Archival Black, Distress ink- Frayed Burlap, scattered straw, black soot, brick red
scrap paper (for making masks)
Marker Sprayer for distressing
make-up sponge or distress tool for additional shading
Tim Holtz Tiny Attacher/stapler
Sizzix Movers & Shapers Die - Tag & Tie
Scraps of orange paper (for the circles on the tag)cord/string
Black marker (fine point for writing and drawing lines)
water spritzer optional
score tool/board optional
Scissors
File folder to trace top of (or you can wing it! lol)
Glossy Accents (or Glue of choice)
To Begin cut your card Base - 8.5x 5.5 score or fold at 4.5 This gives you the long and short side of your file. On the long side trace the tab of your file , then on the short side trace the inward dip (make sure they are on the same side so it looks right). Cut out your base and admire ho cute this mini file is!
I start by stamping/drawing all of my masked off images in archival black ink: the Doctor was stamped then stamped on scrap paper to create a "mask" to protect it while i work, For the Rx pad, I traced my acrylic stamping block with a black marker leaving one corner open so i could draw it to look like folded paper. (You can also trace a post it not in your size of choice and you will save yourself from cutting out a "mask" for this.) I then traced it again on scrap paper to create a mask (and just folded the corner of the mask to match what i drew rather than guessing)
Next, stamp the skull, Rx pad with the Rx label from the Rx stamp (I cup mine out, so i can use it separate and still use the cute note box on other pieces : D ), and using the Type letters from plate 1430 I stamped out the J. Kevorkian (AKA "Dr. Death" get it a Rx for death, from Dr. Death himself... hehe) The Tiny #'s are numbers from the corners of the Plates of rubber : P Also stamp the patient (aka pt.) Name that you would like... Mine is patient X1446
Now, place both of your "mask" on to cover up your focal pieces. Get out your scattered straw ink and a makeup sponge and add color over the entire front of the card (careful not to move your masks). Set this aside to dry while you do this next step...
On a separate piece of paper stamp the "Radioactive" in red , then cut it out to look like a rectangle medical sticker "chart note"... Using the black soot distress the edge so that this will pop against the background! Also While you have the red out stamp the "Do Not Read This!" on the file tab
(After All this is a confidential patient file!)
Back to the file, Sporadically stamp the dictionary page stamp to distress the file....Remove your masks (admire your clean work...now we are going to grunge it up more!) Using your frayed burlap distress ink, ink up the coffee ring stamp (I spritzed my stamp with water at this point to give it the wet/watery coffee look but you don't have too) then stamped as if coffee had sat on the file and Rx script
Take the marker spritzer with the black soot Distress marker and add some grunge all over where you feel it's to "clean" and bright!
Cut out the tab in plain card stock (bread tie looking thing) then 2 of the reinforcing circles in orange . Distress the pieces with the frayed burlap, then glue the circles on the front and back to reinforce the piece to look like the "Toe Tag". Tie yours cord around it and attach with the tiny attacher
Enjoy your spooktacular work!!!
Below I have a few more views : P
Enjoy your spooktacular work!!!
Below I have a few more views : P
Labels:
Card,
creepy,
death,
Dictionary Page,
Distress,
doctor,
DT-Tera,
Grunge,
Halloween,
radioactive,
rubber stamping,
scene stamping,
skull,
spooky,
stamping humor,
strange,
Tera
Thursday, January 30, 2014
The End Is Near
Hello again! It's me Tera here with another fun project. This time I am sharing a Small keep sake box I made for youngest brother. We just helped him move into his dorm a few weeks ago.
For this box I've created a distressed Apocalypse style box!
Fitting for a boys Dorm room Don't you think!?!
To start I painted all of the edges of the box black with the ranger acrylic paint dabber.
Next I cut out some vintage book pages, for all of the edges I cut parts of pages without words. All of the pieces were cut so that there would be a 1/8 inch boarder. Next I added some text.
To start I stamped Man In Gas Mask 2 1/2 x 3, next I stamped Apocalypse 3/4 x 2 1/2 on a scrap then layered it.
Next I stamped Radioactive 2 x 2 and Crime Scene Tape 1 x 4 on two of the sides
On the 3rd side I stamped Biohazard 2 x 2, I also stamped The End is Near 1 1/2 x 1 1/4 and layered it on the top.
For the finishing touches I added one of the UM Wow Studio Gear Mash gears. I added some gold and silver mica pieces to symbolize his hunt for money in life! I also added a grunge board #4 and splatted black dylusions spray ink.
(all images were stamped with Ranger Archival Pad #0 Jet Black)
Thank you all so much for stopping by! I hope you are all inspired!
Stay warm It's a snowy mess here!!
Labels:
achival ink,
altered,
Altered Box,
apocalypse,
archival ink,
biohazard,
Crime Scene do not cross,
DT-Tera,
gears,
Grunge,
grunge board,
radioactive,
Tera,
The End Is near,
UmWow Studio
Monday, October 08, 2012
Time 2 Stamp - Episode 2
Hi Everyone!! Here is the 2nd episode of Time 2 Stamp with VLVS!
After I turned off the camera I finished the page with some doodling and of course a bit of journaling:
Stamps used:
Ink used: Glimmer mist in Inchworm and Charcoal by Tattered Angels, Archival Black by Ranger, a uniball pen
Other: Gaffer tape by 7gypsies
Labels:
gaffer tape,
journal page,
mason jar,
radioactive,
rubber stamping,
t2s,
time 2 stamp,
Video,
Viva Las Vegastamps,
VLVS
Subscribe to:
Posts (Atom)