Friday, September 12, 2014

Keep summer in the bottle

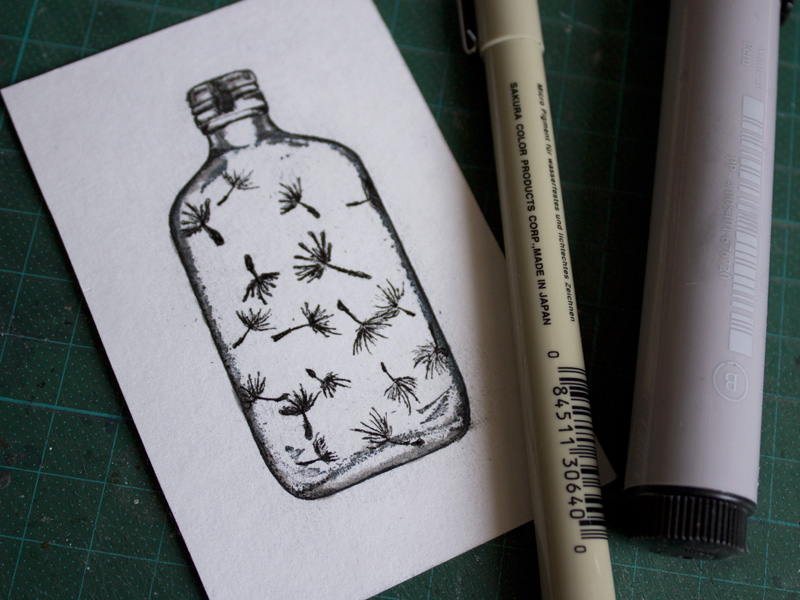
Hello all! Nataliya is here :) And I don't want to say goodbye to summer! So I decided to preserve it and make this card:


I really love fuzzy cutting :)


And how do you this glass bottle with dandelions and bubbles?


Now I'll tell you how I did it :)
First of all, I stamping Bottle 2 x 3 with 2 colors of Memento Luxe:


For next step I cut "stencil" and stamping in bottle Blowing Dandelion and Extra Seed by Susan M. Brown 2 x 3 1/2 and 3/4 x 3/4:


Little bit of drawing with Pigma Micron & Faber Castell Pitt Brush:


And watercolor & Gelly Roll:


To make a "glass" bottle, I used Emboss It from Ranger Ink & Ultra High Embossing from WOW!:


Looks great!


But I decided to add another layer of powder. As a result, bubbles appeared unexpectedly. But I loved it!


Have a summer day!

Thursday, September 11, 2014

Mail Art Mania is back!

Hello again!!!
It's me Tera here again with another super fun piece of Mail Art 


For this piece i wanted to stick with the fun medical theme from my last post, but go in a slightly different direction.
 If you like what you see here you can easily recreate it with the following products:
Stamps used: 

Biohazard 2 x 2


Other Items:
Envelope
Black Marker
Your favorite Black Ink
Color Box ink-Seattle grey (or other Dark grey ink)
Distress ink- Weathered Wood (or other light grey ink)
post-it note or other item to trace to draw your "Rx pad"
Ink Blending tool or make-up sponge
Scrap paper to create "masks" to cover images you want to protect

LET'S GET STARTED...
To begin stamp the Doctor With Needle 2 3/4 x 3 1/4 and Man With Organs Exposed 1 3/4 x 2 1/2  in black and create a mask to cover them so that non of your other stamping/inking will get on them. Next trace around a post-it note to create the base shape of your Rx pad. Stamp the Prescription Pad 2 x 2 letters on the upper right corner and add some numbers for fun! Cover the freshly stamped area of your Rx pad to protect it from further inking/stamping.

Now stamp all of your "background" images (these ones will be in the darker grey)... After those have dried use your blending tool to add the base color of weathered wood (or your favorite light grey ink). Now you can add your Wow factor stamping in black to pull the whole piece together. Make sure to stamp some over the "masks" so that it gives you the depth and feel that they are behind the 1st focal images we stamped... (this is why we use the "masks") 

FINALLY... 
Remove the masks and enjoy your work of art!!!! 
(add shading with a pale grey marker for added depth if you'd like) 
Can you imagine what the post office workers will be thinking when this passes through?? 

Below are a few more angles so you can see more detail 


Thank you for taking the time to stop by today! 


Wednesday, September 10, 2014

Banksy love

I just love the Banksy stamps and decided to make a trio of ATC's using some of them.  Here is the first card
and I used the following stamps:

the Banksy spray can cop


the Line of chevrons


and the Brick background,


along with a rub on and lots of yummy mists dripping down.

The next card is a little cheeky but when I look at this Banksy cop giving the finger this is what comes to mind:
and for this card I used the Banksy cop giving finger stamp, a stencil, letter stickers, inks and a piece of Hambly transparency.

Here is my last card:
and for this one I used the Banksy sweeping under lady along with the Marrakech stencil from StencilGirl, inks, glitter, clear patterned tape, a piece of Hambly transparency and an acrylic sticker.

I hope you all enjoyed my trio of Banksy ATC's and have a great day!


Tuesday, September 09, 2014

The Journey Awakens the Soul, Mixed Media Canvas

Hello and Happy Tuesday!  Tina here today with a mini mixed media canvas, full of personal meaning and feeling.

One of my latest obsessions, is creating mini mixed media canvases.  There is something about their smaller size that is less threatening and overwhelming.  I especially love incorporating metal embellishments with stamped images for a different, eclectic look.


The Whimsical Diver stamp is quickly becoming a favorite.  I find myself reaching for it over and over again.  For this project, I simply stamped the image onto heavy cardstock, then colored the image for effect.  I also added a few alcohol ink colored rhinestones for texture.


Using the same sprays and paints on the canvas AND embellishments,  I created a cohesive project that looks like all of the individual parts were made for each other.  


In addition to the texture created on my canvas with a Crafters Workshop stencil, I added a bit of stamping, using Bubble Background.  This is a great stamp for creating amazing texture on any mixed media project.

What is your current creative obsession?  I'd love to hear about it!  Maybe it will become my next crafty project!  :)

Thanks for stopping by!  Have a wonderful day!


Monday, September 08, 2014

August Winner!

We have a winner to announce today from our August Challenge ---


it is.....

Corrie !!!


Loved her interpretation and hope she joins us again in challenge. Corrie, please email me @ deedee430@gmail.com with your shipping address and we'll send you out a grab bag of rubber!

Don't forget to stop by and enter September's challenge.

Friday, September 05, 2014

Guest Designer Marilyn Hughes

Today we have Guest Design Team Member MARILYN HUGHES joining us :) 


I'm a 45-year old married mother of one living in southeast Louisiana.  I work full time as an Assistant Director of Facility Services for an internationally renown research center, but spend all my weekends in my studio where I create a wide range of mixed media projects ranging from ATCs to Tags to Journal pages and beyond.  My studio is a converted 10x20 metal storage building that sits in my backyard until a large oak tree (I'm currently campaigning for a larger, better studio).  Not only do I like to play with stamps, paints, and paper, but I am a voracious reader; my Nook is my constant companion.  
You may have seen my projects over on Gauche Alchemy where I am a dt member or on Basically Bare and Art Anthology where I am the Coordinator.  Being a guest designer for Viva Las VegaStamps! is a dream come true and I'm very thankful that DeeDee has given me this opportunity.

If you would like to see more of my work, you can visit my blog, Tarnished Rose, at www.dollsetc.blogspot.com.
 
 
Hi everyone! It's a Happy Day for me today.  I'm doing the Snoopy Dance because I get to be the Guest Designer on VLVS! for September!  So today, for your viewing pleasure, I've got three projects for you; two ATCs and a journal page.  For the ATCs, I was working with a monochromatic color palette, not the easiest thing in the world.

Other Supplies:
Art Anthology Sandcastle, Salted Caramel, and Cinnamon Twist Colorations,Art Anthology Splashed Sorbet, Tim Holtz Layering Stencils Chevron, Sepia Archival Ink

For "The Road" ATC, I sprayed the background with a combination of the three mists, going lightest to dark, saving the the darkest one (Cinnamon Twist) to spray through my Chrevron stencil to give me a line of chevrons across the top.  I then stamped the Sunflowers in sepia archival ink directly onto the card.  The dragonflies were stamped onto white cardstock, sprayed with the darkest brown of my mists, cut out, and then painted with Art Anthology Sorbet to give them sparkle.  


​Stamps Used:

Other Supplies:
Distress Stain Squeezed Lemonade, Distress Ink Mustard Seed, Tim Holtz Layering Stencil Dot Fade, Glitter Dome Stickers

For my sunny Chemistry ATC, I drug my card through a puddle of Squeezed Lemonade Distress Stain and then inked on the dots using the Dot Fade Stencil.  I stamped the DNA Strand, Chemistry 101, Books, & Mouse in Hole in Mustard Seed ink directly onto the card.  Taking some Glitter Dome stickers, I highlighted all the circles in the DNA Strand to make them stand out and give the card dimension.  I then stamped and cut out the Chemistry 101 and Set of Books from cardstock, inked around the edges, then added popup dots to the back to make them stand out, placing them over the previously stamped images. 

And finally, just for fun (and for a lovely journal swap hosted by VLVS!) I completed the following journal spread:


Stamps Used:

Other Supplies:
Art Anthology Salted Caramel Colorations, Art Anthology Mardi Gras Velvet, Shaved Ice, Fresco Flakes
TCW Sketch Grid 12 x 12, Tim Holtz Layering Stencil Dot Fade, Liquitex Bead Gel Medium, Distress Markers, UmWowStudio Flair, UmWow Daisy
 
 
I threw a lot at this page, but the Dr. Who stamp is on one of my favorite and to me, it's a visual representation of my stenciled statement, that "You really can do whatever your want".  

Thank you for having me!
Until later...................
Smiles~
Marilyn

Thursday, September 04, 2014

Live in the moment..

Happy Thursday!! Karen with you again. Hope you have had a wonderful week so far. I have a quick little tag to share with you today..

The stamps I've used today are:


Coffee Ring Stain 2 3/4 x 2 1/4


French Writing Background 2 1/2 x 3 3/4


Bird In Flight 1 3/4 x 1 3/4


Once again I  started of with some pattern paper for my tag base from the  7 Dots Studio - Cold Country range.  Stamped my background with the coffee ring stain and French writing background stamps.- I really do love these stamps!,  I used a mixture of pumice stone, black soot and iced spruce  distress inks to stamp these.


 I then stamped the bird in flight onto some scraps of the same paper that I used for my tag base, and fussy cut around the stamped image.  I then did  a bit of rummaging through my embellishments, added in some flair and star confetti from UmWow studio, a selection of Tim Holtz Idea-ology - memo pin, metal corner, word band and button  and a prima clock hand. So there you have it.. I have to admit I'm really loving the minimalistic and more monochromatic look to this tag.


Thank you so much for stopping by, Until next time..
 Happy stamping
Karen xx


Wednesday, September 03, 2014

Foxy Adventures

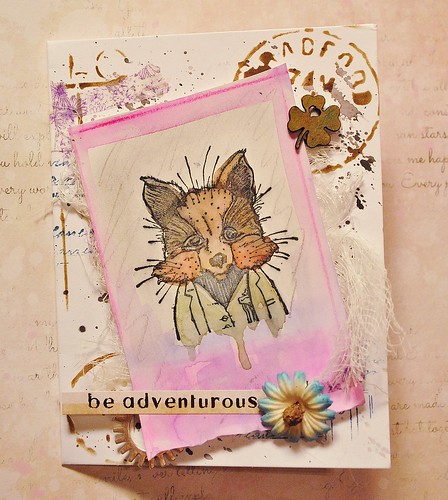
be adventurous, VLVS, ALL
Hello my stamper friends! It's Amy here today to share a card I made, using a bit of an art journal page that went a little awry. :) I had created a set of watercolored art journal pages, when I dropped a stamp very inconveniently on the page....causing an irreparable smudge. I was sad, but realized I could cut out sections that I really loved, and use them for cards!
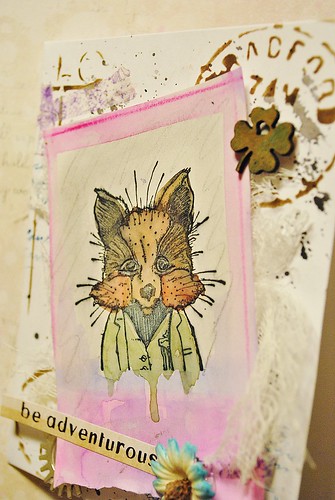
After stamping the Cute Fox in Coat using Memento ink in tuxedo black over the top of a watercolored section. I painted him in watercolors as well, making sure to have the green in his coat drip slightly. I liked how that made him sort of seamlessly blend into the page. adventurous, side close
I then used a ruler and penciled with pink Faber Castell Design Memory Craft Aquarelles (smudging with my wet paintbrush), and then cut along those edges, adhering it to the card with foam adhesive dots. I gave the card a little pizazz with ink splotches, stenciling, and stamping with the Waybill/Invoice Background stamp, before adding my foxy little dude. I added some embellishments, and voila! My card had come together, easy as pie! The best part of this project? I saved a "mistake," from the waste bin, and gave it a new life as a card I can send to a friend.
 I hope you were inspired, and smiled a little at the sweet fox in his green coat.  :)
~Amy  

Supply List: 
Viva Las VegaStamps!:Cute Fox in Coat, waybill invoice
Paper: Strathmore Mixed Media
Watercolors: Sakura
Sticker: 7 Dots Studio
Chipboard: UmWowStudio
Stencil: The Crafter's Workshop
Flower: Prima
Metal: Bead Landing
Ink: IMAGINE Crafts- Memento Ink, Tuxedo Black, Teal; Ranger Ink-Potting Soil
Washi Tape: Gauche Alchemy

Tuesday, September 02, 2014

September challenge inspiration

Hi Hermine,

Here my inspiration piece for september. if you want to enter the challenge take a look at the previous article.


step 1: take wooden blocks (one rectangle and one trianlge shaped) and gif it a licht coat of white gesso, not covering up  the whole surface. Then sponge several colours of brown like Adirondack Mushroom, Latte and Espresso on all sides.
step 2: use Stazon Black ink to stamp Men in Balloon Basket 19002 on the front, flip the stamp to the upper side but make sure the lines are lined up. Do the same with the clockface 19468, starting at the back, then flip to the side, and flip again to the front. Stamp the Hot air balloon with flags 19006 besides the clockface on the back. Then stamp Time Flies 19008 on the side and flip to the back.Stamp In the corner on the side where Time is the small wasp 19011. Stamp the tops of the weathered tree 19467 at the free spaces at the bottom of the wooden block. Make some accents with a white Sharpie. put this piece aside for a while
step 3: Sponge with the same colours the rooftop and stamp the Victorian Floruish 19417. And put aside
step 4: use the quickutz the cut the sign. Once out of black and once out of white. Sponge the white little card and stamp Smile 19181 on it, do this on both sides. Then glue the black parts the the little sign.
step 5: assemble the whole project by drilling 4 holes in the bottom and 2 holes in the top of the block and 2 holes in the bottom of the roof. Hammer 4 nails in the holes in the bottom, the  nail heads function as feet now. Take some wire and put the roof on the block. Take a TH pin put the sign in it and pin into rooftop. Take some thinner whire and tread some leafs on it,  twist it into branches.


Hope you like this project and gives you some inspiration to enter the challenge.


Warmly Hermine


Used materials:
Men in Balloon Basket 19002
Clockface 19468
Hot air balloon with flags 19006
Time Flies 19008
Small wasp 19011
Weathered tree 19467
Victorian Flourish 19417
Smile 19181
Stazon Black
gesso
Sharpie white
Adirondack Mushroom, Latte and Espresso
wooden blocks
wire
nails
silk leafs

Monday, September 01, 2014

September Challenge

A new month. A new Challenge.


Bring forth some of your sky/steampunky goodness. Please feel free to enter any type of project; altered art, ATCs, cards, layouts, journal pages and more! Also, be inspired by whatever you want; the balloons, the vintage colors, tan, black, orange, brown, steampunk stuffs, travel, trees, nature, sky elements, celestial, birds, flight, floating, adventure, you name it! Visit us this time next week for August's winner!

Don't forget the rules:
-Create a new project based on our inspiration board
-Use at least one (but certainly more if you want) Viva Las VegaStamps! rubber stamps
(We are now allowing competitors stamps to be on your work, but please make VLVS! the focus of the project, thank you.)
-Post it to your blog with a link back to us
-Upload to our linky using your direct blog post link (You may also upload via facebook, flickr or other gallery)

You could win a Project Spotlight post on our blog + some new rubber of course.

And visit us back here tomorrow for some inspiration from Hermine Koster.