Showing posts with label Sakura of America Gelly Roll Pens. Show all posts

Friday, April 03, 2015

EGGstra Special Easter Wishes...


Welcome to Viva Las Vegastamps! Susan here today to bring some seasonal crafting inspiration... and a Bunny who's all dressed up for the Easter Parade!


This project is a little altered home decor project using a leftover scrap of Ranger Distress Stain painted cardstock and a plaster egg decor piece... and my stash of VLVS! {of course}, with one "Fancy Bunny #17610" to star in this crafty redux. This egg base is partially decorated on the front and is glittered, which will make a great finish for the backside – so I will alter the backside which is flat and plain just screaming for some inky stamped goodness.


First thing, trace shape onto my painted scrap of cardstock, stamp bunny with Versafine ink, and make a quick mask.


I traced shape onto a section of Miracle Sheet, trimmed and adhered my stamped background with mask applied to the backside of the egg. Using purple and green dye inks, I stamped in some grass and pattern to the egg background... and my bunny is perfectly safe!


Now the magic is revealed!! A few minutes of fussy cutting is always worth it for layering stamps and seamless image. I had planned to use "Fancy Border" #18951 for grass, but it wasn't working... so I smooshed the edge of ink pad to paper making chunky grass. 


Now for the finishing touches... lots of hand coloring and doodling using a variety of pens and a waterbrush. I tied off some creme organza ribbon for a hanger at the top with a bow – and from the bottom, hung a ribbon tail with a triple matted sentiment block combining words from two different stamps. This stamped lovely is ready to hang and is super sparkly!

"Mr. Bunny brings Easter Wishes"


• • • • • • • • • • • • •


Other Supplies: painted cardstock using Ranger Distress Stains; Versafine Black Pigment Ink; green and purple dye inks; Sakura of America Gelly Roll Stardust Pens; waterbrush; Faber-Castell Pitt Pens; Offray organza ribbon.

• • • • • • • • • • • • •


Thanks so much for dropping by! It's a brand new month - check out the April inspiration board... just makes you want to get inky. Join us and play along with the April inspiration challenge {CLICK HERE for details}. Just make a creation using the inspiration above and your stash of VLVS! stamps... you could win more RUBBER! Take some time to browse around the blog here and the amazing creations from the entire VLVS! Team... there's so much amazing inky inspiration to see!

If you would like to see more of my creations please visit my blog, sbartist : painting in the dark HERE. Hope you have a fabulous day!!  Sb

Friday, September 12, 2014

Keep summer in the bottle

Hello all! Nataliya is here :) And I don't want to say goodbye to summer! So I decided to preserve it and make this card:


I really love fuzzy cutting :)


And how do you this glass bottle with dandelions and bubbles?


Now I'll tell you how I did it :)
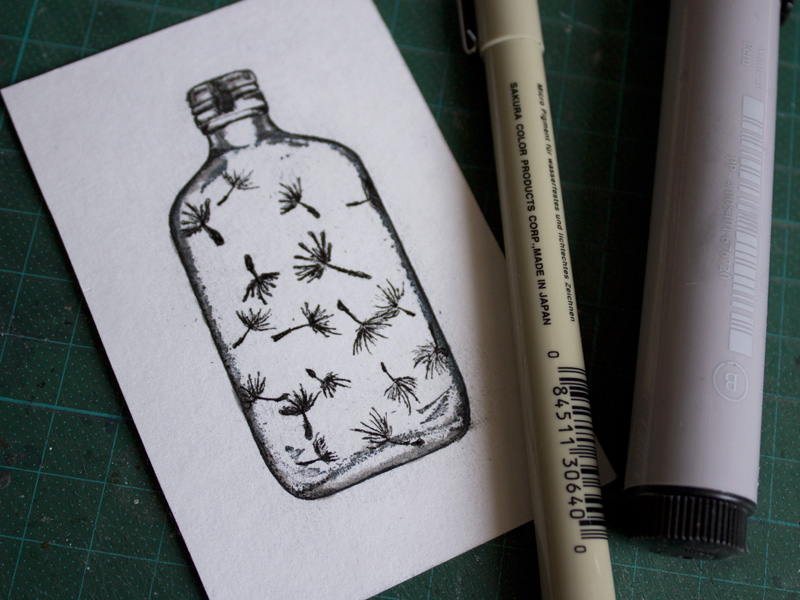
First of all, I stamping Bottle 2 x 3 with 2 colors of Memento Luxe:


For next step I cut "stencil" and stamping in bottle Blowing Dandelion and Extra Seed by Susan M. Brown 2 x 3 1/2 and 3/4 x 3/4:


Little bit of drawing with Pigma Micron & Faber Castell Pitt Brush:


And watercolor & Gelly Roll:


To make a "glass" bottle, I used Emboss It from Ranger Ink & Ultra High Embossing from WOW!:


Looks great!


But I decided to add another layer of powder. As a result, bubbles appeared unexpectedly. But I loved it!


Have a summer day!

Monday, September 23, 2013

The Winning Costume Gets the PRIZE... and a CORN-u-Copia of Halloween Goodness!!!


Welcome to Viva Las Vegastamps! Susan here today to bring you some Halloween Treats and inky goodness. I set out to make a fun treat holder with handmade fringe, distress stained acetate, and a handmade acetate prize ribbon... with my Miracle Tape, assembly is quick and easy! Acetate is always fun to work with and it's the current challenge at Craft Stamper's Take It Make It Challenge.


Also - I've made my own crepe paper fringe with Miracle Tape! It's super easy and adds just the right amount of seasonal color and festive texture. First I layered an orange section of crepe paper {about 3 feet long}; then ran a stripe of 1/4" Miracle Tape down the center for the entire length. Then I repeated with black; then tape and repeated 4 more times alternating colors until I had six layers.


I added a stripe of Miracle Tape to the back of the first layer; then pressed everything flat to get good adhesion in the layers and folded the whole thing in half. The final stem is trimming small cuts at about 1/4" intervals to make the fringe.


I waited until after I adhered it to my piece to fluff it out.


Now for painting the acetate. I spread some Peeled Paint and Seedless Grape Ranger Distress Stains onto a craft sheet and rolled over with my brayer. This will make a nice drippy background.


I dragged the acetate through the puddles of distress stain, rolled a little with my brayer and repeated until I got the effect I desired. This particular acetate I'm using takes ink very well because it is recycled film from my imagesetter at work {please test inks on your inkjet or overhead projector acetate before trying with your final project}. I let it sit and dry for about a 1/2 an hour and while I waited, I mopped up the rest of this inky goodness with some blank tags and cardstock for use later. Before forming my cone, I stamped the creepy tree with Staz-On Black ink and accented the eerie eyes in the bat, pumpkin and stump with Sakura of America Souffle® 3-D Opaque yellow pen to make them glow.


I added strips of Miracle Tape to the length along the bottom edge and also along the short edge where the seam will meet. I formed it into a cylinder shape, exposed the tape and sealed my tube. This is a good time to secure with a couple staples for good measure.


Now a bit about the ribbon rosette... if you are going to attempt this in acetate - you need a hot glue gun and several hands {though I managed to do it with just two}. I reserved a section of stained acetate that was mainly purple and cut three strips using my Fiskars deckle edge scissors. I stamped the winner stamp on a scrap of green/purple stained cardstock and punched out with a tag punch. I gave it a shimmery touch with my Sakura of America Gelly Roll® Stardust® Glitter Pen. The Stardust is my most used of all pens - it's sheer and gives a twinkle to everything. 

Two of the strips I accented with ribbon for the tails. The third section I scored at 1/4" intervals on my Scor-Pal® and accordion folded. Now for the tricky part. Form the accordion into a loop and secure the ends together with Miracle Tape, then lay it flat and form it into a circle. I had another punched tag ready with Miracle Tape to secure the back, but it popped off as soon as I let go. So I put loads of hot glue in the center and sandwiched the top stamped tag on top to hold it tight. I put a glass on top to keep it flat until the glue completely cooled {about 10 minutes}. When cooled I added a small dab to hold the tails on and it's all complete.


I added the fringe and fluffed it pretty; punched holes and laced some coordinating ribbon and filled my cone with candy corn - topped off with some green and purple paper fringe that makes the Prize Ribbon "POP".


This prize is ready to be awarded... or I've earned my sweet reward - LOL!

•••••••••••
Supplies used: STAMPS - "Costume Contest Winner" #19211 and "Halloween Tree Silhouette" #19205. Other supplies: white cardstock; Staz-On Black ink; Miracle Tape; Sakura of America Gelly Roll® Stardust® Glitter Pens; Sakura of America Souffle® 3-D Opaque Pens; Ranger Distress Stains - Peeled Paint and Seedless Grape; Scor-Pal®; hot glue gun; Fiskars deckle edge scissors; recycled acetate; decorative paper shred, candy corn; and ribbon.
•••••••••••


Thanks so much for dropping by. I invite you to play along with the monthly challenge - there's still a week left - make a creation using the inspiration and your stash of VLVS! stamps... you could win! CLICK HERE for challenge details. Also, did you receive the latest Viva Las VegaStamps! newsletter??? If not - you may have missed the FIVE NEW PLATES on pre-order for 20% off. Make sure you SUBSCRIBE to be IN THE KNOW of everything going on at the Viva Las Vegastamps!. There's so much amazing inky inspiration to see!

If you would like to see more of my creations please visit my blog, sbartist : painting in the dark HERE. I'll be back soon with another stamping adventure! Sb

Thursday, September 19, 2013

A Note to a Falling Feather


Layer it, color it, stamp it!  An illustrative piece affirmation to give or put up to look at.

VLVS Images:
19126 - Feather Silhouette
19024 - Discover 
19072 - Washi Chevron Background
6038 - Butterfly

VLVS Partners:
Sakura of America - Micron Pen, Gelly Roll Pens
Helmar 450 Quick Dry Adhesive

Feather is stamped using DTR - Direct To Rubber technique.  The feather image is beautiful and mostly solid and so this works well.  Turn, stamp image face up and use dye based inks starting with a pink hue, then blue/periwinkle, then green.  I did press a tiny bit of the blue into the pink for contrast and green into blue on the edges as well.

Huff on stamp (moisture) and stamp image.  You will see (as above) the colors meld together.


Simple swirls drawn with Micron pens, other images colored with Gelly Roll Pens.

"A-R-T" letters drawn on circles with Gelly Roll pens.

The washi chevron image is cut into a flag and the bright color makes the feather pop!


Color your life!  Discover Art.


Cre8tivelea Yours - Lea


Monday, September 02, 2013

Doing My Part to Creatively Save the Planet...
with my Stash of Viva Las VegaStamps!


Welcome to Viva Las Vegastamps! Susan here today to bring you some inspiration using September's Challenge Inspiration Board. I am all about recycling and greencrafting so this was right up my alley... and my crazy "one touch rule" decided to tag along also.


In gathering up goodies to create with I came across an Altoid tin... so this project is also inspiration for the current Viva Las VegaStamps! Altoid Tin Swap {CLICK HERE for swap details}.


I have these scraps of book pages that are leftover from cutting out a niche in an altered book which is a perfect size for ATCs... and for today's project... papering the inside of an Altoid Tin. I put down a base layer of gesso, then overlaid Peeled Paint, Old Paper and Antique Linen Ranger Distress Stains. This made a nice background for scene stamping on top of.


I hammered the lid of the tin to flatten out the raised embossed letters - and it left a nice bumpy texture and rounded convex finish to the lid.


Inside the tin, I primed with a mixture of gesso and Peeled Paint Distress Stain. I mounted and prepared my stamps; "Panda Eating" #963 and "Flower Background" #18369. I stamped the panda onto white cardstock using Staz-On Black ink and added touches of color using my Ranger Distress Markers and waterbrush.


I stamped the flower background onto my painted paper using Frayed Burlap and Peeled Paint Distress Inks; then overstamped with Staz-On Black ink to give the effect of depth in the foilage.


Now to add some color and "POP" with my Sakura of America Gelly Roll® Stardust® Glitter Pens and also Souffle® 3-D Opaque pens. The colors of the Souffle pens are opaque and dry a little raised, and the Stardust pens are translucent and give that touch of glittery shimmer. I really love smudging the color of the Stardust pens around to get subtle color with a little bling.

I finished off with some buttons, a knot of natural raffia and painted corrugated around the outside of the tin – all in the flavor the inspiration above. Built the scene with layers of texture and various chipboard details - a disassembled UmWowStudio Cattails and a balanced in the opposite corner with a decorative flourish; each painted in the same fashion as the book page base. To add that final bit of detail, I ran a bead of Diamond Glaze around the edge of each side and dropped in some pale green iridescent glitter... one can never have enough glittery goodness!

Doing My Part to Creatively Save the Planet...


I hope you are INSPIRED and will link up your creation to this month's Challenge.


Left side detail... with a field of button florals and glittery goodness.


Right side detail with the panda nestled amongst the foliage.

•••••••••••
Supplies used: STAMPS - "Panda Eating" #963 and "Flower Background" #18369. Other supplies: white cardstock; recycled book pages and Altoid Tin; gesso; Staz-On Black inkMiracle TapeRanger Distress Markers; Sakura of America Gelly Roll® Stardust® Glitter Pens; Sakura of America Souffle® 3-D Opaque; Ranger Distress Stains - Peeled Paint, Old Paper, and Antique Linen; water brush; Peeled Paint and Frayed Burlap Ranger Distress Inks; Cattails Chipboard from UmWowStudio; buttons; glitter; Diamond Glaze; and natural raffia.

Thanks so much for dropping by. I invite you to play along with the monthly challenge - make a creation using the inspiration and your stash of VLVS! stamps... you could win! CLICK HERE for challenge details. Also, did you receive the latest Viva Las VegaStamps! newsletter??? If not - you may have missed the LABOR DAY SALE and the Altoid Tin Swap info. Make sure you SUBSCRIBE to be IN THE KNOW of everything going on at the Viva Las Vegastamps!. There's so much amazing inky inspiration to see!


If you would like to see more of my creations please visit my blog, sbartist : painting in the dark HERE. I'll be back soon with another stamping adventure!  Sb