Showing posts with label Dandelion. Show all posts

Thursday, January 19, 2017

Dandelion Breeze any occasion card - by Cheetarah Cheda


Hi all! I'm back this week with a card I wanted to share based on our challenge this month.

This is the mood board for our january challenge. Nice vintage looking style and colors. 

And inspiration words like foliage, flowers, weeds, nature, bugs, moths, butterflies, wings, numbers, script, invoice, background stamps, vintage, tan, black, white, brown, distressed, grungy,... made me dig up some great VLVS! images to work with. A full list of stamps and other items I used are listed below.
 

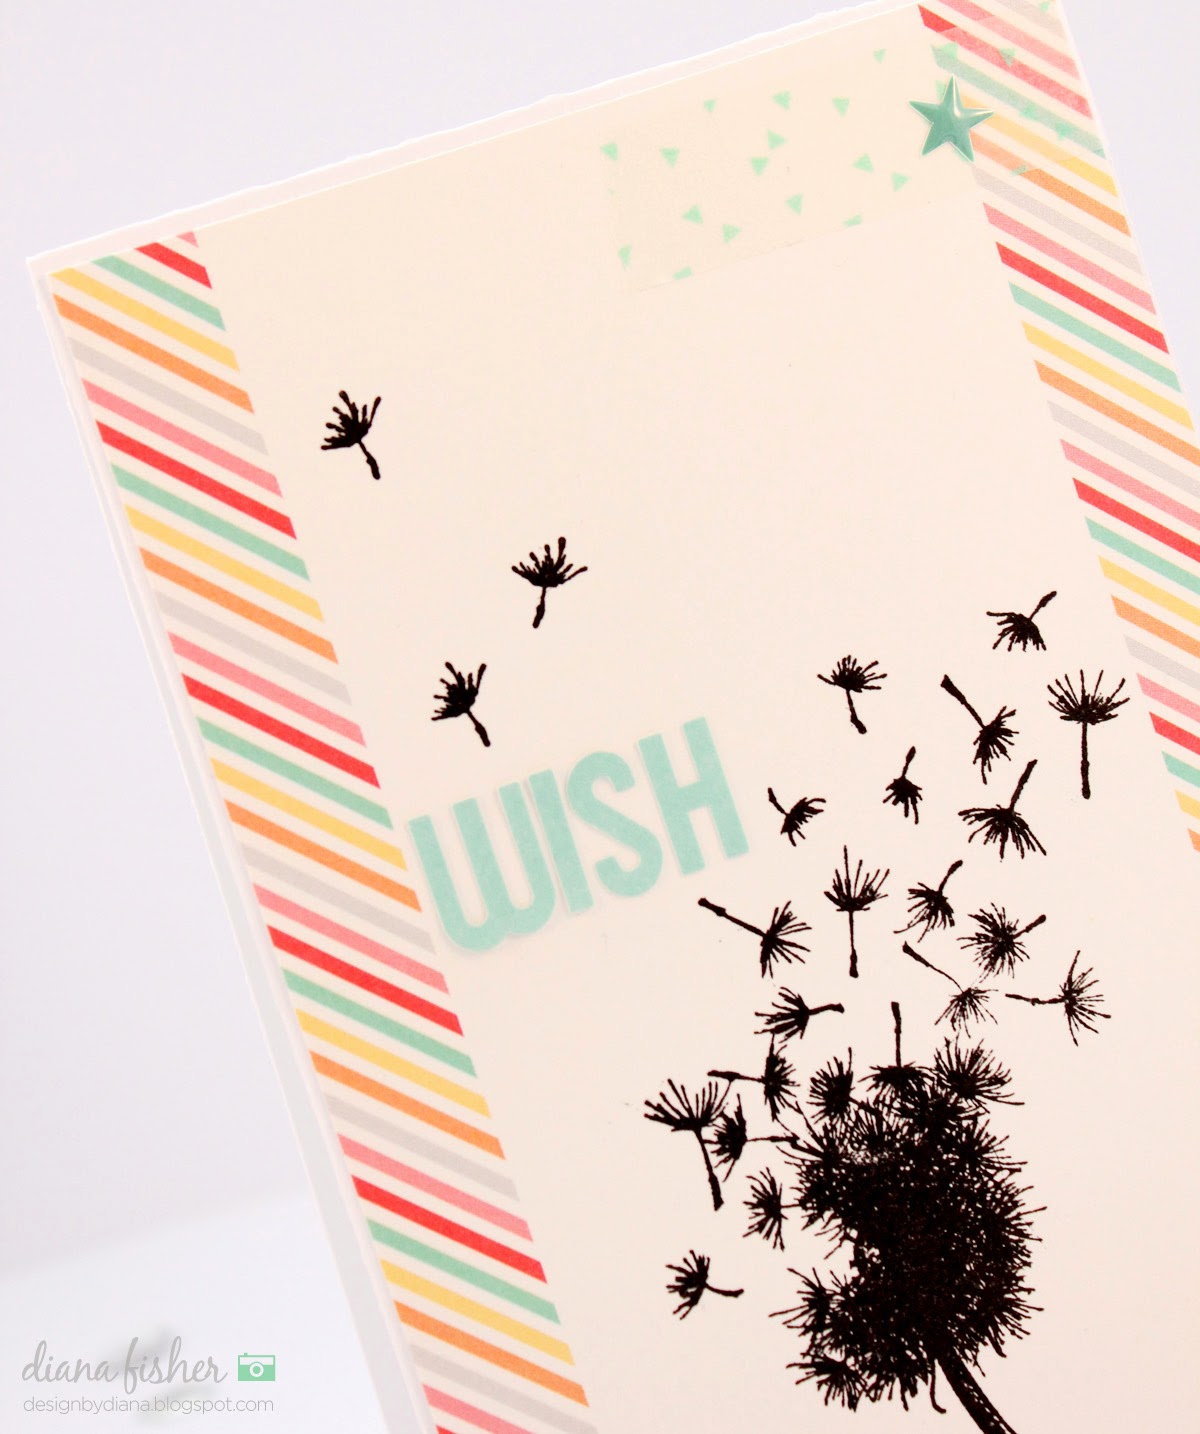
I worked on thick vellum paper on which I used a circle stencil and light and fluffy modeling paste. Then went on to distress it with brownish Distress inks to get that vintage look going. The vellum is nice and smooth so you can get a great transition into colors. The main image I used for this card is Blowing Dandelion and Extra Seed by Susan M. Brown which I stamped twice. First with Staz-On timbre brown and then with versamark ink to emboss it in a golden honey pearl color. The timber brown stamped image gives a nice shadow effect under the embossed image. Then I used Postcards ATC size and other fun stamps for more interest. The sentiment "she flies with her own wings" is a part of this stamp by Cat Kerr which I thought would be fitting to add here. I also stamped this sentiment twice to get a shadow effect. 


After I matted the card on cream paper and adhered onto a black card (which I used Miracle Tape for!)
 I also embossed the dandelion and sentiment on the envelope, which is also in a honey pearl cream color.

They make a classy pair, the card and envelope and is ready to be written on and mailed out!


Stamps used: 
Blowing Dandelion and Extra Seed by Susan M. Brown 
Postcards ATC size 
"she flies with her own wings" is a part of this stamp by Cat KerrWriting
Circles background
Smear/Smudge
Stitching Lines 1

Others:
Miracle Tape
Thick vellum paper
Cream pearlized envelope
The Crafter's Workshop Light and Fluffy Modeling paste
Carabelle studio circle stencil
Distress inks: Old paper, vintage photo and ground espresso
Staz-On inks: Jet Black, Timber Brown, Saddle brown
Top Boss Honey Pearl embossing powder
Distress Stain Tarnished Brass

Hope this inspired you to play along with our challenge this month.

Thanks so much for stopping by!


Monday, June 20, 2016

Mail Art Monday with Fiona

Hello VLVS groupies! Fiona here with you for a "Mail Art Monday" YAY!!!


As a scrapbooker, I often send my work to an Australian magazine to be published and to do so I send my layouts in pizza boxes! This is my latest I created using the Viva Las Vegastamps!


I've been dying to use this gorgeous Dandelion stamp ever since it arrived in the mail! After blending some Distress ink colours over the box I stamped first with water to remove some of the colour and then with black ink.


The flock of geese in the top left hand corner balance the scene. 


You can see the water mark effect here next to the "You Are Beautiful" stamp.

Viva Las Vegastamps used:


Happy Monday and happy Mail art day xx

See you again soon


Monday, October 20, 2014

A Simple Wish

Hi everyone :)

DeeDee here today! I'm always very fond of "CAS" cards (Clean and Simple) because they SEEM like they should be quick to put together, and quick to get the point across, and perfect for little notes here n there. That being said, I can never do them. EVER. 

However, that doesn't mean I don't attempt them. So, here is my stab at a CAS card for a local friend who was doing some healing : 


The base of the card is Nature Walk from 7 Dots Studio with a layer of punched watercolor paper on top. There's a bit of gray watercolor paint in the next layer (Which I think puts me over the CAS limit already! hah.) 


Then I've taken the Blowing Dandelion with Extra Seed and stamped only the seed across the card in two colors; Versafine Black and Versafine Smoky Gray from our friends @ ImagineCRAFTS. The sentiment was hand written on coordinating watercolor paper and adhered down.

Are you any good at CAS cards? I feel about midway successful with this one. I'll be giving them a go again soon :)

Friday, September 12, 2014

Keep summer in the bottle

Hello all! Nataliya is here :) And I don't want to say goodbye to summer! So I decided to preserve it and make this card:


I really love fuzzy cutting :)


And how do you this glass bottle with dandelions and bubbles?


Now I'll tell you how I did it :)
First of all, I stamping Bottle 2 x 3 with 2 colors of Memento Luxe:


For next step I cut "stencil" and stamping in bottle Blowing Dandelion and Extra Seed by Susan M. Brown 2 x 3 1/2 and 3/4 x 3/4:


Little bit of drawing with Pigma Micron & Faber Castell Pitt Brush:


And watercolor & Gelly Roll:


To make a "glass" bottle, I used Emboss It from Ranger Ink & Ultra High Embossing from WOW!:


Looks great!


But I decided to add another layer of powder. As a result, bubbles appeared unexpectedly. But I loved it!


Have a summer day!

Wednesday, August 13, 2014

July Winner

We had a ton of beautiful purple inspired nature entries for our July Challenge!


Our randomly chosen winner is Carla:


She used our Blowing Dandelion with Extra Seed, Boy in Cape and Dream Big.

Please grab the following button dear winner!

And email me @ deedee430@gmail.com with your shipping address to collect a grab bag of rubber.
 
Want to win your own feature, button and rubber? Stop by our August Challenge, be inspired and join in!

Wednesday, February 19, 2014

Wish


Time to make a wish! Diana Fisher here with you today to share a fun, bright card.

I have a very simple and quick card for you today. I used one 4" x 6" card from Elle's Studio (cut down to 4" x 5.5") and centered it on my card front.

The gorgeous Blowing Dandelion and Extra Seed stamp is stamped at the lower part of the card using VersaFine Onyx ink.

The tiny little extra seed is then stamped in the upper left corner to look like it is blowing away. Then I added the WISH lettering (also from Elle's Studio).


In the top corner I added a little bit of washi tape and an enamel star sticker just for added dimension and texture. 

I love the whimsy of this card! It could be used for birthday, thinking of you, missing you… so many things start with a wish. 


Tuesday, September 03, 2013

Sunday's Tag Demo catch up!

The first Sunday of each month we meet up @ The Crafting Place locally on Russel and I do a two hour tag demo. It's very mixed media based -- focusing on paints, ink, stamps, chipboard, and other materials.

For September I shared with the group the post-it-note masking technique for layering and scene stamping.


This was the base tag for the demo that everyone based their creations from. I did bring a few different bottles, plant type stamps, bugs and celestial bits for some variety and ease of use. The base tag includess the Bottle, Sunflowers, Dandelion with extra seed, Don't Let Anyone and Moon Circle stamps. The tag also has Distress Ink in Mustard Seed, Peeled Paint, Tumbled Glass, and Walnut Stain, UmWowStudio Chipboard Daisy and Light bulb mask, Archival ink in black, Sakura of America Micron and May Arts Burlap String.

Here are some photos from the class as they worked on building up their scenes :

We had 10 or 11 people stop by to do tags, and they all turned out SO AWESOME!  You can see my demo area here, using the kraft mat. It works out pretty well with these nice big long tables provided by The Crafting Place, we can pass around lots of supplies easily. Here are some attendees inking up stamps, stamping post its and tags! They're fussy cutting and layering. It's pure awesome.


And here you can see some closeups of the girls at work :

You can see the postits working as a mask really well in these shots. Each month we explore a different technique and or medium (sometimes several!) -- we'd love to have you down :) Get all the info HERE and stop by the Meetup HERE (Look for Free Demonstration of Mixed Media) if you'd like to register and or need a reminder. They're completely FREE!

Tuesday, July 09, 2013

A New Face..

Good Morning Everyone..
 Karen here with you today, for my very first DT post with VLVS! - I have to say I'm both a little excited and nervous..

Just a few little bits of info about me:  I live in Queensland , Australia with my hubby and our son. I love to create , and have been now for the last 10 years or so.
 
so I'll just jump in feet first, and we'll see how it goes..
 
 My very first project I have to share with you today is a tag.


I have used four different VLVS! on this tag..

Blowing Dandelion by Susan M. Brown
Don't Follow Your Dreams
Leafless Tree
Dictionary Page

And a here are the steps I used to make my tag..

Step 1 : I inked my tag with my chosen colours and did 2 rows of  machine stitching around the outside of my tag. If you don't have access to a sewing machine this Triple Line stamp would be perfect to stamp around the outside.

 
Step 2: Because I wanted to add in a photo, I chose my photo, and cut a small piece of cardstock to use as a matt for it. I inked and stamped my matting card with the dictionary page stamp, I then stamped just the top half of the leafless tree all the way along the bottom of my tag, and the dandelion seeds randomly on the right hand side of my tag.
 
 
( at this stage you could also machine stitch around your photo and matt if desired, I did this after I had assembled my tag, it would be much easier to do at this stage.)
 
Step 3:  To finish off my tag, I stuck down my matt and photo using miracle tape. Stamped the '"Don't Follow your dreams" image on a piece of card stock , cut it out and inked the edges. I used foam tape to stick it to my tag, to add another layer of dimension My last touch was to add in a piece of seam binding in the hole in the side of the tag.. and I was done.
 
 
I hope you've enjoyed my very first post, Thank you so much for stopping by today, See you again soon.. Happy Stamping 
 
Karen xxx