Wednesday, July 22, 2020

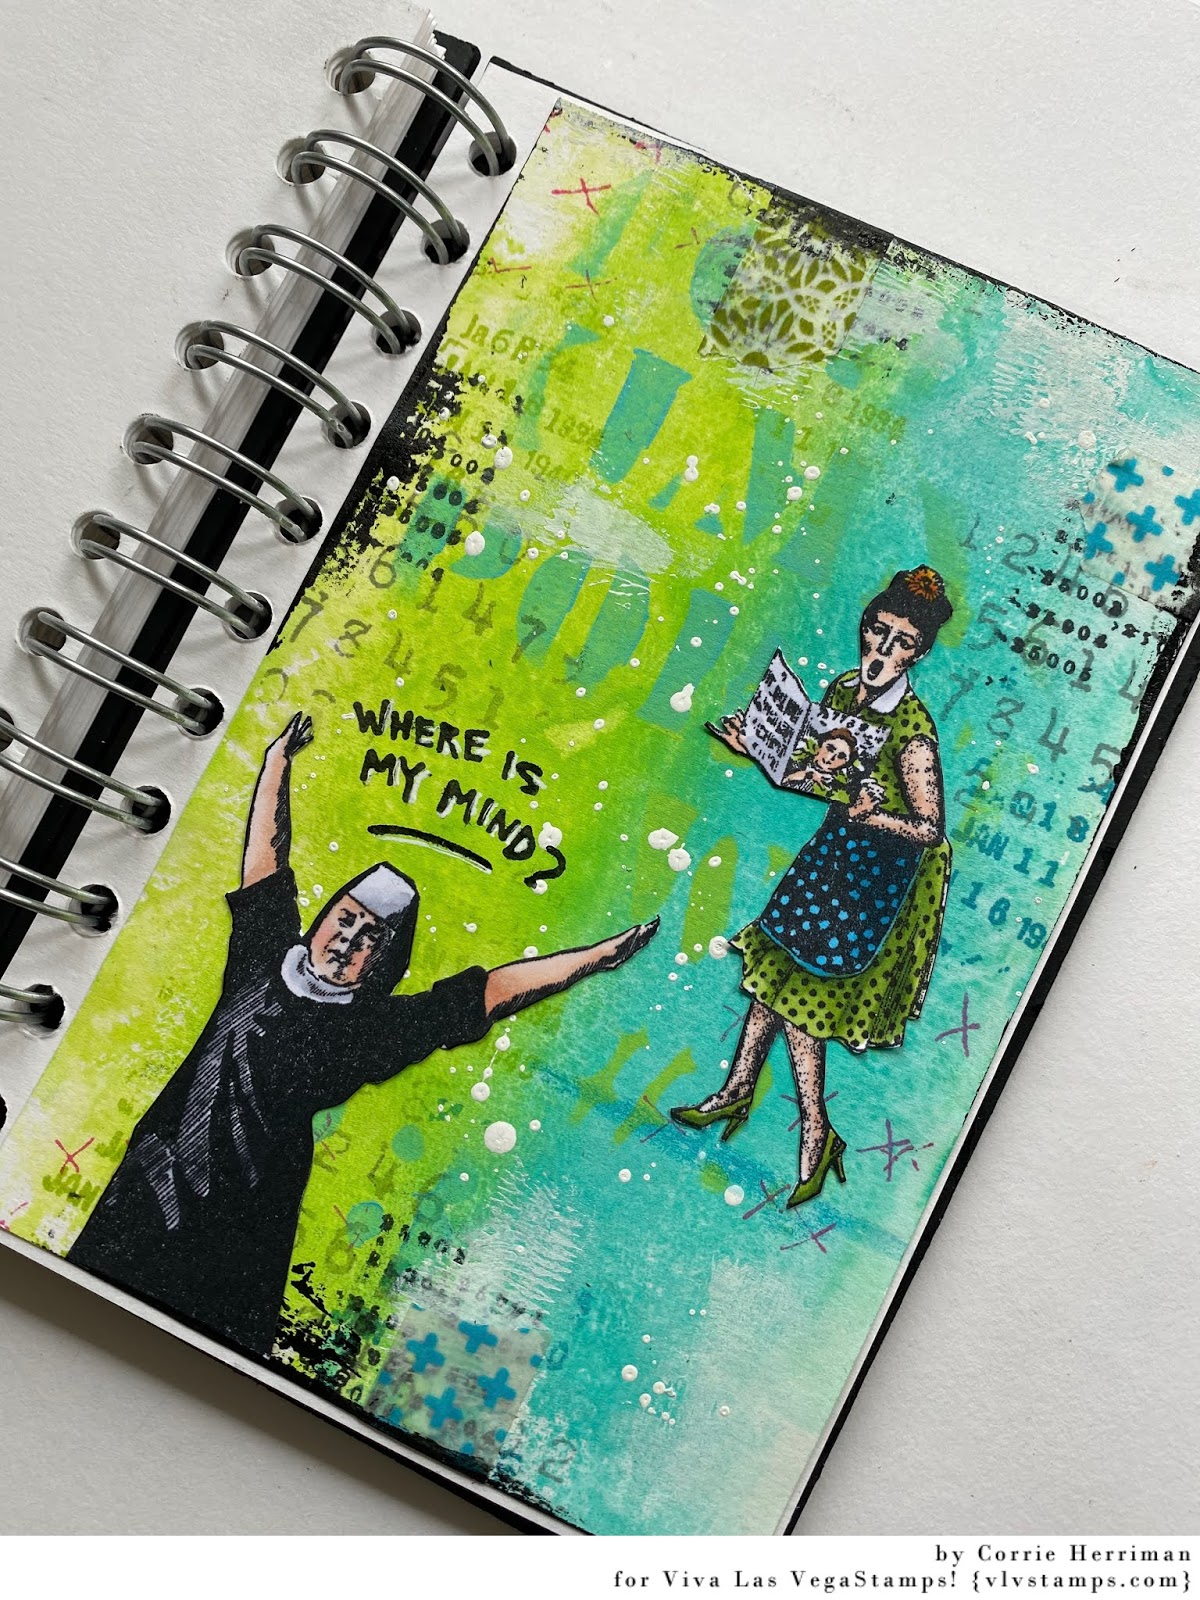
Where is my mind

Hello everyone,

welcome to the VLVS! blog where today I am sharing a mini art journal page.


And here is how I made it:


I added paint to my page with a brayer and then stencilled over the top with the same colours on opposite sides. 


Next I stamped the background randomly. You will find a list of stamps I used at the bottom of this post. 


I coloured the images that were going to be the focal points with my Copic Markers and cut them out. 


So, I then put it together by adding black paint along the edges and also some pieces of washi tape. I used a white paint pen to add splatters, I adhered the two ladies the way I wanted them and then added the sentiment that was stamped directly onto the page. Lastly I added some shading under the lady with the magazine and glued the page into my journal. 


I have used the following stamps:

Other materials:
Dina Wakley Acrylic paints, Lime and Turquoise
White paint pen for splatters
Memento ink - Tuxedo Black
Copic Markers
Versafine Clair - Morning Mist, Nocturne, Warm Breeze and Verdant
Distress Oxide ink in Picked Raspberry
Washi tape

Thank you for stopping by today ! 


Tuesday, July 21, 2020

Making Shrink Plastic Embellishments with Josefine

Hello everyone, and welcome back to the Viva Las VegaStamps! blog. 

I am in a creative low. I only have little time to create and when I find a few minutes I seem to be overwhelmed and don't know where to start. That happens all the time though, so I prepared a few tricks to get my mind going. One of them is to pick something from my "new supplies" pile (how big is yours? ;) ). This time, the item I picked was shrink plastic. Yikes... I've never used it and it totally intimidates me.


So, I thought that I'd start with something simple. Just a stamped image. Maybe a few more, so I don't do one and then have to stamp another image. If I have a few ready, I might get into it.


I stamped the images using my Misti and StazOn ink. 


Then I cut all the pieces. I didn't even try to cut right at the edges. That plastic is rather thick and starts breaking when the scissor is at a too tight angle. Also, something that I learned during the process, the more intricate the piece, the more difficult it is to shrink it.


In addition to shrinking just a simple stamped image, I decided to color two of them using Copic markers.


And guess what... IT WORKED :D
I thought the sheep would end as a black blob, but you can actually still see the shape. One more tip: punch the holes for the embellishment before you shrink them. Much easier (guess how I know that....).


Now I got a bit creative. I dusted off an old jewelry making kit that had some earrings left. I think the sheep work great as earrings.


I have not done much with the colored images yet, but am sure that at least the silly reindeer will end up on a Christmas art journal.


This turned out amazingly crisp. I'm so excited about it.


And finally, the Ethos Door is now an embellishment for my zine art journal that I created for one of the last VLVS blog posts


What do you think? Fun project or not worth the time? ;)

Stamps used:

Thanks for stopping by!


Friday, July 17, 2020

Discover ► Majo


Hello my friends,

it’s time again for me to show you a little creation for the smallest Art Journal I have.


 I have used several VLVS! Stamps and created a little scene this time. The rub on I used is one from Tim Holtz.

I stamped the background with Bundled Sage and the tree with Peeled Paint and Brushed Corduroy Distress inks from Ranger. 

I added some grass tuffs to the bottom of the tree and placed the cute sheep on top.

The rub on finished my little garden scene.


I have used the following stamps:

20375

I hope you enjoy life nowadays even with the current situation. Stay safe and have a great time crafting.

Take care, my friends


Wednesday, July 15, 2020

Art journal page: Currently

Hey everyone,

Natalie here with an art journal page that I want to share with you, along with an easy background technique. For this technique you just need a stencil and some spray inks. I'm sure it would work with a water reactive ink pad, too.


I picked three earthy and greenish color sprays from Lindy's Gang and started with the lightest one which was Opal Sea Oats. I sprayed my stencil with the spray and then pressed it onto the paper. Then I repeated the process on another spot of my page and let it dry. This is important if you don't want the colors to bleed into another.
The next color I used was My Mojito Green. Again, I sprayed ink on the stencil, but this time a little less, and pressed it onto the page. It was quite easy to align it right over the last imprint.
I did the same with the last color, Drop Dead Gorgeous Green, and a very light spritz of color.

On the following pictures you can see how I built up the layers.


While my page was drying, I decided that I want to use the bearded man as my focal image. And while browsing through my stamps I found a mushroom with the perfect size for him to sit on. I stamped both with Archival Ink, first in Coffee, then in Watering can. The two colors mixed to a grey tone with a little vintage touch. Using a stamping tool makes it easier to do this.
I cut out both images and added a little watercolor to them as well as I inked up the edges with a black marker.


Back on my page I stamped some flowers and a few other mushrooms to the bottom left corner of the background. I used Oxide Inks for all this stamping, just because they work well and I had some matching colors.


All I had left to do was placing my focal point on the page, backed with some thread for a little more contrast and texture, and adding a quote. Well, I didn't used a whole phrase, this word stamp "currently" was just saying everything that this page needed.
And because the top right corner looked a little too empty I grabbed the waybill stamp and added some stamping there, too.

Hope that my little tutorial inspired you. Here are some more photos of the completed page:


Stamps used:
Wild Flowers (18819)
Wildflowers Silhouette (19666)
Waybill/Invoice Background (19416)
Bearded Man Cross Legged (20087)
Mushroom (20046)
Mushroom (19118)
Tall Mushroom (19117)
Currently (20285)


Other material:
Art Journal (my page was cut from Canson watercolor paper)
Archival Ink (Watering Can, Coffee)
Lindy's Gang Starburst Sprays (Opal Sea Oats, My Mojito Green, Drop Dead Gorgeous Green)
Distress Oxide Inks (Forest Moss, Peeled Paint)
Stencil (TCW - Foral Radar)
Watercolor
Pitt Brush Pen (black)


See you soon!


Sunday, July 12, 2020

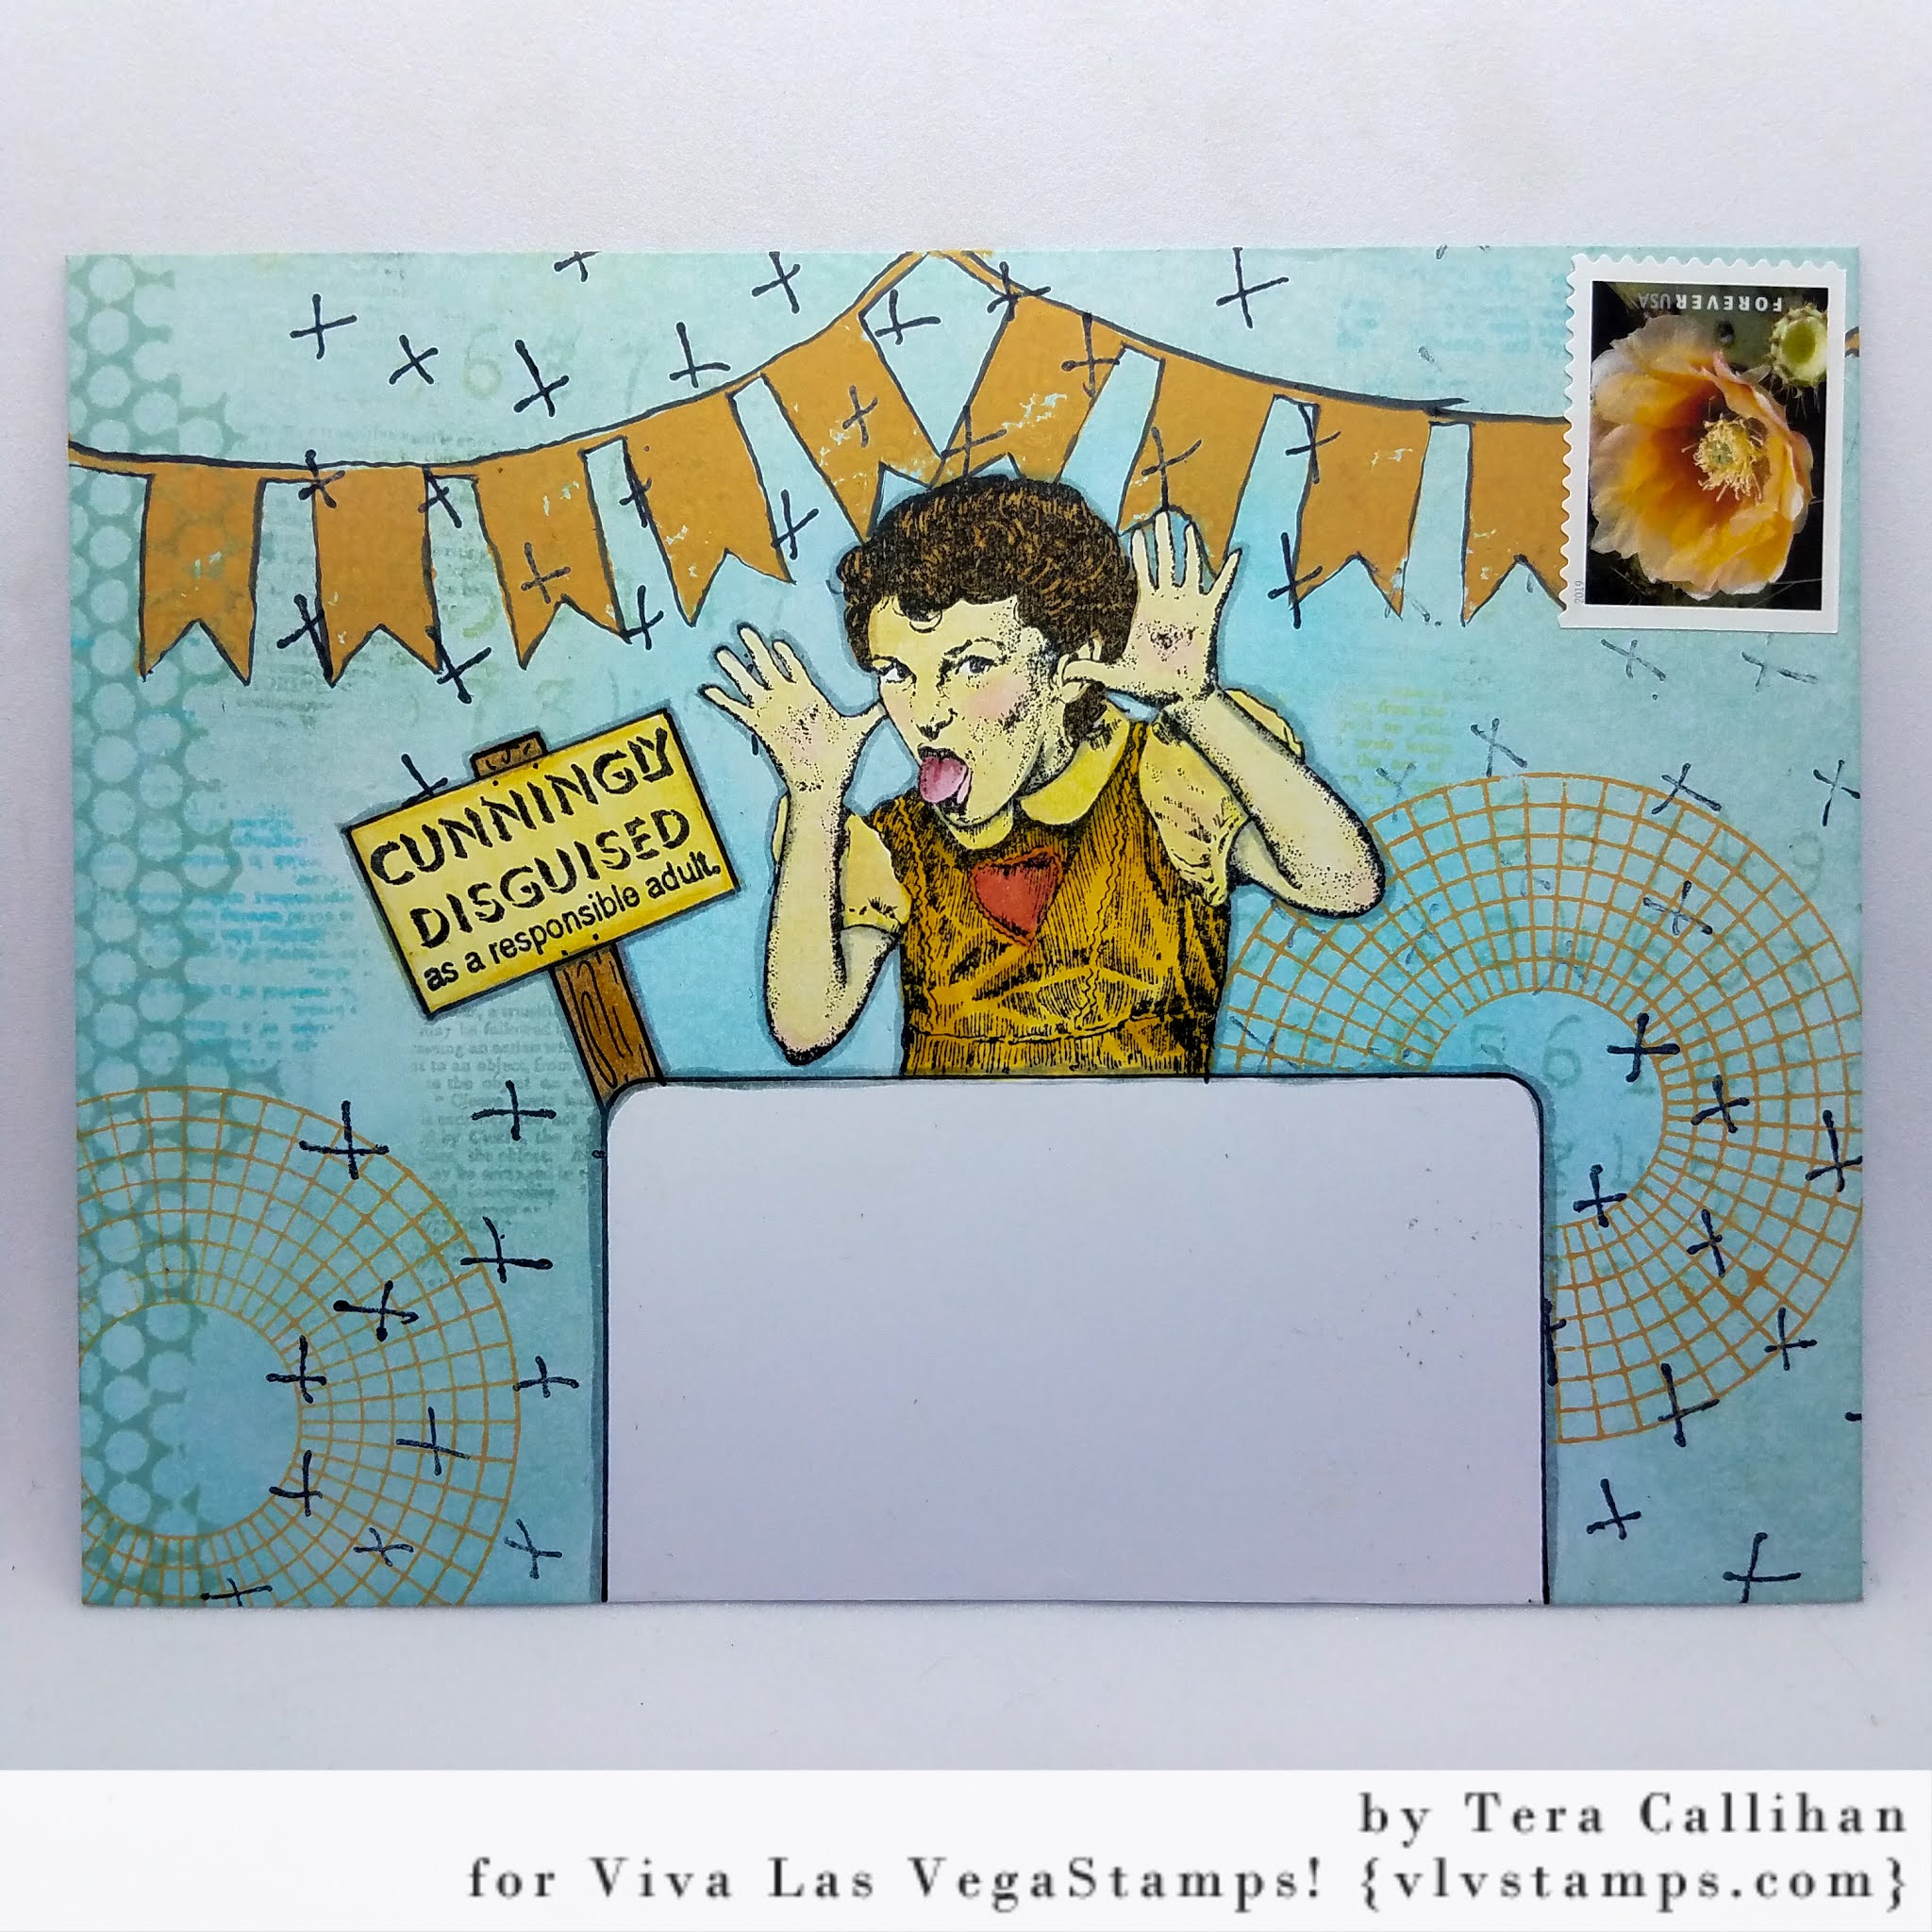
Mail Art Madness

Happy Mail Art Madness...

Oops, I mean Monday.... 

(or do I? I just started Keto on Thursday, so I'm definitely feeling some madness cutting my favorite food group ...carbs <3)


Stamps Used:


I started by stamping "Girl making face" and "Cunningly disguised". I then drew an address block, and a signpost to hold the quote.  With the base started I then masked off the main images.


Using a combination of Distress inks in: Speckled Egg and Tumbled Glass (both oxide and originals). I then added a layer of ink over everything , and began adding background detail stamps.


To add depth I stamped my cross marks in black archival ink. 


The banner was stamped in "Spiced Marmalade" Distress Oxide ink


With the same ink I used for the banner I stamped the color wheel lines, then removed my masks.


I just love the reveal after all that inky madness...
To finish I colored my focal images, then found a matching postage stamp to tie everything together. 


I hope you have enjoyed this little tutorial and bit of sassy mail art!!!

Friday, July 10, 2020

Adventure Awaits...I Hope!

Well, summer is definitely under way!!  We have heat advisories across the United States so I hope that you all are not only staying safe but staying cool!
The heat isn't really bothering me but this stay at home order is getting to me.  I am used to being out and about whenever and where ever! 
I created a card inspired by my dreams of adventure, I know it is coming soon!!


Stamps used:  Astronaut, The Moon, Adventure Awaits

The background on this card is on black card stock with white gesso and several spacey colored Distress Oxide inks.


All coloring is done with Prisma Colored pencils and blended with Gamsol.


That moon is glorious and with the slightest yellow tint it was perfect to add depth to the card.

Stay safe until we can begin our next adventures.
Until next time...get inky.

Wednesday, July 08, 2020

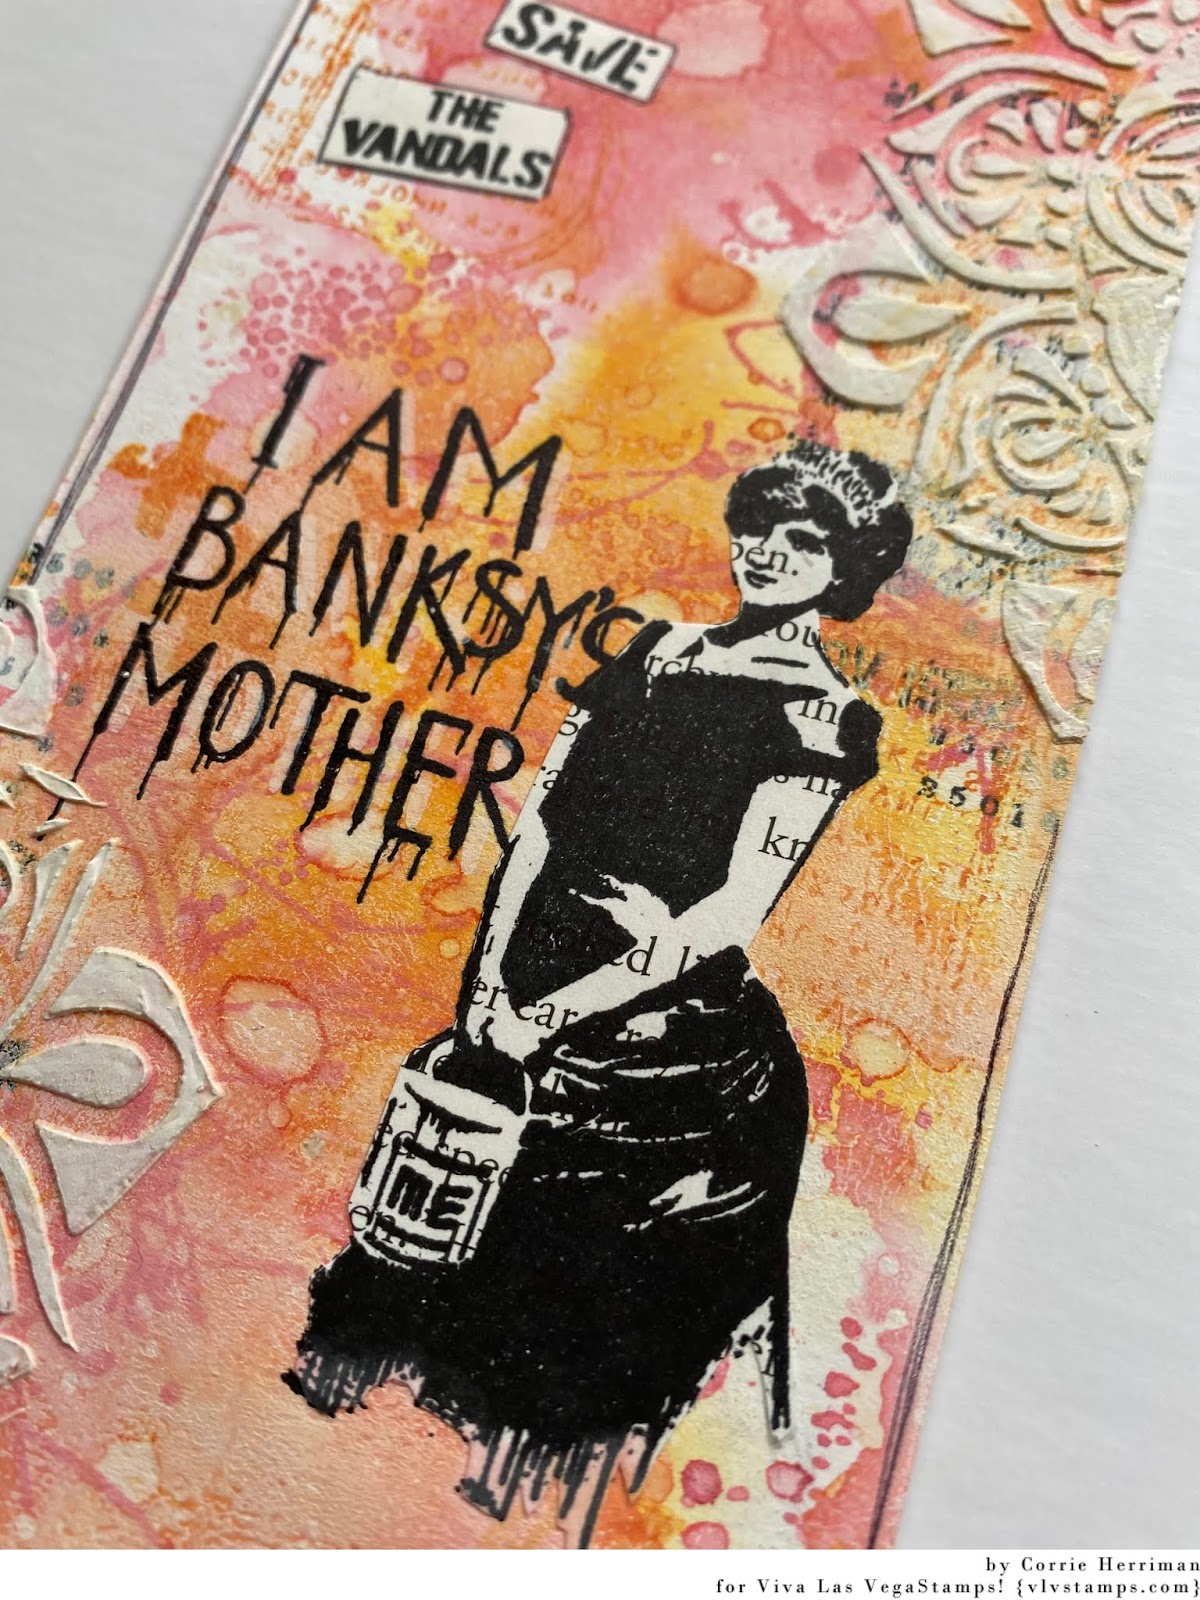
God save the vandals

Hello everyone,

For today's VivaLasVegaStamps! post I have made a tag.


I started off by cutting a tag from Mixed Media Paper. I then smooshed Distress Oxide Inks (Worn Lipstick and Spiced Marmalade) on my craft mat, spritzed with water and dunked the tag into it repeatedly, drying in between, until I was happy.
Next I stamped the background using the same inks and a black Versafine Clair. I then used a brayer and white paint to tone it down again and after drying added the modelling paste through a stencil. 
I stamped the focal image on the tag and on book paper, cut her out of the book paper and adhered her over herself :o) . The sentiment and some doodling finished it off.


I used the following stamps:

Other Materials:
Mixed Media Paper
Distress Oxide ink : Spiced Marmalade and Worn Lipstick
Versafine Clair - Nocturne
an AALL & Create stencil 
Modeling paste
Black pen
Book pages

Thank you for stopping by today !