Showing posts with label mesh texture. Show all posts

Monday, September 05, 2022

DESTINATION UNKNOWN - by Fran Chalmers

Hi everyone!

Today I have made a card for you.


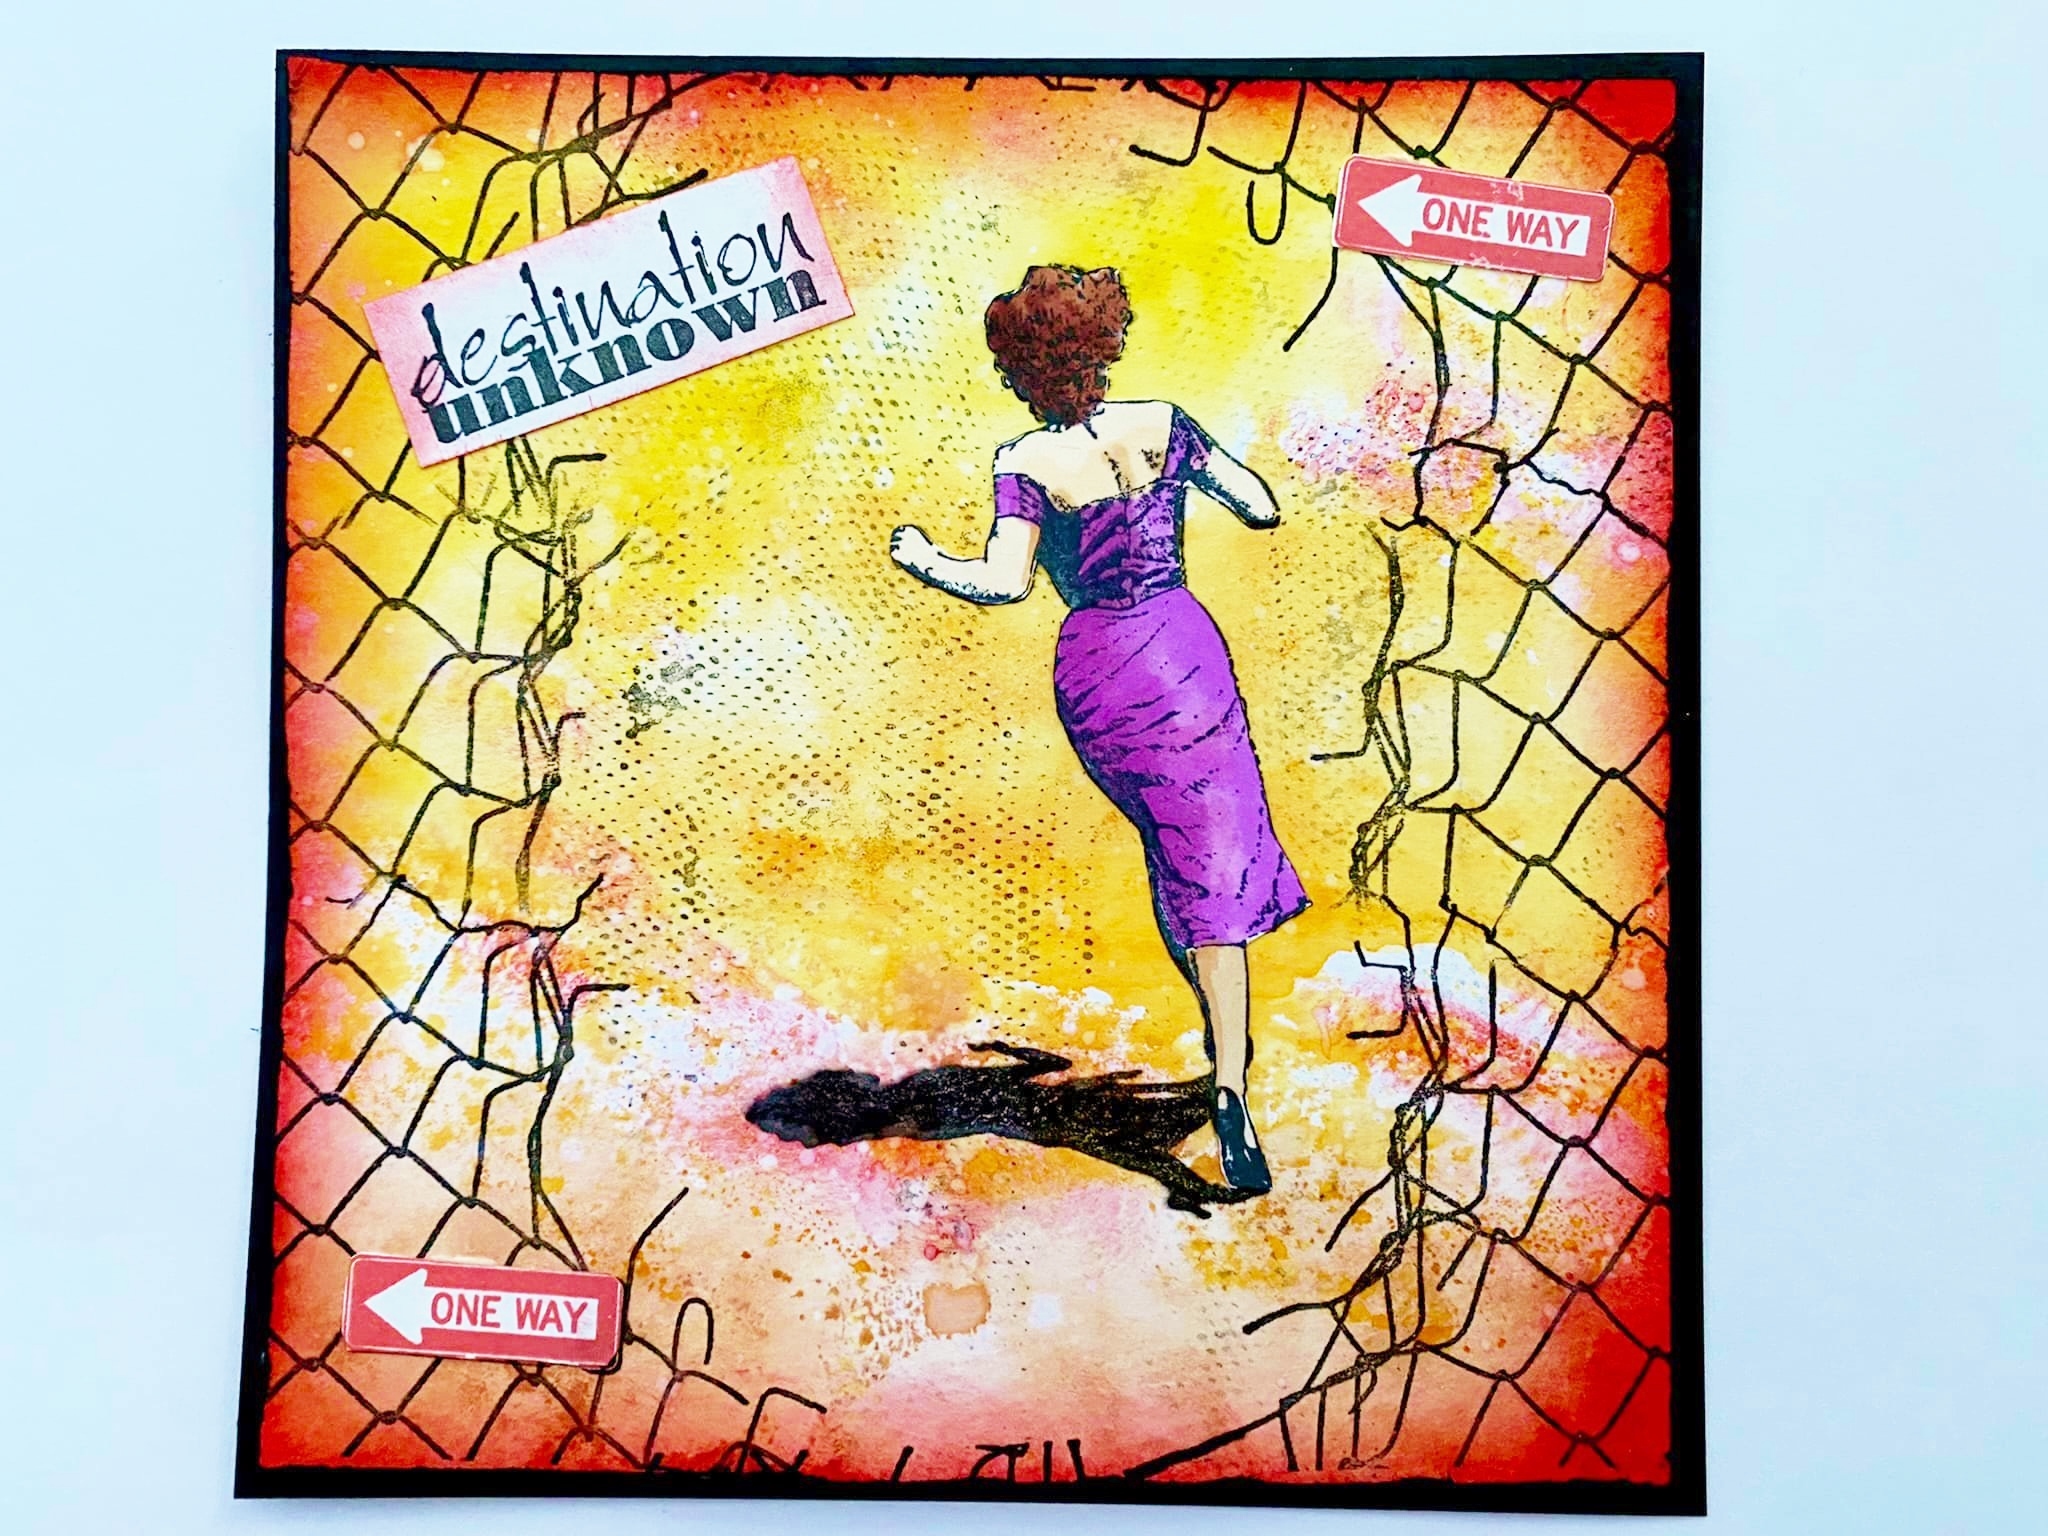
First I  put some distress inks on my mat and added water. I smooshed the card on top, drying between layers.


Then I stamped the broken fence at the edge of the card.  I had to mask the top of the stamp off as the card was bigger than the stamp, and stamp the middle bit on its own before then stamping the top.  It was difficult to match it up completely right, but it it easy to use a fine liner pen to join the lines up if you are a bit out.


I stamped the lady onto the card, and then onto thick paper.  I coloured and fussy cut her out.


 I added a bit of texture in the gap between the fences and around the main image before gluing the coloured image onto the card.  I added the sentiment, which I edged in red.


I added the "One Way" stamp for a bit of interest.


I mounted it onto a black card to finish it off.


Stamps Used:

Running Lady 1080

Jagged Chain Link Fence 19140

Mesh texture 19569

One Way Small 19180

Destination Unknown 19091

Other Items Used:

Distress inks in Tea Dye, Spiced Marmalade, Mustard Seed, Candied Apple

Memento Ink in Tuxedo Black

Versafine Clair ink in Nocturn

Black fine liner

Copic Pens


Hope you  like it! See you next time x

Monday, July 11, 2022

I'M WEIRD BY FRAN CHALMERS

Hi everyone!

Welcome to the blog.  Today I have made a postcard with one of the great clown stamps that VLVS do!


First of all I stamped my main image onto thick paper, coloured with copics and fussy cut out.


Then onto my background.  I blended some Elements Inks onto a piece of card.  The colours were Lime Punch, Pine and Blue Lagoon.


For some interest and texture, I flicked water onto the card and dabbed dry, then I put some thin gesso through a harlequin stencil.  I then stamped some of the texture background stamps randomly in black ink.


I stamped onto some tartan paper I had so that the clown had something to "sit" on, then fussy cut it out.


I finished it off by adding my sentiment, and putting some white gel pen on the gesso to make it more 3D looking.


Hope you like it! See you next time :)

Stamps Used:

Clown Face 6727

Carved Xs 20162

Mesh texture 1455

Scallops from Plate 1471

I'm Weird 18561

Other Items Used:

Elements Inks

Versafine Clair Ink - Nocturn

Copic pens

Thin gesso

White gel pen

Tartan paper


Monday, August 17, 2020

Create your own card backgrounds with Josefine

Is it just me or do people send more cards nowadays? Especially during the last months. It probably helps with feeling closer. So, why not show some ideas on how to make a few quick cards, maybe even with a little humor?

I used the Grunge numbers to create two simple backgrounds that are full of texture.


For the first background, I used my stamp platform to stamp all the numbers at the same time. So, I mounted my paper into the platform, arranged the stamps randomly, and stamped using Distress Oxide. I had to rearrange the numbers and stamp again since they didn't quite fill the entire card base. 


Then I used Distress Ink in a slightly lighter color and blended it all over the background. I made sure to leave it splotchy and uneven. I didn't want to go for a perfect and even look.


Next up, I used the Mesh Texture, Bubble Wrap Texture, and actual bubble wrap to add more interest to the background. I used both ink colors to stamp those. I also splattered some water and Distress Oxide ink on top.


To finish it up, I added a frame around the border.


For the second background, I skipped the stamp platform. I wanted the numbers to be closer together, so it was easier to that by hand. Here, I used Distress Oxide again.


Now I blended two Distress Ink colors on top, used the same stamps and bubble wrap to add some texture, and finished it up with a few splatters of water and other inks.


Here are the two backgrounds next to each other.


Now I simply added a few sentiment stickers, paper dolls, and wings to the card and mounted it onto a 5 1/2 x 4 1/4 card base.


I hope you enjoyed my two cards and that you feel inspired to create some of your own :)

Stamps used:


Wednesday, June 10, 2020

Making a zine art journal with Josefine Fouarge

Hello everyone, and welcome back to the VLVS! blog. I just recently saw a post on social media about someone creating a zine art journal and I remembered how much fun they are to make. So, I decided that now is the best time to make another one ;)


If you are wondering what a zine art journal is, let me explain that briefly. It's a small journal made out of one sheet of paper. I found the pattern in a book on how to make books (I know ;) ) and have loved this pattern ever since. Super simple, you just need a pair of scissors.

I started this one from a sheet of copy paper that had printer settings printed on one side and some clean up stamp marks on the other (funny enough, those stamps are all from VLVS).

Once folded and cut, I picked a few Distress Oxide inks and smeared them on my glass mat. Then, I spritzed the ink with water and dragged my paper through the color. I repeated that a couple of times.


Not just with the Distress Oxide inks though. I also used some of Seth's new ink sprays. Same way - I spritzed the inks onto the surface and dragged my paper through it.


Then I used a few background stamps and added even more texture to the entire piece. That star you can see in the picture below was one of the clean up images.

By the way, that Mesh Texture stamp might be my new favorite background stamp...


Once I finished with the backgrounds, I focused on the front and back cover. I folded the paper in a way that the star appears on the front. Then I added a bunch of the flower stamps from Tina Walker to the front and back.


And then added a few marks with my chalk markers (also a new favorite of mine). 


I finished off with a sentiment and a few more doodles.

Here is the front.


And the back.


A few close ups.


Here are the three inner pages. All still empty, but I'll fill them for my next post. Stay tuned :)


Stamps used:

Thanks so much for stopping by! I hope you got inspired by this super fun little journal and want to try it yourself!


Wednesday, October 23, 2019

Little Boy Lost

Just like that recurring Halloween nightmare...
I am BACK..
with another Halloween inspired set of ATCs.

so my little Winged Boy actually did get a little lost in there but I think it works 
really well with the Halloween theme....
Scroll through the close ups and watch me create this little series... 


 Viva Las VegaStamps used:

Winged Boy (sku: 19062)

Full Moon (sku: 18911)

Flock of Bats (sku: 18909)

Mesh texture (sku: 15969)

Tape X (sku: 15972)

Other Products:
Watercolour paper
Ranger/Tim Holtz Distress Oxide Ink: Fired Brick, Scattered Straw and Candied Apple
Stazon: Jet Black
Shellac
Recycled Baby Wipe
Liquitex Gel Medium
Stitching
Tim Holtz: Chip words, Small Talk
Book Text.

Thank you all for checking out the video.
Don't forget to head over to the facebook groupies and add your OCTOBER entry.
We LOVE seeing what you create.
Leave some love on the Fabulous Design Team creations.

Live With Respect..
Leanne xoxo