Showing posts with label plate 1455. Show all posts

Sunday, June 14, 2020

Make Art Now - Art Journal Page by Elisa Ablett


Hi Crafters,

Elisa here from the design team with my latest inspiration for you for the month of June.

Halfway through this crazy year already! 

Who else has been crafting and creating more during the last 5 months with all that's happening in the world? I find creating therapeutic from the stresses of everyday life and found a bit of solace in my craft room during quarantine. 

I thought I would create an Art Journal page featuring the paint brush from Cat Kerr and all the lovely grungy marks from Plate 1455 to document my love of art.

Here are a few close ups, the page features a background I made using photo paper and watercolour inks plus a gel print from my stash. 


I have included a list and photos of the Viva products I used below:-

Plate 1455Make Art Now 1 1/4 x 1
Magic Maker Paintbrush by Cat Kerr 2 x 4 1/2


Other Products:

Photo Paper
Colour Blast Artists Inks
Dina Wakely Acrylic Paint & Washi Tape
Gel Plate
Assorted Stencils

Thank you for stopping by the blog today, make sure you stop by the shop and keep up to date with any new releases and sales. 

Elisa x


Wednesday, June 10, 2020

Making a zine art journal with Josefine Fouarge

Hello everyone, and welcome back to the VLVS! blog. I just recently saw a post on social media about someone creating a zine art journal and I remembered how much fun they are to make. So, I decided that now is the best time to make another one ;)


If you are wondering what a zine art journal is, let me explain that briefly. It's a small journal made out of one sheet of paper. I found the pattern in a book on how to make books (I know ;) ) and have loved this pattern ever since. Super simple, you just need a pair of scissors.

I started this one from a sheet of copy paper that had printer settings printed on one side and some clean up stamp marks on the other (funny enough, those stamps are all from VLVS).

Once folded and cut, I picked a few Distress Oxide inks and smeared them on my glass mat. Then, I spritzed the ink with water and dragged my paper through the color. I repeated that a couple of times.


Not just with the Distress Oxide inks though. I also used some of Seth's new ink sprays. Same way - I spritzed the inks onto the surface and dragged my paper through it.


Then I used a few background stamps and added even more texture to the entire piece. That star you can see in the picture below was one of the clean up images.

By the way, that Mesh Texture stamp might be my new favorite background stamp...


Once I finished with the backgrounds, I focused on the front and back cover. I folded the paper in a way that the star appears on the front. Then I added a bunch of the flower stamps from Tina Walker to the front and back.


And then added a few marks with my chalk markers (also a new favorite of mine). 


I finished off with a sentiment and a few more doodles.

Here is the front.


And the back.


A few close ups.


Here are the three inner pages. All still empty, but I'll fill them for my next post. Stay tuned :)


Stamps used:

Thanks so much for stopping by! I hope you got inspired by this super fun little journal and want to try it yourself!


Sunday, May 10, 2020

I am anOther Mother...

Hi all and welcome to May.
The theme for this month's challenge is .....
SNARKY... 
which really represents all that VLVS! is.
it is THE stamp company you come to if you just want to have your say.
With a dash of Attitude..
and you know what. THAT is exactly what I LOVE about VLVS!.

In saying that. This first share of mine is pretty tame...

I started with the background in my art journal. 
I scraped some Gesso and Some crackle on the background
added some Oxide Ink in Victorian Velvet. 
Using the same colour I stamped some background stamps all from Plate 1455
Double Coffee Rings and Mesh Texture stamps.
I then stamped again using Momento London Fog ink with:
Double Coffee Rings, Mesh Texture and Tape X 
(all Links for stamps below)
once I stamped it all I spritzed a little water over the top to tone it all down.

Then I stamped my main focal images: Banksy Boy Planting and I am Banksy's Mother.
 As you can see I hadn't made up my mind the background for these so I stamped them with Stazon Ink on several things: Book paper, Index cards, and Clear plastic.
I also stamped the Smear/Smudge in Oxide ink, and Bubble Wrap Texture in stazon onto some masking tape. 
Added some Stencilling to the background and then I started to layer it all up.
and finished with a Stabilo Border, some stitching and some splatters....
It is mother's day here in Australia today and my kids are at their dads until later today.
So I had some me time and created a page and thought something mothery would be fitting.

"I am Another Mother"


so the clear plastic I stamped on was a new product for me.. 
while I like how it comes out, I'm not the greatest fan of the edges 
but it worked a treat...

VLVS! Used:
Banksy Boy Planting (sku: 20456)
I am Banksy’s Mother (sku: 20448)
Plate: 1455 (sku: plate1455)
Double Coffee Rings (sku: 19568)
bubble wrap texture (sku: 19566)
mesh texture (sku: 15969)
smear/smudge (sku: 19573)
tape X (sku: 15972)

Other materials used:
Dylusions: Art journal
Momento: London Fog
Stazon: Jet Black
Ranger, Distress oxides: Victorian Velvet, Candied Apple, Tea Dye
JudiKins Embossable Window Plastic
Book paper, Magazine, masking tape
Chromacryl: Drawing Ink
Atelier: Gesso white
Viva: Artline Facetten-lack
Kinder Kreations: KK1719 Fuck Yeah Stencil.


Thank you all for Joining me,
check out the Viva Las VegaStamps Groupies Facebook page.
enter the May challenge
SNARKY 
using the #may20 for your chance to win a Pound of Rubber!!.

get your snarky on

Live with respect.
Leanne
xoxox0

Thursday, May 07, 2020

Oh my Goddess!

Hello everyone,

I thought I'd try something new and did a wooden tag. It was fun to work on this new (to me) surface and I'm sharing my process with you today.


The tag I used is nearly 8 inches high and it also has a frame which is great to create some dimension. I started with a generous layer of heavy gesso on both parts. 


After the gesso was dry, I added some background stamps with Versamark ink as well as some Embossing powder to the tag. Spoiler alert: You don't see many details of these stamps on the finished tag, but it creates a pretty nice texture. 


Next, I got out a stencil and some light texture paste. With these I added texture to both, tag and frame. To bring in some color I sprayed the tag with Moon Shadow Mists and some of Lindy's Squirts. The heat embossed areas resist the paint. I wanted some more contrast between the tag base and the frame, so I used my fingers to color the inner edge with acrylic paint.


Time to choose a focal point. I stamped the Eastern Goddess and colored her with watercolor. I cut the image and used a marker to darken the cutting edges.


To create some more embellishments, I stamped the Writing Triangles on design paper, heat embossed them in black and also cut them out. On the same paper I stamped a quote: "Inhale the future. Exhalte the past."


I then started to assemble the tag. With matte gel I glued the frame to the base. I added my prepared paper elements, two metal leafs and sequins. As a final touch I added some ribbon to the hole at the top.


I'm happy how the tag turned out and hope you like it as much as I do. Here are some detail photos of my project:


Stamps used:

Texture Background (19570)
Bubble Wrap Texture (19566)
Writing Circles Background (19567)
Writing Triangles (19571)
Eastern Goddess (6010)
Inhale The Future (19892) 


Extra tip: the texture stamps I used can be found on plate 1455, one of my favorites.


Other materials:
- HDF tag with frame
- Heavy Gesso
- Light Modeling Paste
- Gel medium
- Ink Pads (Versamark and Versafine Onyx Black)
- Stencil (Finnabair Tapestry)
- Embossing Powders (WOW! Vintage Peacock; Ranger Black)
- Moon Shadow Mists from Lindy's Stamp Gang (Smoky Sapphire, Buccaneer Bay Blue, Treasure Island Aqua)
- Lindy's Gang Squirt (Loonie Toonie Teal)
- Acrylic Paint (Paynes Grey)
- Design Paper
- Metal embellishments, sequins, ribbon


See you soon!


Thursday, September 05, 2019

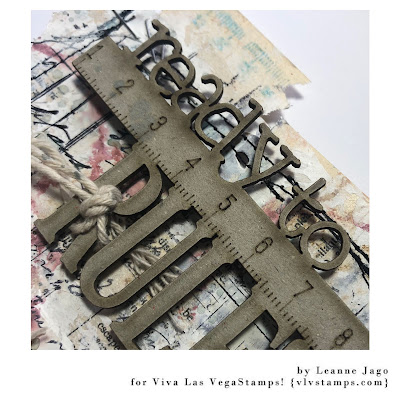
Ready to Rule - Back to School September Challenge

hello Everyone,
I am back at pretty close to the beginning of a new month.
A new month means a new CHALLENGE.. 
this Months SEPTEMBER Facebook challenge is....
BACK TO SCHOOL.... 
(Side NOTE: crap Christmas is FAST approaching)

So here is my take on the "Back to School" theme.


 I had so much fun creating this piece..
Click here..... to watch the whole piece unfold..


Viva Las VegaStamps!!! used: 
Plate 926 (sku: plate926)
Star Sneaker (sku: 19242)
Plate: 1455 (sku: plate1455)
Paperclip (sku: 19574)
Measuring Tape (sku: 19565)
Double Coffee Rings (sku: 19568)
Writing Triangles (sku: 19571)
Writing Circles Background (sku: 19567)

Plate  1440 (sku: Plate1440)
Waybill/invoice Background (sku: 1946)

Other Materials: 

Other Materials:
Dylusions Journal Tag
Ranger, Distress Oxides: Broken China, Walnut Stain, Tea Dye, Fired Brick, Black Soot, Aged Mahogany, Ground Expresso
Stazon Ink Pad: Jet Black
Kinder Kreations: Ready to Rule Chipboard

Book text, Staples, Thread, Butchers Twine

Don't forget to jump onto the Facebook Groupies Page,
to share your challenge Piece...  
Most Importantly.....
#sepentry19


Live with Respect.
Leanne xo

Tuesday, May 03, 2016

Mousey Monthly Challenge inspiration

Hello Every one!! 

Tera here today with a little something to inspire you for this months 

monthly inspiration challenge!!! 


The words that inspired me were: weird, different, grey, tan, black, white, neutrals, mice, rays, critters, cheese, numbers, splatters, light bulb, bright ideas, light bulb moment, spritz, distressed and grungy
(Stamps used at bottom of post)


To start I used plain card stock to cut out a tag measuring 2 3/4" x 4 3/4"
Next I stamped my mouse/rat and the set of 3 triangles so that I would have the placement of my focal images.. 


(if you want to make masks this is the time to mask them off... this time I just glued cut outs on top of each of these after I did the background).

now I stamped all of my background images in a kind of randomness... The coffee ring was stamped in distress ink- pumice stone, I also used this to sponge ink onto the entire background. all of the other images were stamped in black ink. (archival and versafine were on my desk today).  I also used the black ink to distress the edges of my tag

(same thing for the back of the tag)
(to make the light bulb Pop and look 3D I edged it in black pan pastels)

For the crinkle ribbon I used vintage photo, pumice stone, and black distress ink on my craft mat with a little water. 


I hope this inspired you to join in our challenge! 

I can't wait to see everyone's creations!!! 

Stamps Used: 

Creepy Rat With Cheese 2 x 2 1/4

Large Lightbulb 2 x 3

 Writing Triangles 1 1/4 x 3 1.4

Tape X 1 3/4 x 1 3/4

Plate 1455 (the last 4 above are all from this plate... Honestly this is my must have all time fave plate... so here is the link to it too)