Saturday, November 05, 2011

Winner for our October's  Monthly Challenge
with the Theme of "Halloween"
is
Jennifer Willis

 Jennifer made us a wonderful ATC!


Jennifer please contact Terri Sproul at
$25 shopping spree to our On-Line Store.  
There is still time to play this month our theme for 
November is "Thanks"
December is "Christmas"
we hope you play this month. 

"Thanks a Lot" from Grandma's Kitchen


Hello - its Susan and I'm bringing you a special Saturday post! This lovely card reminiscent of Grandma's kitchen features Viva Las Vegastamps! Blender #1571 and "Thanks a Lot" #587 stamps. 

I stamped the blender with Black Memories Dye ink. Let me say that it says this is a waterproof, permanent dye ink - and I put it to the test with this image. I am quite suprised and impressed that after all of the hand coloring and crystal lacquer, the image is still crisp and clean with no bleeding. 

Here's how I made the two-tone blender. First, I stamped it on white and then again on blue cardstock. I cut each blender out and paper pieced it back together, in a retro color style, two-tone blue and clear. Then I colored in accents to give it dimensions with my Marvy markers and water brush. I really like the effect of blending with the water brush opposed to the blender pen. 
Detail after handcoloring with markers and water brush.
I layered the stamped pieced blender onto BoBunny patterned paper, then double matted circles placed on top of a paper doily. The background papers are scraps of BoBunny papers, too. Of course, I adhered it all down with Miracle Tape. This came out so beautifully - just like in Grandma's retro kitchen.


Here is how the card looks before I added some magic...Crystal Lacquer. I filled in the blue areas and the knobs and a few details in the pitcher of the blender with blue Crystal Lacquer. The blue Crystal Lacquer gave the blue paper a "POP" and the illusion of dimension. The rest of the blender, the cord, and switchplate I layered in clear Crystal Lacquer. And "BAM!!!!" Here is the shiny new blender in all it's 3-D splendor. Just like one of those high-priced epoxy stickers...but better - because I made it myself!!!

Detail after adding Crystal Lacquer to blender.
I needed a sentiment to finish off this card so I stamped the "Thanks a Lot" with "Madonna Blue" Memories pigment ink and embossed with VLVS Ultra High Gloss embossing powder. Double matted and adhered with Miracle Tape, the card is complete. I hope you like it and invite you to play along with November's challenge "THANKS".

This is a new month and there is a new VLVS Theme Challenge for November. Submit your "THANKS" theme creations using Viva Las Vegastamps for a chance to win a $25 gift certificate at the VLVS online store. CLICK HERE for info on submissions. Also check out the Viva Las Vegastamps store - there is something for every occasion and more! 

"Thanks a Lot" for visiting & if you would like to see more of my creations please visit my blog, sbartist : painting in the dark HERE. Have a great weekend : )

Thursday, November 03, 2011

Giving Thanks

Most people are thankful for many things every day of the year.  This is a time to really focus on the gifts that life brings to us.  I for one am thankful for my family, friends, and being able to create art!  I don't know how I'd live without art.

The above tag was created with mica powders and pigment ink.  I "treasure" everything in my life and as the leaves change, I look forward to Turkey, family visiting, and pumpkin pie!

VLVS Products:
Maple Leaf 12046
Miracle Tape

Other Supplies:
Tag Book Page
Mica Powders
Pigment Ink  - Stewart Superior (VLVS Sponsor)
Soft Mop Brush (or Blush Makeup Brush)
Pink cardstock
Black Cardstock
Sticker Word Treasure
Fibers
Soft Cloth
Scissor

Stamp Maple Leaf over and over randomly on cardstock one at a time with pigment ink.  (Copper or Mauve ink are good colors).  Pigment ink is juicy and stays wet longer than other inks.  Take the mop brush and dip into the mica powder and tap over the maple leaf you stamped.  Add 2-3 colors on the stamped leaf.  You will have little piles of mica powder. 

Over a scrap piece of paper or garbage can, take the mop brush and burnish the colors of mica powder into the maple leaf image.  The colors will blend.  Don't worry if the background is messy, use a soft cloth wiping over the surface to further burnish the colors and removing the excess mica powder.  The powder will stick on the pigment ink.


Change where you put colors and use different colors to imitate real leaves changing in nature.  The black cardstock makes the color pop - the stamp gives detail and dimension.  If you cannot see on the image, it is very sparkling metallic.  Follow the illustration at the top to finish your piece.

This is just ONE of many designs I will do with this Maple Stamp!   Check back towards the end of November, I will have 2 other projects just like a popular magazine does, "With One Stamp."  I will show you 2 different techniques.  Lots of fun choices, even with a little Maple Leaf!!!!

Bonus - Watercolor Pencil On Fabric.


Cornucopia Stamp  16361
Thank You Stamp 6989

Sometimes I try something new, trying new materials to create with.  I have worked with watercolor pencils on hot press watercolor paper but never on fabric.  I am very happy with the results.  The only thing I would change is the fabric.  I would use cotton or muslin which would be more absorbent than the fabric I used, which I think was a polyester or linen.  It was hard to blend certain parts of the cornucopia. 

Do NOT be AFRAID to try something new, even if the results are not totally what you wanted, you learn, you grown!  You know what to do the next time you create.  I am Thankful for the Opportunity to promote VLVS images and to show old and new techniques. 

Don't forget....Part II of techniques with the Maple image!  Check back in a couple weeks!!!!

Visit the Viva Las Vegastamps! store HERE
For more inspiration and techniques, check out my book:  Creative Art Concepts for Papercrafts -  C&T Publications, available at Amazon.

Tuesday, November 01, 2011

How Many Viva Las Vegastamps! Can You Get on One Card?

So how many Viva Las Vegastamps! can you get on one card? 

This week I am so excited to share a little Viva Las Vegastamps! STEAMPUNK with you. I love to Collage and Steampunk is one of my favorite styles to collage.


If Steampunk is a style you like be sure to  view the amazing collection of Steampunk stamps at Viva Las Vegastamps!  Just type “Steampunk” in search click HERE and you will get a wide selection of Steampunk stamps to view!
In this collage there are 12 Viva Las Vegastamps! (all listed below) on a 5 1/4 x 4 1/2 card base, the gears were used multiple times.  To start, plan the collage by laying out the stamps you would like to use on a blank sheet.  Plan which stamps will need to be stamped first and masked.


Once the images in forefront are stamped, let ink dry. Protect areas form being stamped over using  Fineline Masquepen .  When the  mask is dry stamp other images.  Then gently rub the mask off.  
Using a dauber highlight areas of the images with the Stewart Superior Memories Chalk Foggy Ultramarine Ink and Memories Regal Burgundy.  On this card Memories Chalk Foggy Ultramarine Ink was used on the Eiffel  Tower, Bird Cage, Steampunk Glasses Man and Mustache Face.  The Memories Regal Burgundy was used on the Lightbulb with Filament. 


Stamp the following Viva Las Vegastamps!  Round Top Birdcage, Steampunk Glasses Man, Mustache Face Features, Eiffel Tower Medium on pattern paper tissue, be sure to use a piece of paper or protective craft sheet below as the ink will bleed through the tissue.  Then spray with a fixative. 


Gently tear the tissue around stamped images, layer each image over the its corresponding stamped image on the card.  
Adhere the stamped panel to pattern panel, and scallop paper with VLVS! Miracle Tape. Finally attach to the card base.   Stamp Steampunk Glasses Man on pattern paper and cut out tie and adhere to card. Using the same pattern paper cut a small strip and attach to the bottom of the card to give it a horizon line. To each corner add scraps of torn paper resembling photo corners (see first photo).  Use Sakura 3D Lacquer to highlight the light bulb.  Adhere locking washers with the 3D lacquer, set aside to dry. 

Supplies:
Fineline Masquepen
Stewart Superior Memories Black Ink
Stewart Superior Memories Chalk Foggy Ultramarine Ink
Stewart Superior Memories Regal Burgundy 
Ink Dauber
Card base
Pattern Paper from stash
Tissue paper
Glue stick
Spray Fixative
Locking Washers - hardware store
Scissors
Craft sheet
Paper Cutter
Acrylic Blocks
November Monthly Challenge 
Theme is “THANKS”

Be sure to submit an entry
for your chance to win a $25 online store credit.
Click HERE to find out how to enter!!!
FREE RUBBER 
Just post the Viva Las Vegastamps! Blinkie
on your Blog or Website and 
get a FREE Grab Bag of Unmounted Rubber...  
details at the top of the VLVS blog sidebar!


ANOTHER CARD!


This was made while waiting for the card above to dry.  It is made with the VLVS! Gnome, VLVS! Mushroom with 3D Crystal Lacquer!  Fineline Masquepen was used to layer the mushrooms. The Gnome and brown mushrooms are enhanced using the 3D Lacquer.  All inks are Stewart Superior and images colored with Copics.


Until next time... Have fun STAMPING!
Lyneen
Stop by my BLOG!

Monday, October 31, 2011

Monthly Challenge


This Month's challenge for the Viva Las Vegastamps!  Blog.
Each month we will pick a new theme and we hope you play along with us. At the beginning of the next month, we will pick a winner and that card will be featured on our Blog and the winner will receive a $25.00 Gift Certificate to our online store or if you are visiting Las Vegas, stop by our Retail Store to use your Gift Certificate.

November's Theme
"THANKS"


The Viva Las Vegastamps! online store has lots of  stamps to choose from
CLICK HERE

How to enter:
1) Must be a follower of the Viva Las Vegastamps! Blog - I will check
2) Post a card/project  on the Viva Las Vegastamps! facebook page using the Theme by NOV 30, 2011 11:59PM Pacific Time
3) Card MUST use a stamp from Viva Las Vegastamps!
4) Winner will have their Card featured on our Blog - how exciting it that! - and get a $25 online store credit.

We will pick a winner the first week of December , 2011 and post the next month's Challenge on the 1st of each month. We hope you play with us...

The Bonecracker Suite

Happy Halloween Everyone!!! Susan here and I am so excited to be posting on Halloween. Today I am sharing the "Black Magic" technique using two Viva Las Vegas Stamps: Skeleton Flashing #1041 and Ballerina Dancer #1555
 
The Black Magic technique creates a dramatic look by stamping on dark cardstock with light ink and coloring it with colored pencils, then adding high contrast with a white gel pen. 
I stamped both images to create a scene using Colorbox white pigment ink onto black cardstock then heatset.
Using Berol Prismacolor pencils, I gradually build up layers of color from light to dark over the images. Berol pencils are great for this technique and blend well. Except for a handful of basic colors, I haven't used these much since art school, and I miss my old friends.
A dramatic effect is created with the lighter edges toward the outside blending to darker in the center of the objects. As I layer colors, the Ballerina begins to pop off the page. The dimension in the curtains really have a velvety feel. I continued to add more layers of color to increase contrast and achieve more depth.
At this point, the skelton has become lost in the image, and was reversed in the image when stamped in white. So to repair this, I am stamped him again with Black Onyx Versafine on white coated cardstock.

I heat set, greyed him a bit with Weathered Wood and Pumice Stone distress ink and cut his hands out to place in front of the curtains. I cut the curtains to fit him into the image then add a little more colored pencil to blend in with background seamlessly. I added back some details with a black pigment ink marker and pops of white and gold with gel pens. I added some pale pink gem accents to finish her off. Here are details of each:

HERE IS THE FINISHED MASTERPIECE!

To complete this, I made a shadow box housing. I mounted this into an old Frango Chocolate box from Marshall Fields in Chicago that was housing some old cabinet hardware a friend gave to me from updating her cabinets. I painted the box with gesso, then lime green, black and grey acrylic paint. I also painted hardware to mount on outside of box to make it a little ornate and vintage looking. I finished this shadow box off with some fabric scraps folded into curtains and some fancy gold trim at the bottom of the stage.
Today is the last day to enter thee VLVS Theme Challenge for October. Submit your "Halloween" theme creations using Viva Las Vegastamps for a chance to win a $25 gift certificate at the VLVS online store. CLICK HERE for info on submissions. Also check out the Viva Las Vegastamps store - and the Bargain Basement Blowout going on through today!

Thanks for visiting & if you would like to see more of my creations please visit my blog, sbartist : painting in the dark HERE.

Wednesday, October 26, 2011

Using Static Cling Mount Foam!! + Robins Nest goodies!

Hey VLVS! Fans!! DeeDee here again...

Now, I know I Promised a video in my last post.. but my card reader is not working correctly and I can only upload photos at this time... so here is a PHOTO tutorial on using the Cling Mount foam from VLVS! --- This foam has an adhesive side.. and a smooth side.. and once adhered to your rubber stamps allows them to cling to acrylic blocks like photopolymer clear stamps!!! No more heavy bulky wood hanging around.. just easy peasy cling mounted rubber!! 

Onto the tutorial:
Step one: gather supplies.:
Cling Mount Foam (1/8 inch thick) and (1/16 inch thick)
A nice pair of scissors (Click here for some via VLVS!)

Step two: cut foam to size of stamp

Step three: peel backing from ADHESIVE side and stick to underside of stamp

Step four: Cut and trim individual stamps

Step five: remove 2nd backing to reveal cling... press to acrylic block.. ink up.. and STAMP AWAY!


And here's what I ended up with! Small party favors at a local Halloween party! Paper and Dew Drops courtesy of The Robins Nest!!
The small bottles can be found HERE @ VLVS!


Hope this helps!! -DeeDee

Sunday, October 23, 2011

Beware the Pumpkin Eater!


The Pumpkin Eater card by Joe Morgan


Halloween, my favorite holiday, is almost here! For this week's post, I made a cute card using three different pumpkin stamps. To start out, I stamped the three stamps on white cardstock, and colored them with Copic markers. I cut out all three of them. One of them includes a graveyard scene in the background, but I cut that off so that I would just have the pumpkin by itself.


For the sentiment, I wrote my own, and then printed it directly on a 6”x12” piece of the light brown cardstock. The font is called Centaur, and I thought it looked like a good storybook font. Be sure to click on the pictures to enlarge them for easier reading. For the tree, I cut some dark brown cardstock with a Tim Holtz Sizzix die. I cut out a silhouette of a man to use for Peter Peter the Pumpkin Eater.


When assembling, I glued down the moon and then the tree. I glued down one man silhouette and then placed black pop dots on top of him and then put an identical silhouette on top for a 3D effect. For the pumpkins, I glued down the center one, and then used pop dots for the two on the outside to add dimension.


Here are the three stamps I used for this project:
Pumpkin in Cemetery #6264
Jack O’Lantern #5896
Pumpkin Sneering #6490


For an added Halloween bonus, I am posting a second card that I made for Viva Las Vegastamps! ad in Rubber Stamp Madness magazine.


Frankenstein Collage Card by Joe Morgan


For this card, I used Frankenstein stamp #5842, some colored paper and acrylic paint dabbers from Ranger. To start out, I cut eight colored squares of paper about 2.5”x2.5” I adhered four of them to the front of a 5”x5” card.


I stamped on the four remaining squares using paint dabbers instead of ink on my stamp. I stamped blue paint on the greenish white square, black paint on the purple square, purple paint on the blue square and green paint on the yellow square. You can do it any way you like. I then cut out my monsters and adhered them to the squares on the card in the order I liked best. You’ll want to wash your stamps ASAP when using paint. I doesn’t hurt them, but the longer it sets, the harder it is to clean.


Be sure to visit the Viva Las Vegastamps! blog to see what the rest of the design team have created for Halloween! There are lots of great ideas this month!


I hope you have enjoyed my cards as much as I enjoyed making them! Feel free to check out my blog at Create & Craft for more fun ideas! Thanks for stopping by!

Thursday, October 20, 2011

Who's Your "Sugar" Daddy???

In the tradition of Alfred Hitchcock, this stamp collage piece is done "tongue n' cheek" with the screaming lady, who realizes her "sugar daddy" is a zombie.  By stamping  screaming lady to the right and in the front she looks like she is running away.  I
used the Masquepen so that I could stamp the zombie and tombstone words and not have the zombie covered in black ink.

VLVS Stamps  and Products Used:

Pointy Eared Alien Lady 10722 - Note:   I used her as the zombie guy

Other Products:

Cardstock, White, Decorative Purple, Decorative  Stripe, Word Paper, and Decorative Zig-Zag
Masquepen
Stewart Superior Black Memories Ink (VLVS Sponsor)
Colored Pencils
Epoxy Stickers
Black Bat - I cut from paper
Glue Pen just for loops of striped paper frame
Scissors

As a mixed media artist who collages a lot, I like to even sort of collage with stamps.  There are various ways to do this.  This is the simplest because only one image overlaps. 

I start out by stamping out the images on scrap paper to see where I want to place the images and to see if any would overlap.  If they overlap, then I have to "mask" the image (in this case the zombie), so when I stamp "Return of the Living Dead," it won't mess up the zombie image.  So, I started with the zombie image and stamped it first on the upper left side with the black Memories ink.

I next used the Masquepen and filled in the head and shoulders of the zombie with the product.  Let dry.  Stamp "The Return of the Living Dead" over the top of the zombie's head and use your index finger to roll off the masque.  While the Masquepen has a fine tip, the flow was smooth and easy so it took no time to fill in the area to mask it.

Stamp the Sugar Daddy candy bar just below the zombie and the screaming lady to the right.  Use colored pencils to color the images like a cartoon page.  I only did a little bit of shading with a light and dark shade of color on the sugar daddy candy, a little bit on the screaming lady, and background.  Cut out whole art piece when done coloring.

Assemble to finish following the illustration above.  I used the purple paper first, adhered the word paper to the striped frame and then on top of the purple paper.  Then I adhered the stamped art piece and added embellishements.


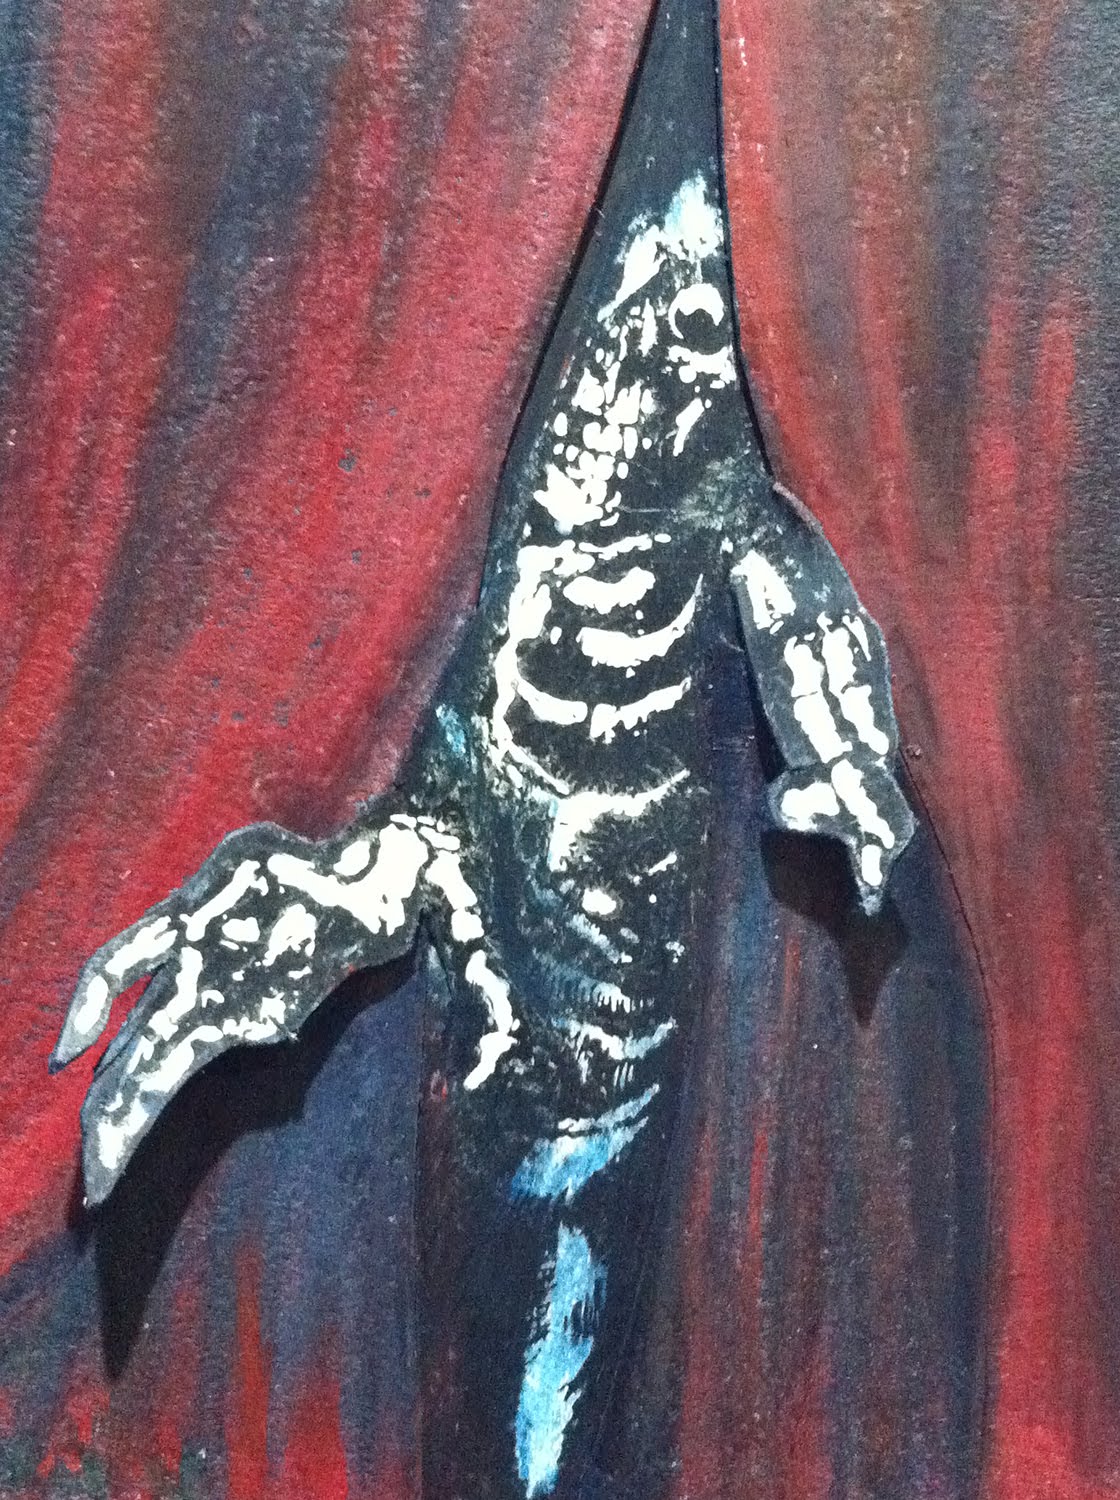
Use Ultra High Gloss Clear Embossing Powder to work as a mask or resist.    The Skeleton Businessman was stamped first using PIGMENT INK.  Pigment ink is juicy and stays wet longer so you can then sprinkle the Ultra Gloss EP on top of what you just stamped an tap off the excess.  A heat tool will melt the EP to a shiny, epoxy-like surface.  
Stamp the words "Gossip" over the skeleton businessman with dye or permanent ink.  Because of the EP, the ink will not stick on it.  Use a soft cloth and wipe over the skeleton and the ink will remove!  Now all the gossip words are in the background.

Here is the finished art.

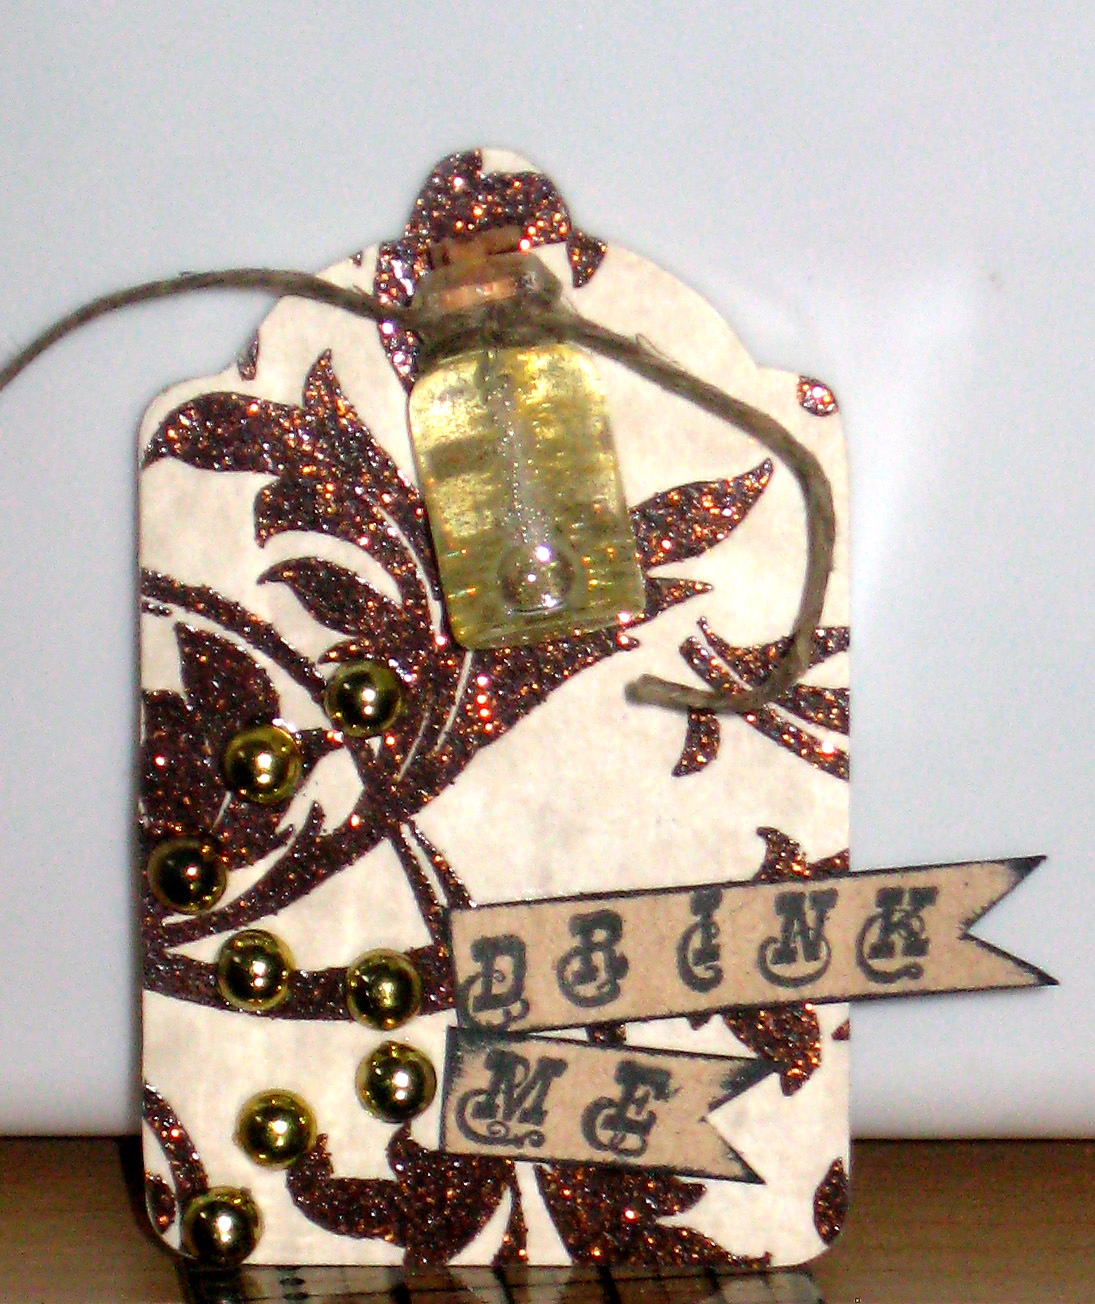
I did one more piece using the same stamps but making a paper wall hanging.  I cut out ghosts from The Robin's Nest Paper - one of VLVS sponsors.  Also from The Robin's Nests are Dew Drops - colored accents to coordinate with your art. 


Happy Haunting ~ with Viva Las Vegas Stamps!