Showing posts with label altered piece. Show all posts

Wednesday, October 31, 2012

Altered Halloween File Folder Part II


Happy Wednesday everyone! leslierahye here with part two of my altered folder project that I began two weeks ago. Today I am finishing up the labels on the pockets making the base tags for my recipe cards. To catch up on the beginning of this project start here.

For this project :

[list for the 1st part of the post is here]

The base of the tags was formed in the same manner as the base of the file folder--black was "dry-brushed" around the edges. Images were stamped to mimic the images on the folder. Space was left on the middle of the tag to label your recipe and the entire back side was made available for the recipe. May Arts ribbons and trimmed were colored with ink to match.


using the alphabet from the December Daily plate and a ¼" square punch I created letters for my words from a piece of water colored paper. I kept my alpha intact for this express purpose. I love how the words on my pocket turned out with this stamped alphabet!
I hope you enjoy my project! Thank you for looking~leslierahye


Tuesday, October 16, 2012

Altered Halloween File Folder | Part 1

Happy Wednesday everyone! leslierahye here with one of my favorite altered projects--an altered file folder. These are fun to make in different sizes for a variety of subjects. Today's altered file folder will serve as a Halloween inspired recipe card holder. I will share this project with you over two posts...the first is today about the construction of the folder. The second will be in two weeks and cover the creation of the recipe cards themselves and the final details in the journal areas on the back side of the pockets.

For this project :

File folder/bone folder
watercolor crayons, brush and heat tool
assorted distress inks & markers
Picket Fence Distress Marker

Begin by folding file folder to fit your tags. I had 4 regular size pockets and one that was a tad short that served well to fold in and be a flap. With watercolor crayons base in where you want colors. Starting with the lightest first, activate the crayons with water. Work in layers adding drips, splatters and darker colors. Dry with the heat tool in between to capture some of your favorite drips/splatters.

Using background stamps. stamp in various shades of the colors you used to give a hint of visual texture on both sides of folder. For the back of the pockets, lines in picket fence were added to make journalling favorite recipes or sample menus easier. The tag shape was further enhanced with a black outline, mimicking the  real tags that will be added to the inside next.

Each pocket was stamped with separate "spooky" image--when i return next time the titles will be added to categorize each type of recipes that go there--for example: "entrees to raise the dead" or "Frankies favorite firsts [starters]". The last panel on the left is a flap rather than a pocket. It folds in first making the 2nd panel on the non-pocket side the "cover" of the recipe card holder.

I hope you enjoy my project! Thank you for looking~leslierahye

Sunday, October 07, 2012

My Poe-st (pun intended)

I was introduced to Edgar AllanPoe and The Raven in Junior High School. I still remember how we acted out the poem in class. Naturally, I was the star - the Raven. I only had one line but it was the most important of the entire poem, “Nevermore.” I didn’t receive a standing ovation for my performance but a few classmates applauded, and for a moment in time I actually considered acting as a career path.

I still love the unparalleled literary master of the macabre. Poe believed that visual art should not make a clear statement, but rather suggest and evoke emotions and stimulate the mind. I hope my interpretation of The Raven does just that.
After leaving his home in China, Mr. Crow aka Mr.Raven flew to my local Dollar Tree. He is now residing on a slightly crushed eye-medicine box that I retrieved from the Friday garbage.

I don't find it a bit odd that Mr.Raven is wearing a party hat with a
purple pom-pom. Do you?

SUPPLIES
Black Bird
Recycled Box
Scrapbook Paper
Page from an Old Book
Pom-Pom
Ribbon or Paper Trim for hat/scarf
4 Wooden Feet
Glue Gun
Stickles
Moss
Chipboard Clock
Black Ink

VLVS
NEVERMORE STAMP
MIRACLE TAPE
I kept this craft simple because I wanted to highlight the ornate Nevermore stamp from Viva Las Vegas Stamps. The whole project took around an hour and was easy peasy.

DIRECTIONS
1. Cut scrapbook paper to fit box and using Miracle Tape attach to bottom, top and sides of the box.
2. Cover the 4 wooden feet with Stickles. When dry attach to bottom of the box using your glue gun.
3. Make hat for Mr. Raven by rolling up book paper and attach trim and a pom-pom. Dress Mr. Raven in his hat and scarf using Miracle Tape. Bling optional.
5. Attach Mr. Raven to box and then cover the empty area of the top of the box with Miracle Tape. Cover with moss.
6. Make a banner out of plain paper and stamp NEVERMORE. Attach to box. Add your chipboard clock.
7. Mr. Raven is ready to party!!

Poe died on October 7, 1849 at the age of forty. It seems fitting that the cause of Poe’s death remains a mystery. Your thoughts on Edgar Allan Poe? Or Halloween Parties?

Sunday, September 30, 2012

I am the Princess!

This is my last blog post for this term for the Viva Las Vegastamps! design team.Thank you DeeDee, Jeff, and Wayne for giving me this opportunity for being part of this awesome team and an awesome stamp company!

I picked up baggie full of round coaster at Savers back in May. I got them to alter them and or to make little round journals with them. Here is one that I did. It was a quick and easy project


I took some pink tissue paper and tore it into pieces and glued it down with matte medium. I then took a number stencil put it over the coaster and sponged some magenta acrylic paint on it.  I took some punchinella and sponged some white craft paint on it.  On White cardstock I stamped the Angel baby with black Menento ink pad. The Angel baby is probational a boy, but I made the angle into a girl. LOL I colored the wings and diaper pink. I cut out a crown from a My Minds Eye paper that I was given a scrap of.  I mounted the baby on the coaster with foam tape.I stamped the But, but, but, I'm the PRINCESS! on white card stock with the same ink pad. I cut the sentiment out and used glossy accents to it.


Items used:
Coaster
Tissue paper
matte medium
white cardstock
black memento ink pad
color pencils
white craft paint
magenta acrylic paint
sponge
scissors
foam tape
glossy accents

Stamps used:


Tuesday, July 17, 2012

Puzzled about holiday gifts?

I am certain I am not the only crazy crafter out there that gets to July and thinks "Oh, it's time to start holiday crafting!" During the month of July in my own crafty world I spend much of the month dedicated to holiday crafting--challenges, streams, scrapbooking, gifts and decorations. A few years back I began making 80-90% of my holiday gifts handmade only. My family and friends appreciate the time I spend on them and I adore spending the time giving of myself and my creativity to those I love.
So today I share with you these fun puzzles that I have made with a puzzle diecut, antique book paper, watercolors and my current favorite holiday stamps. I hope you enjoy them!


for this project you will need
book paper
Diecut Puzzle
watercolors
watercolor pen
craypas


Thank you for looking! ~leslierahye

Friday, December 30, 2011

Peace...Love...and Naked Men!

Wow it's the end of December!!! It's Susan (again) with my end of the month project. Today's project also features a fun product called Creative Paperclay® now available for sale over at Viva Las Vegastamps! 
This project is using four stamps from Viva Las Vegastamps! This piece begins with Angel Blowing Horn #6303. I also used "I Wish For A World" #1541, Patriotic Shirt Man #18119 and Leafy Border #6292.
 
I started with a sheet of paper that was previously business cards that has been painted over with gesso and other acrylic paint. I make these when I have paint leftover that I've mixed up for a project so it doesn't go to waste. The business cards were on this gunmetal parchment, which on the backside is lovely, but for this I used the painted side. It is a nice base and has a nice texture from the gesso. I stamped the Angel, the leafy border and my naked man with Stewart Superior Memories Regal Burgundy Pigment ink and embossed using VLVS Ultra High Gloss embossing powder. Before stamping the man, I rubbed the area with Stewart Superior "New Canvas" Palette hybrid ink {this is white}. I used the ink pad directly to paper in a circular motion and blended out the edges with a paper towel. This made a nice highlighted area for my guy. After stamping, I added some color with watercolor pencils and waterbrush. I added some coloring with CaranD'Ache watercolor crayons, but left them as pastel state {I didn't blend with water}. I finished off by stamping sentiment in Stewart Superior Memories Black Dye ink and mounting on burgundy cardstock.

For the corner embellishments I used the Creative Paperclay® in a small embossing folder. I rubbed the embossing folder with clear ink before pressing clay into it to help ease release. I gently pulled it out and accelerated the drying process by placing in a pan in the toaster oven on one medium toast cycle. Then I cut it apart, sanded edges then inked with chalk inks.


Detail of the Half-naked man colored with watercolor pencils.

Detail of Corner Embellishment made with Creative Paperclay® in embossing folder.

Today is December 30th which means there's only two days left to enter the monthly VLVS Theme Challenge. Submit your "CHRISTMAS" theme creations using Viva Las Vegastamps! for a chance to win a $25 gift certificate at the VLVS online store. CLICK HERE for info on submissions. Also check out the Viva Las Vegastamps! store - there is something for every occasion and more! Please drop by on Sunday for a special New Year's Celebration with the Viva Las Vegastamps! Design Team Bloghop with a chance to win by commenting on every stop on the hop.

Thanks so much for visiting & if you would like to see more of my creations please visit my blog, sbartist : painting in the dark HERE. Happy NEW YEAR!!! : )

Saturday, December 03, 2011

Ho...Ho...WHOA!!!

Happy Saturday and welcome to December!!! It's Susan (again) with my regularly scheduled Saturday top of the month project. Today's project also features a fun product called Creative Paperclay® now available for sale over at Viva Las Vegastamps! This is my first time working with this and I'm so happy with the results.

Can't believe Christmas is just a couple weeks away. Have you seen our 12 Tags of Christmas Bloghop? This project will certainly get you in the Christmas spirit!

A sneek peek!
This piece begins with this Santa Foot through Ceiling #5395 and the unmounted Christmas alphabet #7560 from Viva Las Vegastamps! As soon as I saw this stamp I knew what I wanted to make.


For the background wall, I rolled out some Creative Paperclay and sandwiched it in my T!m Holtz distressed brick embossing folder. This took a little over a day to dry. I made sure that I could get it out of the folder before I let it dry completely. **Make sure to dust embossing folder with powder or rub with versamark or something similar to help clay release - I forgot to do that.**
Creative Paperclay® after pressed and dried in embossing folder.
Bricks colored with distress inks and mounted to patterned paper
backing with miracle tape.
Stamped image colored in on cardstock.
Santa foot stamped on clear acetate.


CLOSE UP of finished boot mounted in box.
Here's the details: The box is the base of a box of blank cards with envelopes. I try to upcyle things into art pieces whenever possible. I stamped the Santa Foot with Stazon onto white cardstock and also onto clear acetate. I painted in broken pieces with white gesso on transparency and cut out. I left about 1" above image to use as a glue flap when mounting in shadow box. The foot stamped on paper I colored in and then embossed the boot with clear embossing powder. The white fuzzy part is embossed with a Ranger white puff powder. This really didn't puff up how I expected. I cleaned up all the edges with a black zig pen. I mounted all of the pieces in the box and I stamped my sentiment in red ink with the candy cane letters. I love these letters! I finished off scene with some tinsel trim and a Jolee's Christmas tree embellishment. 

Santa might want to lay off the cookies...

It's December which means there is a new VLVS Theme Challenge. Submit your "CHRISTMAS" theme creations using Viva Las Vegastamps! for a chance to win a $25 gift certificate at the VLVS online store. CLICK HERE for info on submissions. Also check out the Viva Las Vegastamps! store - there is something for every occasion and more! December's Theme is "Christmas" and we will be celebrating with a Twelve Tags of Christmas Bloghop December 1st thru December 12th CLICK HERE to check it out!

Thanks so much for visiting & if you would like to see more of my creations please visit my blog, sbartist : painting in the dark HERE. Have a great weekend! : )

Monday, October 31, 2011

The Bonecracker Suite

Happy Halloween Everyone!!! Susan here and I am so excited to be posting on Halloween. Today I am sharing the "Black Magic" technique using two Viva Las Vegas Stamps: Skeleton Flashing #1041 and Ballerina Dancer #1555. 
 
The Black Magic technique creates a dramatic look by stamping on dark cardstock with light ink and coloring it with colored pencils, then adding high contrast with a white gel pen. 
I stamped both images to create a scene using Colorbox white pigment ink onto black cardstock then heatset.
Using Berol Prismacolor pencils, I gradually build up layers of color from light to dark over the images. Berol pencils are great for this technique and blend well. Except for a handful of basic colors, I haven't used these much since art school, and I miss my old friends.
A dramatic effect is created with the lighter edges toward the outside blending to darker in the center of the objects. As I layer colors, the Ballerina begins to pop off the page. The dimension in the curtains really have a velvety feel. I continued to add more layers of color to increase contrast and achieve more depth.
At this point, the skelton has become lost in the image, and was reversed in the image when stamped in white. So to repair this, I am stamped him again with Black Onyx Versafine on white coated cardstock.

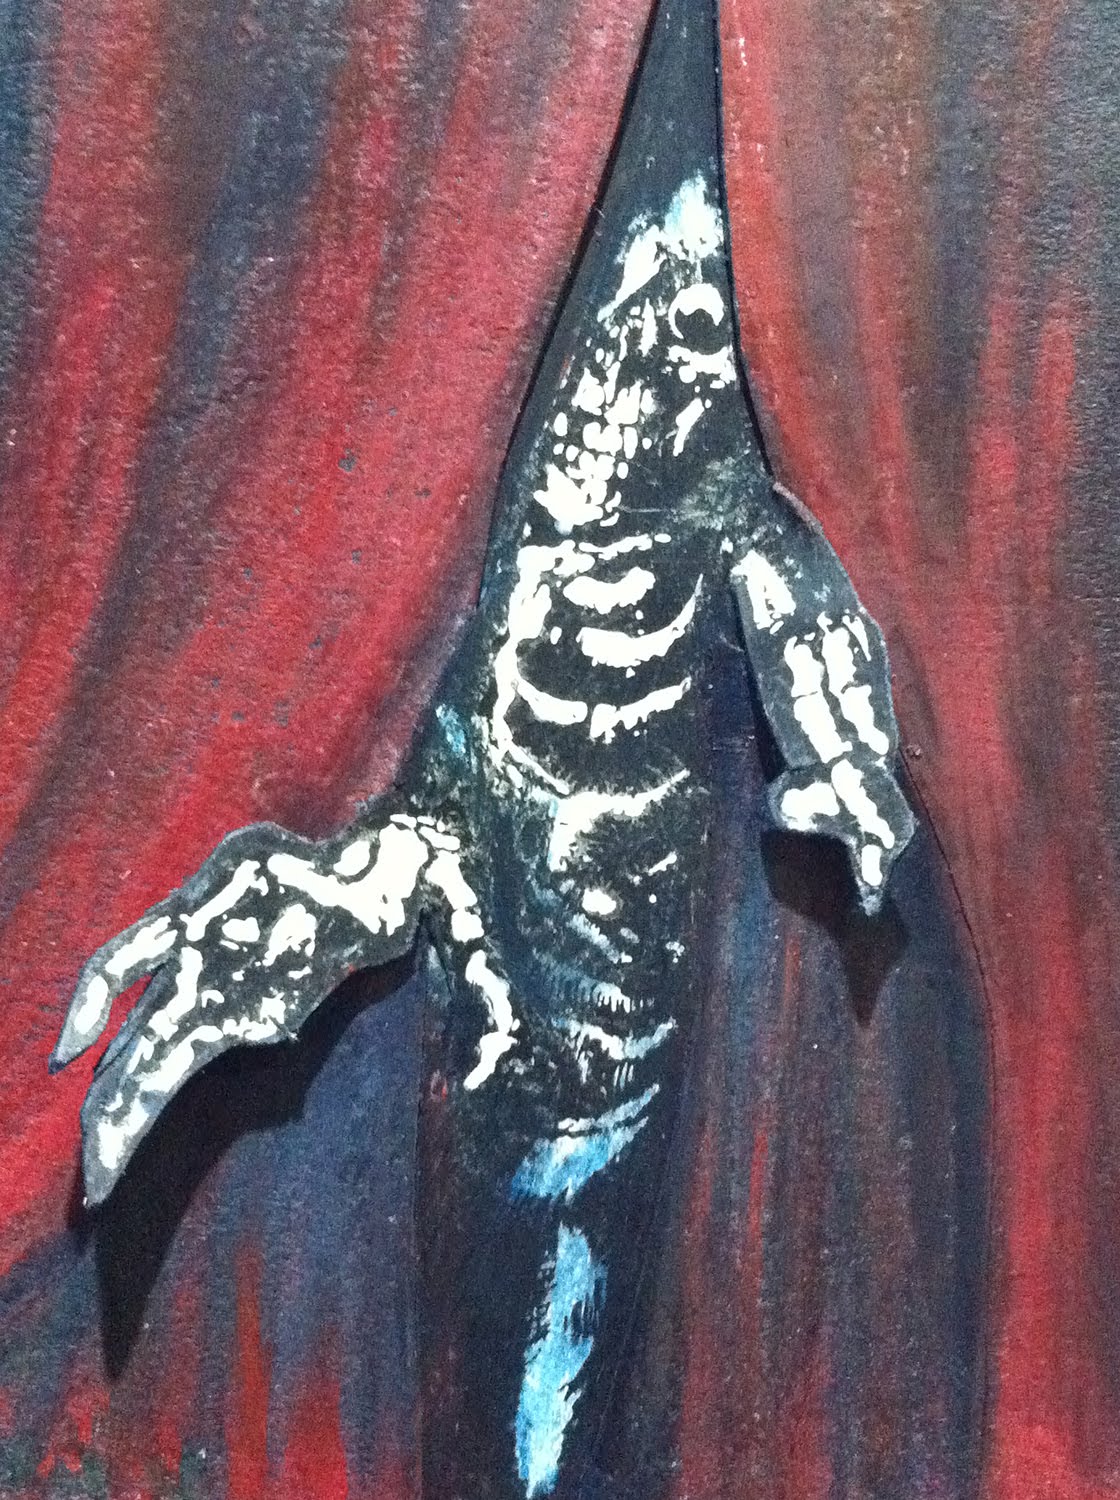
I heat set, greyed him a bit with Weathered Wood and Pumice Stone distress ink and cut his hands out to place in front of the curtains. I cut the curtains to fit him into the image then add a little more colored pencil to blend in with background seamlessly. I added back some details with a black pigment ink marker and pops of white and gold with gel pens. I added some pale pink gem accents to finish her off. Here are details of each:

HERE IS THE FINISHED MASTERPIECE!

To complete this, I made a shadow box housing. I mounted this into an old Frango Chocolate box from Marshall Fields in Chicago that was housing some old cabinet hardware a friend gave to me from updating her cabinets. I painted the box with gesso, then lime green, black and grey acrylic paint. I also painted hardware to mount on outside of box to make it a little ornate and vintage looking. I finished this shadow box off with some fabric scraps folded into curtains and some fancy gold trim at the bottom of the stage.
Today is the last day to enter thee VLVS Theme Challenge for October. Submit your "Halloween" theme creations using Viva Las Vegastamps for a chance to win a $25 gift certificate at the VLVS online store. CLICK HERE for info on submissions. Also check out the Viva Las Vegastamps store - and the Bargain Basement Blowout going on through today!

Thanks for visiting & if you would like to see more of my creations please visit my blog, sbartist : painting in the dark HERE.

Wednesday, October 12, 2011

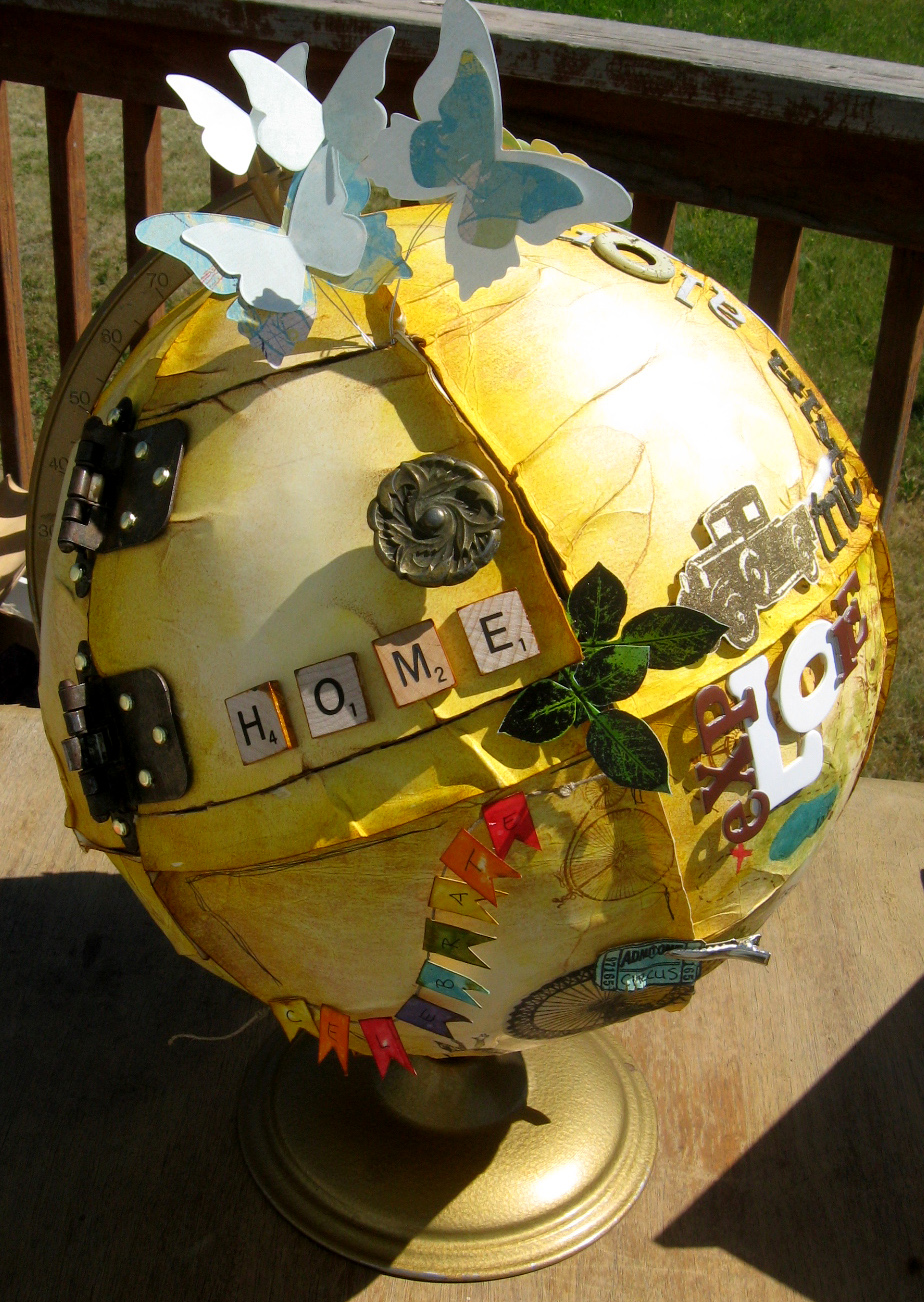
Altered Globe


Hey all!! DeeDee here!! So excited to be back for a 2nd term with the FABULOUS Viva Las Vegastamps! and their GORGEOUS red rubber assortment!

Today I have an altered globe to show you featuring TONS of my favorite VLVS! Stamps.. and if you come back to visit me again in 2 weeks I'll have a short video to show you on using cling rubber to mount your favorite stamps on :)

Onto the project!

Here is the piece as a whole:


and here are my favorite three sections of the globe.. all featuring the most amazing VLVS! Stamps!
The celebrate section uses the Jester with Arms UP stamp, the Vintage Bicycle stamp and the Ferris Wheel stamp

The fly section focuses on the balloon stamp  which was embossed with smooth black embossing powder and colored with a blue prisma color marker

and right next to the fly section is the brave the storm section using the Vintage Umbrella Man stamp which I first stamped on tissue paper and then glued down with watered down elmer's glue.. to REVERSE THE IMAGE! Such a super easy peasy and wonderful technique!

The base of the globe was made out of manila folders that were inked with mustard seed and vintage photo distress ink.. from there I just did tons of stamping, doodling and inking to create each section :)

Can't wait to see you next time! -DeeDee